steering wheel adjustment TOYOTA YARIS 2009 2.G Owners Manual
[x] Cancel search | Manufacturer: TOYOTA, Model Year: 2009, Model line: YARIS, Model: TOYOTA YARIS 2009 2.GPages: 392, PDF Size: 8.52 MB
Page 38 of 392
38
1-3. Adjustable components (seats, mirrors, steering wheel)
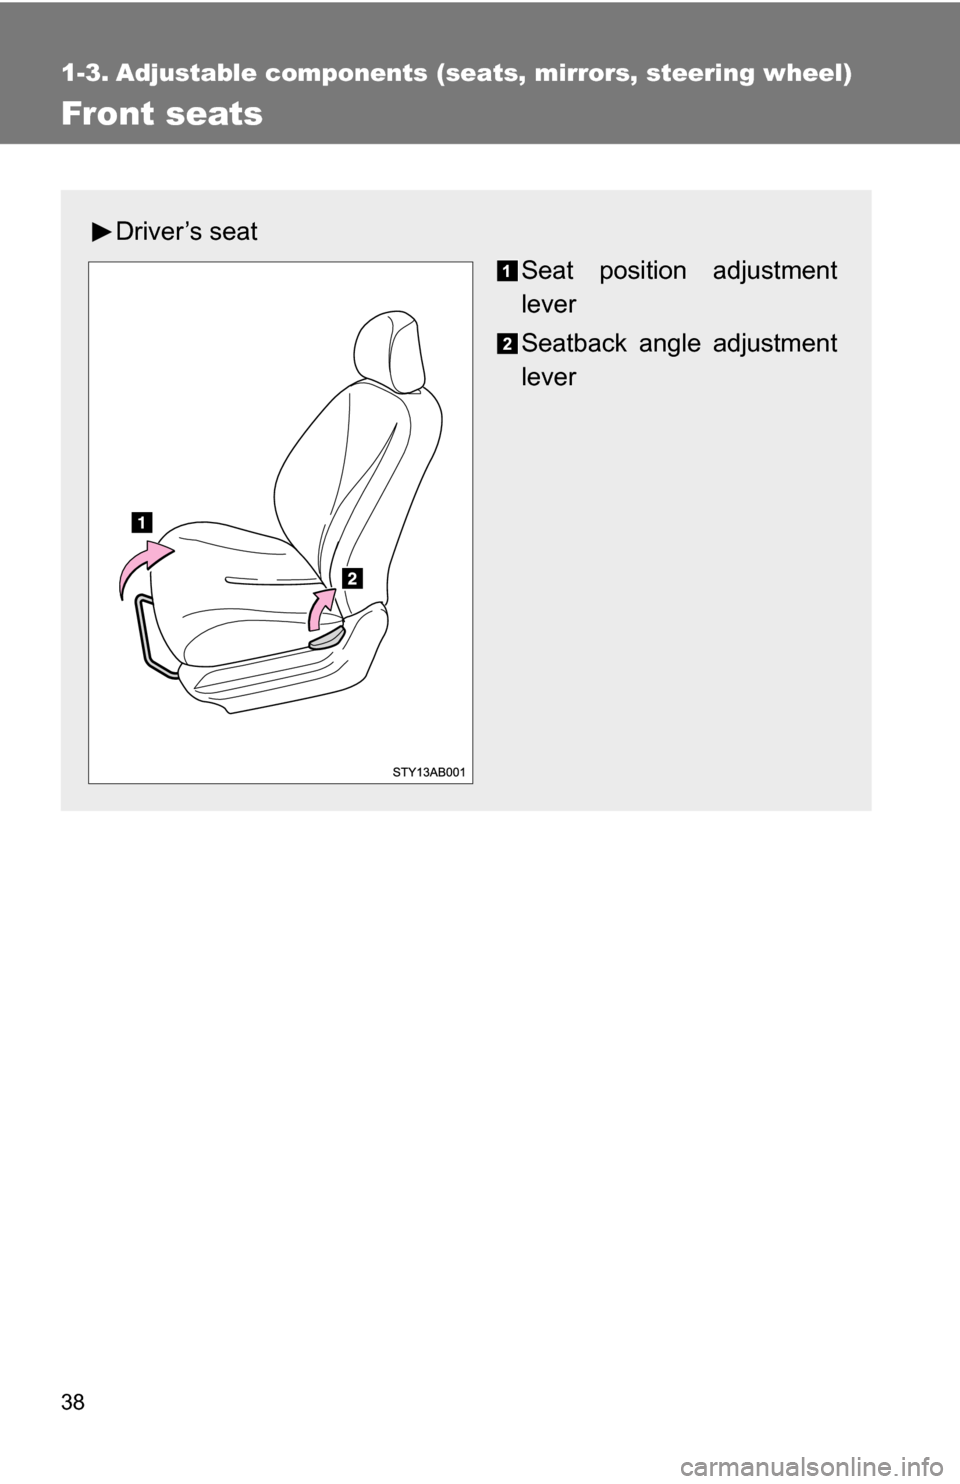
Front seats
Driver’s seat
Seat position adjustment
lever
Seatback angle adjustment
lever
Page 39 of 392
39
1-3. Adjustable components (s
eats, mirrors, steering wheel)
1
Before driving
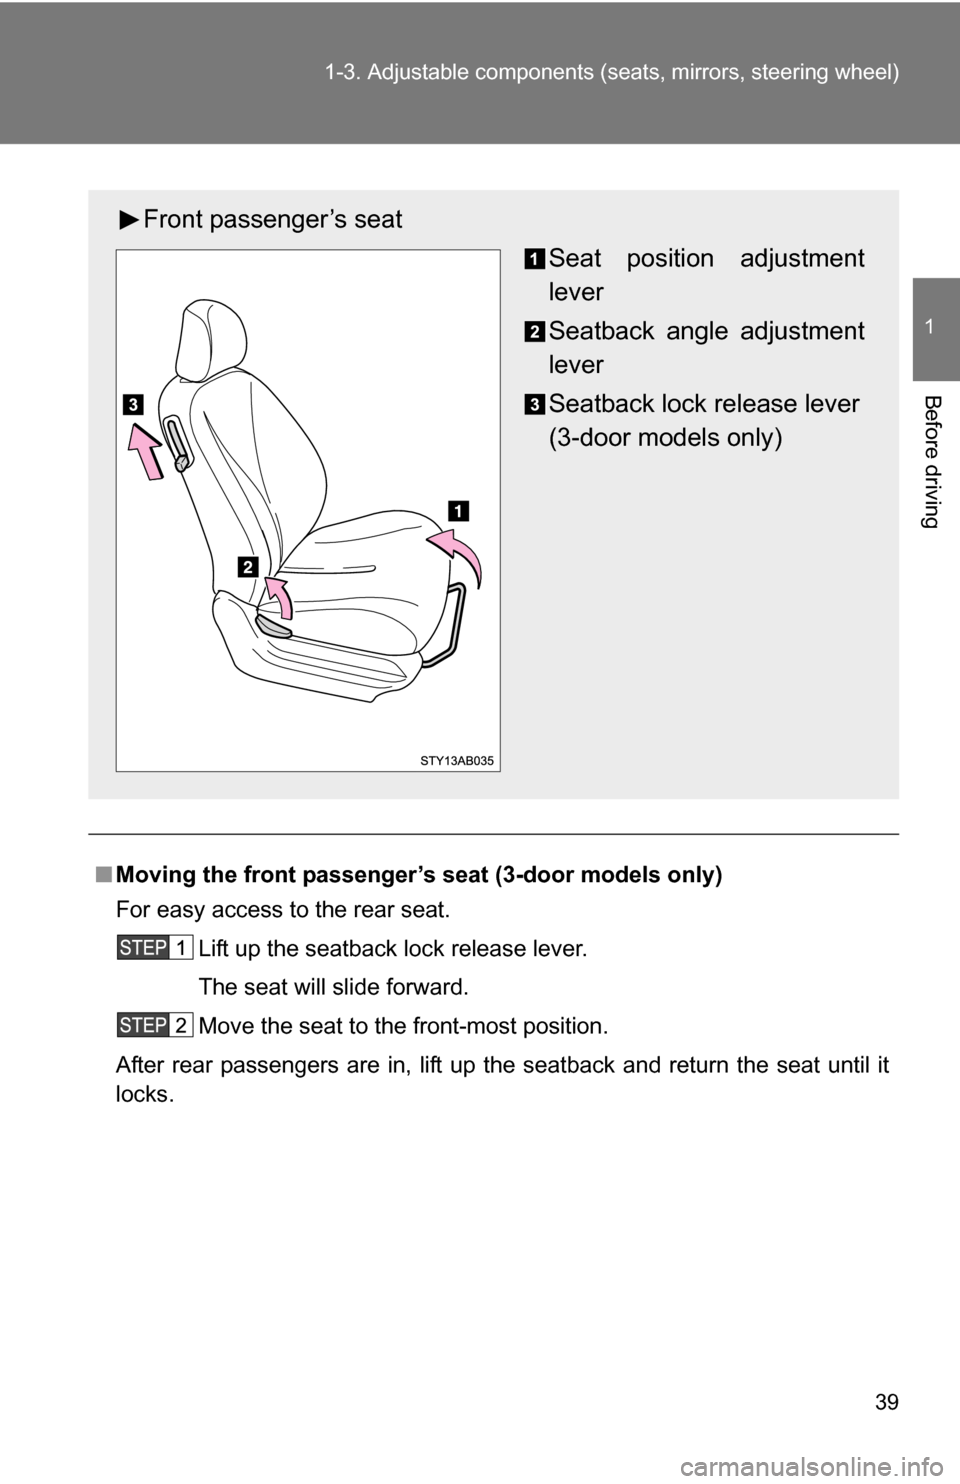
■Moving the front passenger’s seat (3-door models only)
For easy access to the rear seat.
Lift up the seatback lock release lever.
The seat will slide forward.
Move the seat to the front-most position.
After rear passengers are in, lift up the seatback and return the seat until it
locks.
Front passenger’s seat Seat position adjustment
lever
Seatback angle adjustment
lever
Seatback lock release lever
(3-door models only)
Page 40 of 392
40 1-3. Adjustable components (seats, mirrors, steering wheel)
CAUTION
■Seat adjustment
●Do not recline the seat more than necessary when the vehicle is in motion
to reduce the risk of sliding under the lap belt.
If the seat is too reclined, the lap belt may slide past the hips and apply
restraint forces directly to the abdomen or your neck may contact the
shoulder belt, increasing the risk of death or serious injury in the event of
an accident.
● After adjusting the seat, make sure that the seat is locked in position.
■ After returning the seatback
Push and pull the seatback to confirm that it is securely locked.
■ Caution while driving
Never operate the seatback lock release lever.
Page 41 of 392
41
1
1-3. Adjustable components (seats, mirrors, steering wheel)
Before driving
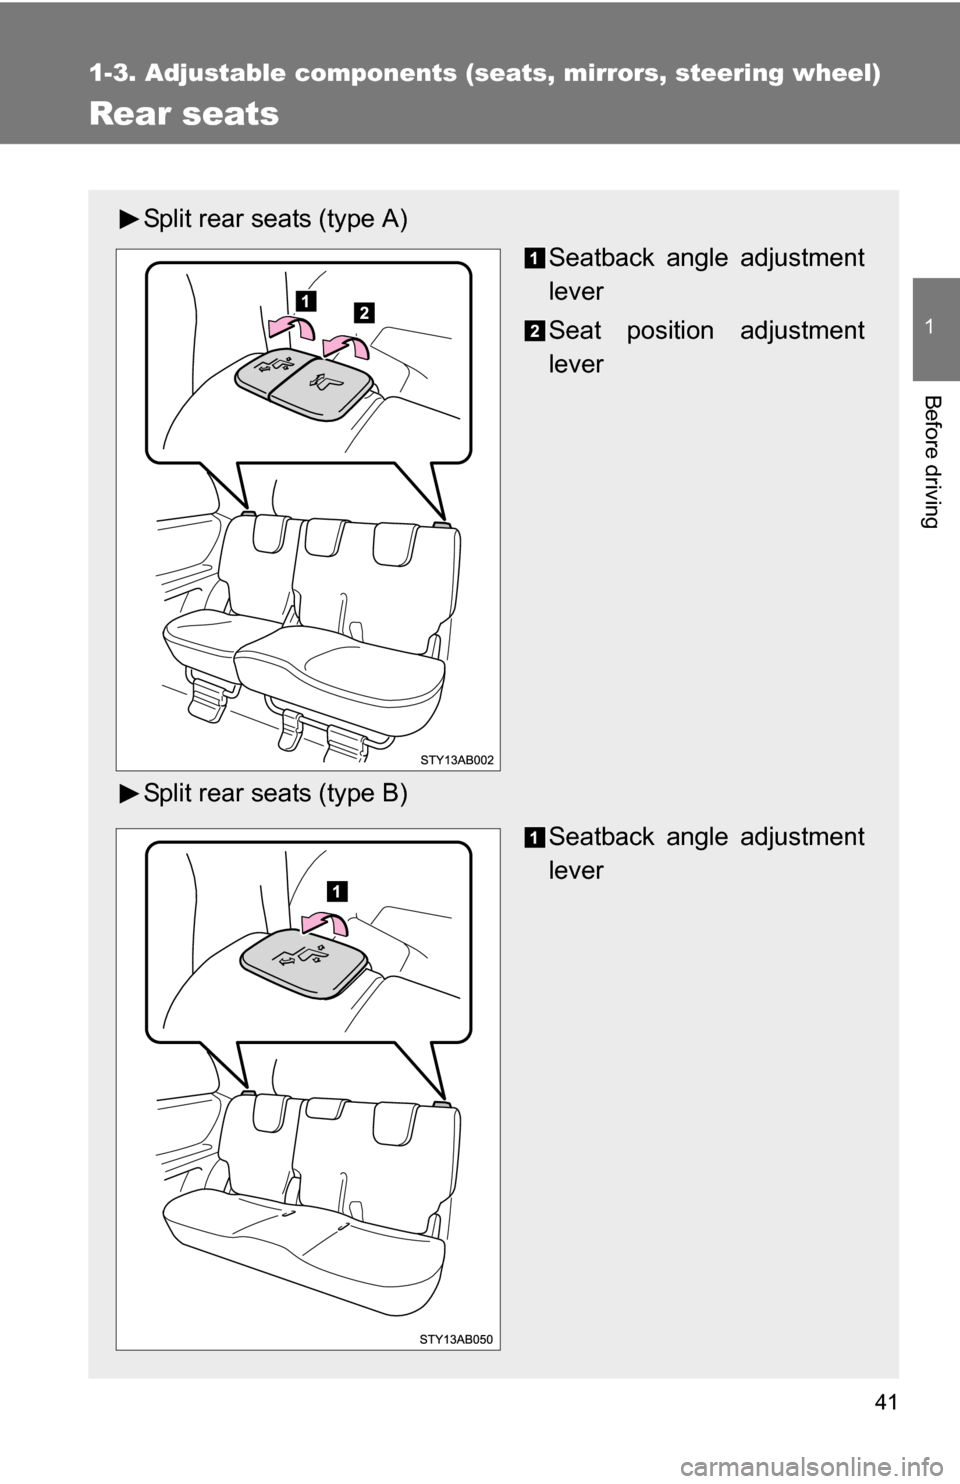
Rear seats
Split rear seats (type A)Seatback angle adjustment
lever
Seat position adjustment
lever
Split rear seats (type B) Seatback angle adjustment
lever
Page 42 of 392
42 1-3. Adjustable components (seats, mirrors, steering wheel)
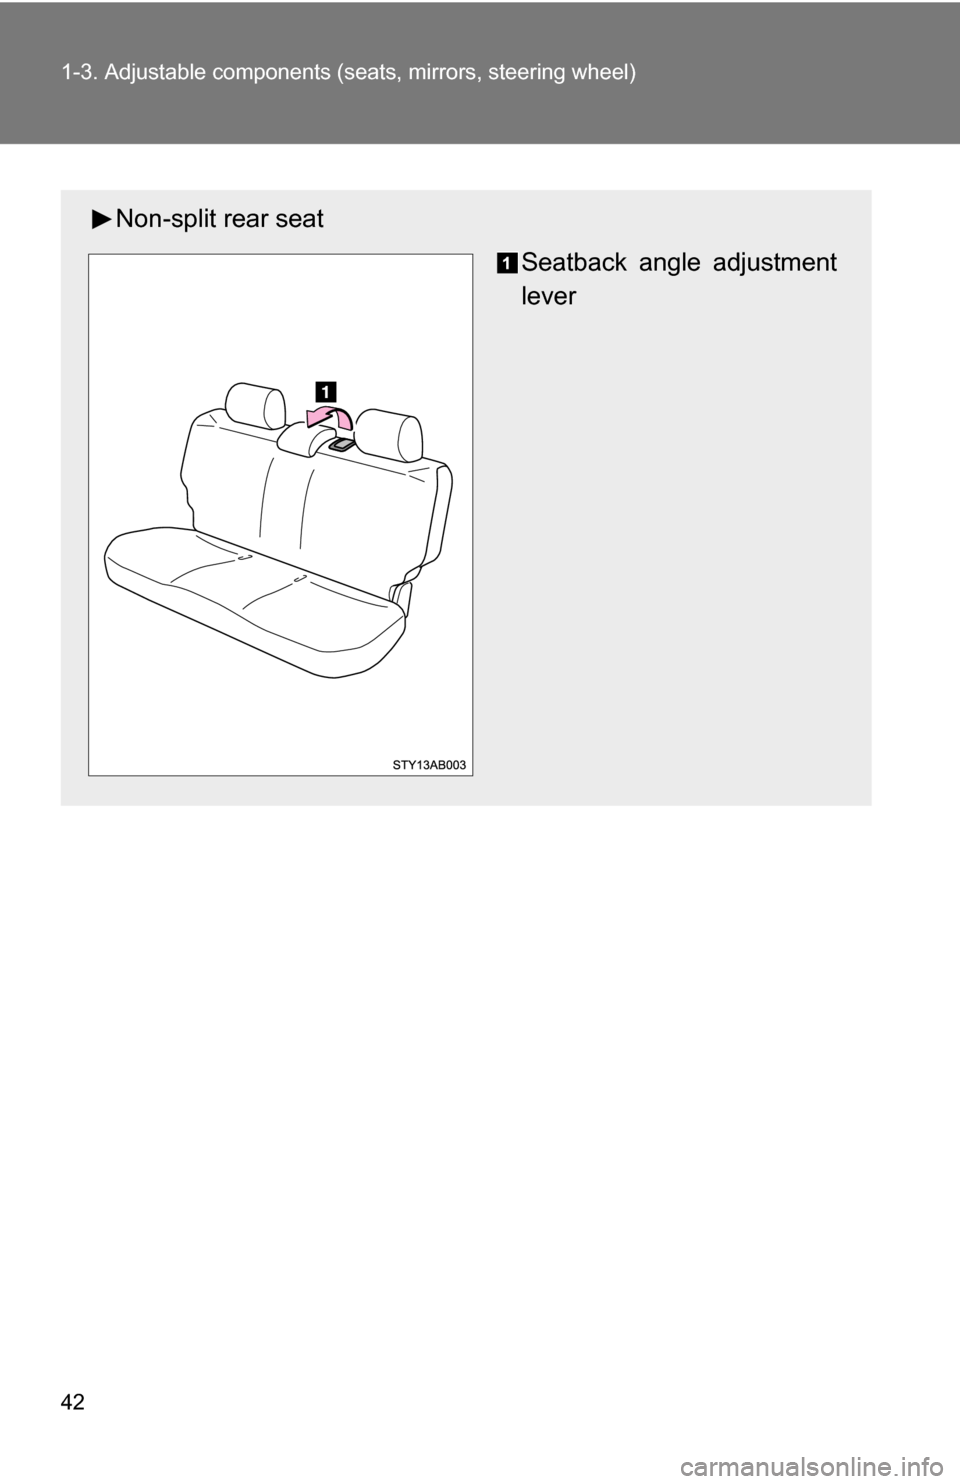
Non-split rear seat
Seatback angle adjustment
lever
Page 44 of 392
44 1-3. Adjustable components (seats, mirrors, steering wheel)
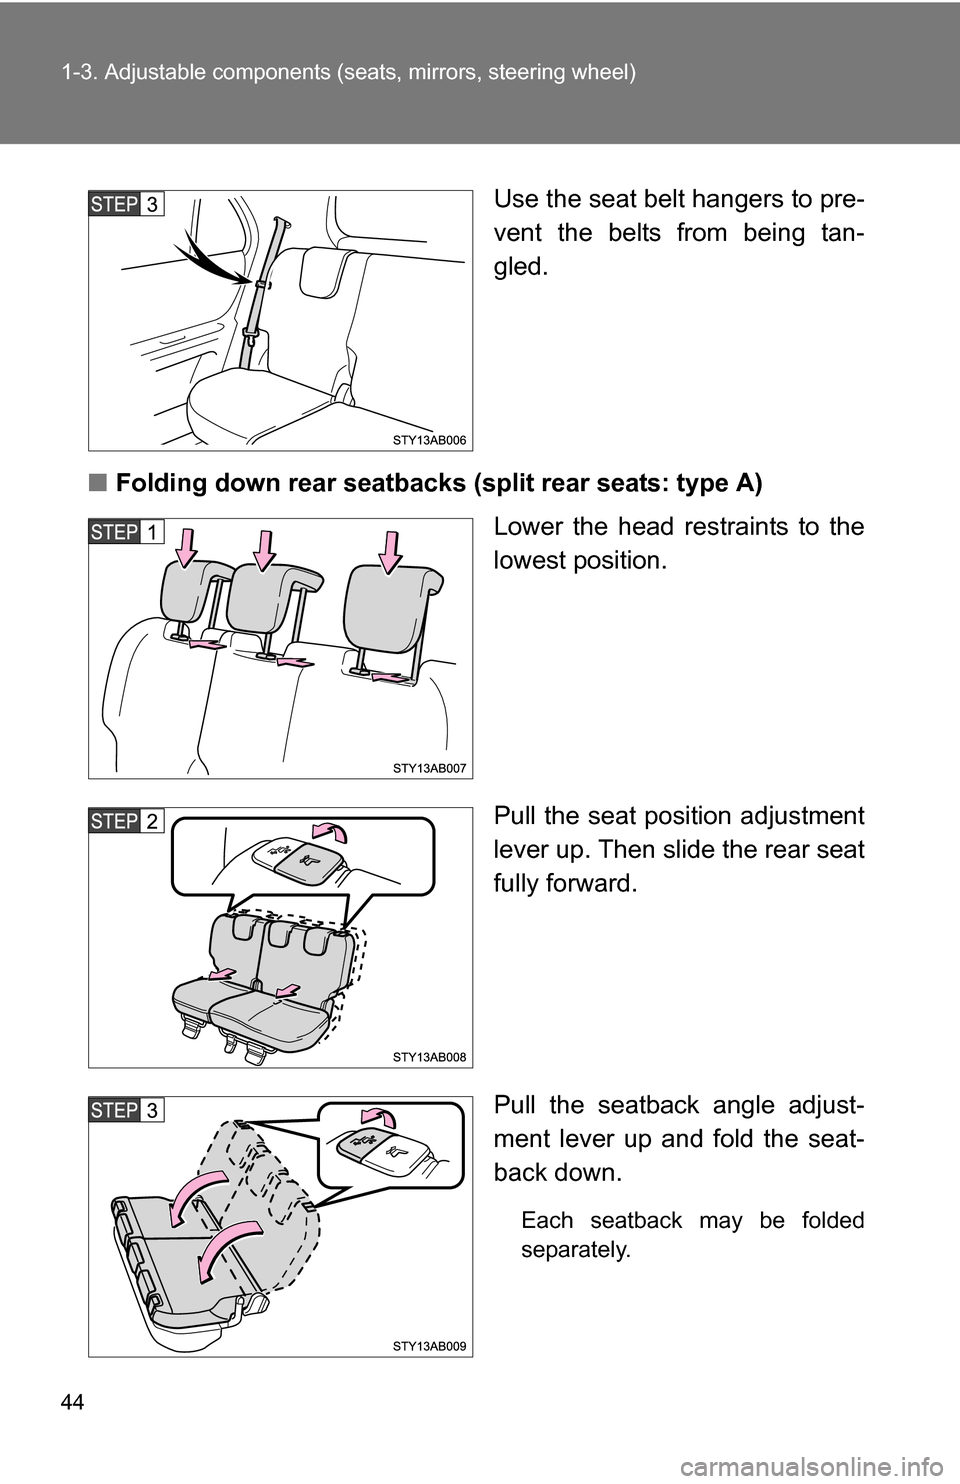
Use the seat belt hangers to pre-
vent the belts from being tan-
gled.
■ Folding down rear seatbacks (split rear seats: type A)
LLower the head restraints to the
lowest position.
Pull the seat position adjustment
lever up. Then slide the rear seat
fully forward.
Pull the seatback angle adjust-
ment lever up and fold the seat-
back down.
Each seatback may be folded
separately.
Page 47 of 392

47
1-3. Adjustable components (s
eats, mirrors, steering wheel)
1
Before driving
CAUTION
■Seat adjustment
●Do not recline the seat more than necessary when the vehicle is in motion
to reduce the risk of sliding under the lap belt. If the seat is too reclined,
the lap belt may slide past the hips and apply restraint forces directly to the
abdomen or your neck may contact the shoulder belt, increasing the risk of
death or serious injury in the event of an accident.
● After adjusting the seat, make sure that the seat is locked in position.
■ After returning the seatback to the upright position
Observe the following precautions. Failure to do so may result in death or
serious injury.
●Make sure that the seatback is securely locked in position by lightly rock-
ing it back and forth.
● Check that the seat belts and buckles are not twisted or caught under the
seat.
● Arrange the seat belts in the proper positions for ready use.
NOTICE
■Stowing the seat belts
The seat belts and the buckles must be stowed before you fold down the
rear seat backs.
■ When returning the seatback to the upright position
Do not pull the pocket that stores the seat belt comfort guide.
Page 48 of 392
48
1-3. Adjustable components (seats, mirrors, steering wheel)
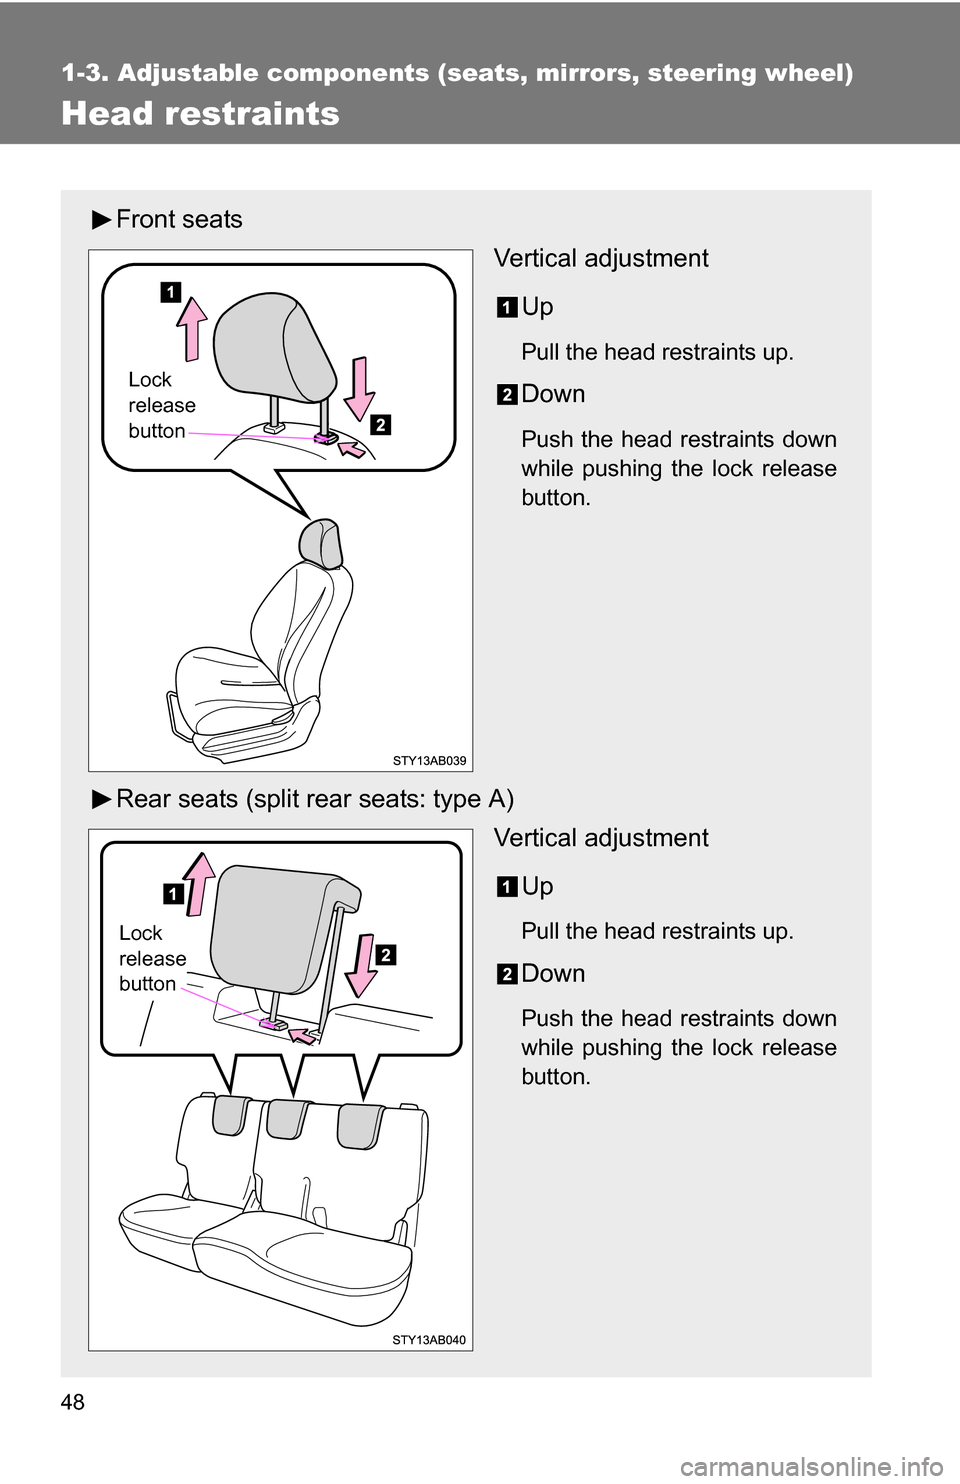
Head restraints
Front seatsVertical adjustment
Up
Pull the head restraints up.
Down
Push the head restraints down
while pushing the lock release
button.
Rear seats (split rear seats: type A) Vertical adjustment
Up
Pull the head restraints up.
Down
Push the head restraints down
while pushing the lock release
button.
Lock
release
button
Lock
release
button
Page 49 of 392
49
1-3. Adjustable components (s
eats, mirrors, steering wheel)
1
Before driving
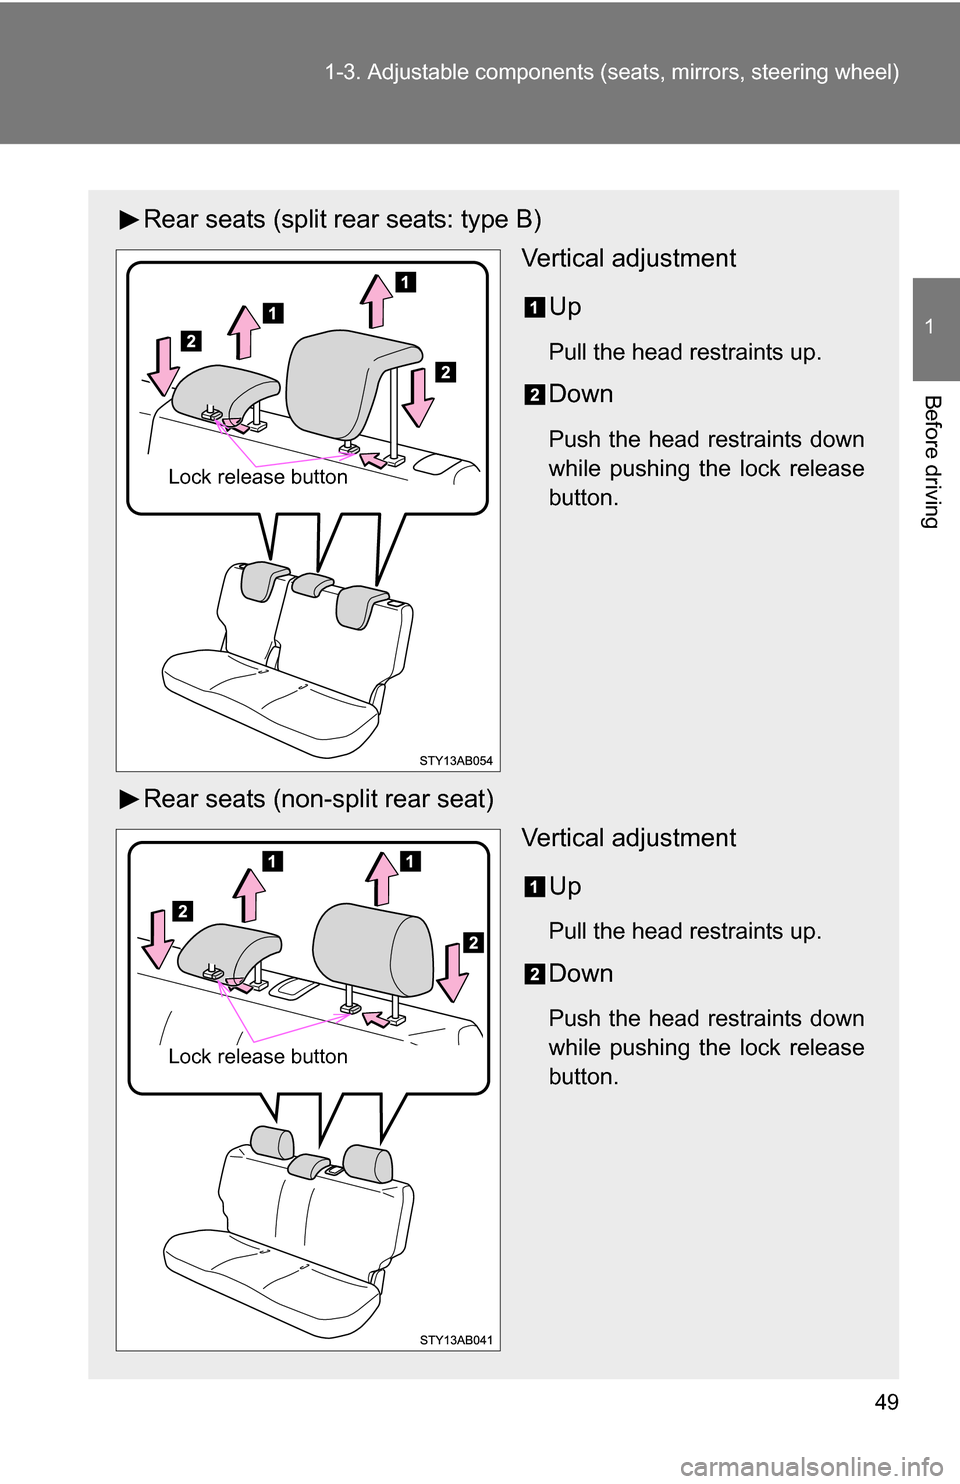
Rear seats (split rear seats: type B)
Vertical adjustment
Up
Pull the head restraints up.
Down
Push the head restraints down
while pushing the lock release
button.
Rear seats (non-split rear seat) Vertical adjustment
Up
Pull the head restraints up.
Down
Push the head restraints down
while pushing the lock release
button.
Lock release button
Lock release button
Page 314 of 392
314 5-2. Steps to take in an emergency
■Customization that can be co nfigured at Toyota dealer
● The vehicle speed linked seat belt reminder buzzer can be disabled.
(Customizable features P. 369)
● The key reminder buzzer can be disabled.
(Customizable features P. 369)
● The light reminder buzzer can be disabled.
(Customizable features P. 369)
CAUTION
■If the tire pressure warning light comes on
Be sure to observe the following precautions. Failure to do so could
cause loss of vehicle control and re sult in death or serious injury.
●Stop your vehicle in a safe place as soon as possible. Adjust the tire
inflation pressure immediately.
●If the tire pressure warning light comes on even after tire inflation pres-
sure adjustment, it is pr obable that you have a flat tire. Check the tires.
If the tire is flat, change to the spare tire and have the flat tire repaired
by the nearest Toyota dealer.
●Avoid abrupt maneuvering and braking. If the vehicle tires deteriorate,
you could lose control of the steering wheel or the brakes.
■If a blowout or sudden air leakage should occur
The tire pressure warning syste m may not activate immediately.
■Maintenance of the tire
Each tire, including the spare (if provided), should be checked monthly
when cold and inflated to the inflation pressure recommended by the
vehicle manufacturer on the vehicle placard or tire inflation pressure
label (tire and load information label). (If your vehicle has tires of a differ-
ent size than the size indicated on the vehicle placard or tire inflation
pressure label [tire and load information label], you should determine the
proper tire inflation pr essure for those tires.)