meter TOYOTA YARIS 2016 3.G Owners Manual
[x] Cancel search | Manufacturer: TOYOTA, Model Year: 2016, Model line: YARIS, Model: TOYOTA YARIS 2016 3.GPages: 368, PDF Size: 7.86 MB
Page 1 of 368
Pictorial indexSearch by illustration
1For safety
and securityMake sure to read through them
2Instrument
clusterHow to read the gauges and meters, the variety of
warning lights and indicators, etc.
3
Operation of
each
componentOpening and closing the doors and windows,
adjustment before driving, etc.
4DrivingOperations and advices which are necessary for
driving
5Interior featuresUsage of the interior features, etc.
6Maintenance
and careCaring for your vehicle and maintenance
procedures
7When trouble
arisesWhat to do in case of malfunction or emergency
8Vehicle
specificationsVehicle specifications, customizable features, etc.
9For ownersReporting safety defects for U.S. owners, and seat
belt and SRS airbag instructions for Canadian
owners
IndexSearch by symptom
Search alphabetically
Page 2 of 368
TABLE OF CONTENTS2
For your information....................... 6
Reading this manual .................... 10
How to search .............................. 11
Pictorial index .............................. 12
1-1. For safe useBefore driving ...................... 22
For safety drive ................... 24
Seat belts ............................ 26
SRS airbags ........................ 34
Front passenger occupant classification system ......... 46
Safety information for children ........................ 52
Child restraint systems ........ 53
Installing child restraints ...... 57
Exhaust gas precautions ..... 66
1-2. Theft deterrent system Engine immobilizer system............................... 67
Theft prevention labels (except Canada) ............... 69
2. Instrument cluster Warning lights and indicators........................... 72
Gauges and meters............. 76
Multi-information display ..... 78 3-1. Key information
Keys..................................... 84
3-2. Opening, closing and locking the doors
Side doors ........................... 89
Back door ............................ 94
3-3. Adjusting the seats Front seats........................... 98
Rear seats ......................... 101
Head restraints .................. 104
3-4. Adjusting the steering wheel and mirrors
Steering wheel ................... 107
Inside rear view mirror ....... 109
Outside rear view mirrors ............................. 111
3-5. Opening and closing the windows
Power windows.................. 113
1For safety and security
2Instrument cluster
3Operation of
each component
Page 14 of 368
14Pictorial index
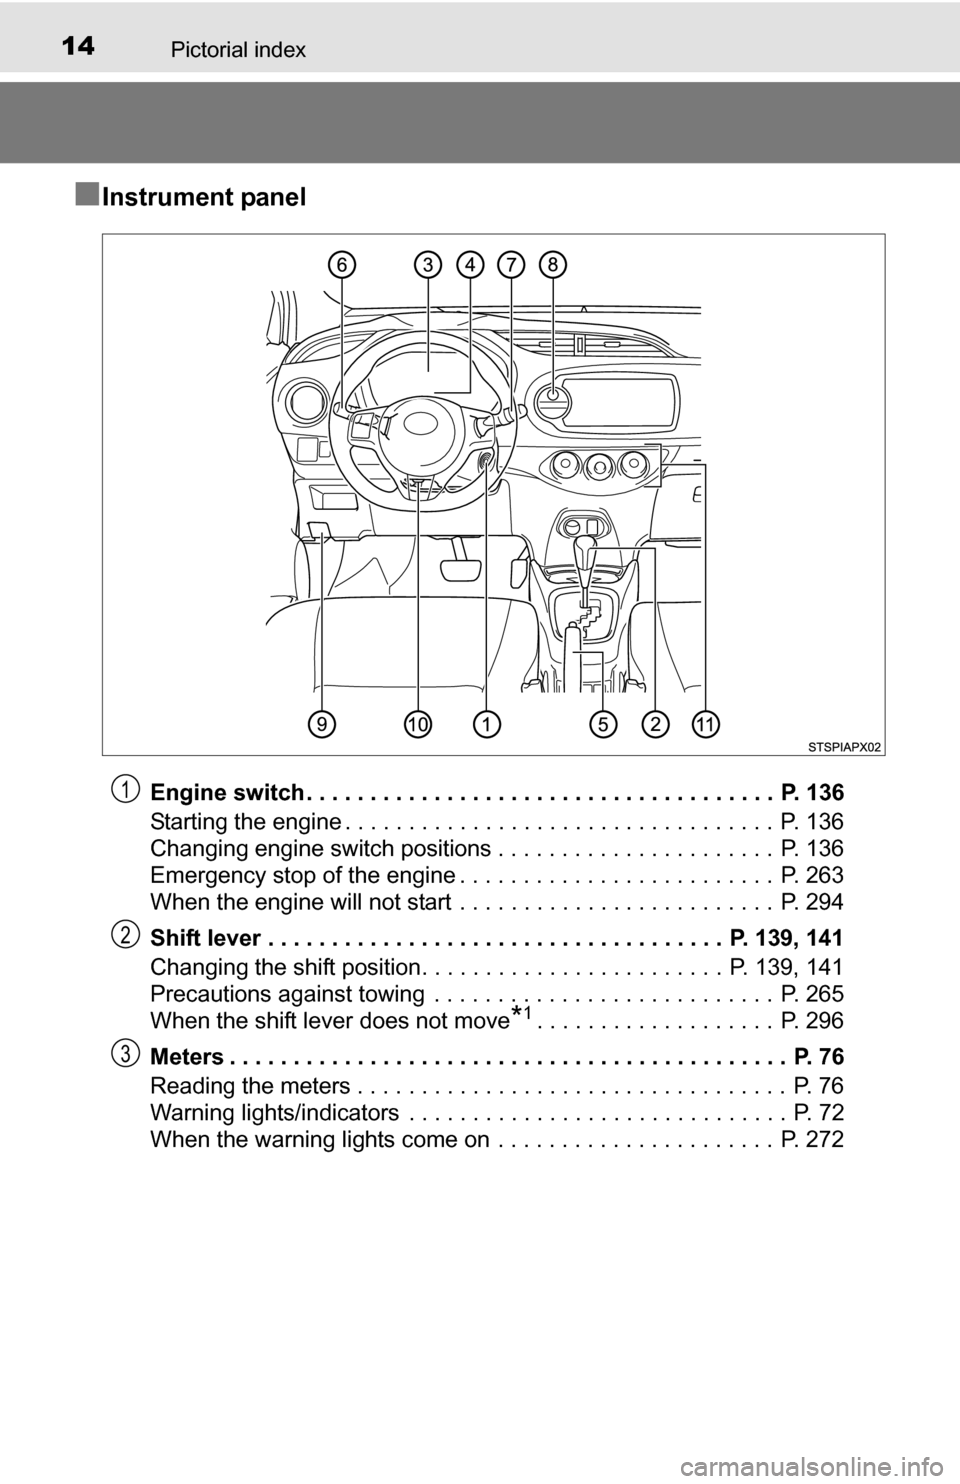
■Instrument panel
Engine switch . . . . . . . . . . . . . . . . . . . . . . . . . . . . . . . . . . . . . P. 136
Starting the engine . . . . . . . . . . . . . . . . . . . . . . . . . . . . . . . . . . P. 136
Changing engine switch positions . . . . . . . . . . . . . . . . . . . . . . P. 136
Emergency stop of the engine . . . . . . . . . . . . . . . . . . . . . . . . . P. 263
When the engine will not start . . . . . . . . . . . . . . . . . . . . . . . . . P. 294
Shift lever . . . . . . . . . . . . . . . . . . . . . . . . . . . . . . . . . . . . P. 139, 141
Changing the shift position. . . . . . . . . . . . . . . . . . . . . . . . P. 139, 141
Precautions against towing . . . . . . . . . . . . . . . . . . . . . . . . . . . P. 265
When the shift lever does not move
*1. . . . . . . . . . . . . . . . . . . P. 296
Meters . . . . . . . . . . . . . . . . . . . . . . . . . . . . . . . . . . . . . . . . . . . . P. 76
Reading the meters . . . . . . . . . . . . . . . . . . . . . . . . . . . . . . . . . . P. 76
Warning lights/indicators . . . . . . . . . . . . . . . . . . . . . . . . . . . . . . P. 72
When the warning lights come on . . . . . . . . . . . . . . . . . . . . . . P. 272
1
2
3
Page 71 of 368
71
Instrument cluster2
2. Instrument clusterWarning lights and indicators .......................... 72
Gauges and meters ............ 76
Multi-information display ..... 78
Page 72 of 368
722. Instrument cluster
Warning lights and indicators
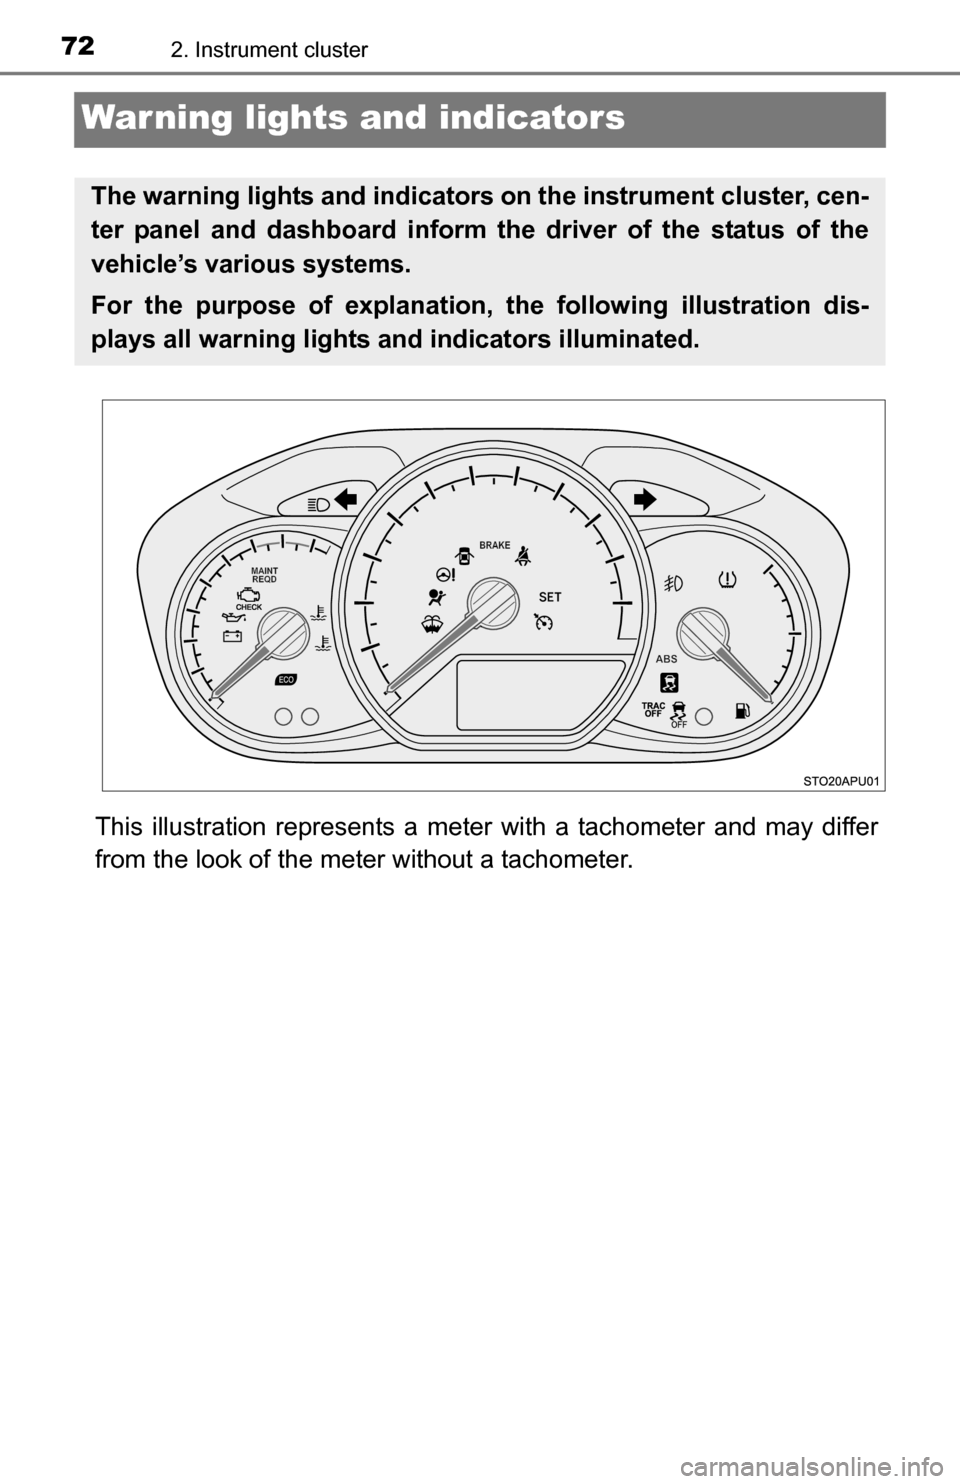
This illustration represents a meter with a tachometer and may differ
from the look of the meter without a tachometer.
The warning lights and indicators on the instrument cluster, cen-
ter panel and dashboard inform the driver of the status of the
vehicle’s various systems.
For the purpose of explanation, the following illustration dis-
plays all warning lights a nd indicators illuminated.
Page 76 of 368
762. Instrument cluster
Gauges and meters
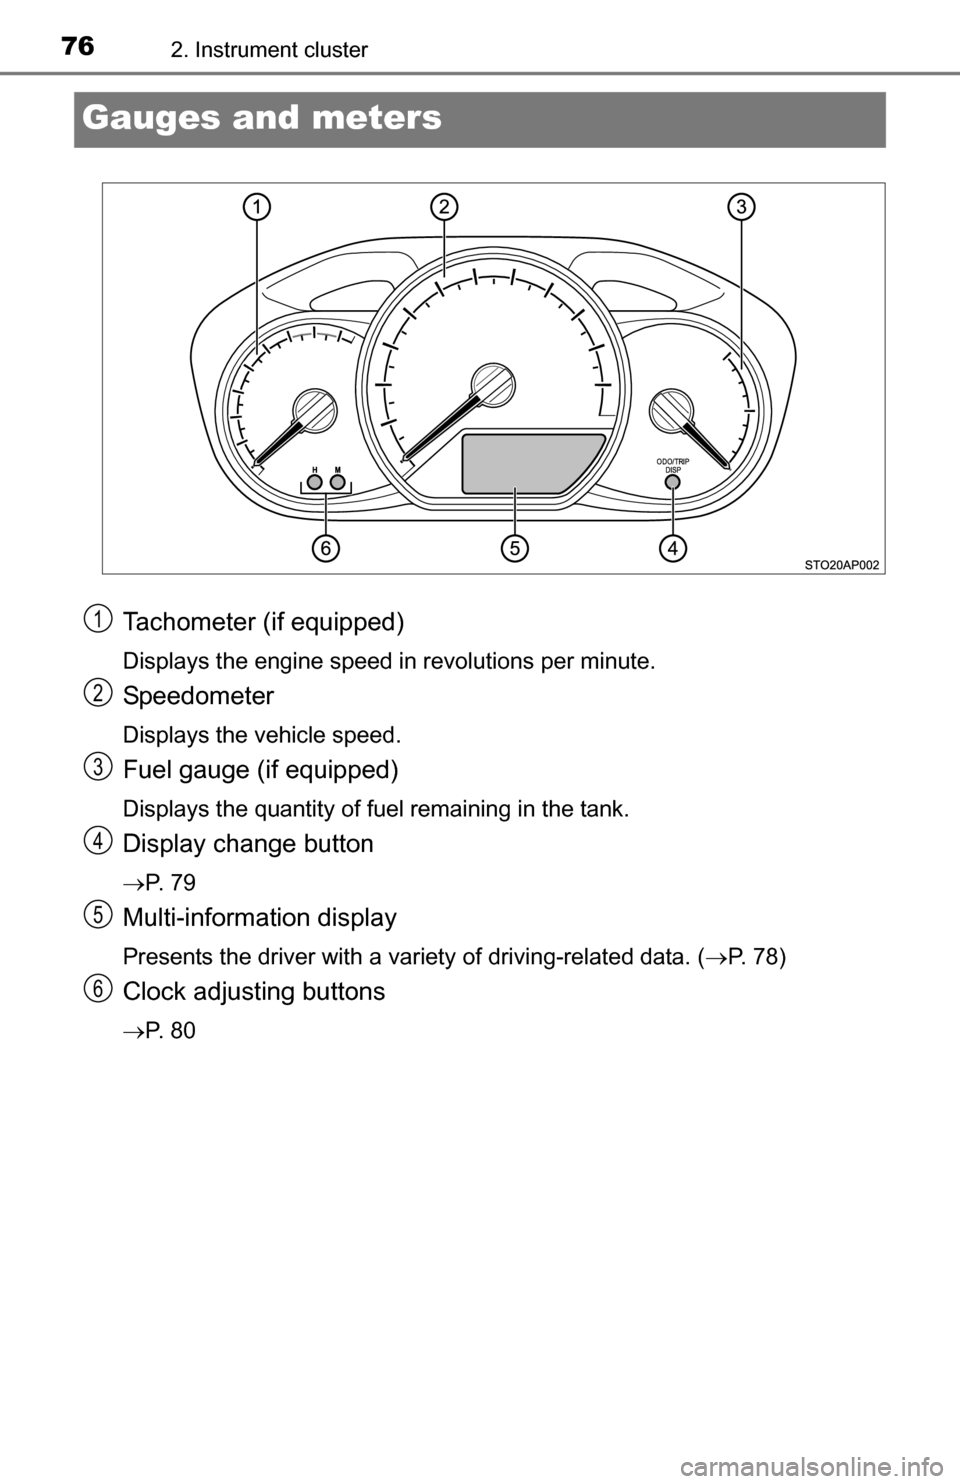
Tachometer (if equipped)
Displays the engine speed in revolutions per minute.
Speedometer
Displays the vehicle speed.
Fuel gauge (if equipped)
Displays the quantity of fuel remaining in the tank.
Display change button
P. 7 9
Multi-information display
Presents the driver with a variety of driving-related data. (P. 78)
Clock adjusting buttons
P. 8 0
1
2
3
4
5
6
Page 77 of 368
772. Instrument cluster
2
Instrument cluster
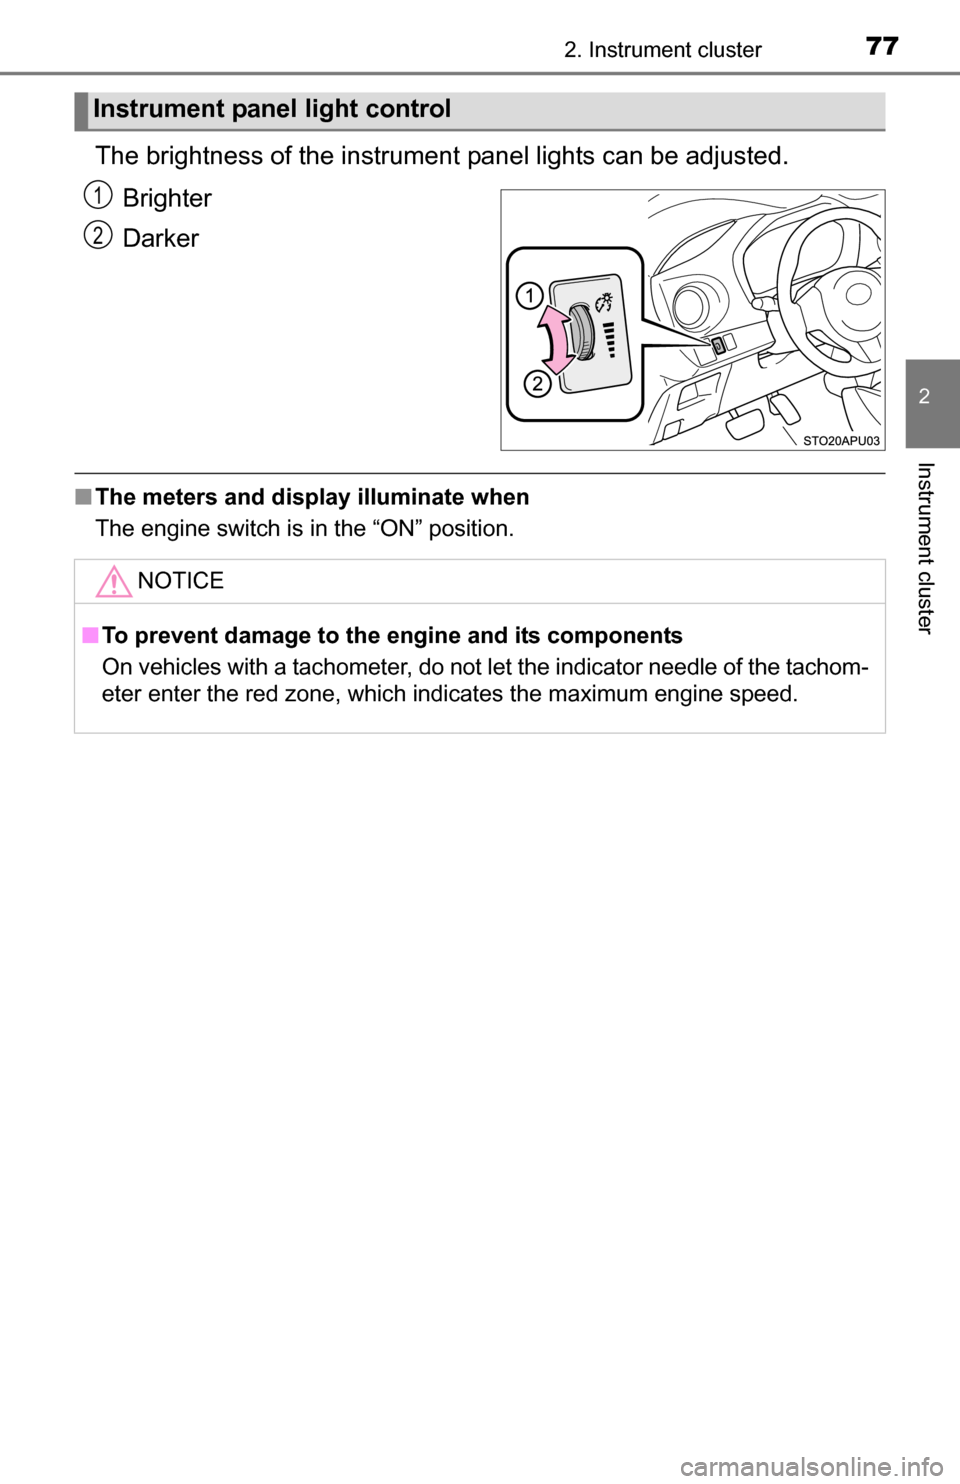
The brightness of the instrument panel lights can be adjusted.
Brighter
Darker
■ The meters and display illuminate when
The engine switch is in the “ON” position.
Instrument panel light control
1
2
NOTICE
■To prevent damage to the engine and its components
On vehicles with a tachometer, do not let the indicator needle of the tachom-
eter enter the red zone, which indicates the maximum engine speed.
Page 79 of 368
792. Instrument cluster
2
Instrument cluster
.
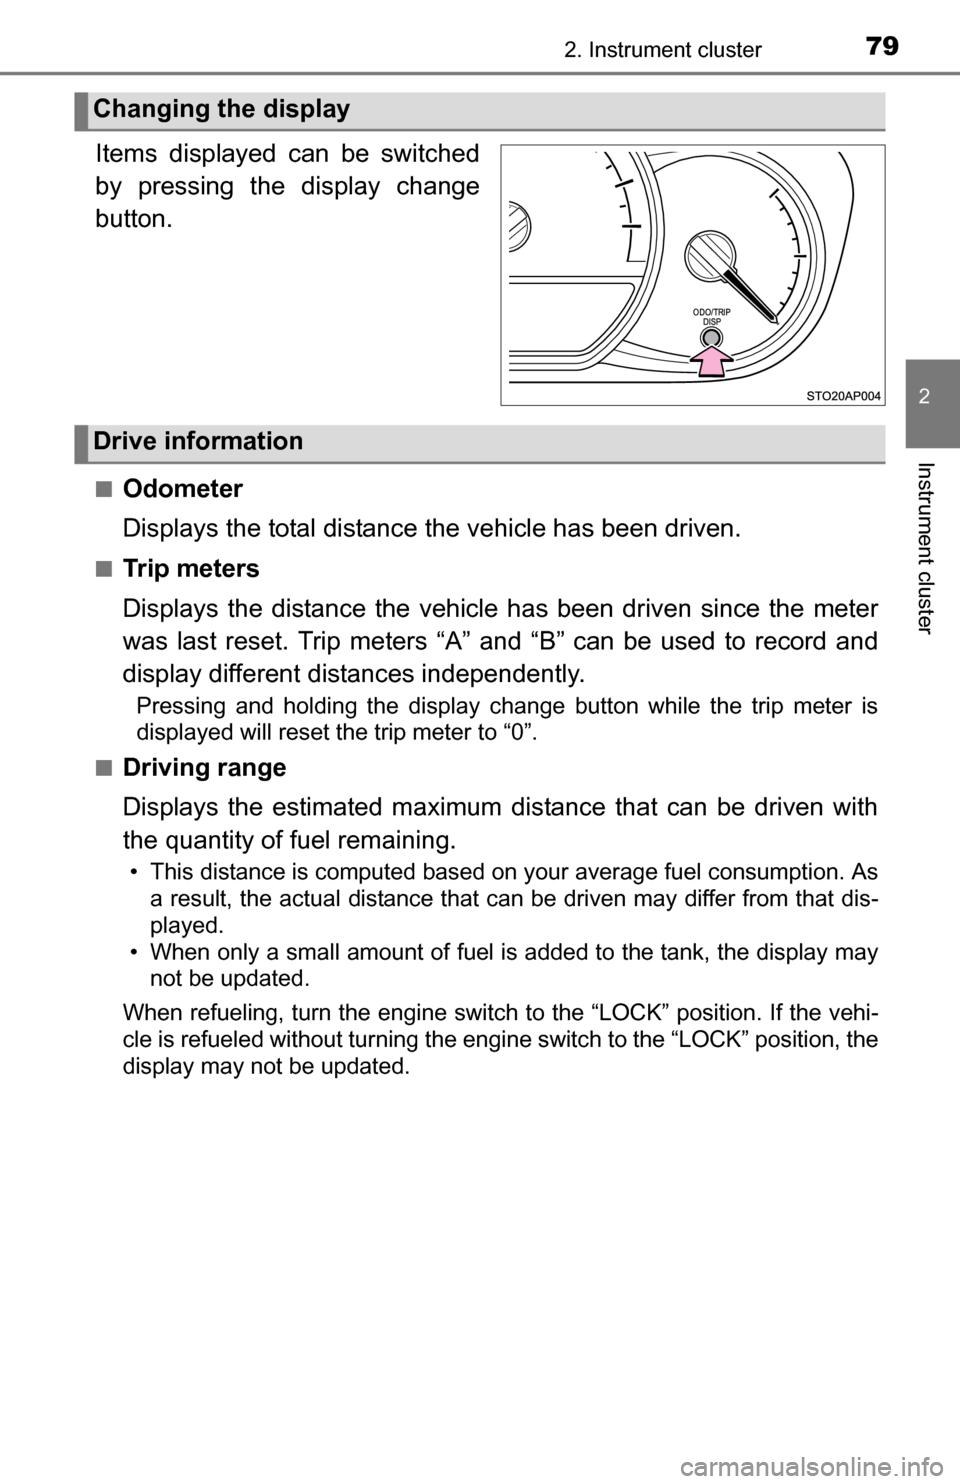
Items displayed can be switched
by pressing the display change
button.
■Odometer
Displays the total distance the vehicle has been driven.
■Tr i p m e t e r s
Displays the distance the vehicle has been driven since the meter
was last reset. Trip meters “A” and “B” can be used to record and
display different distances independently.
Pressing and holding the display change button while the trip meter is
displayed will reset the trip meter to “0”.
■
Driving range
Displays the estimated maximum distance that can be driven with
the quantity of fuel remaining.
• This distance is computed based on your average fuel consumption. As a result, the actual distance that can be driven may differ from that dis-
played.
• When only a small amount of fuel is added to the tank, the display may not be updated.
When refueling, turn the engine switch to the “LOCK” position. If th\
e vehi-
cle is refueled without turning the engine switch to the “LOCK” po\
sition, the
display may not be updated.
Changing the display
Drive information
Page 80 of 368
802. Instrument cluster
■Average fuel consumption
Displays the average fuel consumption since the function was
reset.
• The function can be reset by pressing and holding the display change button when the average fuel consumption is displayed.
• Use the displayed average fuel consumption as a reference.
■
Instantaneous fuel consumption
Displays the instantaneous of fuel consumption.
■Average vehicle speed
Displays the average vehicle speed since the engine was last
started.
Eco Driving Indicator Light can be activated or deactivated by press-
ing the display change button when the Eco Driving Indicator Light
customization display is displayed.
To change the Eco Driving Indicator Light customization display, display the
odometer and press and hold the display change button until the display
changes.
After customization, press the display change button for more than 2 sec-
onds to return to the odometer.
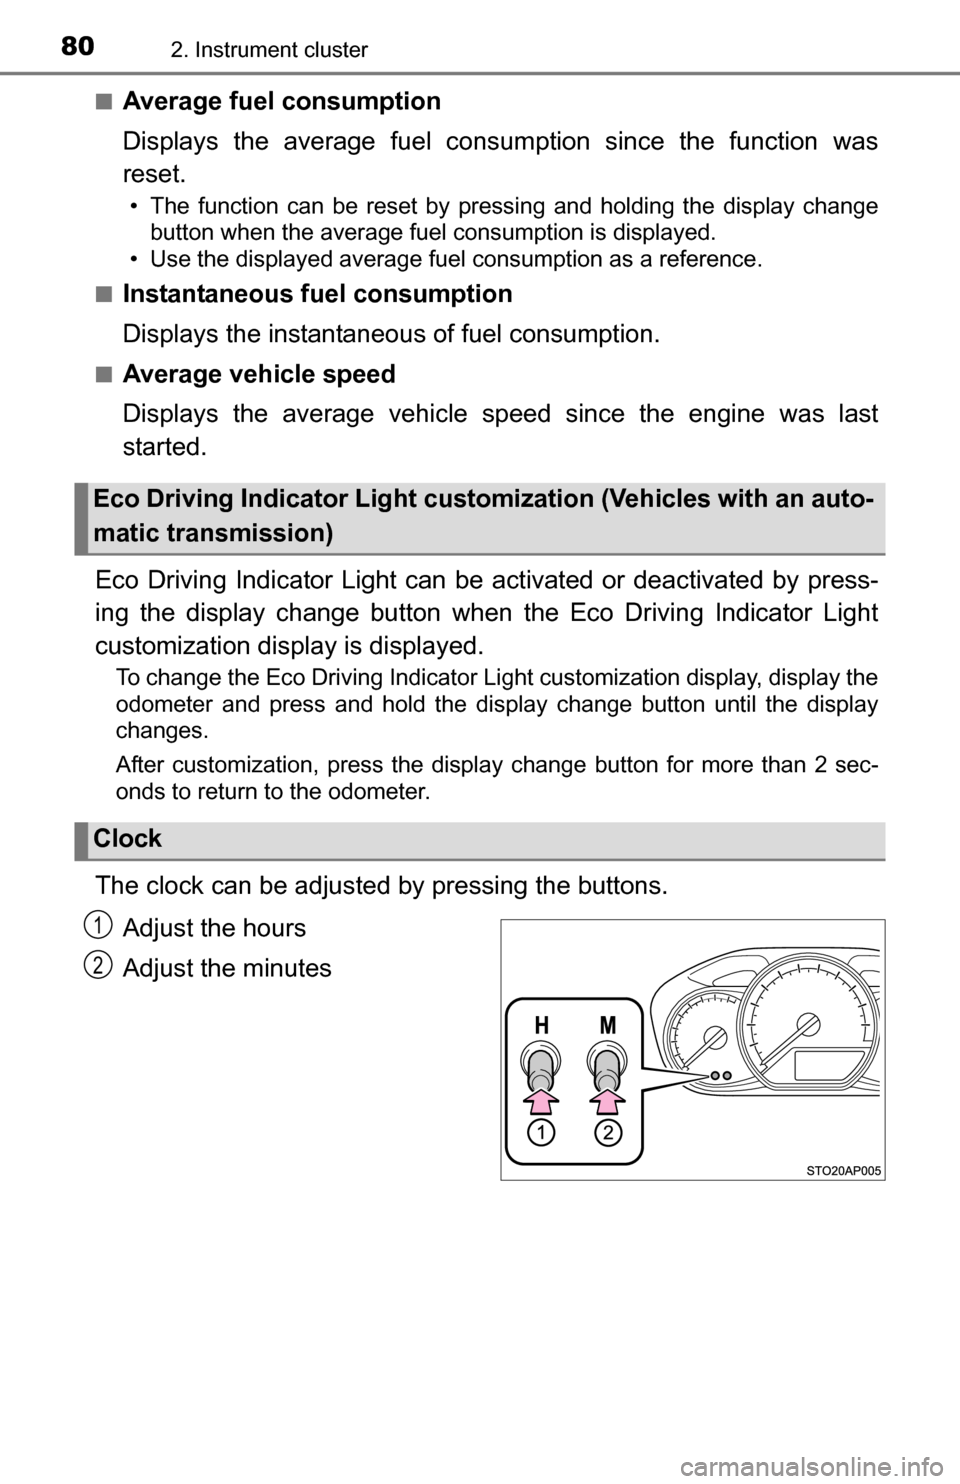
The clock can be adjusted by pressing the buttons.
Adjust the hours
Adjust the minutes
Eco Driving Indicator Light custom ization (Vehicles with an auto-
matic transmission)
Clock
1
2
Page 168 of 368
1684-6. Driving tips
Accelerate the vehicle slowly, keep a safe distance between you and
the vehicle ahead, and drive at a reduced speed suitable to road con-
ditions.
Park the vehicle and move the shift lever to P (automatic transmis-
sion) or 1 or R (manual transmission) without setting the parking
brake. The parking brake may freeze up, preventing it from being
released. If necessary, block the wheels to prev ent inadvertent sliding
or creeping.
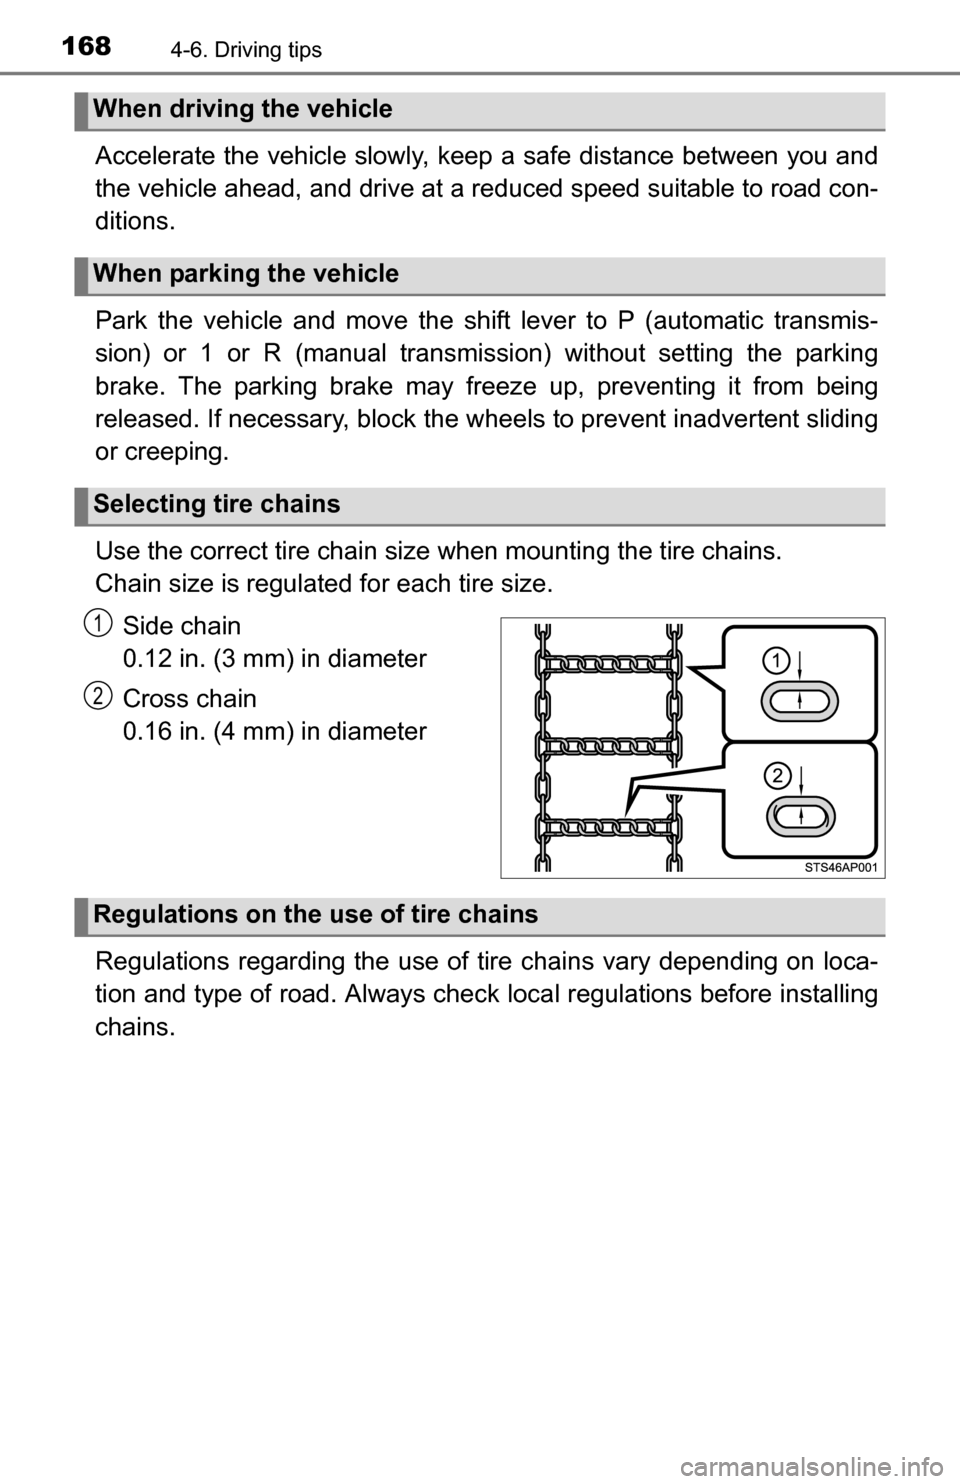
Use the correct tire chain size when mounting the tire chains.
Chain size is regulated for each tire size.
Side chain
0.12 in. (3 mm) in diameter
Cross chain
0.16 in. (4 mm) in diameter
Regulations regarding the use of tire chains vary depending on loca-
tion and type of road. Al ways check local regulations before installing
chains.
When driving the vehicle
When parking the vehicle
Selecting tire chains
1
2
Regulations on the use of tire chains