TOYOTA YARIS HATCHBACK 2008 Owners Manual
YARIS HATCHBACK 2008
TOYOTA
TOYOTA
https://www.carmanualsonline.info/img/14/59275/w960_59275-0.png
TOYOTA YARIS HATCHBACK 2008 Owners Manual
Trending: fuse, compression ratio, differential, lights, traction control, suspension, maintenance
Page 191 of 400
177
3-2. Using the audio system
3
Interior features
n
Using cellular phones
Interference may be heard through the audio system's speakers if a cellular
phone is being used inside or close to the vehicle while the audio syste\
m is
operating.
CAUTION
nFor vehicles sold in U.S.A. and Canada
lPart 15 of the FCC Rules
FCC Warning:
Any unauthorized changes or modifications to this equipment will void the
user’s authority to operate this device.
l Laser products
• Do not take this unit apart or attempt to make any changes yourself.
This is an intricate unit that uses a laser pickup to retrieve information
from the surface of compact discs. The laser is carefully shielded so
that its rays remain inside the cabinet. Therefore, never try to disas-
semble the player or alter any of its parts since you may be exposed to
laser rays and dangerous voltages.
• This product utilizes a laser. Use of controls or adjustments or performance of procedures other
than those specified herein may result in hazardous radiation expo-
sure.
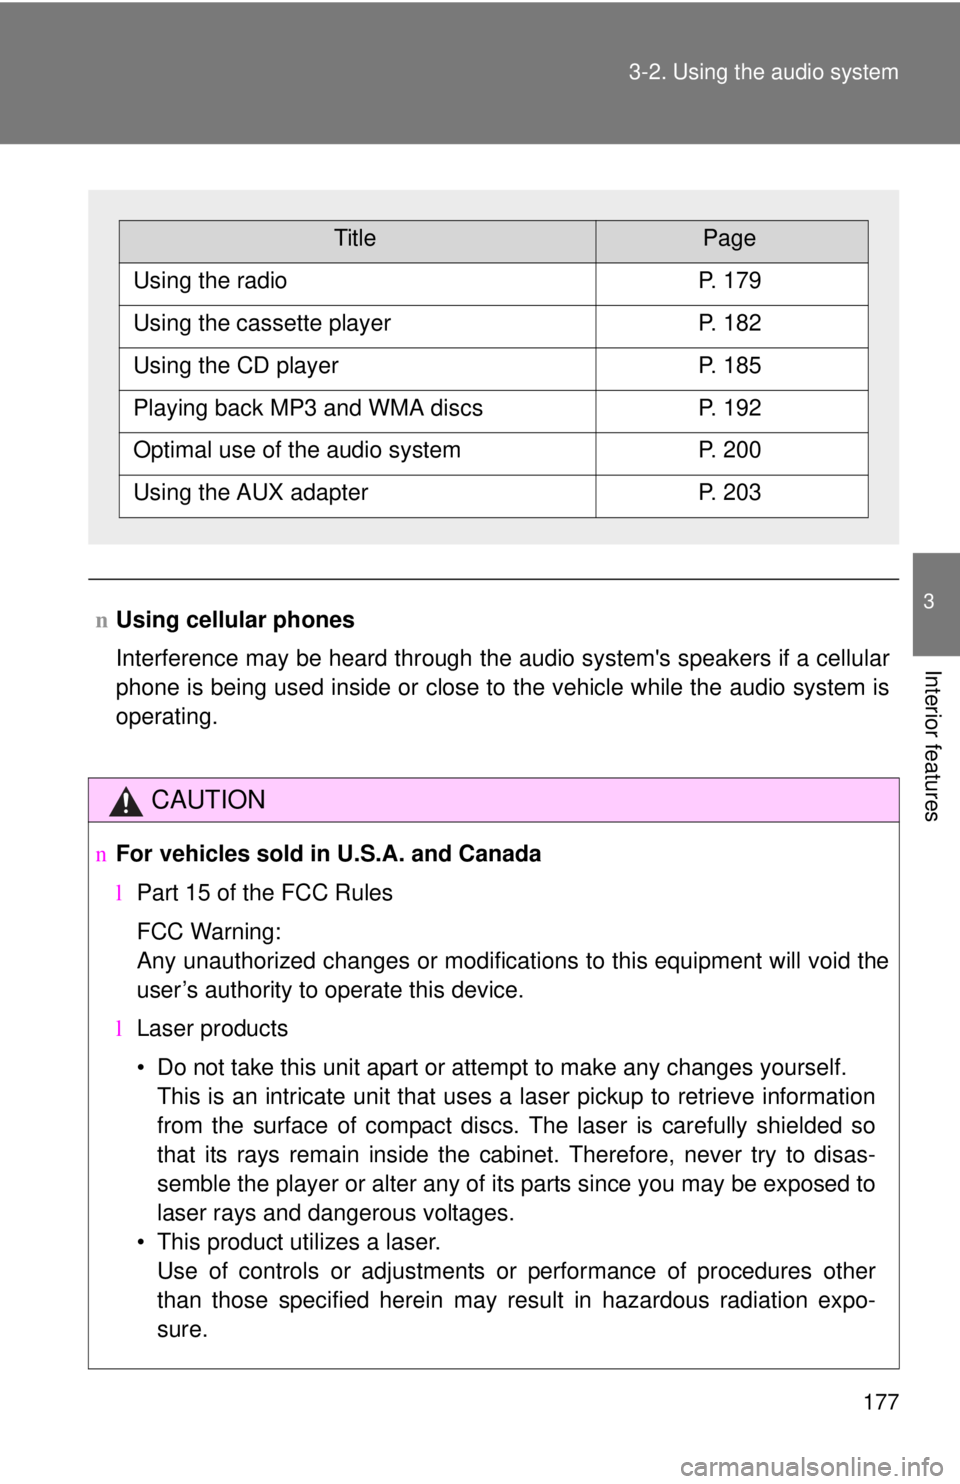
TitlePage
Using the radioP. 179
Using the cassette playerP. 182
Using the CD playerP. 185
Playing back MP3 and WMA discsP. 192
Optimal use of the audio systemP. 200
Using the AUX adapterP. 203
Page 192 of 400
178 3-2. Using the audio system
NOTICE
nTo prevent battery discharge
Do not leave the audio system on longer than necessary with the engine o\
ff.
n To avoid damaging the audio system
Take care not to spill drinks or other fluids over the audio system.
Page 193 of 400
179
3-2. Using the audio system
3
Interior features
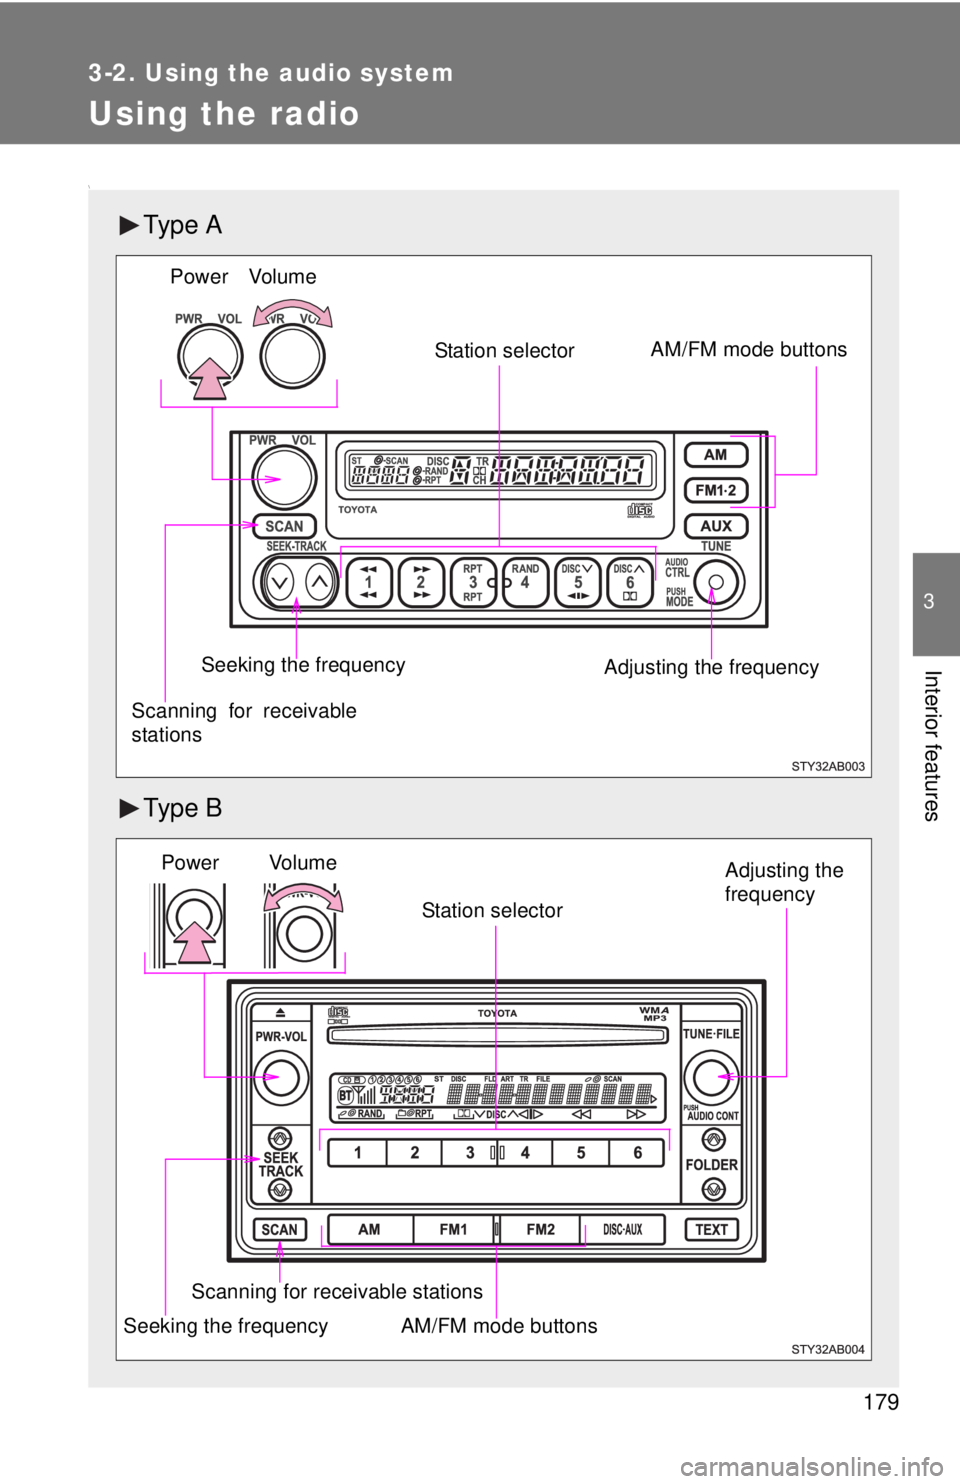
Using the radio
\
Ty p e A
Ty p e B
Vol um e
Seeking the frequency AM/FM mode buttons
Scanning for receivable
stations Power
Adjusting the frequency
Station selector
Vo lu m e
Scanning for receivable stations Station selector
Seeking the frequency Adjusting the
frequency
AM/FM mode buttonsPower
Page 194 of 400
180 3-2. Using the audio system
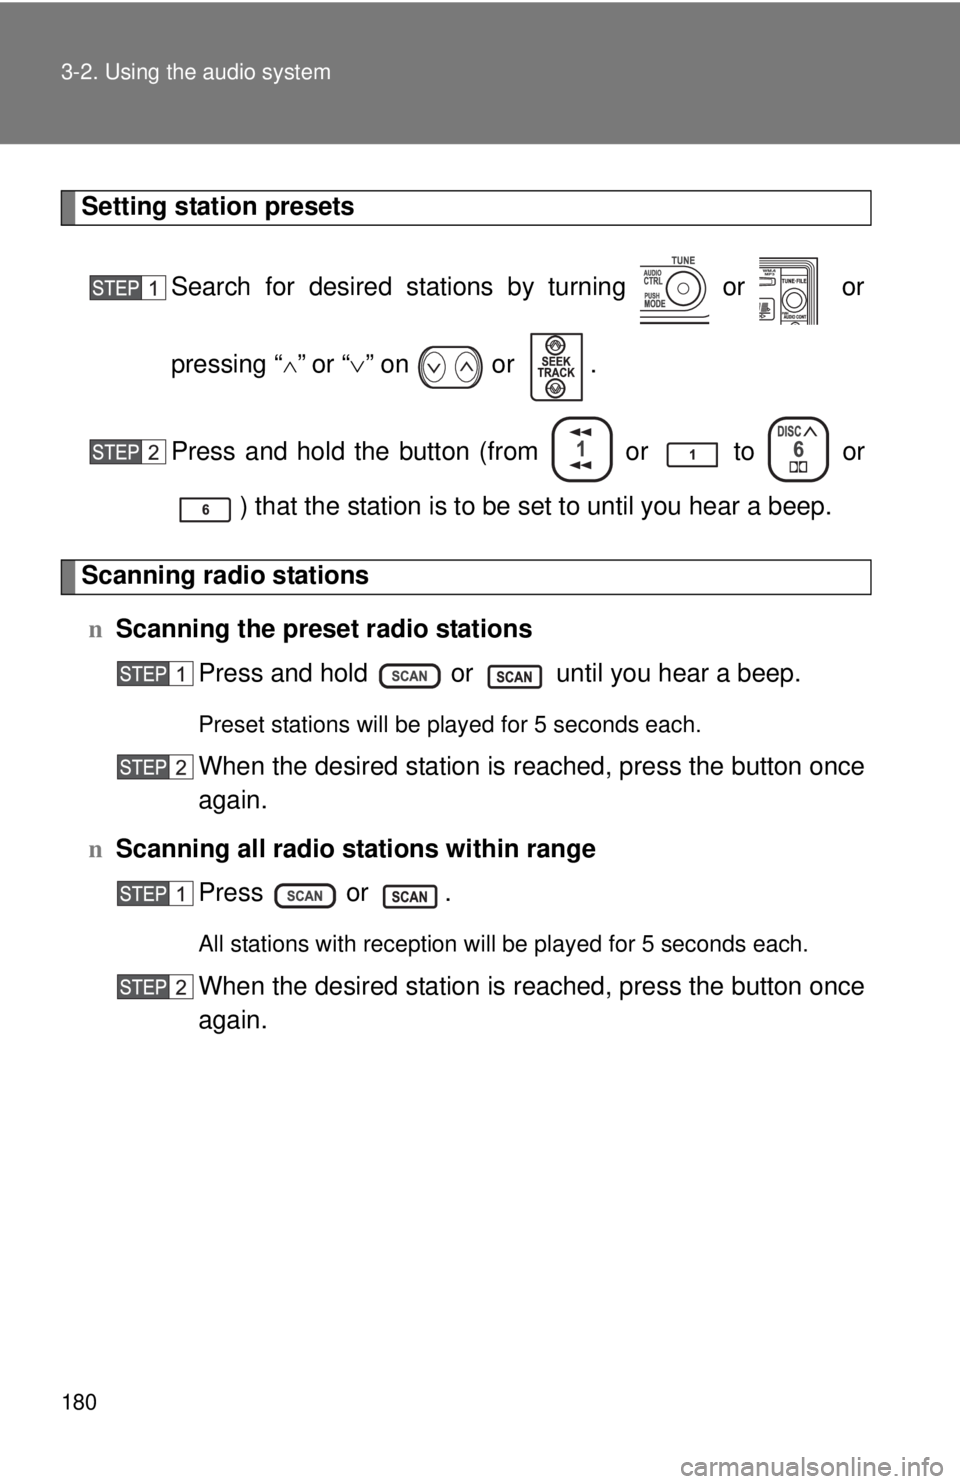
Setting station presetsSearch for desired stations by turning or or
pressing “
∧” or “∨” on or .
Press and hold the button (from or
to or
) that the station is to be set to until you hear a beep.
Scanning radio stations n Scanning the preset radio stations
Press and hold or until you hear a beep.
Preset stations will be played for 5 seconds each.
When the desired station is reached, press the button once
again.
n Scanning all radio stations within range
Press or .
All stations with reception will be played for 5 seconds each.
When the desired station is reached, press the button once
again.
Page 195 of 400
181
3-2. Using the audio system
3
Interior features
n
When the battery is disconnected
Stations presets are erased.
n Reception sensitivity
lMaintaining perfect radio reception at all times is difficult due to the con-
tinually changing position of the antenna, differences in signal strength
and surrounding objects, such as trains, transmitters, etc.
l The radio antenna is mounted on the rear roof. The antenna can be
removed from the base by turning it.
NOTICE
nTo prevent damage, remove the antenna in the following cases.
lThe antenna will touch the ceiling of a garage.
l A cover will be put on the vehicle.
Page 196 of 400
182
3-2. Using the audio system
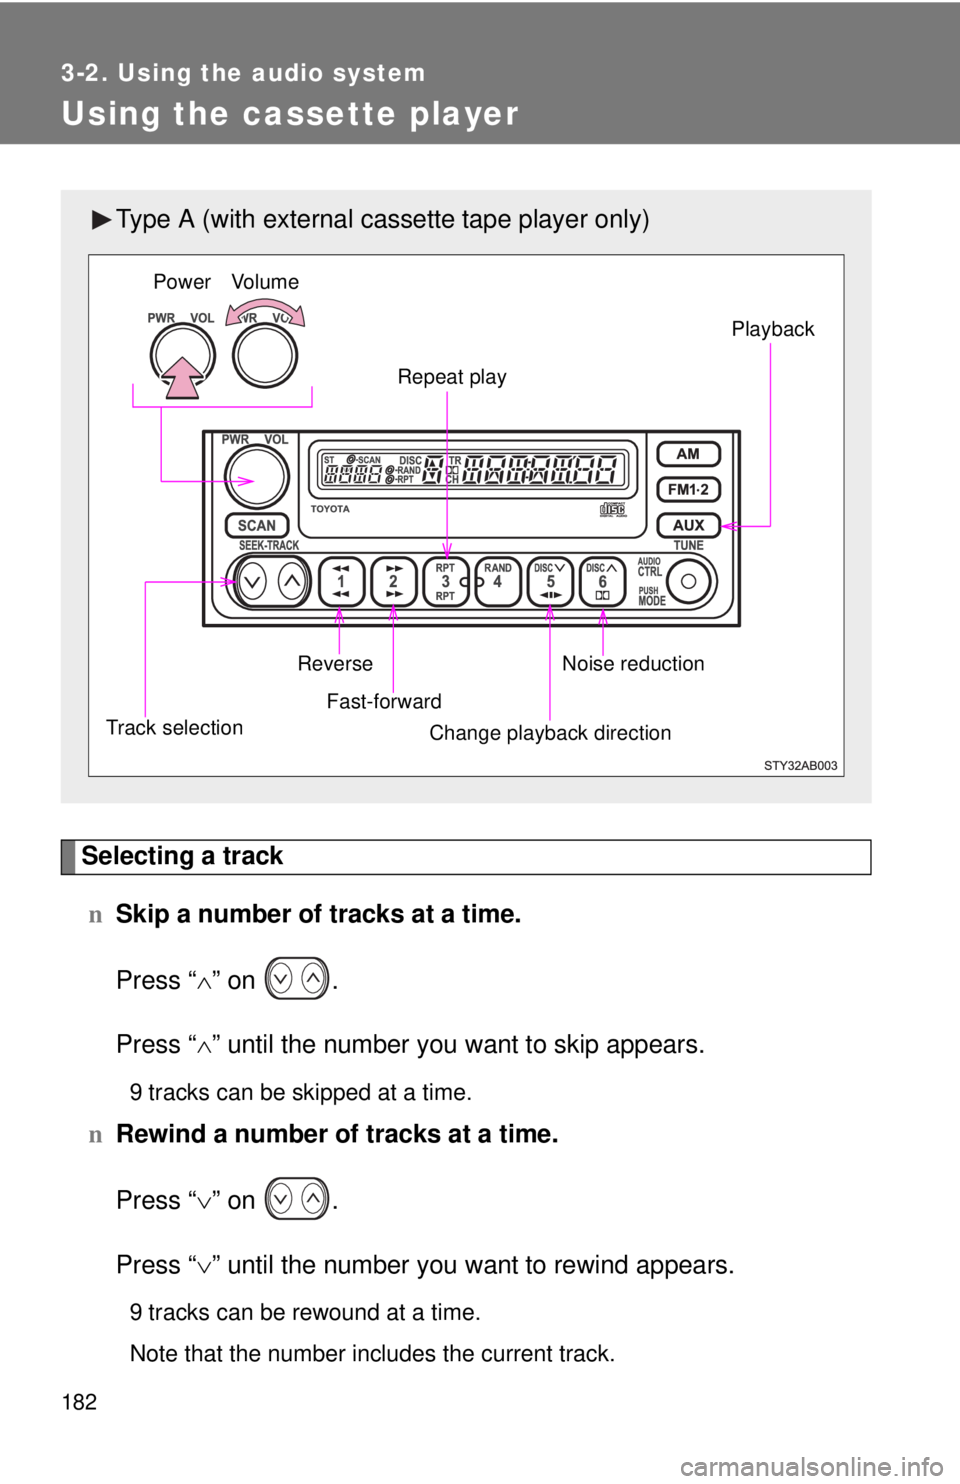
Using the cassette player
Selecting a trackn Skip a number of tracks at a time.
Press “ ∧” on .
Press “ ∧” until the number you want to skip appears.
9 tracks can be skipped at a time.
n Rewind a number of tracks at a time.
Press “ ∨” on .
Press “ ∨” until the number you want to rewind appears.
9 tracks can be rewound at a time.
Note that the number includes the current track.
Type A (with external ca ssette tape player only)
Power Volume
Repeat play Playback
Noise reduction
Change playback direction
Fast-forward
Reverse
Track selection
Page 197 of 400
183
3-2. Using the audio system
3
Interior features
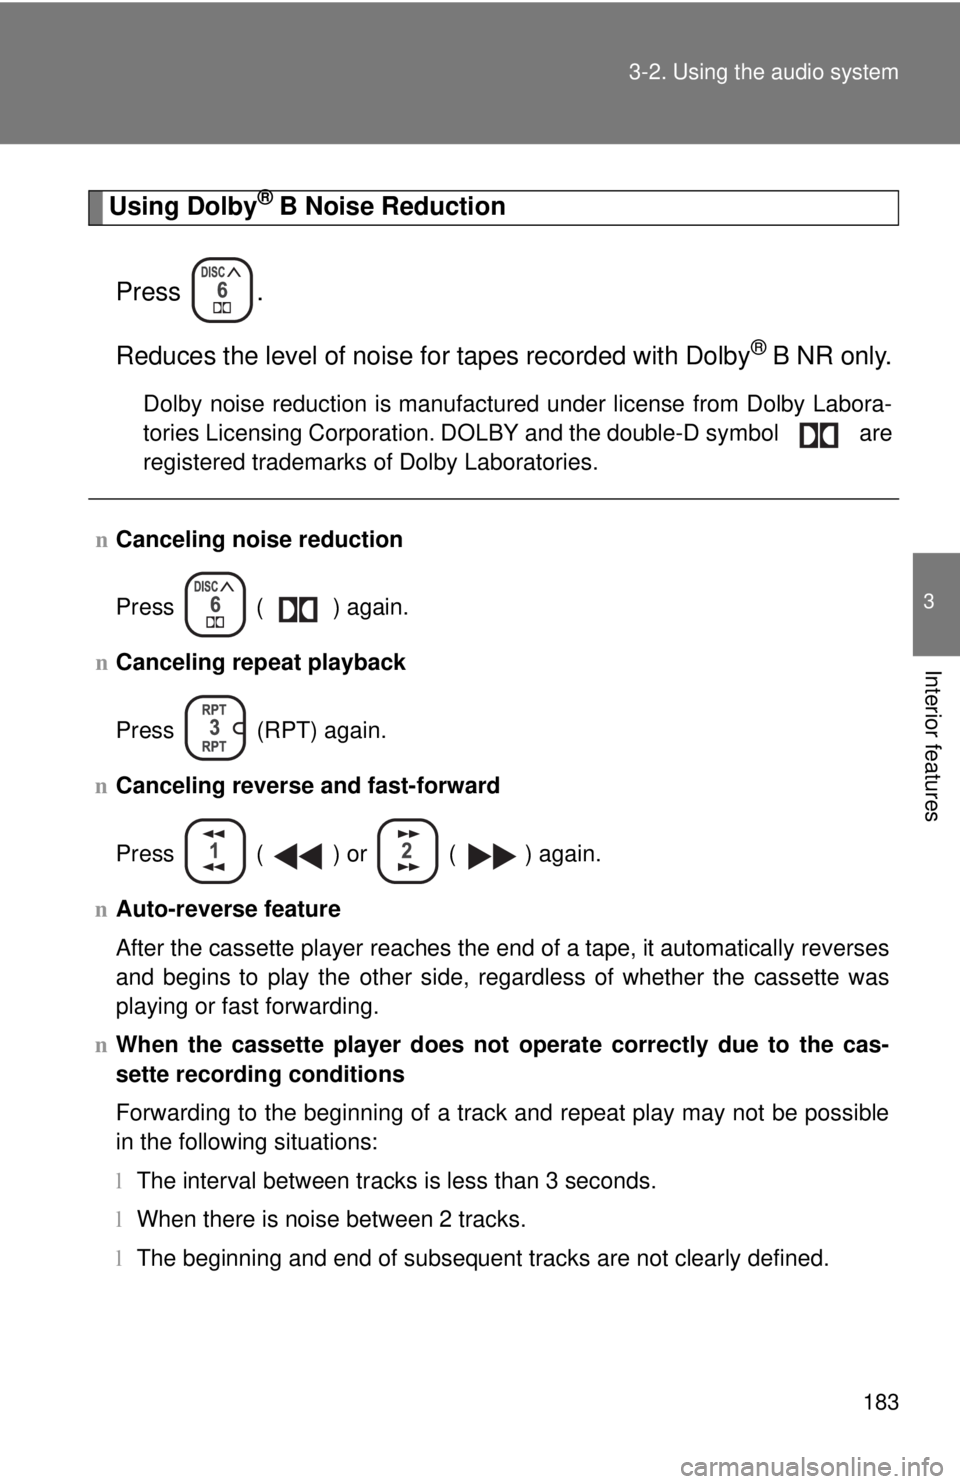
Using Dolby® B Noise Reduction
Press .
Reduces the level of noise for tapes recorded with Dolby
® B NR only.
Dolby noise reduction is manufactured under license from Dolby Labora-
tories Licensing Corporation. DOLBY and the double-D symbol are
registered trademarks of Dolby Laboratories.
n Canceling noise reduction
Press ( ) again.
n Canceling repeat playback
Press
(RPT) again.
n Canceling reverse and fast-forward
Press ( ) or ( ) again.
n Auto-reverse feature
After the cassette player reaches the end of a tape, it automatically reverses
and begins to play the other side, regardless of whether the cassette was
playing or fast forwarding.
n When the cassette player does not operate correctly due to the cas-
sette recording conditions
Forwarding to the beginning of a track and repeat play may not be possib\
le
in the following situations:
lThe interval between tracks is less than 3 seconds.
l When there is noise between 2 tracks.
l The beginning and end of subsequent tracks are not clearly defined.
Page 198 of 400
184 3-2. Using the audio system
nCleaning the cassette player
Cassette player components (heads, capstan, pinch rollers) should be
cleaned at least once a month using a cleaning tape to remove dirt and dust
that can easily build up.
n Using long playing cassette tapes
Avoid using tapes with a length of more than 90 minutes, as the tape used is
very thin and may become tangled in the cassette player.
NOTICE
nCassette tapes that cannot be used
Do not use a cassette tape if it has been damaged or tangled or if its label is
peeling off. Such tapes may affect playing speed and may also get stuck in
the player.
n Cassette player precautions
lStore cassette tapes away from direct sunlight.
l Do not insert anything other than cassette tapes into the cassette player.
l Do not apply oil to the cassette player.
Page 199 of 400
185
3-2. Using the audio system
3
Interior features
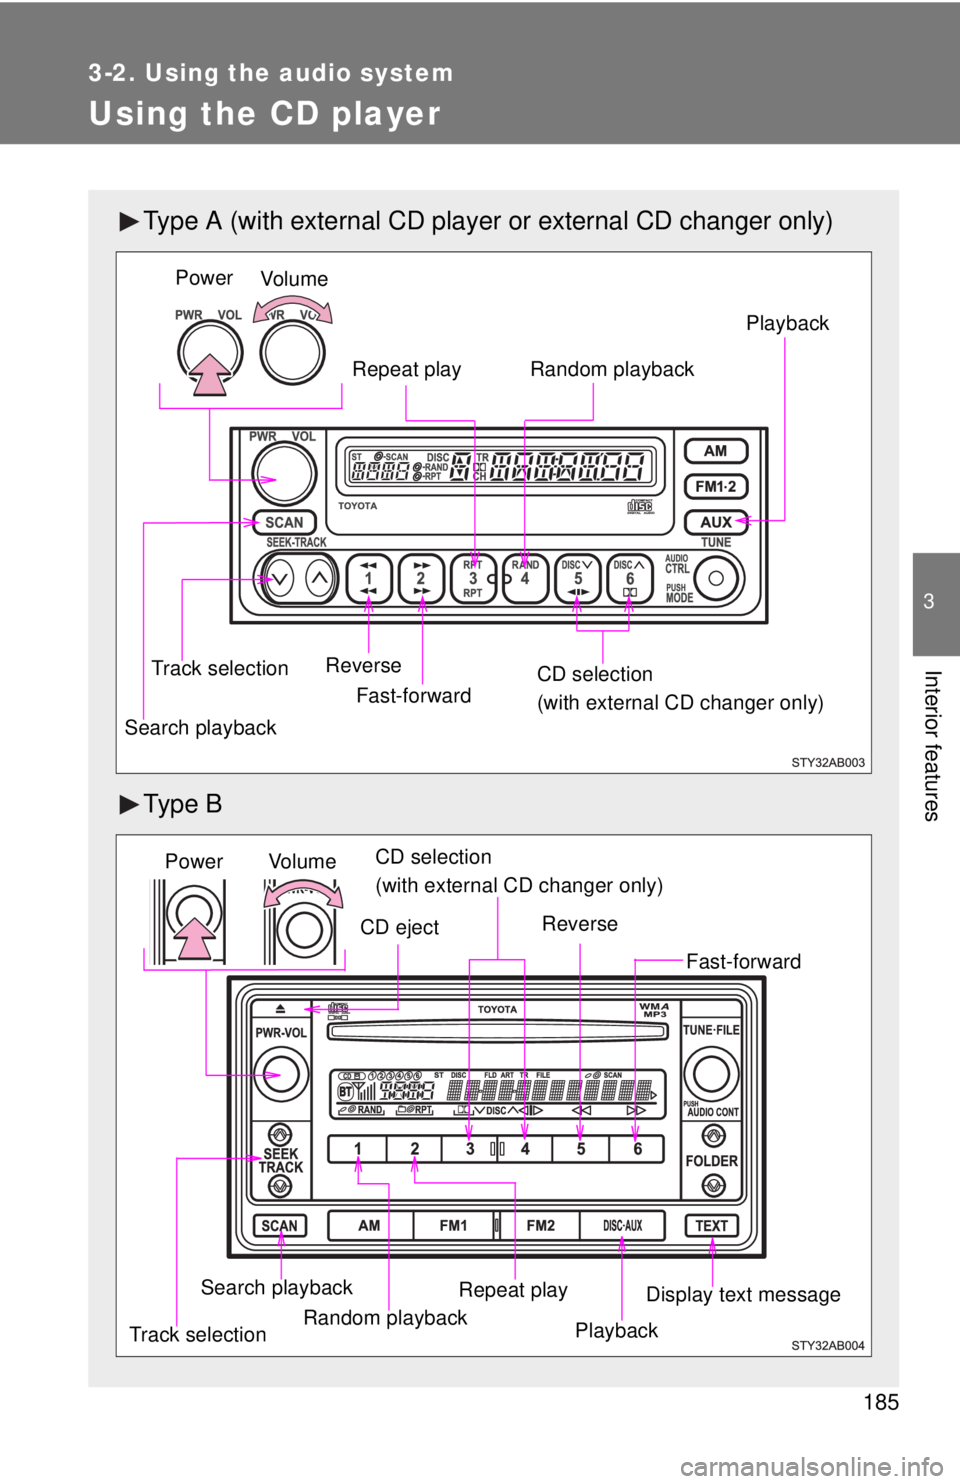
Using the CD player
Type A (with external CD player or external CD changer only)
Ty p e B
Vo l u m e
Power
CD selection
(with external CD changer only)
Reverse
Repeat play Playback
Fast-forward
Track selectionRandom playback
Search playback
Vol u m e
Random playback
Track selection Repeat play
Playback
Power
CD eject
Display text message
CD selection
(with external CD changer only)
Search playback
Reverse
Fast-forward
Page 200 of 400
186 3-2. Using the audio system
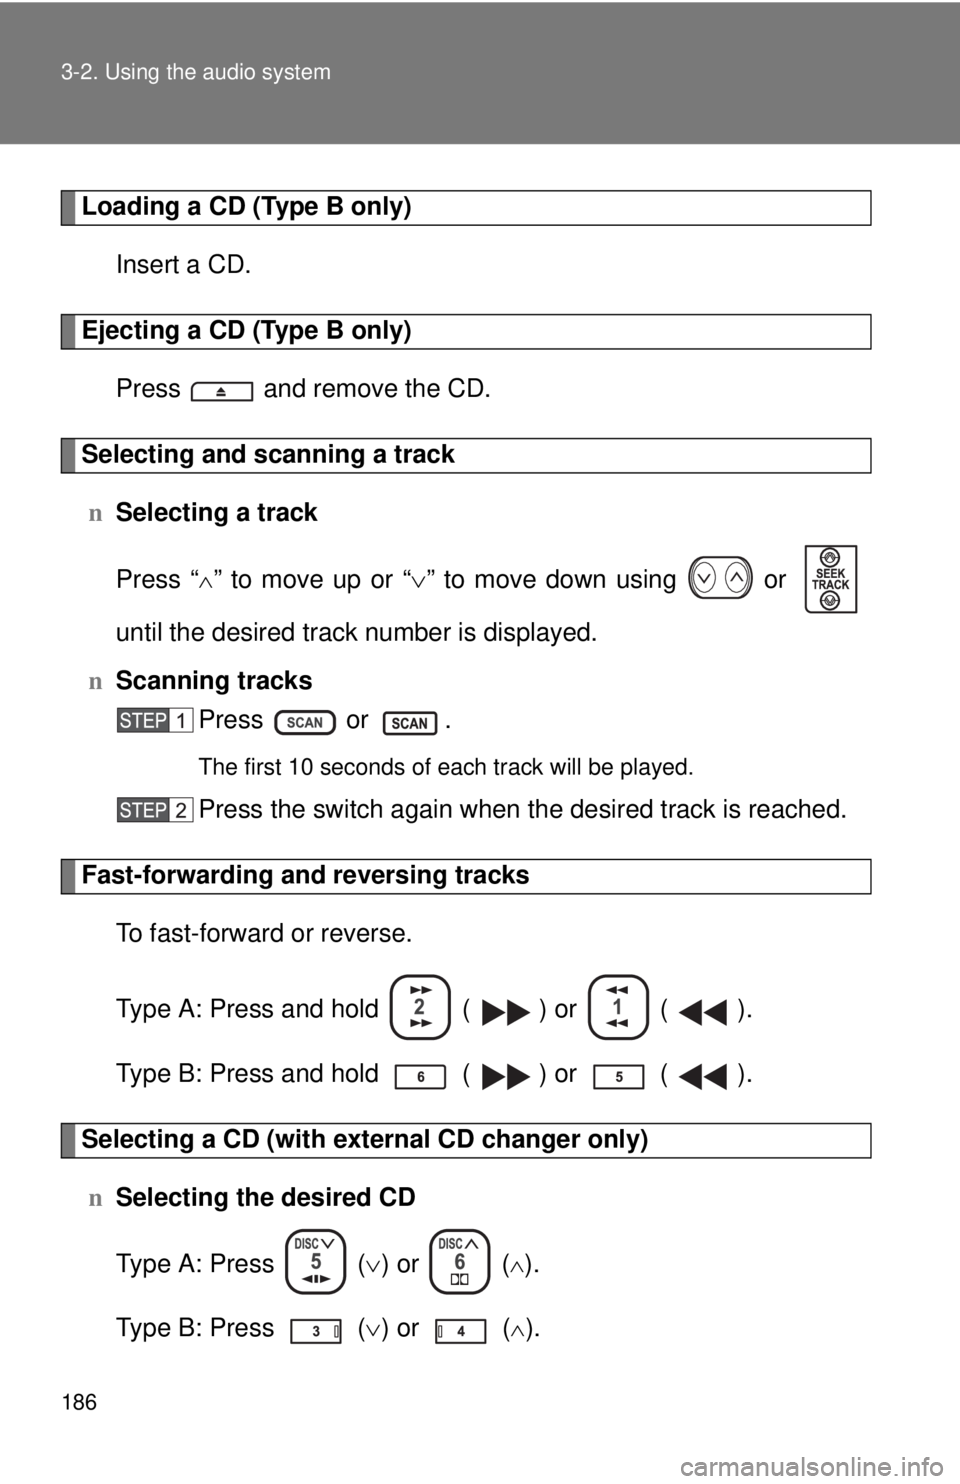
Loading a CD (Type B only)Insert a CD.
Ejecting a CD (Type B only)Press and remove the CD.
Selecting and scanning a trackn Selecting a track
Press “
∧” to move up or “ ∨” to move down using or
until the desired track number is displayed.
n Scanning tracks
Press or .
The first 10 seconds of each track will be played.
Press the switch again when the desired track is reached.
Fast-forwarding and reversing tracks
To fast-forward or reverse.
Type A: Press and hold ( ) or ( ).
Type B: Press and hold ( ) or ( ).
Selecting a CD (with exte rnal CD changer only)
n Selecting the desired CD
Type A: Press ( ∨) or (
∧).
Type B: Press ( ∨) or (
∧).
Trending: engine overheat, climate control, radio antenna, lane assist, automatic transmission, turn signal, oil dipstick

