display TOYOTA YARIS SEDAN 2008 Owners Manual
[x] Cancel search | Manufacturer: TOYOTA, Model Year: 2008, Model line: YARIS SEDAN, Model: TOYOTA YARIS SEDAN 2008Pages: 384, PDF Size: 6.19 MB
Page 103 of 384
87
1
1-7. Safety information
Before driving
Installing child restraints
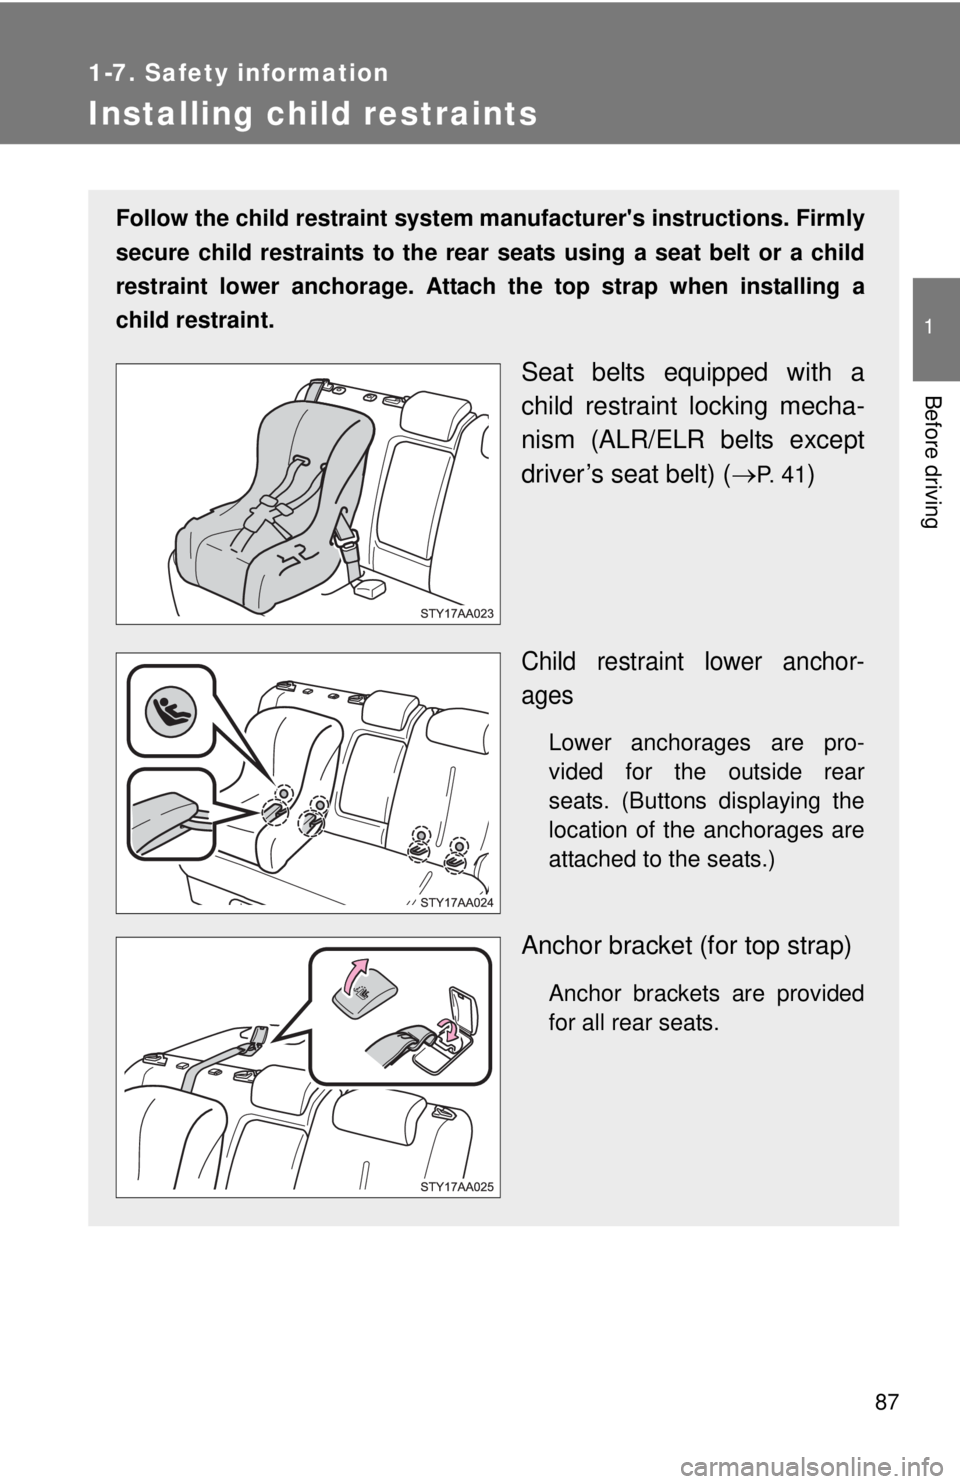
Follow the child restraint system manufacturer's instructions. Firmly
secure child restraints to the rear seats using a seat belt or a child
restraint lower anchorage. Attach the top strap when installing a
child restraint.
Seat belts equipped with a
child restraint locking mecha-
nism (ALR/ELR belts except
driver’s seat belt) ( →
P. 4 1)
Child restraint lower anchor-
ages
Lower anchorages are pro-
vided for the outside rear
seats. (Buttons displaying the
location of the anchorages are
attached to the seats.)
Anchor bracket (for top strap)
Anchor brackets are provided
for all rear seats.
Page 133 of 384
118
2-2. Instrument cluster
Gauges and meters
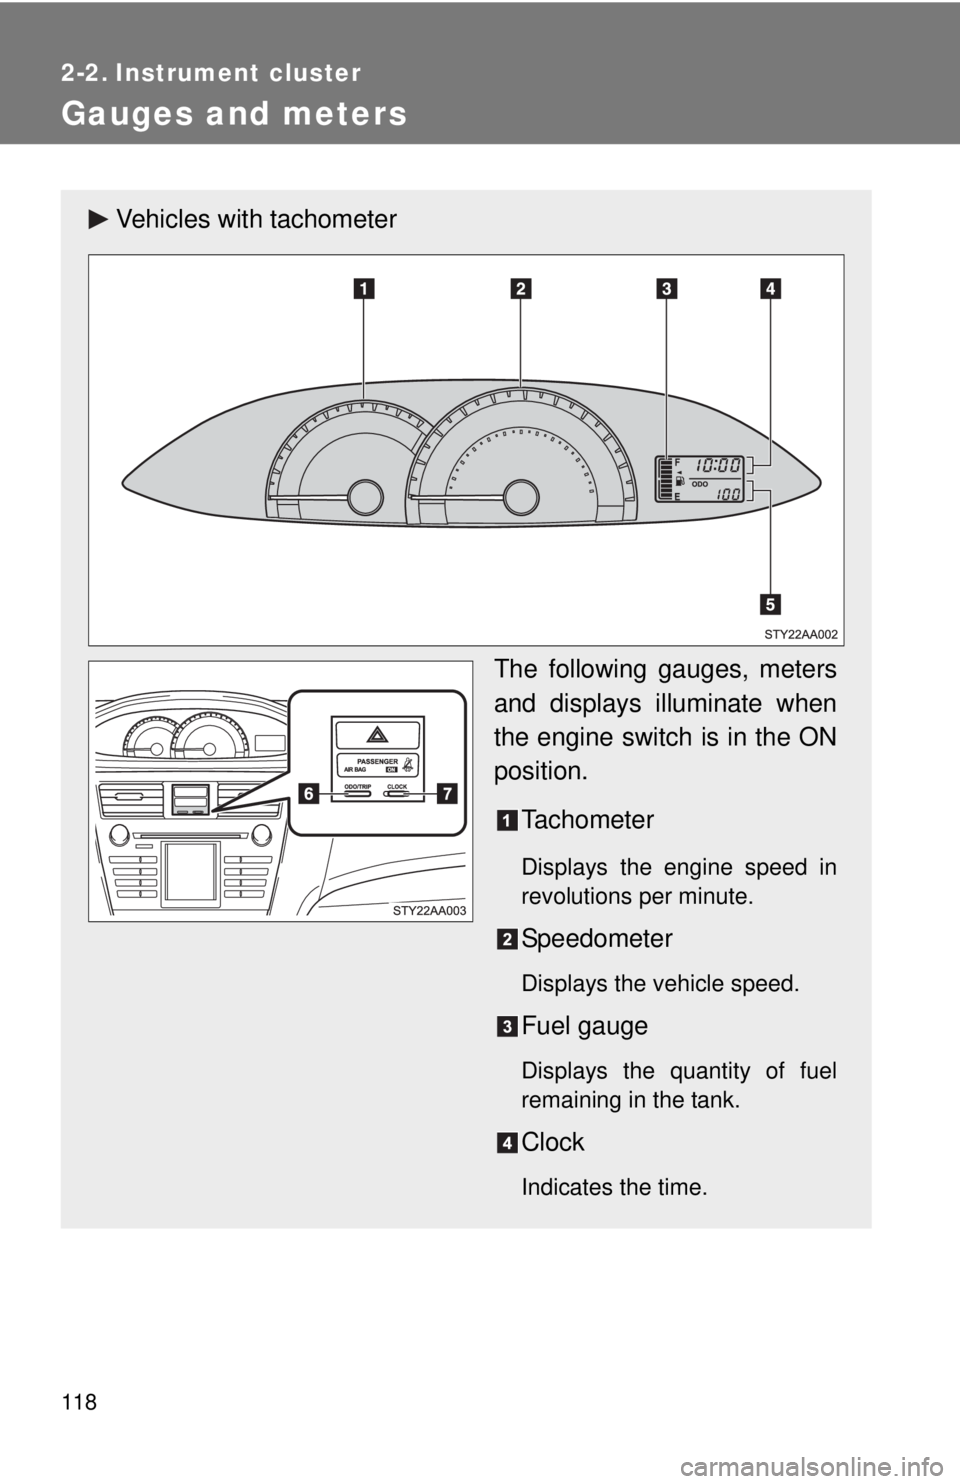
Vehicles with tachometerThe following gauges, meters
and displays illuminate when
the engine switch is in the ON
position.Tachometer
Displays the engine speed in
revolutions per minute.
Speedometer
Displays the vehicle speed.
Fuel gauge
Displays the quantity of fuel
remaining in the tank.
Clock
Indicates the time.
Page 134 of 384
119
2-2. Instrument cluster
2
When driving
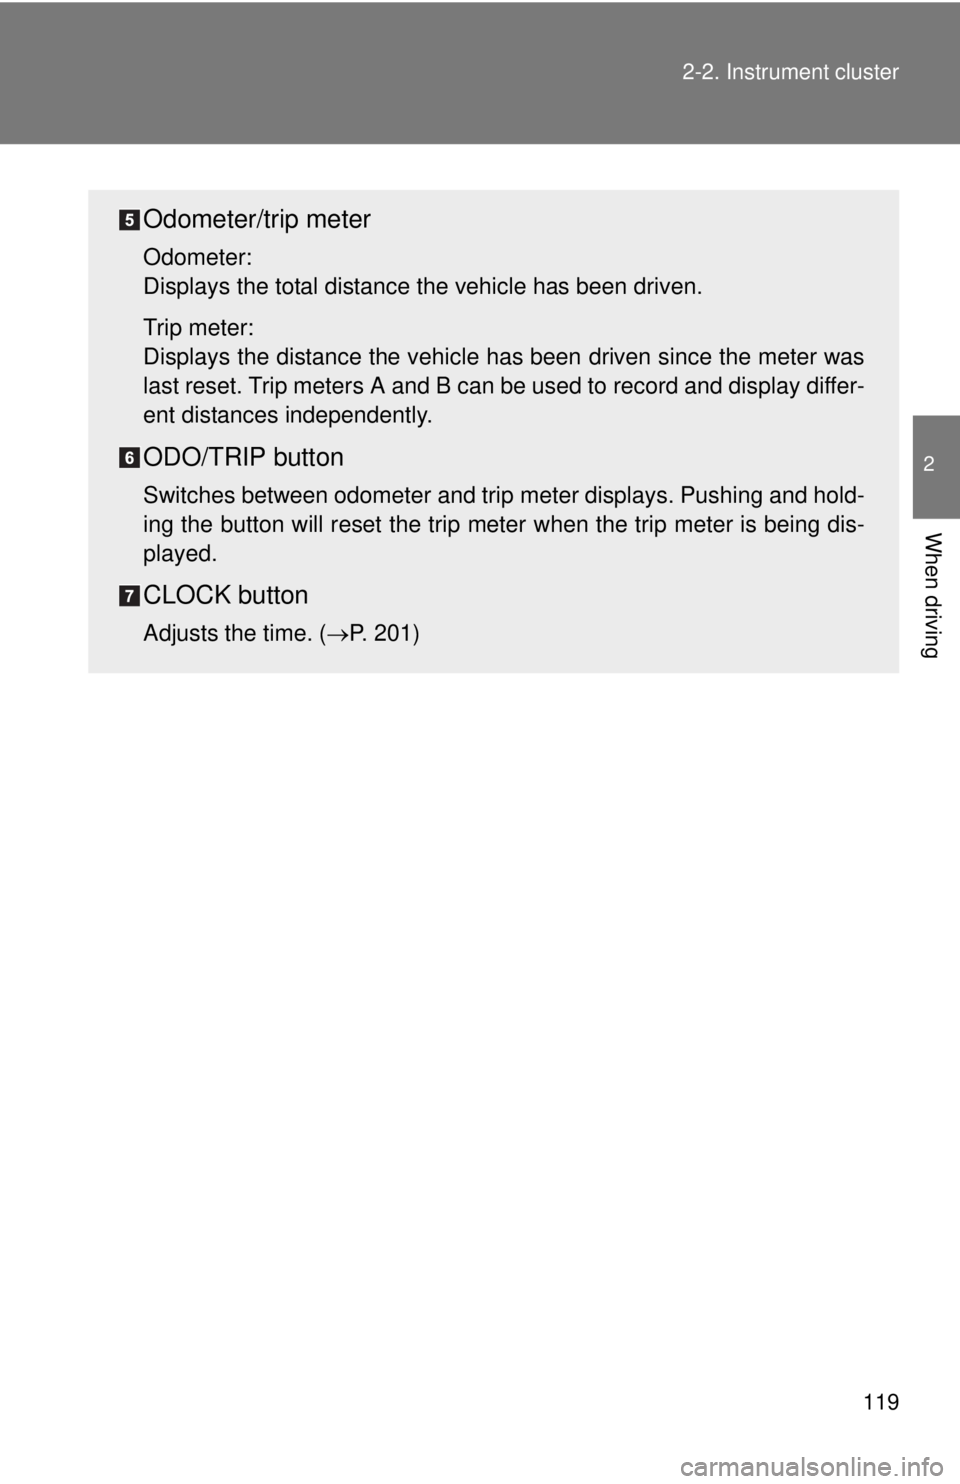
Odometer/trip meter
Odometer:
Displays the total distance the vehicle has been driven.
Trip meter:
Displays the distance the vehicle has been driven since the meter was
last reset. Trip meters A and B can be used to record and display differ-
ent distances independently.
ODO/TRIP button
Switches between odometer and trip meter displays. Pushing and hold-
ing the button will reset the trip meter when the trip meter is being dis-
played.
CLOCK button
Adjusts the time.
( →P. 201)
Page 135 of 384
120 2-2. Instrument cluster
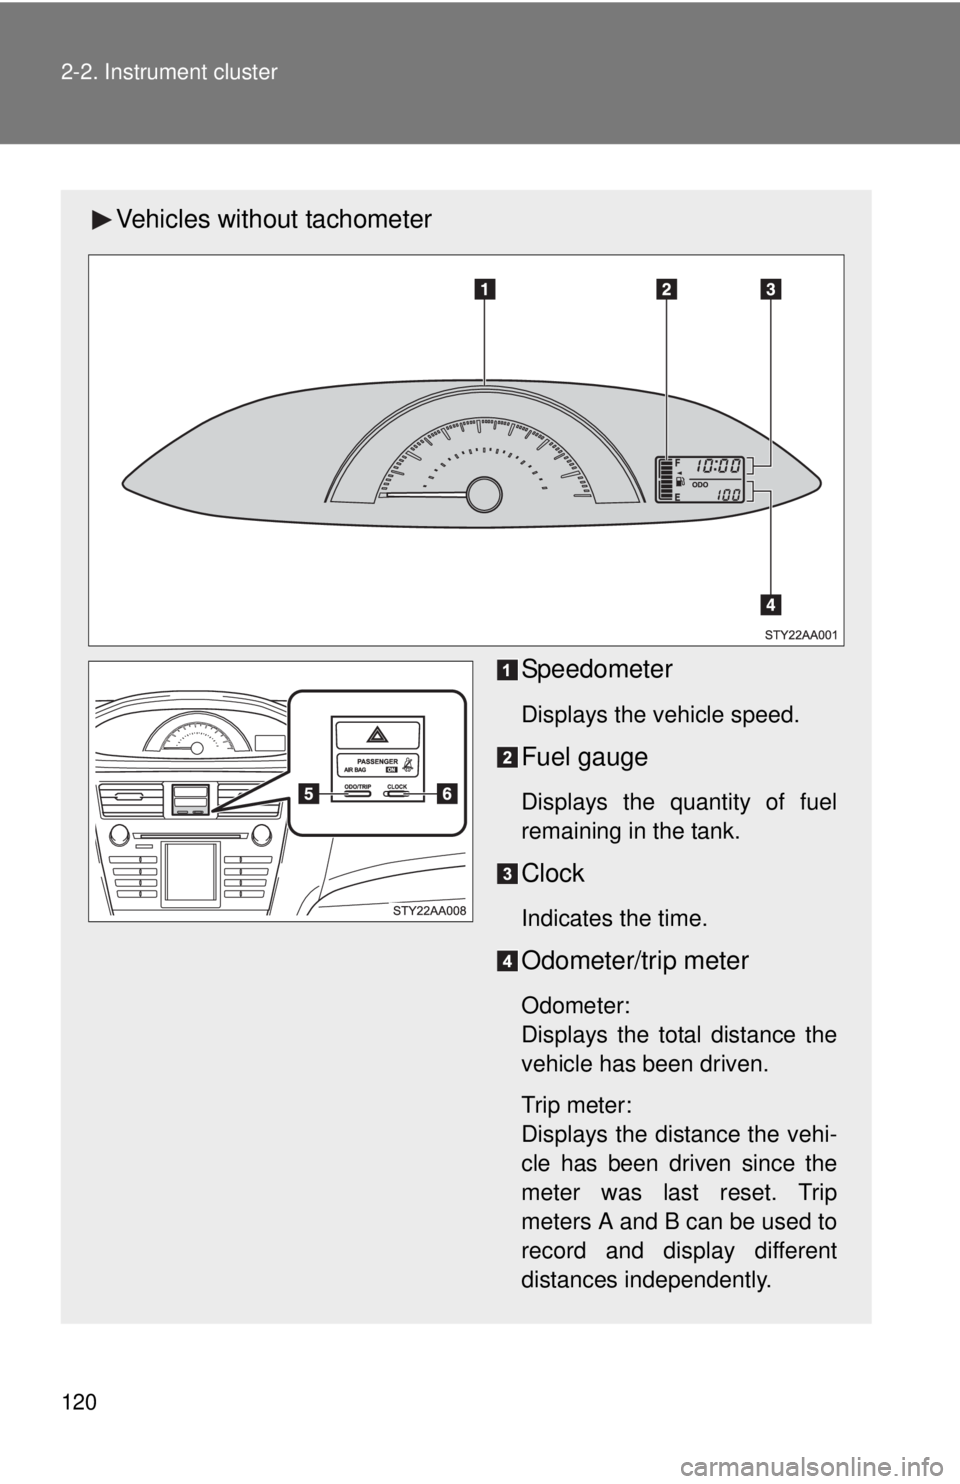
Vehicles without tachometerSpeedometer
Displays the vehicle speed.
Fuel gauge
Displays the quantity of fuel
remaining in the tank.
Clock
Indicates the time.
Odometer/trip meter
Odometer:
Displays the total distance the
vehicle has been driven.
Trip meter:
Displays the distance the vehi-
cle has been driven since the
meter was last reset. Trip
meters A and B can be used to
record and display different
distances independently.
Page 136 of 384
121
2-2. Instrument cluster
2
When driving
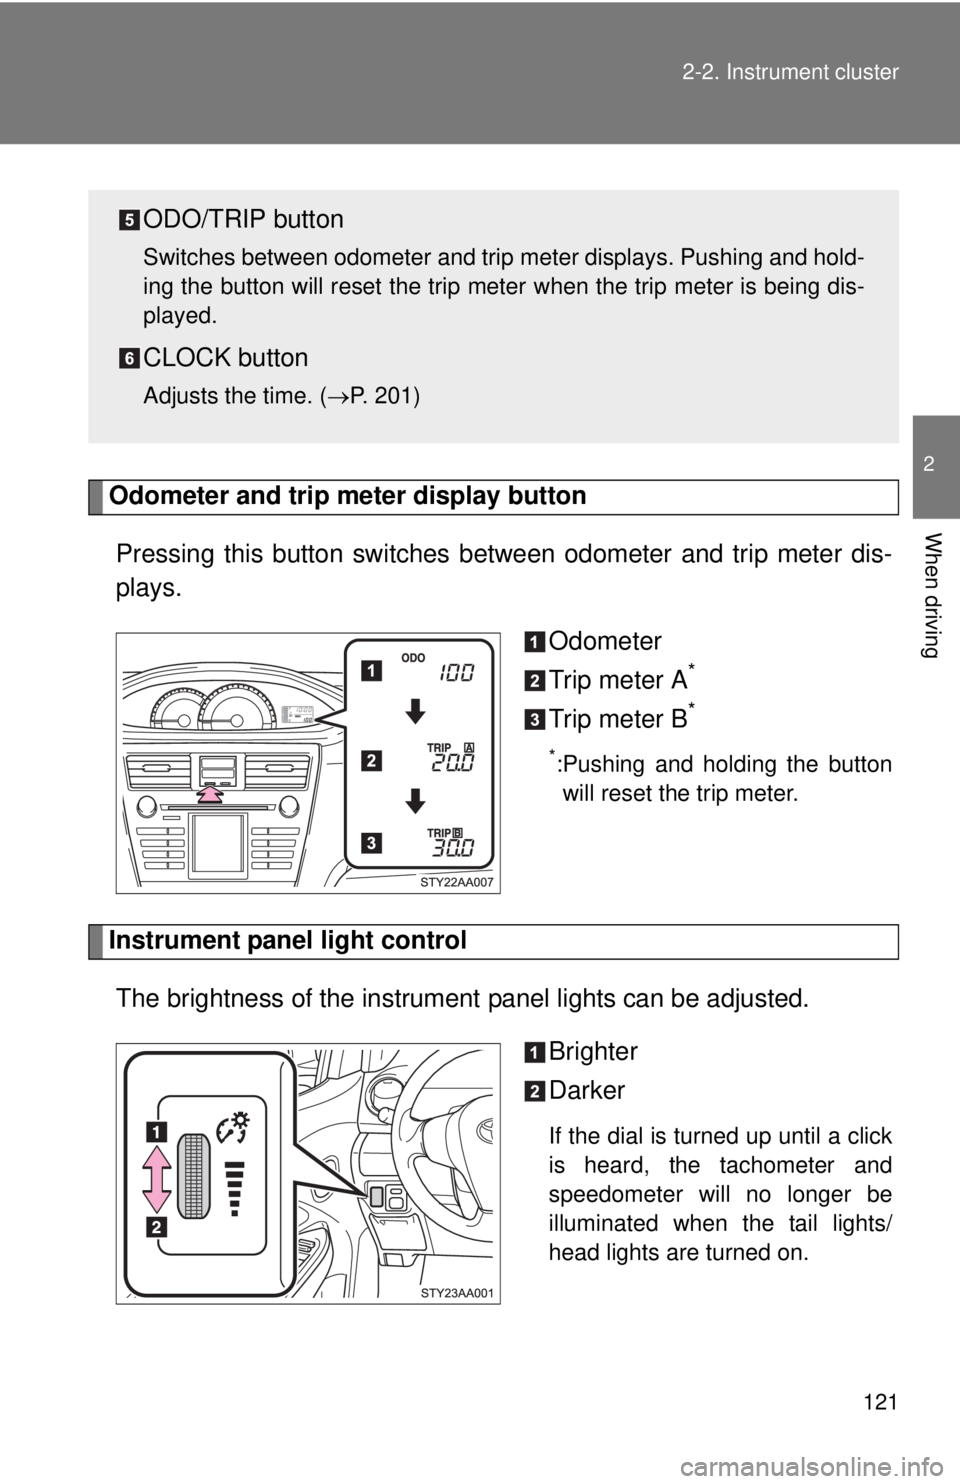
Odometer and trip meter display button
Pressing this button switches
between odometer and trip meter dis-
plays.
Odometer
Trip meter A
*
Trip meter B*
*:Pushing and holding the buttonwill reset the trip meter.
Instrument panel light control
The brightness of the instrument panel lights can be adjusted.
Brighter
Darker
If the dial is turned up until a click
is heard, the tachometer and
speedometer will no longer be
illuminated when the tail lights/
head lights are turned on.
ODO/TRIP button
Switches between odometer and trip meter displays. Pushing and hold-
ing the button will reset the trip meter when the trip meter is being dis-
played.
CLOCK button
Adjusts the time. ( →P. 201)
Page 185 of 384
171
3-2. Using the audio system
3
Interior features
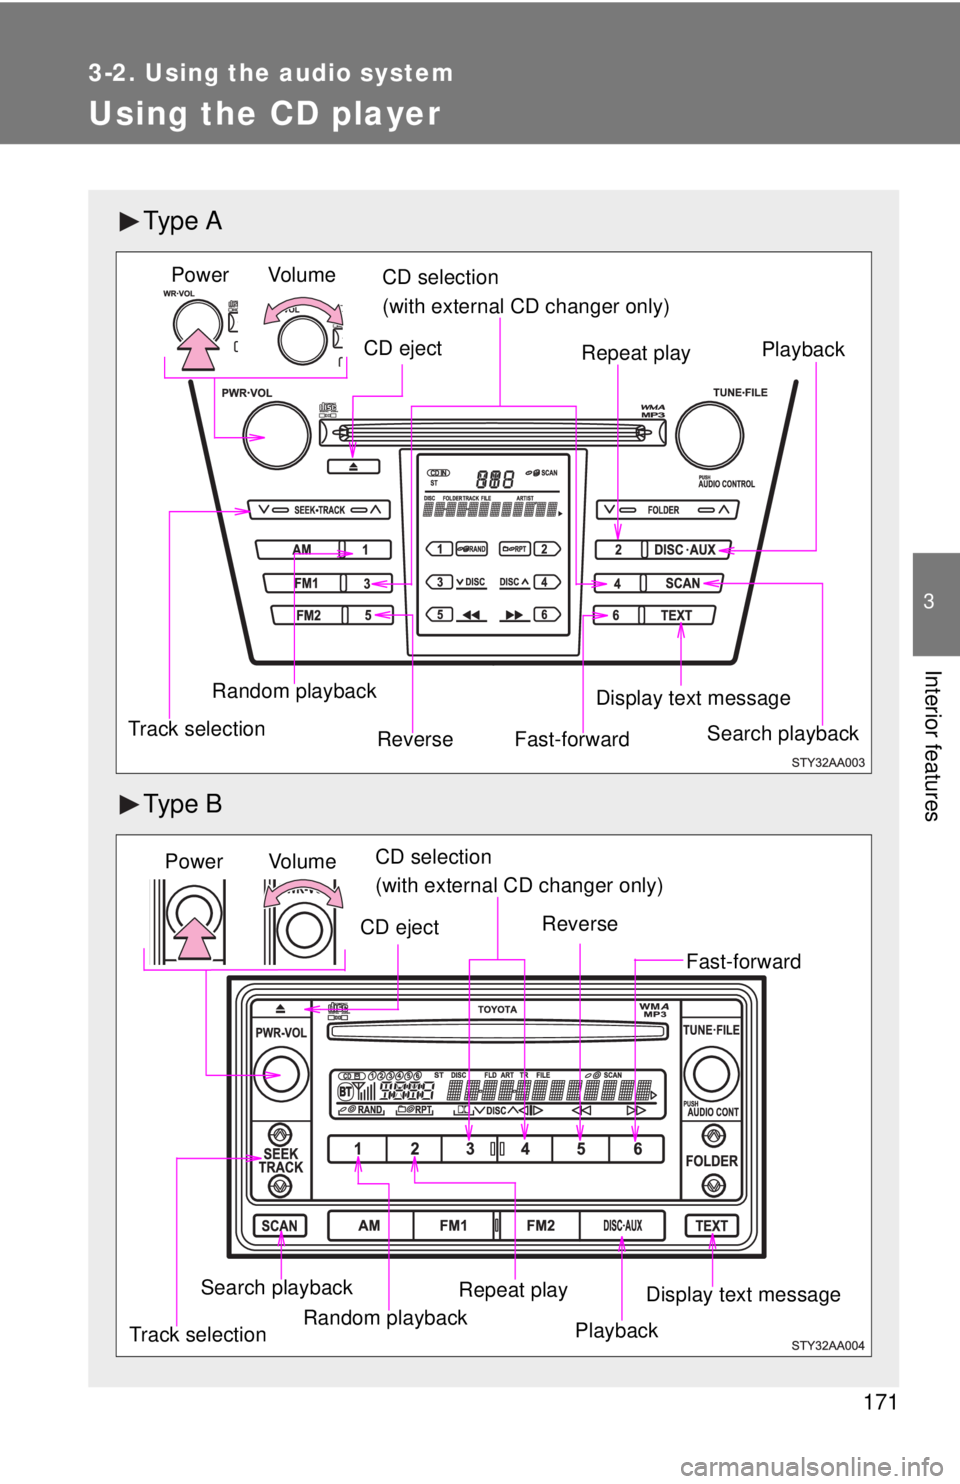
Using the CD player
Ty p e A
Ty p e B
Vol um e
Random playback
Track selection Repeat play
Playback
Power
CD eject
Display text message
CD selection
(with external CD changer only)
Fast-forward
Search playbackReverse
Vol u m e
Random playback
Track selection Repeat play
Playback
Power
CD eject
Display text message
CD selection
(with external CD changer only)
Search playback
Reverse
Fast-forward
Page 186 of 384
172 3-2. Using the audio system
Loading a CDInsert a CD.
Ejecting a CDPress or and remove the CD.
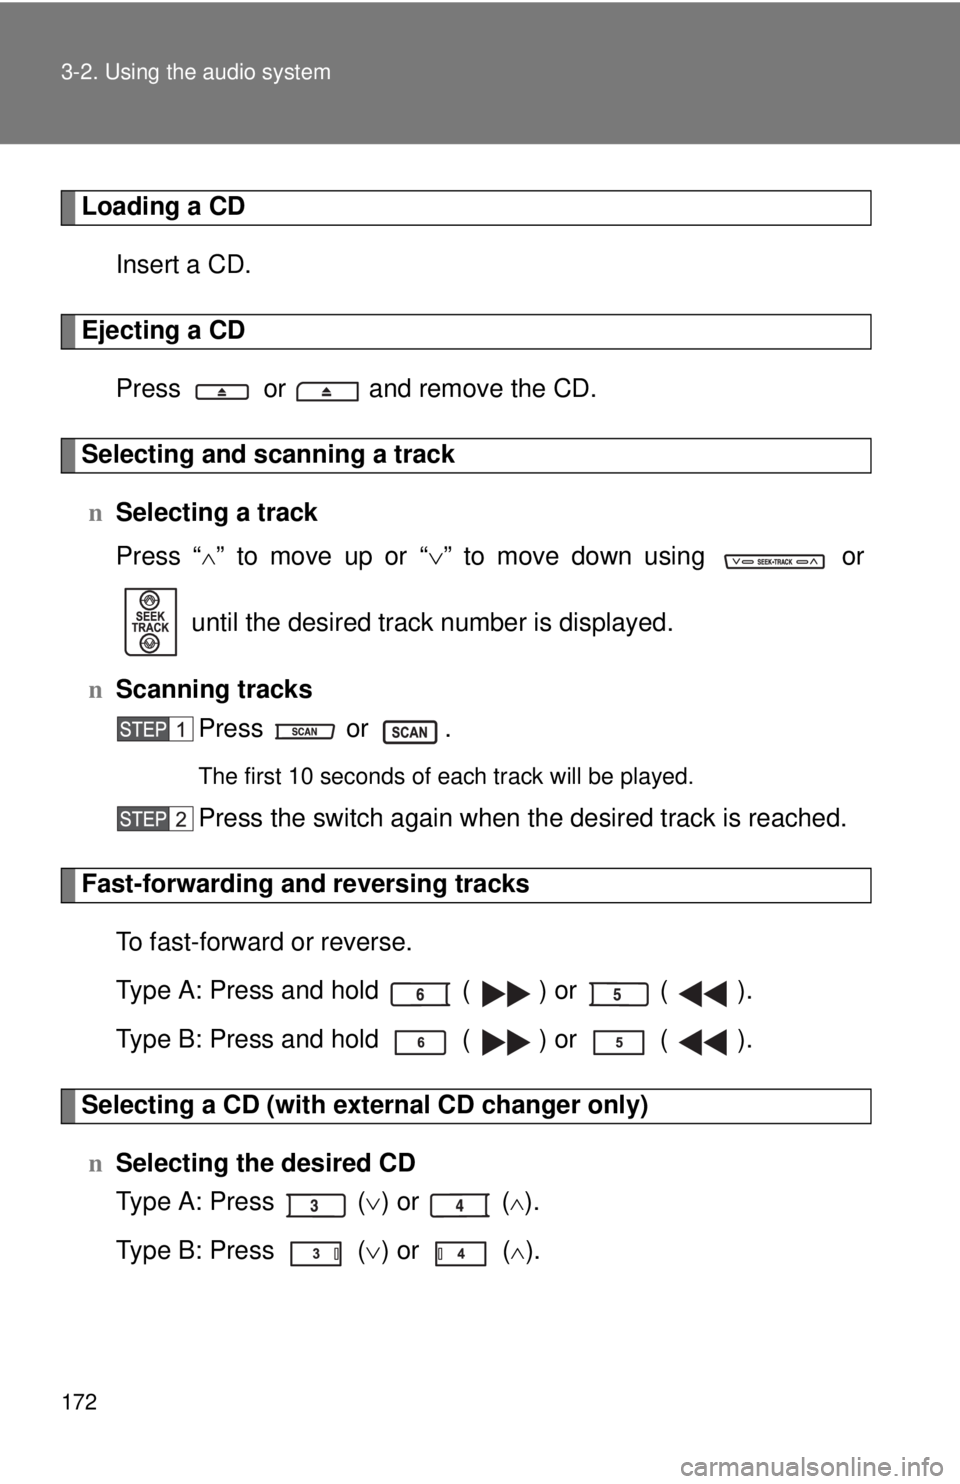
Selecting and scanning a trackn Selecting a track
Press “
∧” to move up or “ ∨” to move down using or
until the desired track number is displayed.
n Scanning tracks
Press or .
The first 10 seconds of each track will be played.
Press the switch again when the desired track is reached.
Fast-forwarding and reversing tracks
To fast-forward or reverse.
Type A: Press and hold ( ) or ( ).
Type B: Press and hold ( ) or ( ).
Selecting a CD (with exte rnal CD changer only)
n Selecting the desired CD
Type A: Press ( ∨) or (
∧).
Type B: Press ( ∨) or (
∧).
Page 187 of 384
173
3-2. Using the audio system
3
Interior features
n
Scanning loaded CDs
Press and hold or until you hear a beep.
The first 10 seconds of the first track on each CD will be played.
Press the switch again when the desired CD is reached.
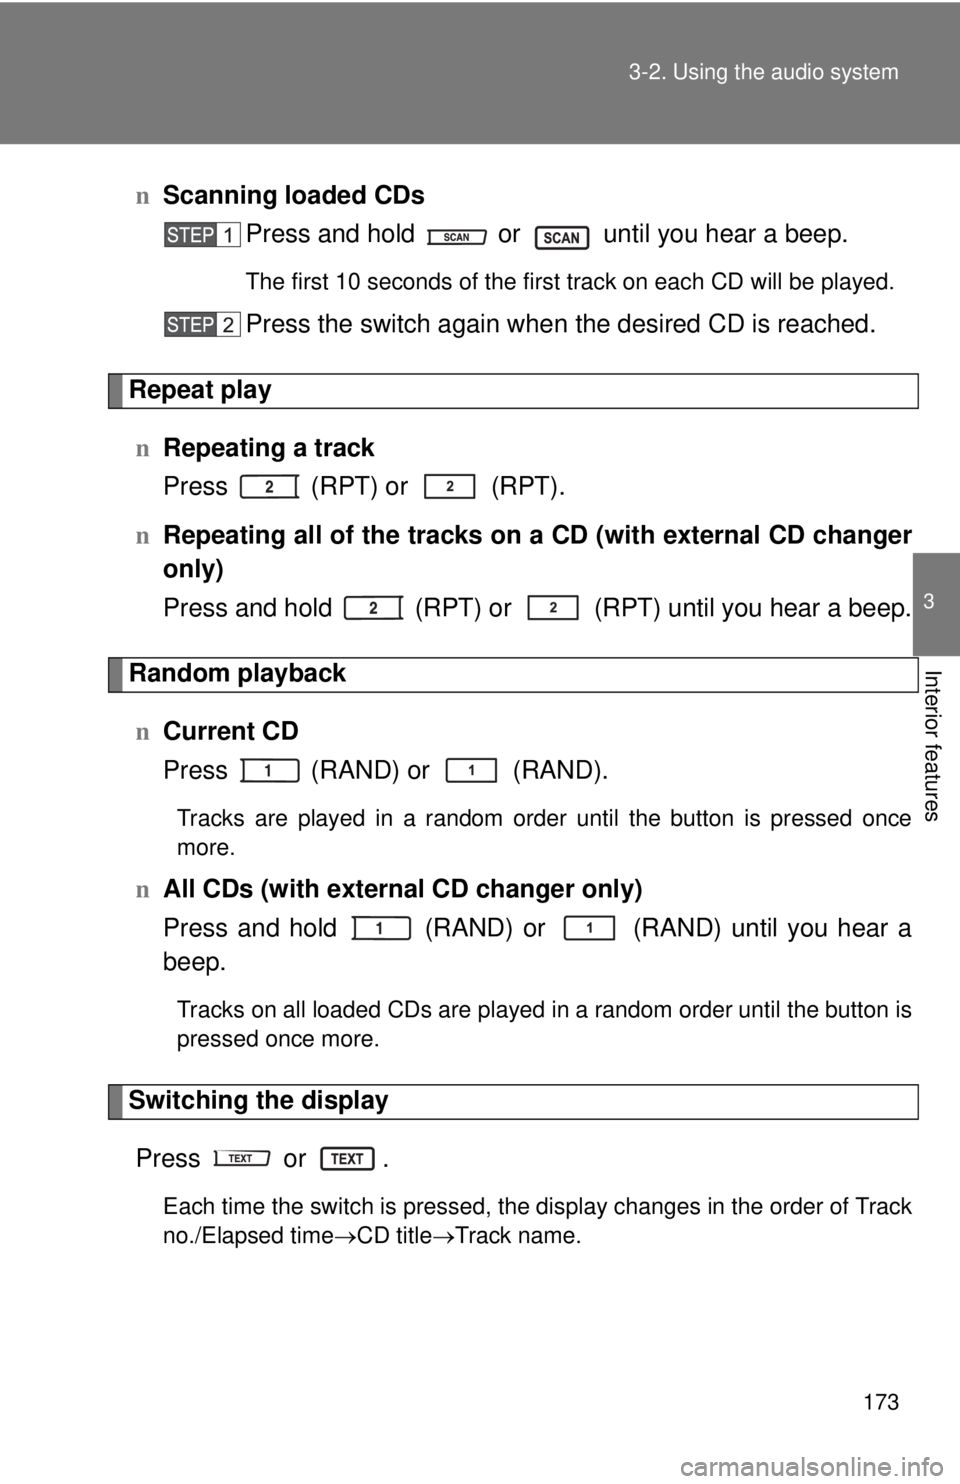
Repeat play
n Repeating a track
Press (RPT) or (RPT).
n Repeating all of the tracks on a CD (with external CD changer
only)
Press and hold (RPT) or (RPT) until you hear a beep.
Random playback
n Current CD
Press (RAND) or (RAND).
Tracks are played in a random order until the button is pressed once
more.
nAll CDs (with external CD changer only)
Press and hold (RAND) or (RAND) until you hear a
beep.
Tracks on all loaded CDs are played in a random order until the button is
pressed once more.
Switching the display
Press or .
Each time the switch is pressed, the display changes in the order of Track
no./Elapsed time →CD title→Track name.
Page 188 of 384
174 3-2. Using the audio system
nDisplay
Up to 12 characters can be displayed at a time.
If there are 13 characters or more, pressing and holding
or
for 1 second or more will display the remaining characters.
A maximum of 24 characters can be displayed.
If
or is pressed for 1 second or more again or has not been
pressed for 6 seconds or more, the display will return to the first 12 charac-
ters.
Depending on the contents recorded, the characters may not be displayed
properly or may not be displayed at all.
n Canceling random playback
Press
(RAND) or (RAND) again.
n Canceling repeat play
Press
(RPT) or (RPT) again.
n Error messages
Refer to the following table and take the appropriate measures. If the prob-
lem is not rectified, take the vehicle to your Toyota dealer.
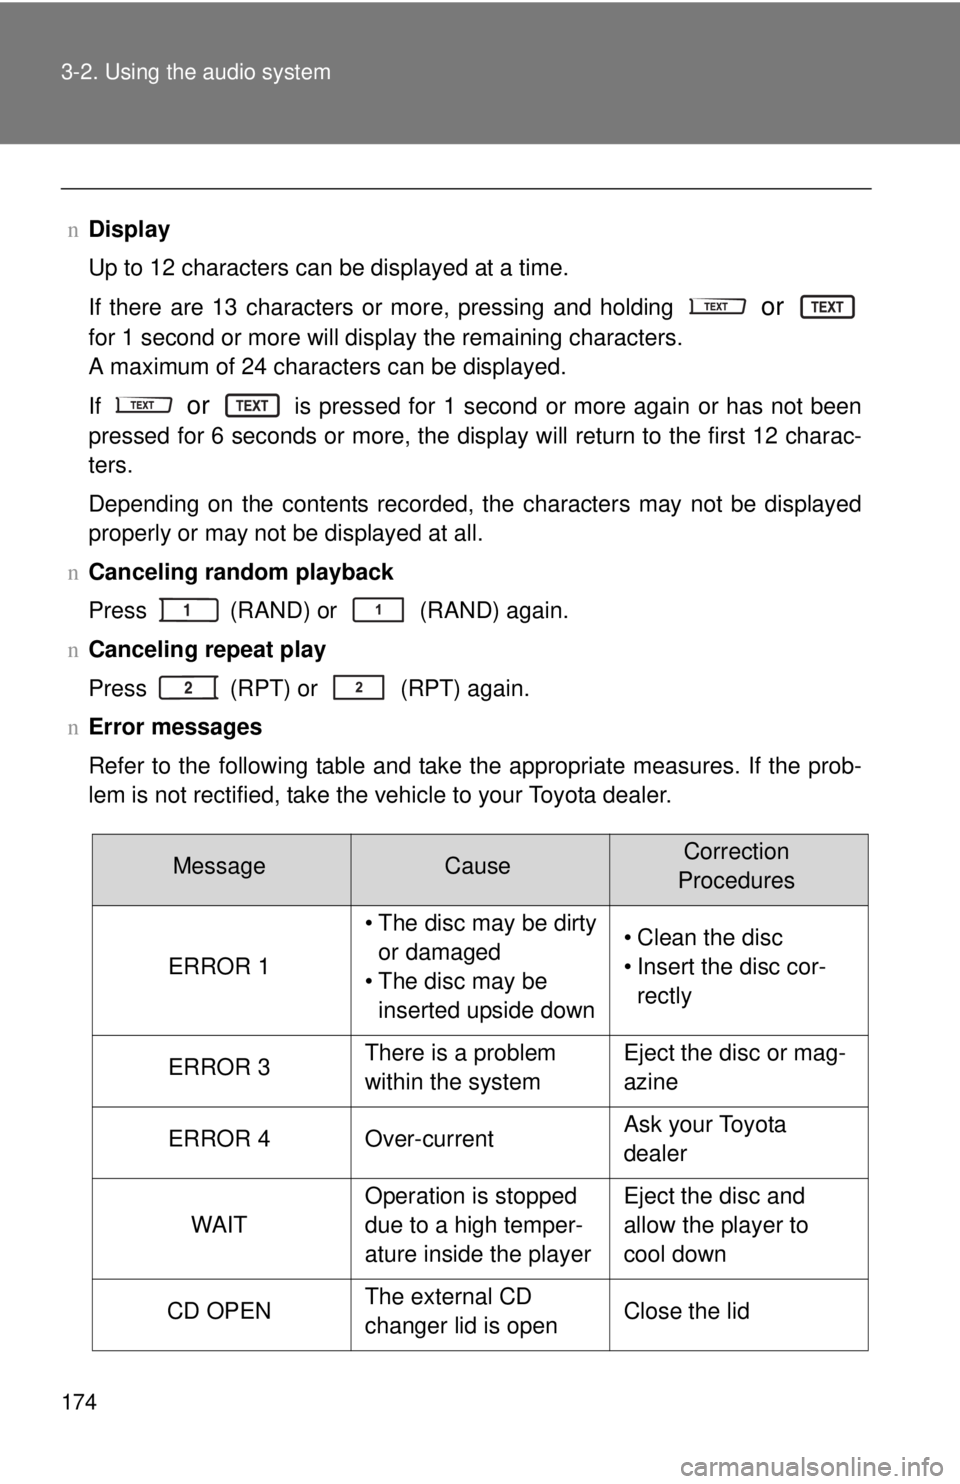
MessageCauseCorrection
Procedures
ERROR 1
• The disc may be dirty or damaged
• The disc may be inserted upside down• Clean the disc
• Insert the disc cor-rectly
ERROR 3There is a problem
within the systemEject the disc or mag-
azine
ERROR 4Over-currentAsk your Toyota
dealer
WAIT
Operation is stopped
due to a high temper-
ature inside the playerEject the disc and
allow the player to
cool down
CD OPENThe external CD
changer lid is openClose the lid
Page 192 of 384
178
3-2. Using the audio system
Playing back MP3 and WMA discs
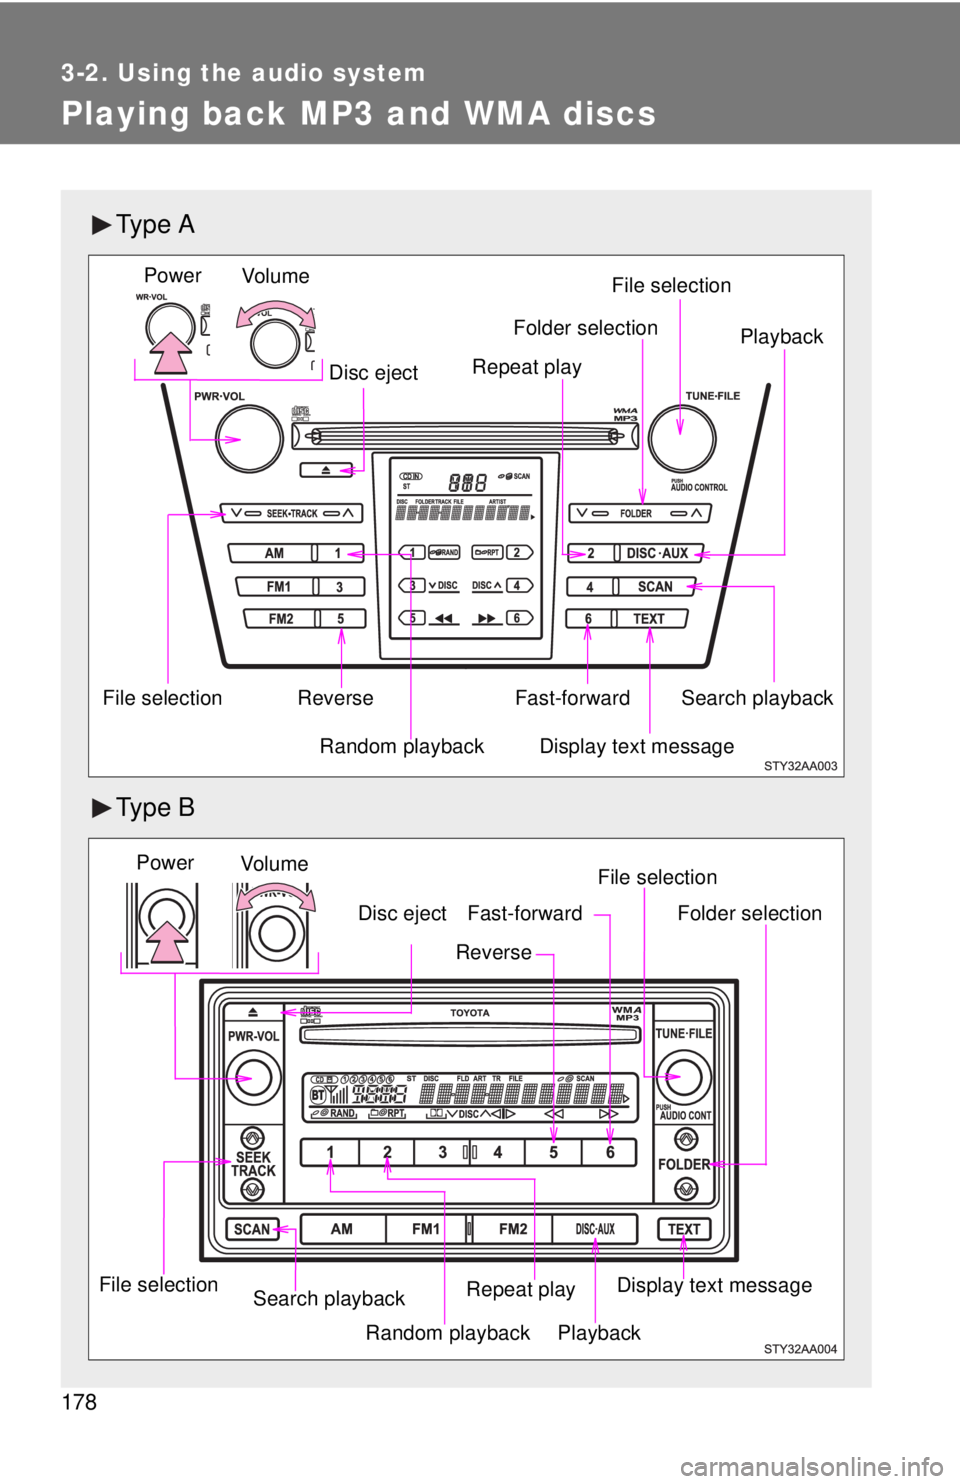
Ty p e A
Ty p e B
Vo lu m eRandom playback
File selection File selection
Repeat play Playback
Power
Disc eject
Display text message
Folder selection
Search playback
Reverse Fast-forward
Vol u m e
Random playback
File selection File selection
Repeat play Playback
Power
Disc eject
Display text message
Folder selection
Search playback
Reverse
Fast-forward