height TOYOTA YARIS SEDAN 2011 Owners Manual
[x] Cancel search | Manufacturer: TOYOTA, Model Year: 2011, Model line: YARIS SEDAN, Model: TOYOTA YARIS SEDAN 2011Pages: 406, PDF Size: 9.23 MB
Page 30 of 406
9
OVERVIEW
FEATURES/OPERATIONS
SAFETY AND EMERGENCY FEATURES
hift
ays
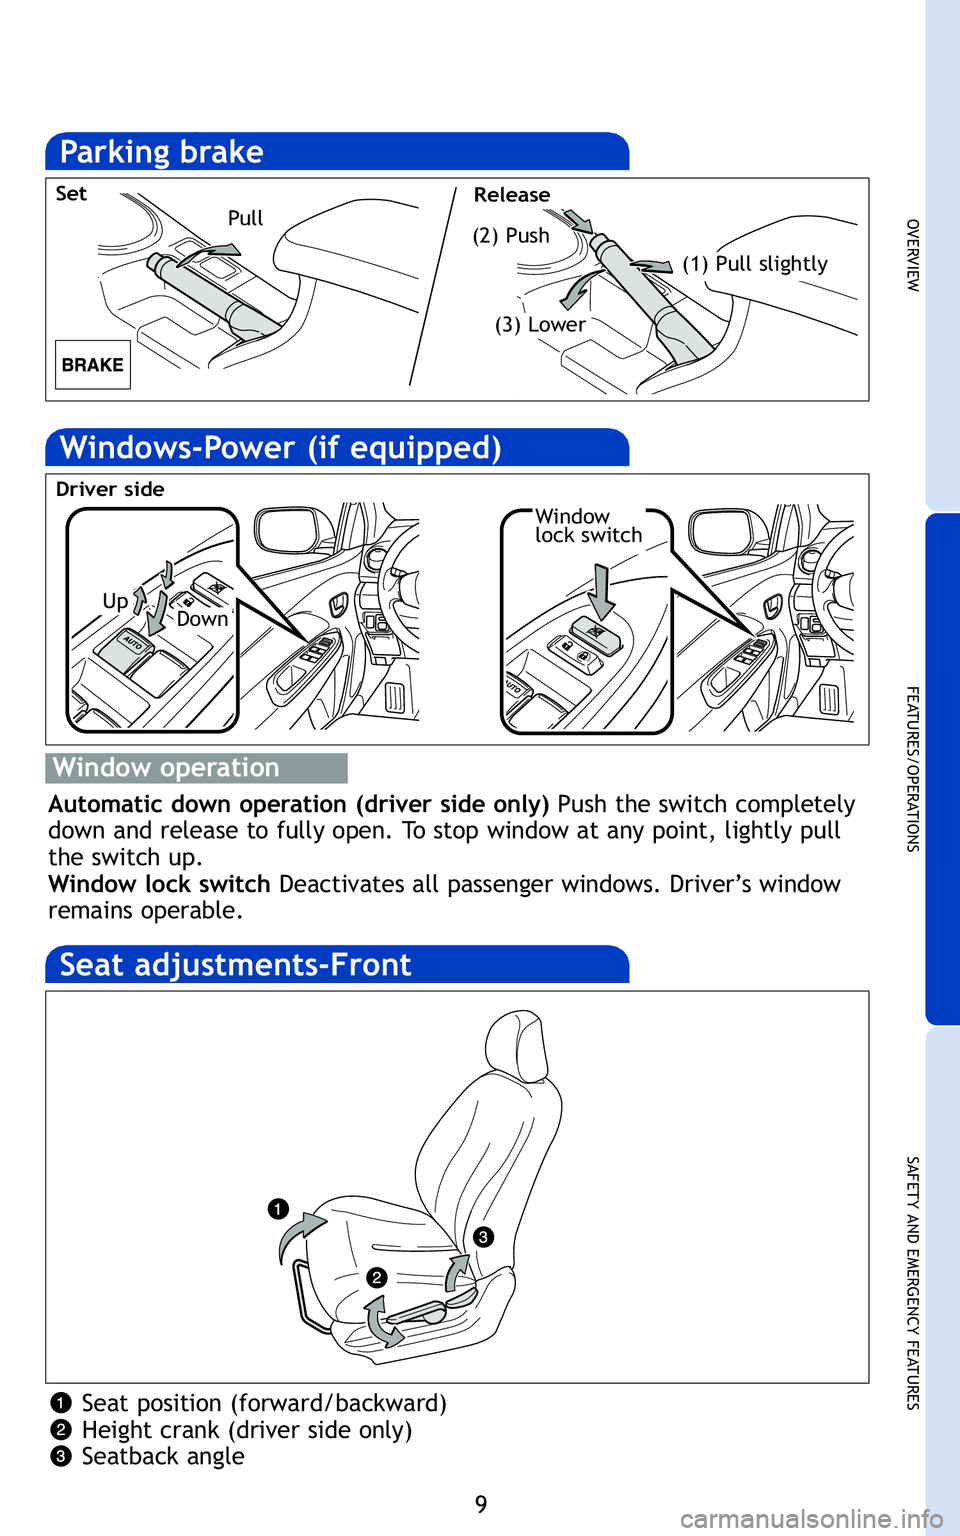
Seat position (forward/backward)
Height crank (driver side only)
Seatback angle
Window
lock switch
Up
Driver side
Down
Pull (\f) PushSet Release
(1) Pull slightly
(3) Lower
Automatic down operation (driver side only) Push the switch completely
down and release to fully open\b To stop window at any point, lightly pull
the switch up\b
Window lock switch Deactivates all passenger windows\b Driver’s window
remains operable\b
414838M2.qxd:414838\:M2 8/4/10 6:08 AM\: Page \f
Page 51 of 406
37
1
Before driving
1-3. Adjustable components (seats, mirrors, steering wheel)
Front seats
CAUTION
nSeat adjustment
lDo not recline the seat more than necessary when the vehicle is in motion
to reduce the risk of sliding under the lap belt.
If the seat is too reclined, the lap belt may slide past the hips and apply
restraint forces directly to the abdomen or your neck may contact the
shoulder belt, increasing the risk of death or serious injury in the event of
an accident.
l After adjusting the seat, make sure that the seat is locked in position.
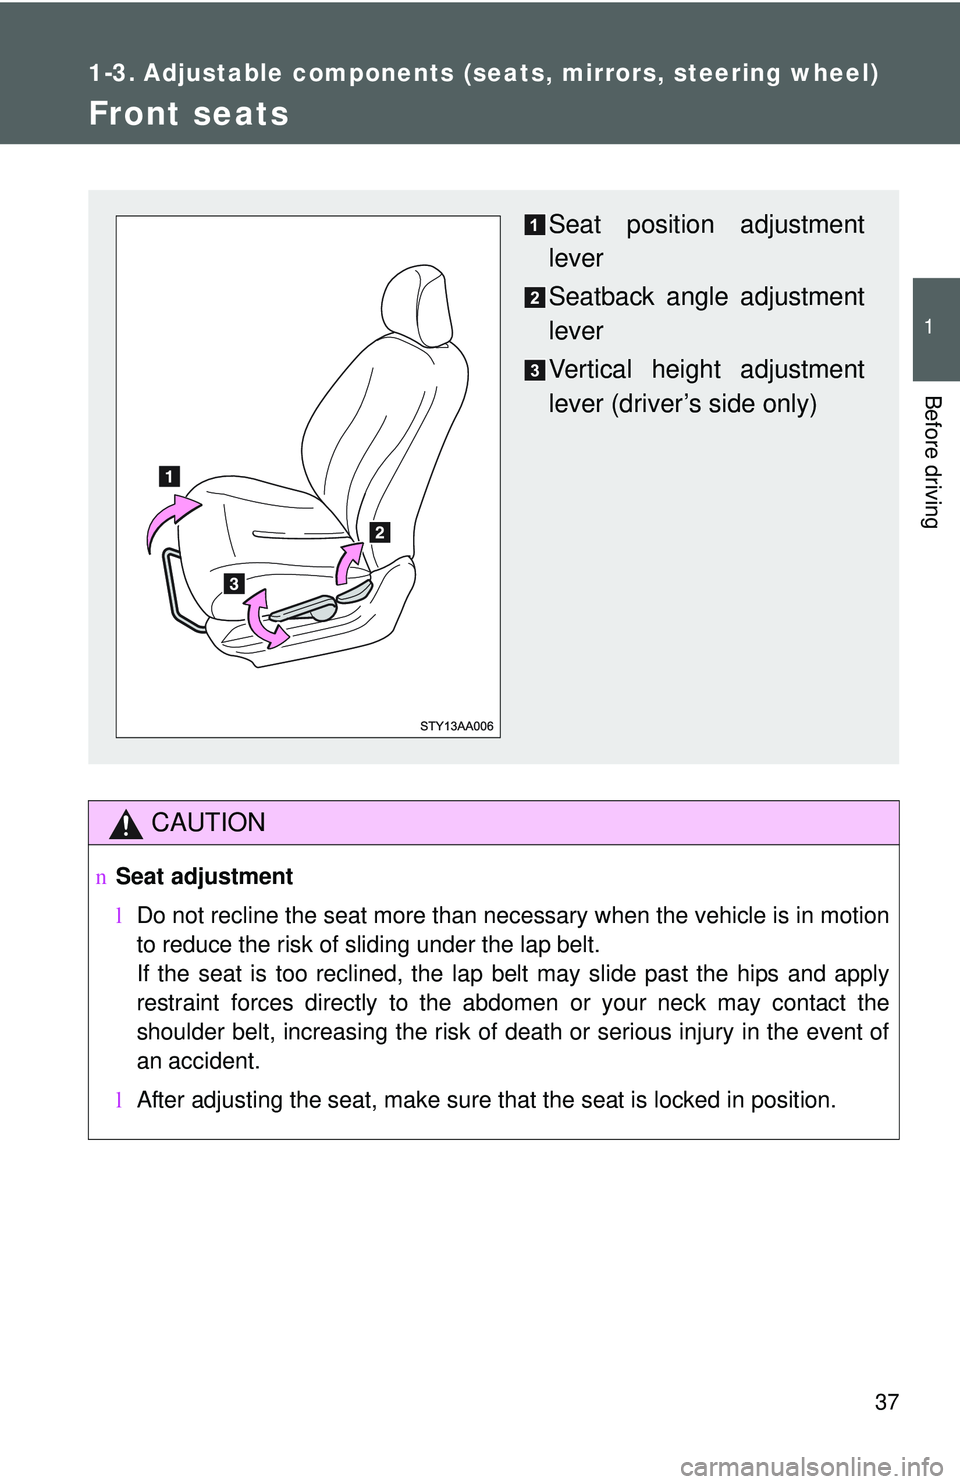
Seat position adjustment
lever
Seatback angle adjustment
lever
Vertical height adjustment
lever (driver’s side only)
Page 56 of 406
42 1-3. Adjustable components (seats, mirrors, steering wheel)
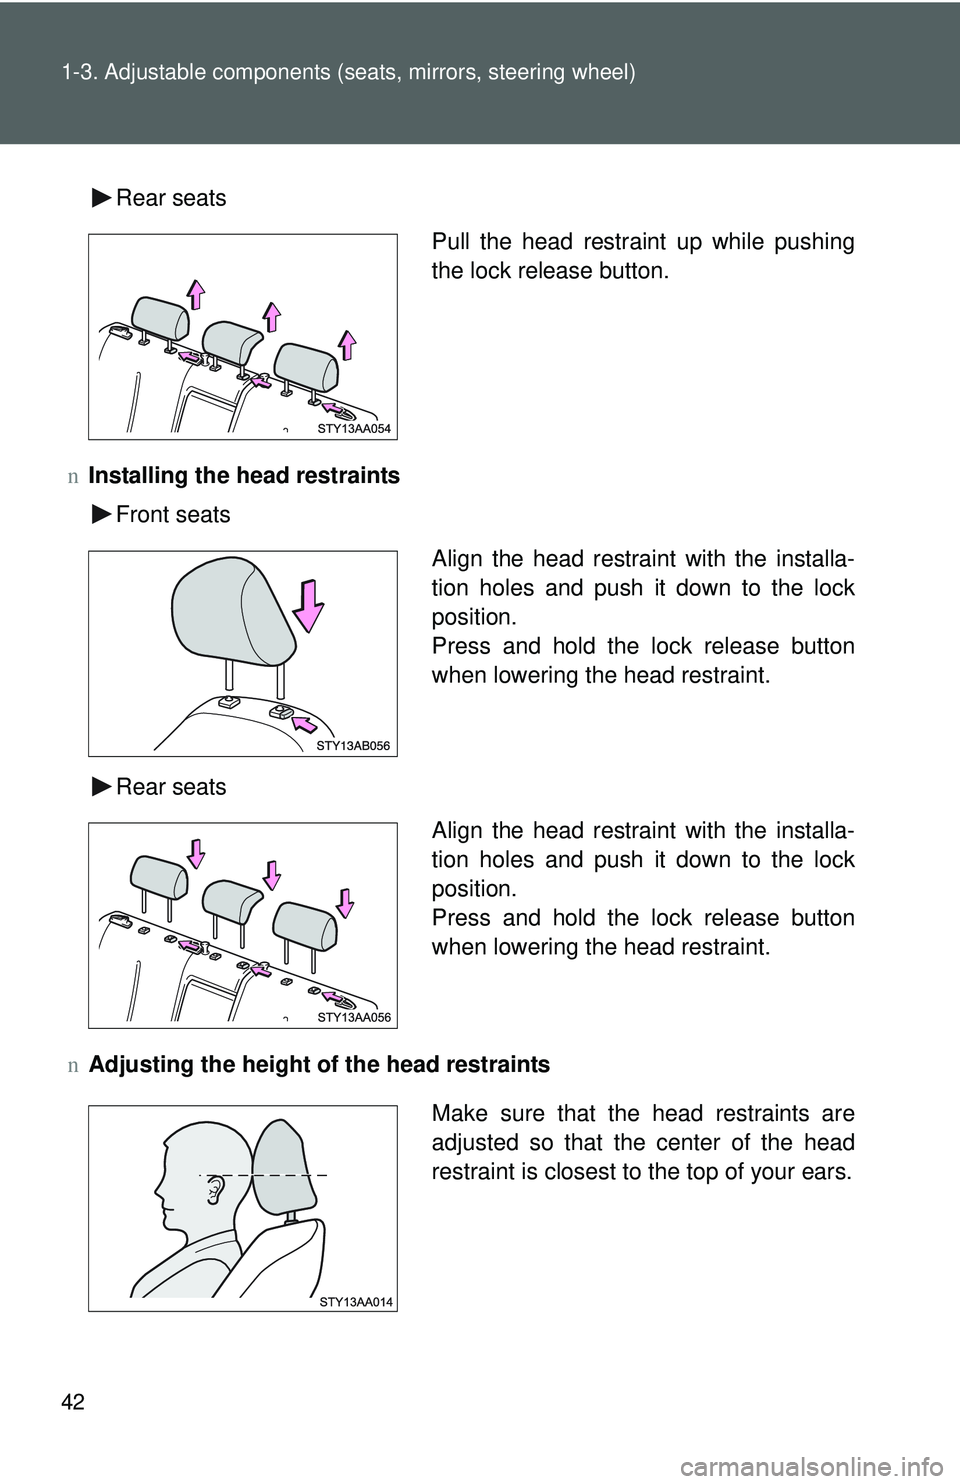
Rear seats
n Installing the head restraints
Front seats
Rear seats
n Adjusting the height of the head restraints
Pull the head restraint up while pushing
the lock release button.
Align the head restraint with the installa-
tion holes and push it down to the lock
position.
Press and hold the lock release button
when lowering the head restraint.
Align the head restraint with the installa-
tion holes and push it down to the lock
position.
Press and hold the lock release button
when lowering the head restraint.
Make sure that the head restraints are
adjusted so that the center of the head
restraint is closest to the top of your ears.
Page 59 of 406
45
1-3. Adjustable components (s
eats, mirrors, steering wheel)
1
Before driving
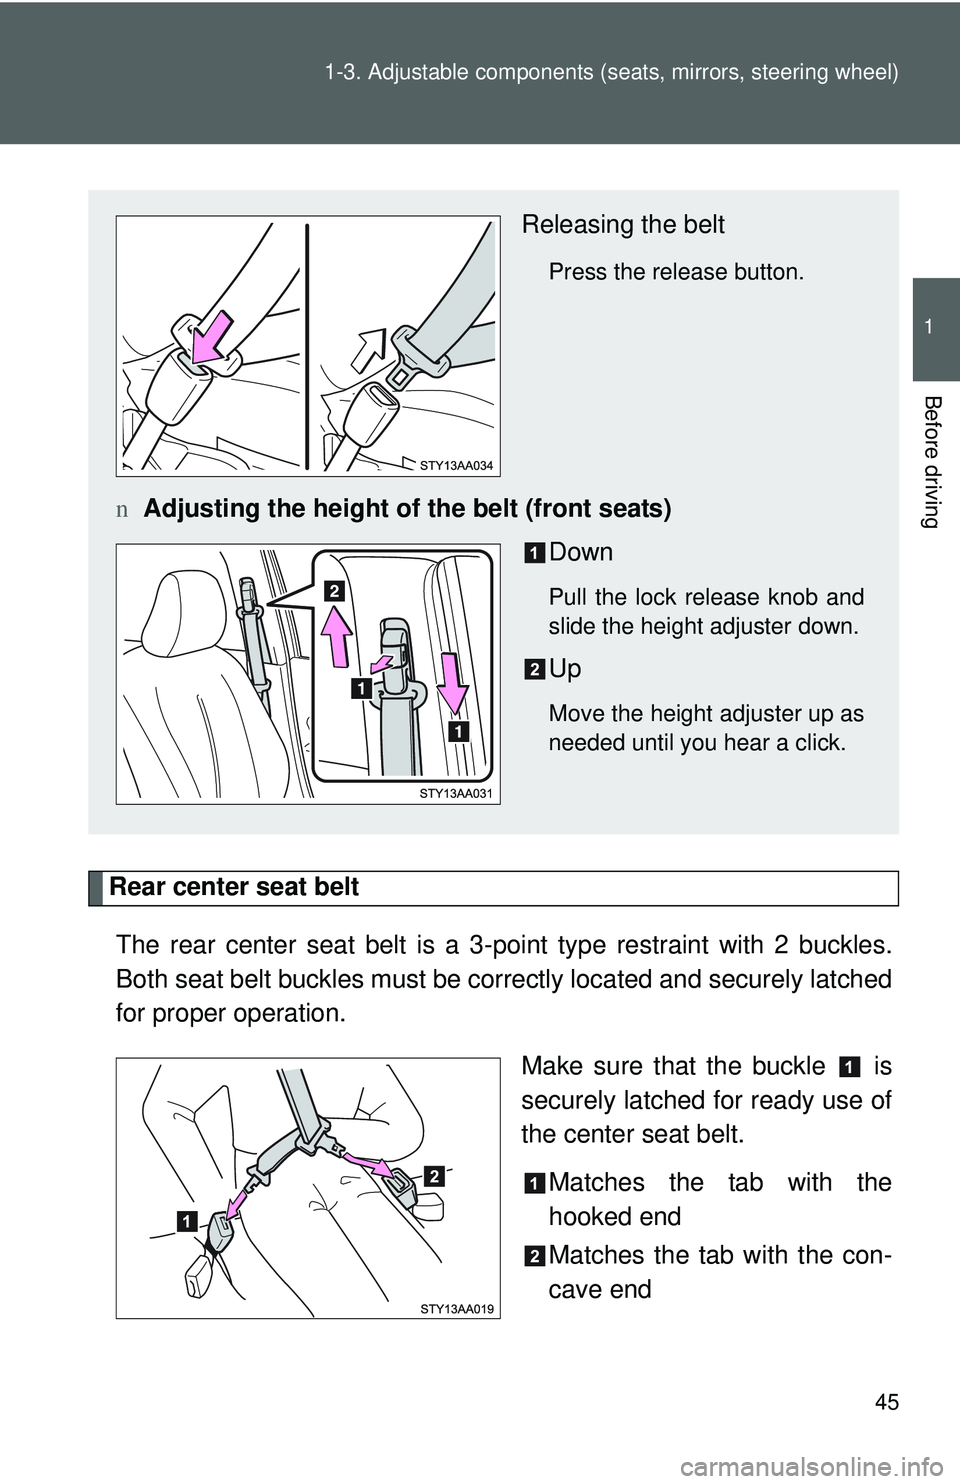
Rear center seat belt
The rear center seat belt is a 3- point type restraint with 2 buckles.
Both seat belt buckles must be co rrectly located and securely latched
for proper operation.
Make sure that the buckle is
securely latched for ready use of
the center seat belt.Matches the tab with the
hooked end
Matches the tab with the con-
cave end
Releasing the belt
Press the release button.
nAdjusting the height of the belt (front seats)
Down
Pull the lock release knob and
slide the height adjuster down.
Up
Move the height adjuster up as
needed until you hear a click.
Page 66 of 406
52
1-3. Adjustable components (seats, mirrors, steering wheel)
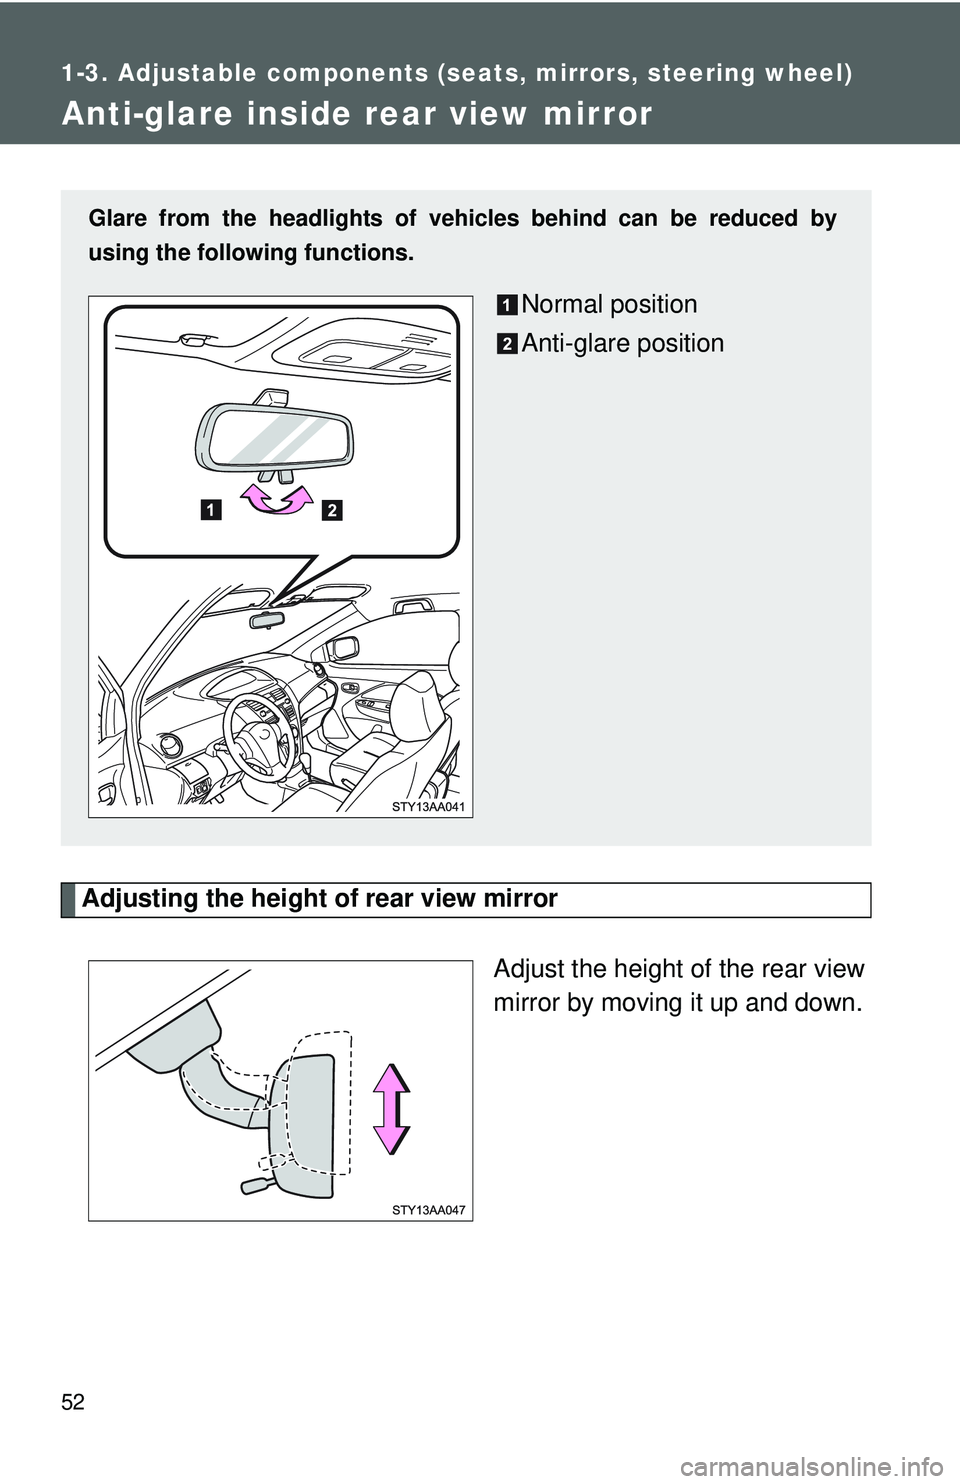
Anti-glare inside rear view mirror
Adjusting the height of rear view mirrorAdjust the height of the rear view
mirror by moving it up and down.
Glare from the headlights of vehicles behind can be reduced by
using the following functions.
Normal position
Anti-glare position
Page 169 of 406
156 2-5. Driving information
Towing a trailerConsult your Toyota dealer for further information about additional
requirements such as a towing kits, etc.
n Before towing
Check that the following conditions are met:
lEnsure that your vehicle’s tires are properly inflated. ( →P. 347)
l Trailer tires should be inflated according to the trailer manufacturer’s rec-
ommendation.
l All trailer lights work to be legal.
l Confirm all lights work each time you connect them.
l The trailer ball is set up at the proper height for the coupler on the t\
railer.
l Check that your vehicle remains level when a loaded or unloaded trailer
is hitched. Do not drive if the vehicle is not level, and check for improper
tongue load, overloading, worn suspension, or other possible causes.
l Make sure the trailer cargo is securely loaded.
l Check that your rear view mirrors conform to any federal, state/provincial
or local regulations. If they do not, install rear view mirrors appropriate for
towing purposes.
n Break-in schedule
Toyota recommends that you do not use a new vehicle or a vehicle with any
new power train components (engine, transmission, differential, wheel bear-
ings, etc.) to tow a trailer for the first 500 miles (800 km) of driving.
n Maintenance
lIf you tow a trailer, your vehicle will require more frequent maintenance
due to the additional load. (See “Scheduled Maintenance Guide” or
“Owner’s Manual Supplement”.)
l Retighten the fixing bolts of the towing ball and bracket after approxi-
mately 600 miles (1000 km).
Page 347 of 406
338
6-1. Specifications
Maintenance data (fuel, oil level, etc.)
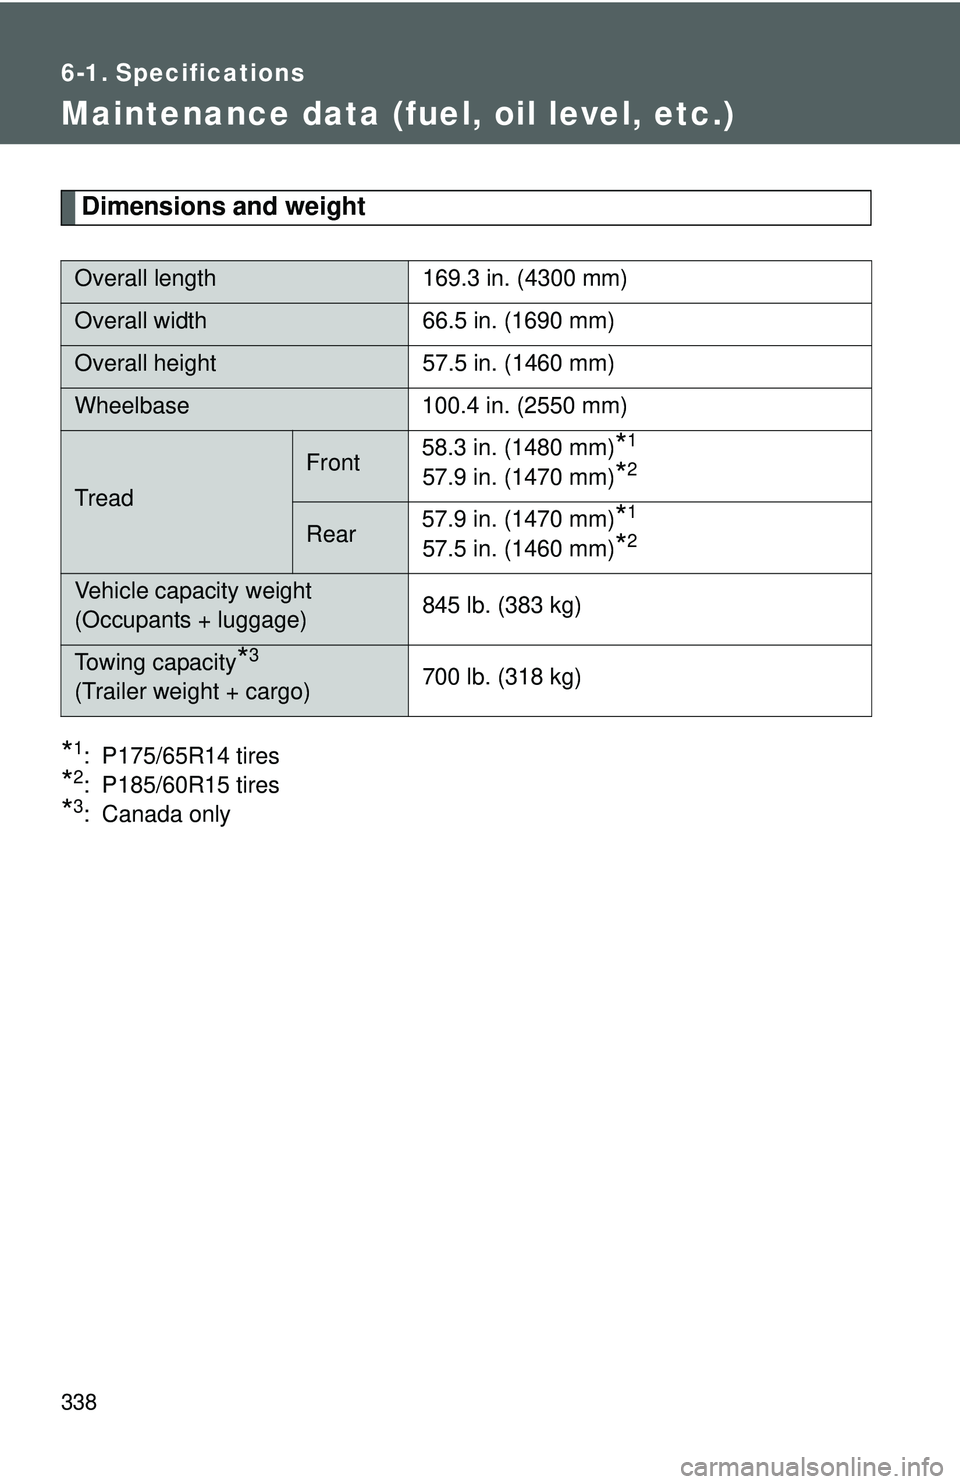
Dimensions and weight
*1: P175/65R14 tires
*2: P185/60R15 tires
*3: Canada only
Overall length169.3 in. (4300 mm)
Overall width66.5 in. (1690 mm)
Overall height 57.5 in. (1460 mm)
Wheelbase100.4 in. (2550 mm)
Tread
Front58.3 in. (1480 mm)*1
57.9 in. (1470 mm)*2
Rear57.9 in. (1470 mm)*1
57.5 in. (1460 mm)*2
Vehicle capacity weight
(Occupants + luggage) 845 lb. (383 kg)
Towing capacity*3
(Trailer weight + cargo)700 lb. (318 kg)
Page 365 of 406
356 6-1. Specifications
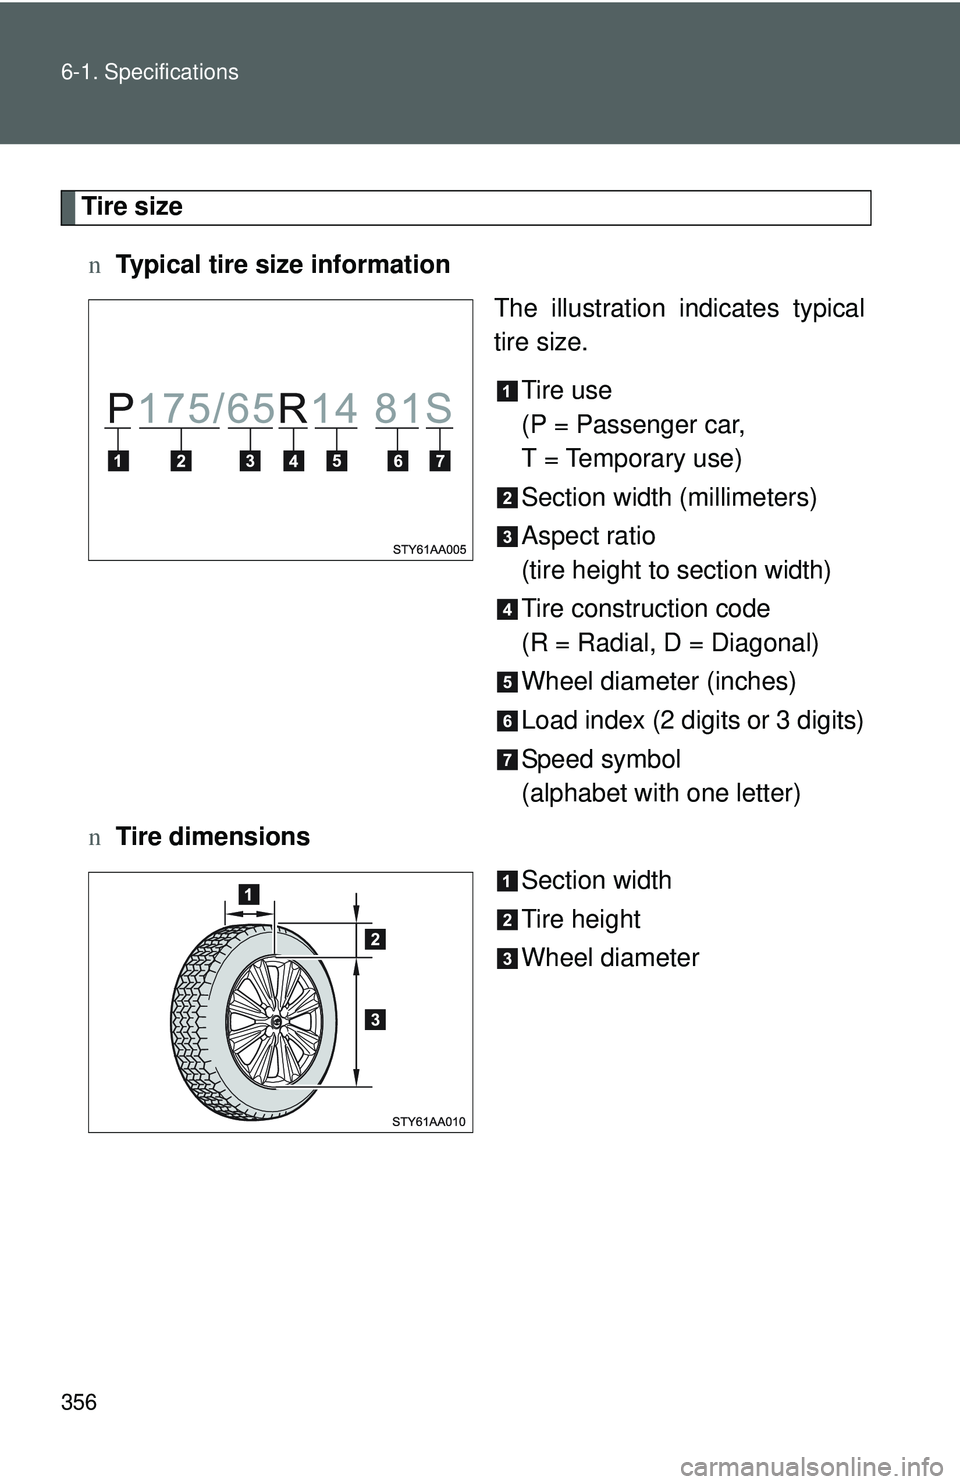
Tire sizen Typical tire size information
The illustration indicates typical
tire size.
Tire use
(P = Passenger car,
T = Temporary use)
Section width (millimeters)
Aspect ratio
(tire height to section width)
Tire construction code
(R = Radial, D = Diagonal)
Wheel diameter (inches)
Load index (2 digits or 3 digits)
Speed symbol
(alphabet with one letter)
n Tire dimensions
Section width
Tire height
Wheel diameter