start stop button VAUXHALL ADAM 2014 User Guide
[x] Cancel search | Manufacturer: VAUXHALL, Model Year: 2014, Model line: ADAM, Model: VAUXHALL ADAM 2014Pages: 217, PDF Size: 6.68 MB
Page 124 of 217

122Driving and operating
Restart of the engine by the
stop-start system The selector lever must be in neutral
to enable an automatic restart.
If one of the following conditions
occurs during an Autostop, the
engine will be restarted automatically
by the stop-start system:
■ The stop-start system is manually deactivated:
■ the bonnet is opened
■ the driver's seat belt is unfastened and the driver's door is opened
■ the engine temperature is too low
■ the charging level of the vehicle battery is below a defined level
■ the brake vacuum is not sufficient
■ the vehicle is driven at least at walking speed
■ the climate control system requests
an engine start
■ the air conditioning is manually switched on
If the bonnet is not fully closed, a warning message is displayed in the
Driver Information Centre.If an electrical accessory, e.g. a
portable CD player, is connected to
the power outlet, a brief power drop
during restart might be noticeable.
Parking ■ Do not park the vehicle on an easily
ignitable surface. The high
temperature of the exhaust system
could ignite the surface.
■ Always apply parking brake. Apply manual parking brake without
pressing release button. Apply as
firmly as possible on downhill or
uphill slopes. Depress the foot
brake at the same time to reduce
operating force.
■ Switch off the engine and ignition. Turn the steering wheel until the
steering wheel lock engages.
■ If the vehicle is on a level surface or
uphill slope, engage first gear
before switching off the ignition. On
an uphill slope, turn the front
wheels away from the kerb.
If the vehicle is on a downhill slope, engage reverse gear beforeswitching off the ignition. Turn the
front wheels towards the kerb.
■ Lock the vehicle and activate the anti-theft alarm system.
Notice
In the event of an accident with airbag deployment, the engine is
turned off automatically if the vehicle comes to a standstill within a certain
time.
Page 127 of 217

Driving and operating125
Fault9Warning
If there is a fault in the ABS, the
wheels may be liable to lock due
to braking that is heavier than
normal. The advantages of ABS are no longer available. During
hard braking, the vehicle can no longer be steered and may
swerve.
Have the cause of the fault remedied
by a workshop.
Parking brake
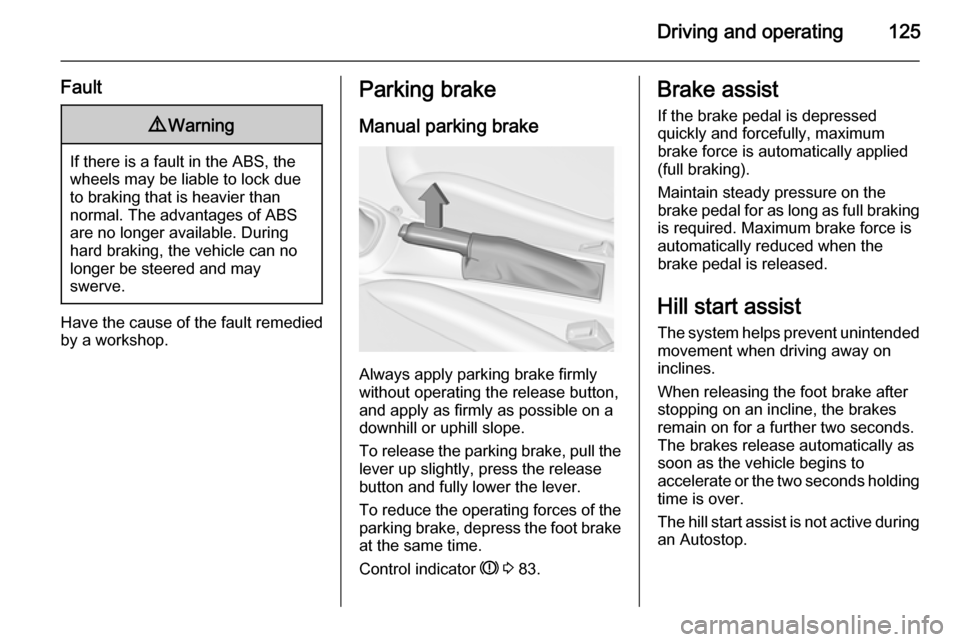
Manual parking brake
Always apply parking brake firmly
without operating the release button,
and apply as firmly as possible on a
downhill or uphill slope.
To release the parking brake, pull the lever up slightly, press the release
button and fully lower the lever.
To reduce the operating forces of the
parking brake, depress the foot brake
at the same time.
Control indicator R 3 83.
Brake assist
If the brake pedal is depressed
quickly and forcefully, maximum
brake force is automatically applied
(full braking).
Maintain steady pressure on the
brake pedal for as long as full braking
is required. Maximum brake force is
automatically reduced when the
brake pedal is released.
Hill start assist
The system helps prevent unintended movement when driving away on
inclines.
When releasing the foot brake after
stopping on an incline, the brakes
remain on for a further two seconds.
The brakes release automatically as
soon as the vehicle begins to
accelerate or the two seconds holding
time is over.
The hill start assist is not active during
an Autostop.
Page 129 of 217

Driving and operating127
ESC is operational after each engine
start as soon as the control indicator
b extinguishes.
When ESC operates b flashes.
9 Warning
Do not let this special safety
feature tempt you into taking risks
when driving.
Adapt speed to the road
conditions.
Fault
If there is a fault in the system the
control indicator b lights up
continuously and a message or a
warning code appears in the Driver
Information Centre. The system is not
operational.
Have the cause of the fault remedied
by a workshop.
City mode City mode is a feature which enables
increased steering assistance during
lower speed conditions, e.g. city
traffic or parking. Steering assistance
is increased for greater convenience.Activation
Press button B when engine is
running. The system works from
standstill up to 22 mph, and in reverse gear. Above this speed the system
changes to normal mode. When
activated, City mode engages
automatically below 22 mph.
An illuminated LED in the City mode
button indicates that the system is
active and a message pops-up in the
Driver Information Centre.
City mode remains active during an
Autostop, but is only operational
when the engine is running.
Page 130 of 217

128Driving and operating
Stop-start system 3 120.
Deactivation
Press button B; LED in the button
extinguishes and a message pops-up
in the Driver Information Centre.
Each time the engine is started, City
mode is deactivated.
Overload If the steering in City mode is heavily
loaded, e.g. in long parking
manoeuvres or heavy city traffic, the
system is deactivated for overheat
protection. Steering operates in
normal mode until City mode
activates automatically.Fault
In the event of a fault in the system,
c illuminates and a message is
displayed in the Driver Information
Centre.
Vehicle messages 3 92.
System calibration
If control indicators c and a
illuminate simultaneously, a
calibration of the power steering
system is necessary. This can occur
e.g. when turning the steering wheel for one rotation with ignition switched
off. In this case switch on ignition and
turn steering wheel once from lock to
lock.
If control indicators c and a do not
extinguish after calibration, seek the
assistance of a workshop.
Page 139 of 217

Driving and operating137
Parking slot searching mode
Select parallel or perpendicular
parking slot on Driver Information
Centre by pressing the SET/CLR
button or on Colour-Info Display tap
icon 6 or 7.
When a slot is detected, a visual
feedback in the Driver Information
Centre or Colour-Info-Display and an
acoustic signal is given.
If the driver does not stop the vehicle
within 10 metres for parallel parking
slots or 6 metres for perpendicular
parking slots after a parking slot is
proposed, the system starts to search
for another suitable parking slot.Parking guiding mode
The parking slot suggestion of the system is accepted when the vehicle
is stopped by the driver within
10 metres for parallel parking slots or
6 metres for perpendicular parking slots after the Stop message is given.
The system calculates the optimal
path into the parking slot.
Page 180 of 217

178Vehicle care
9. Connect the compressor plug tothe power outlet or cigarette
lighter socket.
To avoid discharging the battery,
we recommend running the
engine.
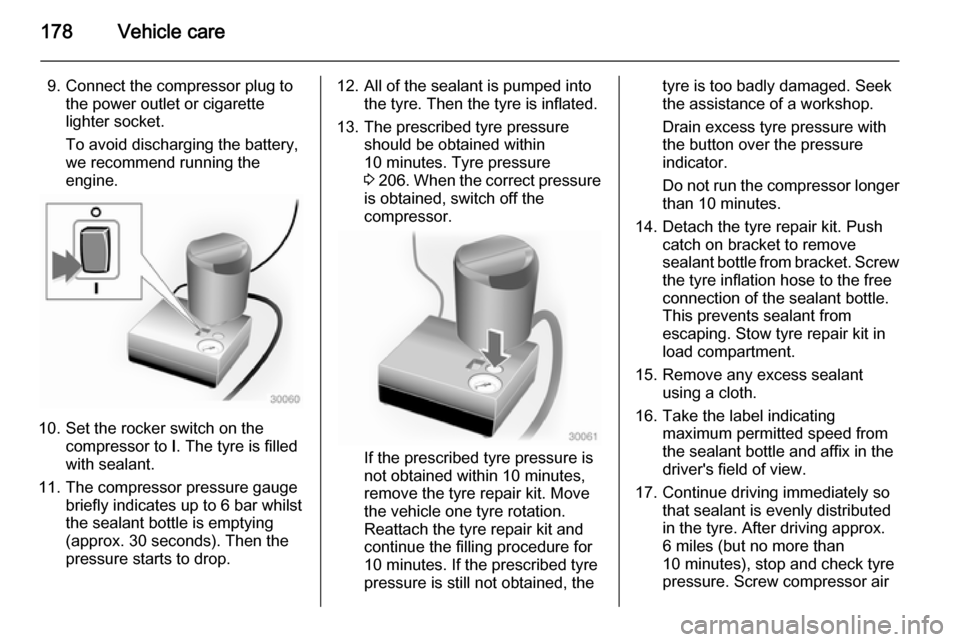
10. Set the rocker switch on the compressor to I. The tyre is filled
with sealant.
11. The compressor pressure gauge briefly indicates up to 6 bar whilstthe sealant bottle is emptying
(approx. 30 seconds). Then the
pressure starts to drop.
12. All of the sealant is pumped into the tyre. Then the tyre is inflated.
13. The prescribed tyre pressure should be obtained within
10 minutes. Tyre pressure
3 206 . When the correct pressure
is obtained, switch off the
compressor.
If the prescribed tyre pressure is
not obtained within 10 minutes,
remove the tyre repair kit. Move
the vehicle one tyre rotation.
Reattach the tyre repair kit and
continue the filling procedure for
10 minutes. If the prescribed tyre
pressure is still not obtained, the
tyre is too badly damaged. Seek
the assistance of a workshop.
Drain excess tyre pressure with
the button over the pressure indicator.
Do not run the compressor longer
than 10 minutes.
14. Detach the tyre repair kit. Push catch on bracket to remove
sealant bottle from bracket. Screw the tyre inflation hose to the freeconnection of the sealant bottle.
This prevents sealant from
escaping. Stow tyre repair kit in
load compartment.
15. Remove any excess sealant using a cloth.
16. Take the label indicating maximum permitted speed from
the sealant bottle and affix in the
driver's field of view.
17. Continue driving immediately so that sealant is evenly distributedin the tyre. After driving approx.
6 miles (but no more than
10 minutes), stop and check tyre
pressure. Screw compressor air