Speed control VAUXHALL ADAM 2014 Owner's Guide
[x] Cancel search | Manufacturer: VAUXHALL, Model Year: 2014, Model line: ADAM, Model: VAUXHALL ADAM 2014Pages: 217, PDF Size: 6.68 MB
Page 124 of 217

122Driving and operating
Restart of the engine by the
stop-start system The selector lever must be in neutral
to enable an automatic restart.
If one of the following conditions
occurs during an Autostop, the
engine will be restarted automatically
by the stop-start system:
■ The stop-start system is manually deactivated:
■ the bonnet is opened
■ the driver's seat belt is unfastened and the driver's door is opened
■ the engine temperature is too low
■ the charging level of the vehicle battery is below a defined level
■ the brake vacuum is not sufficient
■ the vehicle is driven at least at walking speed
■ the climate control system requests
an engine start
■ the air conditioning is manually switched on
If the bonnet is not fully closed, a warning message is displayed in the
Driver Information Centre.If an electrical accessory, e.g. a
portable CD player, is connected to
the power outlet, a brief power drop
during restart might be noticeable.
Parking ■ Do not park the vehicle on an easily
ignitable surface. The high
temperature of the exhaust system
could ignite the surface.
■ Always apply parking brake. Apply manual parking brake without
pressing release button. Apply as
firmly as possible on downhill or
uphill slopes. Depress the foot
brake at the same time to reduce
operating force.
■ Switch off the engine and ignition. Turn the steering wheel until the
steering wheel lock engages.
■ If the vehicle is on a level surface or
uphill slope, engage first gear
before switching off the ignition. On
an uphill slope, turn the front
wheels away from the kerb.
If the vehicle is on a downhill slope, engage reverse gear beforeswitching off the ignition. Turn the
front wheels towards the kerb.
■ Lock the vehicle and activate the anti-theft alarm system.
Notice
In the event of an accident with airbag deployment, the engine is
turned off automatically if the vehicle comes to a standstill within a certain
time.
Page 128 of 217

126Driving and operatingRide control systems
Traction Control system
The Traction Control system (TC) is a
component of the Electronic Stability
Control (ESC).
TC improves driving stability when
necessary, regardless of the type of
road surface or tyre grip, by
preventing the drive wheels from
spinning.
As soon as the drive wheels starts to spin, engine output is reduced and
the wheel spinning the most is braked individually. This considerably
improves the driving stability of the
vehicle on slippery road surfaces.
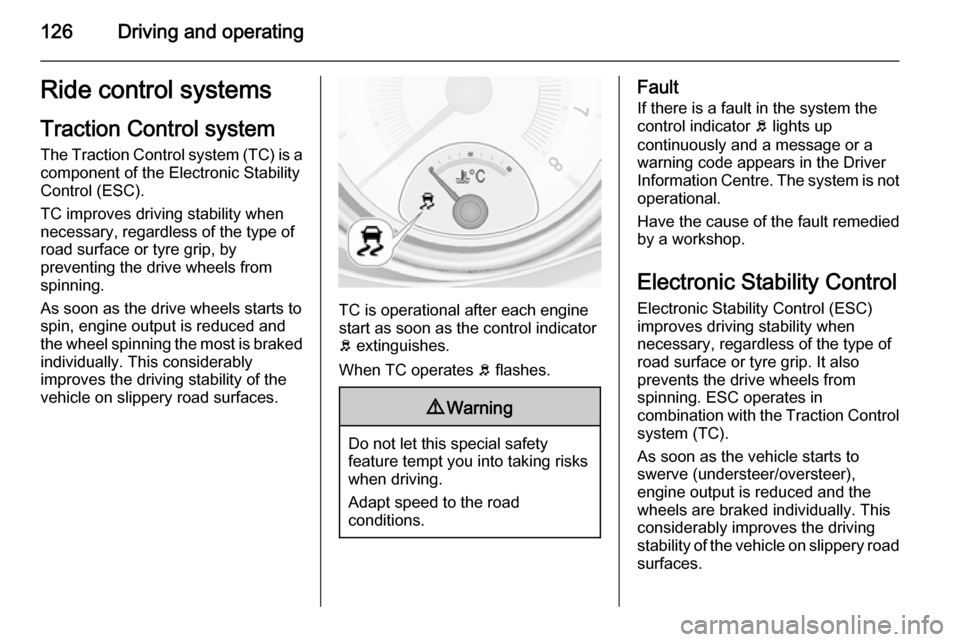
TC is operational after each engine
start as soon as the control indicator
b extinguishes.
When TC operates b flashes.
9 Warning
Do not let this special safety
feature tempt you into taking risks
when driving.
Adapt speed to the road
conditions.
Fault
If there is a fault in the system the
control indicator b lights up
continuously and a message or a
warning code appears in the Driver
Information Centre. The system is not
operational.
Have the cause of the fault remedied
by a workshop.
Electronic Stability Control Electronic Stability Control (ESC)
improves driving stability when
necessary, regardless of the type of
road surface or tyre grip. It also
prevents the drive wheels from
spinning. ESC operates in
combination with the Traction Control system (TC).
As soon as the vehicle starts to
swerve (understeer/oversteer),
engine output is reduced and the
wheels are braked individually. This
considerably improves the driving
stability of the vehicle on slippery road
surfaces.
Page 129 of 217

Driving and operating127
ESC is operational after each engine
start as soon as the control indicator
b extinguishes.
When ESC operates b flashes.
9 Warning
Do not let this special safety
feature tempt you into taking risks
when driving.
Adapt speed to the road
conditions.
Fault
If there is a fault in the system the
control indicator b lights up
continuously and a message or a
warning code appears in the Driver
Information Centre. The system is not
operational.
Have the cause of the fault remedied
by a workshop.
City mode City mode is a feature which enables
increased steering assistance during
lower speed conditions, e.g. city
traffic or parking. Steering assistance
is increased for greater convenience.Activation
Press button B when engine is
running. The system works from
standstill up to 22 mph, and in reverse gear. Above this speed the system
changes to normal mode. When
activated, City mode engages
automatically below 22 mph.
An illuminated LED in the City mode
button indicates that the system is
active and a message pops-up in the
Driver Information Centre.
City mode remains active during an
Autostop, but is only operational
when the engine is running.
Page 131 of 217

Driving and operating129Driver assistance
systems9 Warning
Driver assistance systems are
developed to support the driver
and not to replace his attention.
The driver accepts full
responsibility when driving the
vehicle.
When using driver assistance
systems, always take care
regarding the current traffic
situation.
Cruise control
The Cruise control can store and
maintain speeds of approx. 20 to
120 mph. Deviations from the stored
speeds may occur when driving uphill or downhill.
For safety reasons the cruise control cannot be activated until the foot
brake has been operated once.
Activating in first gear is not possible.
Do not use the cruise control if it is not advisable to maintain a constant
speed.
Control indicator m 3 85.
Switching on
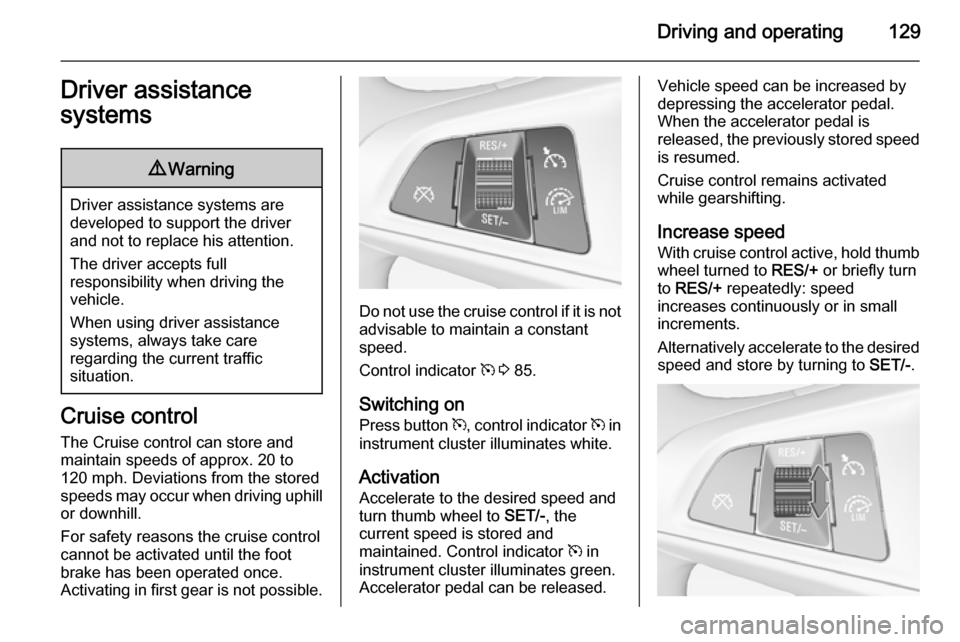
Press button m, control indicator m in
instrument cluster illuminates white.
Activation
Accelerate to the desired speed and
turn thumb wheel to SET/-, the
current speed is stored and
maintained. Control indicator m in
instrument cluster illuminates green.
Accelerator pedal can be released.
Vehicle speed can be increased by
depressing the accelerator pedal.
When the accelerator pedal is
released, the previously stored speed
is resumed.
Cruise control remains activated
while gearshifting.
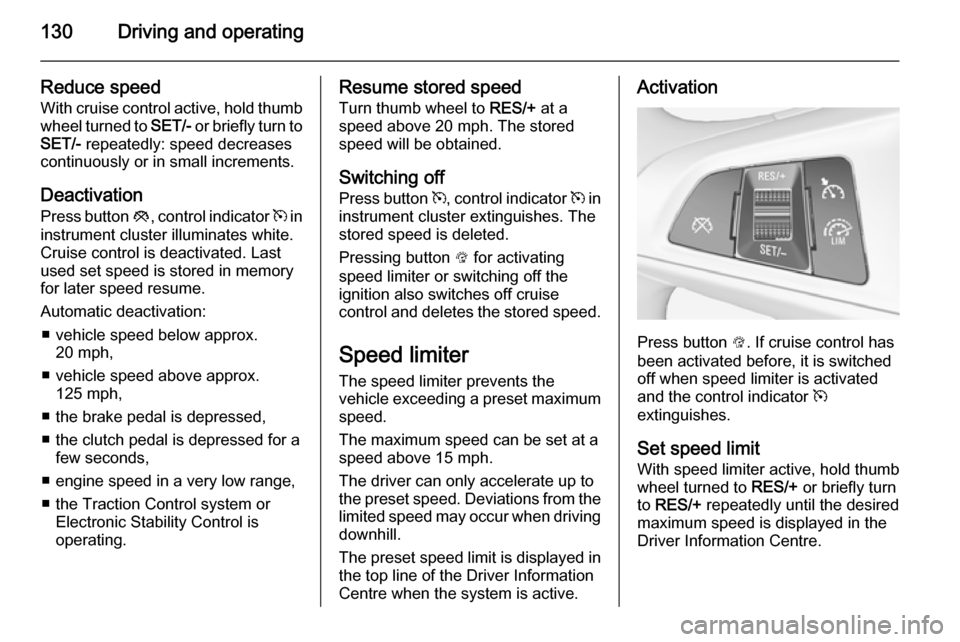
Increase speed With cruise control active, hold thumb
wheel turned to RES/+ or briefly turn
to RES/+ repeatedly: speed
increases continuously or in small
increments.
Alternatively accelerate to the desired speed and store by turning to SET/-.
Page 132 of 217

130Driving and operating
Reduce speedWith cruise control active, hold thumb
wheel turned to SET/- or briefly turn to
SET/- repeatedly: speed decreases
continuously or in small increments.
Deactivation
Press button y, control indicator m in
instrument cluster illuminates white.
Cruise control is deactivated. Last
used set speed is stored in memory
for later speed resume.
Automatic deactivation: ■ vehicle speed below approx. 20 mph,
■ vehicle speed above approx. 125 mph,
■ the brake pedal is depressed,
■ the clutch pedal is depressed for a few seconds,
■ engine speed in a very low range,
■ the Traction Control system or Electronic Stability Control is
operating.Resume stored speed
Turn thumb wheel to RES/+ at a
speed above 20 mph. The stored
speed will be obtained.
Switching off
Press button m, control indicator m in
instrument cluster extinguishes. The
stored speed is deleted.
Pressing button L for activating
speed limiter or switching off the
ignition also switches off cruise
control and deletes the stored speed.
Speed limiter The speed limiter prevents the
vehicle exceeding a preset maximum
speed.
The maximum speed can be set at a
speed above 15 mph.
The driver can only accelerate up to
the preset speed. Deviations from the limited speed may occur when driving
downhill.
The preset speed limit is displayed in
the top line of the Driver Information
Centre when the system is active.Activation
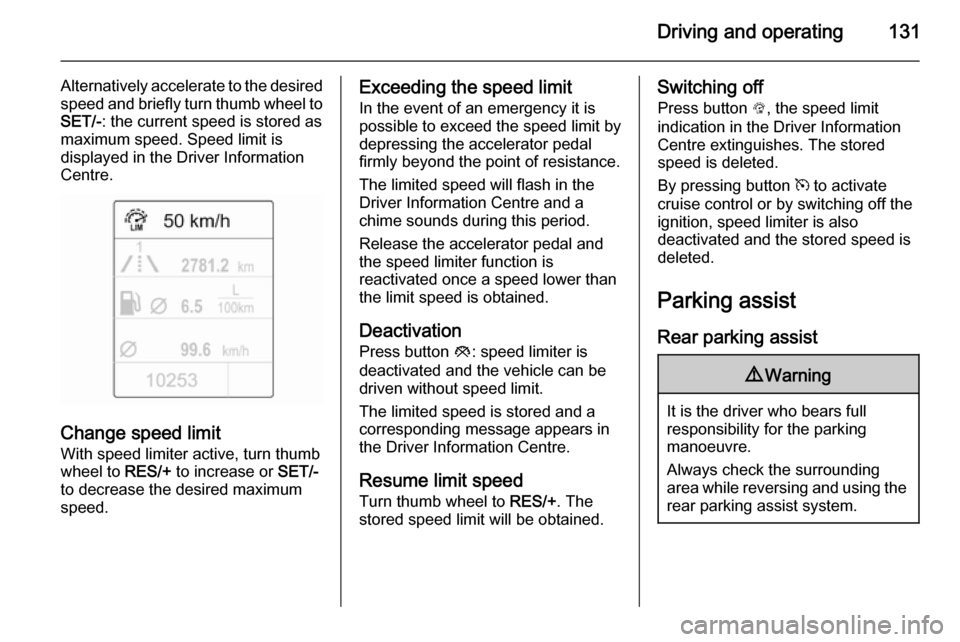
Press button L. If cruise control has
been activated before, it is switched
off when speed limiter is activated
and the control indicator m
extinguishes.
Set speed limit
With speed limiter active, hold thumb
wheel turned to RES/+ or briefly turn
to RES/+ repeatedly until the desired
maximum speed is displayed in the
Driver Information Centre.
Page 133 of 217

Driving and operating131
Alternatively accelerate to the desiredspeed and briefly turn thumb wheel to SET/- : the current speed is stored as
maximum speed. Speed limit is
displayed in the Driver Information Centre.
Change speed limit
With speed limiter active, turn thumb
wheel to RES/+ to increase or SET/-
to decrease the desired maximum
speed.
Exceeding the speed limit
In the event of an emergency it is possible to exceed the speed limit by
depressing the accelerator pedal
firmly beyond the point of resistance.
The limited speed will flash in the
Driver Information Centre and a
chime sounds during this period.
Release the accelerator pedal and the speed limiter function is
reactivated once a speed lower than
the limit speed is obtained.
Deactivation
Press button y: speed limiter is
deactivated and the vehicle can be
driven without speed limit.
The limited speed is stored and a
corresponding message appears in
the Driver Information Centre.
Resume limit speedTurn thumb wheel to RES/+. The
stored speed limit will be obtained.Switching off
Press button L, the speed limit
indication in the Driver Information
Centre extinguishes. The stored
speed is deleted.
By pressing button m to activate
cruise control or by switching off the
ignition, speed limiter is also
deactivated and the stored speed is
deleted.
Parking assist Rear parking assist9 Warning
It is the driver who bears full
responsibility for the parking
manoeuvre.
Always check the surrounding
area while reversing and using the rear parking assist system.
Page 146 of 217

144Driving and operating
Pressing the LPG button switches
between petrol and liquid gas
operation as soon as the required
parameters (coolant temperature,
gas temperature and minimum
engine speed) have been reached.
The requirements are usually fulfilled
after approx. 60 seconds (depending
on exterior temperature) and the first
firm press on the accelerator. The
LED status shows the current
operating mode.LED off=petrol operationLED illu‐
minates=liquid gas operationLED
flashes=no switching is
possible, one type of
fuel is empty
As soon as the liquid gas tanks are empty, petrol operation is
automatically engaged until the
ignition is switched off.
Every six months, run the petrol tank down until control indicator Y
illuminates, then refuel. This helps
maintain fuel quality and system
function for petrol operation.
Fill the tank completely at regular
intervals to prevent corrosion in the
tank.
Faults and remedies
If gas mode is not possible, check the following:
■ Is there enough liquid gas present?
■ Is there enough petrol present for starting?
Due to extreme temperatures in
combination with the gas
composition, it may take slightly
longer before the system switches
from petrol to gas mode.
In extreme situations, the system may
also switch back to petrol mode if the
minimum requirements are not
fulfilled.
Seek the assistance of a workshop in the event of all other faults.Caution
Repairs and adjustments may onlybe made by trained specialists in
order to maintain the safety and
warranty on the LPG system.
Liquid gas is given a particular odour
(odorised) so that any leaks can be
detected easily.
9 Warning
If you smell gas in the vehicle or in
the immediate vicinity, switch to petrol mode immediately. No
smoking. No naked flames or
ignition sources.
If the gas odour persists, do not start
the engine. Have the cause of the
fault remedied by a workshop.
When using underground car parks,
follow the instructions of the operator
and local laws.
Notice
In the event of an accident, switch off
the ignition and lights.
Page 215 of 217

213
Service ....................................... 117
Service display ............................ 78
Service information ....................193
Service vehicle soon .................... 83
Side airbag system ......................40
Side blind spot alert ....................141
Sidelights .................................... 101
Side turn signal lights ................162
Spare wheel ............................... 182
Speed limiter............................... 130
Speedometer ............................... 76
Starting and operating ................118
Starting off ................................... 16
Starting the engine ....................119
Steering wheel adjustment ......9, 68
Steering wheel controls ...............68
Stop-start system........................ 120
Storage ......................................... 49
Storage compartments .................49
Sun visors .................................... 29
Symbols ......................................... 4
T Tachometer ................................. 76
Tail lights ................................... 159
Three-point seat belt .................... 35
Tools .......................................... 169
Top-tether fastening eyes ............48
Towing ........................................ 188
Towing another vehicle .............189Towing the vehicle .....................188
Traction Control system ............. 126
Transmission ............................... 16
Tread depth ............................... 174
Trip computer .............................. 95
Trip odometer .............................. 76
Turn and lane-change signals ...104
Turn signal ................................... 81
Tyre chains ................................ 175
Tyre designations ......................171
Tyre pressure ............................ 171
Tyre pressure monitoring system ............................... 84, 172
Tyre pressures ........................... 206
Tyre repair kit ............................. 175
U
Ultrasonic parking assist ...... 84, 131
Upholstery .................................. 192
Upshift .......................................... 83
Using this manual ..........................3
V Vehicle battery ........................... 154
Vehicle checks............................ 150
Vehicle data ................................ 198
Vehicle data recording and privacy ..................................... 207
Vehicle dimensions .................... 203
Vehicle Identification Number ....196Vehicle jack ................................ 169
Vehicle messages .......................92
Vehicle personalisation ...............97
Vehicle security ............................ 23
Vehicle specific data ......................3
Vehicle storage ........................... 149
Vehicle tools ............................... 169
Vehicle unlocking ........................... 6 Vehicle weight ........................... 203
Ventilation ................................... 109
W
Warning chimes ........................... 94
Warning lights ............................... 76
Warning triangle .......................... 65
Washer and wiper systems .........14
Washer fluid ............................... 153
Wheel changing .........................179
Wheel covers ............................. 175
Wheels and tyres .......................170
Windows ....................................... 27
Windscreen................................... 27 Windscreen wiper/washer ...........70
Winter tyres ............................... 170
Wiper blade replacement ..........156