VAUXHALL ADAM 2014 Repair Manual
Manufacturer: VAUXHALL, Model Year: 2014, Model line: ADAM, Model: VAUXHALL ADAM 2014Pages: 217, PDF Size: 6.68 MB
Page 61 of 217
Storage59
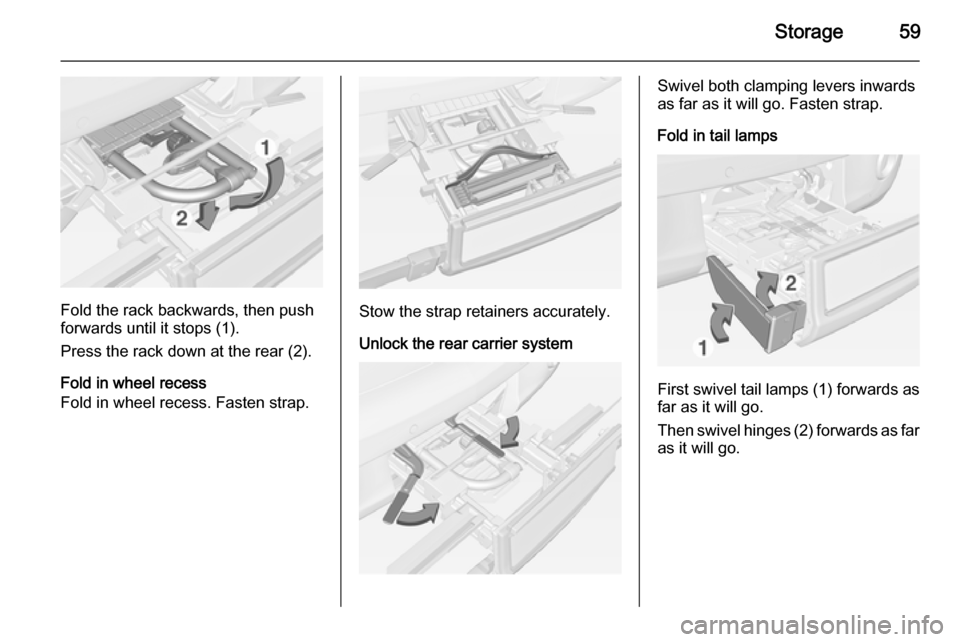
Fold the rack backwards, then push
forwards until it stops (1).
Press the rack down at the rear (2).
Fold in wheel recess
Fold in wheel recess. Fasten strap.Stow the strap retainers accurately.
Unlock the rear carrier system
Swivel both clamping levers inwards
as far as it will go. Fasten strap.
Fold in tail lamps
First swivel tail lamps (1) forwards as
far as it will go.
Then swivel hinges (2) forwards as far as it will go.
Page 62 of 217
60Storage
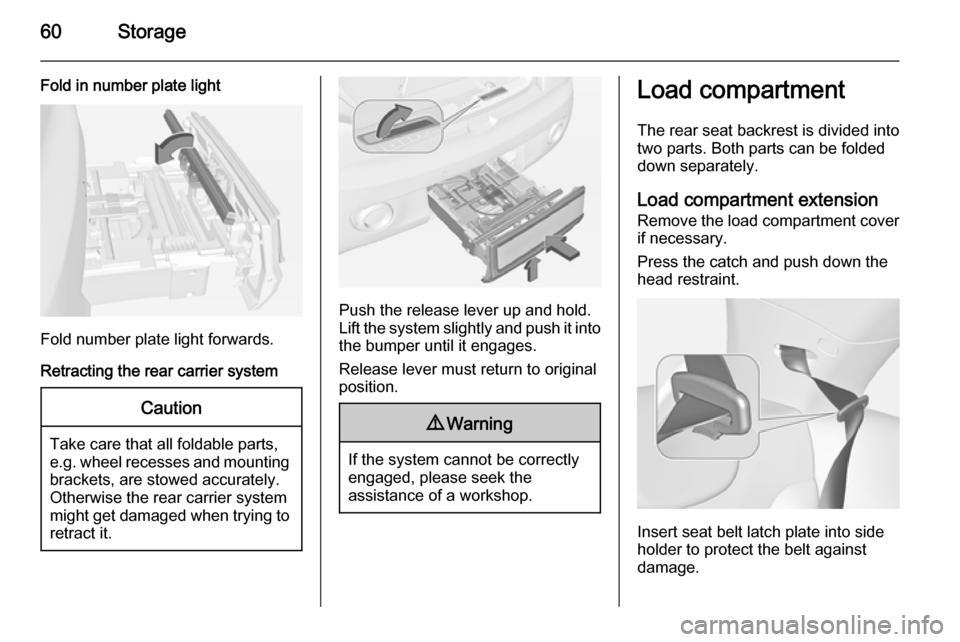
Fold in number plate light
Fold number plate light forwards.
Retracting the rear carrier system
Caution
Take care that all foldable parts,
e.g. wheel recesses and mounting brackets, are stowed accurately.
Otherwise the rear carrier system might get damaged when trying to retract it.
Push the release lever up and hold.
Lift the system slightly and push it into the bumper until it engages.
Release lever must return to original
position.
9 Warning
If the system cannot be correctly
engaged, please seek the
assistance of a workshop.
Load compartment
The rear seat backrest is divided into
two parts. Both parts can be folded
down separately.
Load compartment extension Remove the load compartment cover if necessary.
Press the catch and push down the
head restraint.
Insert seat belt latch plate into side
holder to protect the belt against
damage.
Page 63 of 217
Storage61
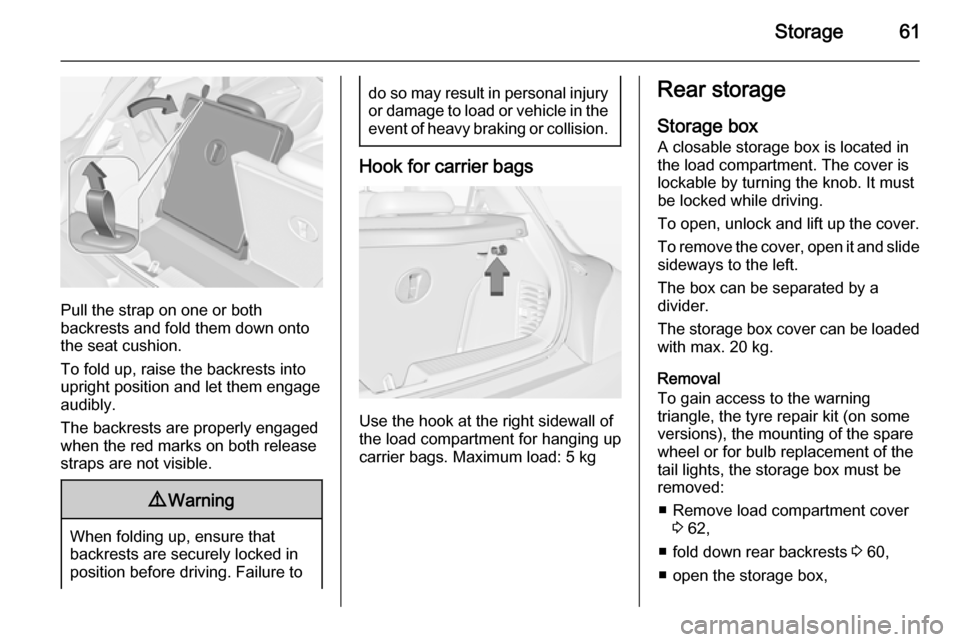
Pull the strap on one or both
backrests and fold them down onto the seat cushion.
To fold up, raise the backrests into
upright position and let them engage
audibly.
The backrests are properly engaged
when the red marks on both release
straps are not visible.
9 Warning
When folding up, ensure that
backrests are securely locked in
position before driving. Failure to
do so may result in personal injury or damage to load or vehicle in the event of heavy braking or collision.
Hook for carrier bags
Use the hook at the right sidewall of
the load compartment for hanging up carrier bags. Maximum load: 5 kg
Rear storage
Storage box A closable storage box is located in
the load compartment. The cover is lockable by turning the knob. It must
be locked while driving.
To open, unlock and lift up the cover.
To remove the cover, open it and slide
sideways to the left.
The box can be separated by a
divider.
The storage box cover can be loaded with max. 20 kg.
Removal
To gain access to the warning
triangle, the tyre repair kit (on some
versions), the mounting of the spare
wheel or for bulb replacement of the
tail lights, the storage box must be
removed:
■ Remove load compartment cover 3 62,
■ fold down rear backrests 3 60,
■ open the storage box,
Page 64 of 217
62Storage
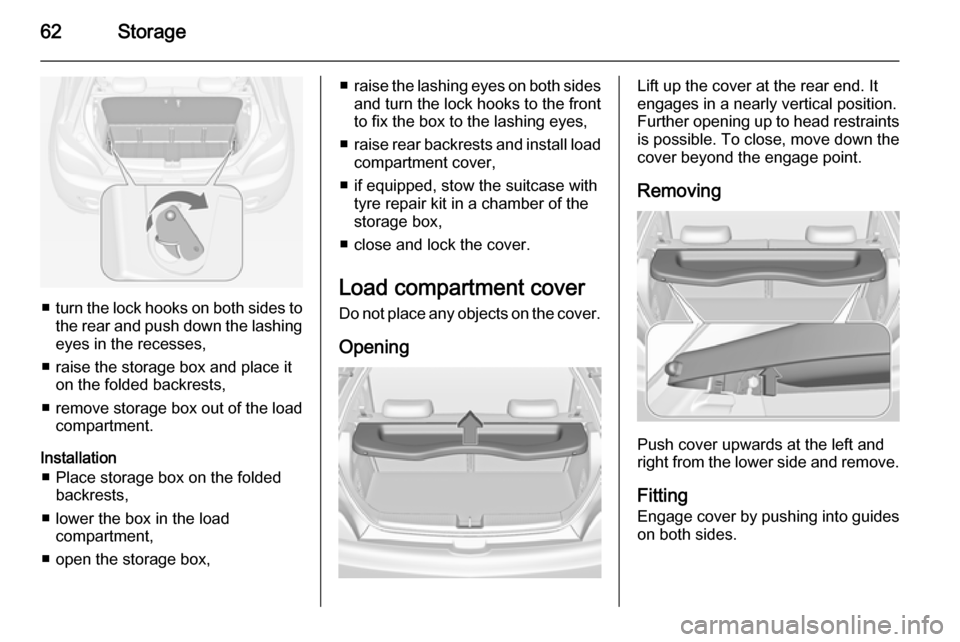
■turn the lock hooks on both sides to
the rear and push down the lashing
eyes in the recesses,
■ raise the storage box and place it on the folded backrests,
■ remove storage box out of the load
compartment.
Installation ■ Place storage box on the folded backrests,
■ lower the box in the load compartment,
■ open the storage box,
■ raise the lashing eyes on both sides
and turn the lock hooks to the front
to fix the box to the lashing eyes,
■ raise rear backrests and install load
compartment cover,
■ if equipped, stow the suitcase with tyre repair kit in a chamber of the
storage box,
■ close and lock the cover.
Load compartment cover Do not place any objects on the cover.
OpeningLift up the cover at the rear end. It
engages in a nearly vertical position.
Further opening up to head restraints is possible. To close, move down the
cover beyond the engage point.
Removing
Push cover upwards at the left and
right from the lower side and remove.
Fitting
Engage cover by pushing into guides
on both sides.
Page 65 of 217
Storage63Rear floor storage coverRear floor cover
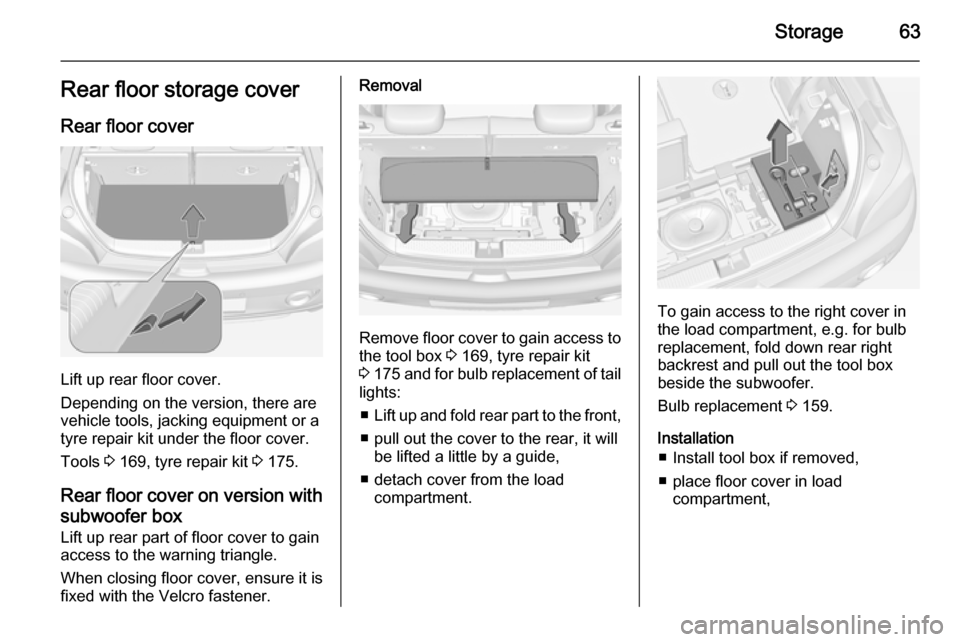
Lift up rear floor cover.
Depending on the version, there are
vehicle tools, jacking equipment or a
tyre repair kit under the floor cover.
Tools 3 169, tyre repair kit 3 175.
Rear floor cover on version with
subwoofer box
Lift up rear part of floor cover to gain
access to the warning triangle.
When closing floor cover, ensure it is
fixed with the Velcro fastener.
Removal
Remove floor cover to gain access to
the tool box 3 169, tyre repair kit
3 175 and for bulb replacement of tail
lights:
■ Lift up and fold rear part to the front,
■ pull out the cover to the rear, it will be lifted a little by a guide,
■ detach cover from the load compartment.
To gain access to the right cover in
the load compartment, e.g. for bulb
replacement, fold down rear right
backrest and pull out the tool box
beside the subwoofer.
Bulb replacement 3 159.
Installation ■ Install tool box if removed,
■ place floor cover in load compartment,
Page 66 of 217
64Storage
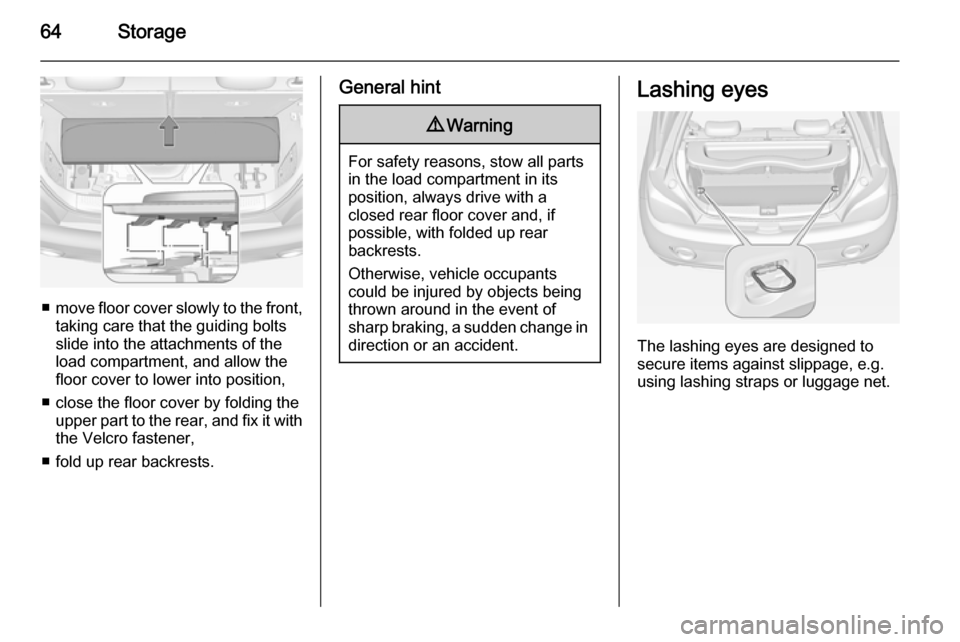
■move floor cover slowly to the front,
taking care that the guiding bolts
slide into the attachments of the
load compartment, and allow the
floor cover to lower into position,
■ close the floor cover by folding the upper part to the rear, and fix it withthe Velcro fastener,
■ fold up rear backrests.
General hint9 Warning
For safety reasons, stow all parts
in the load compartment in its
position, always drive with a
closed rear floor cover and, if
possible, with folded up rear
backrests.
Otherwise, vehicle occupants
could be injured by objects being
thrown around in the event of
sharp braking, a sudden change in direction or an accident.
Lashing eyes
The lashing eyes are designed to
secure items against slippage, e.g.
using lashing straps or luggage net.
Page 67 of 217
Storage65Warning triangle
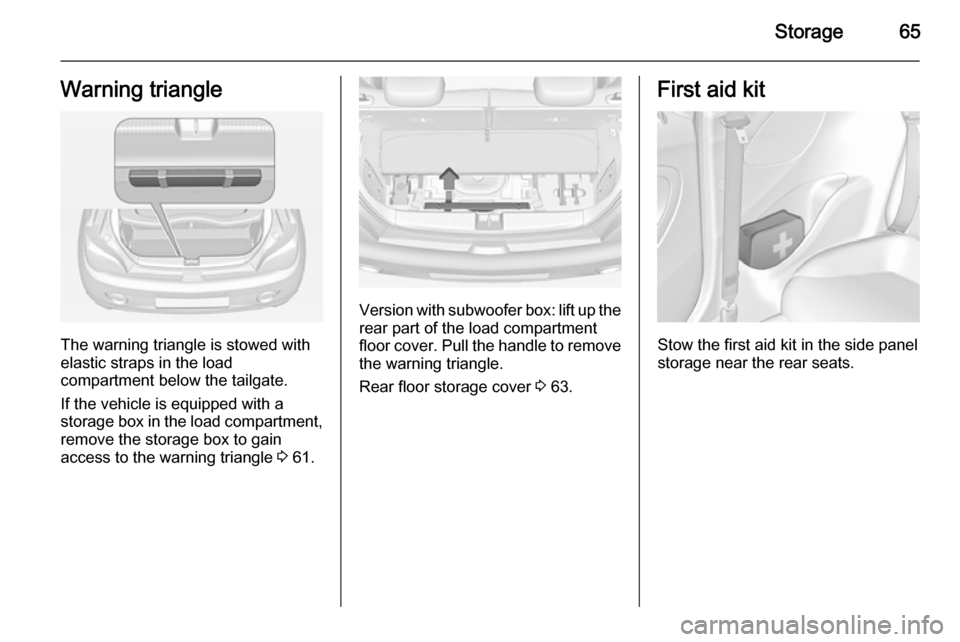
The warning triangle is stowed with
elastic straps in the load
compartment below the tailgate.
If the vehicle is equipped with a
storage box in the load compartment,
remove the storage box to gain
access to the warning triangle 3 61.
Version with subwoofer box: lift up the
rear part of the load compartment
floor cover. Pull the handle to remove
the warning triangle.
Rear floor storage cover 3 63.
First aid kit
Stow the first aid kit in the side panel
storage near the rear seats.
Page 68 of 217
66StorageRoof rack systemRoof rack
For safety reasons and to avoid
damage to the roof, the vehicle
approved roof rack system is
recommended. For further
information contact your workshop.
Follow the installation instructions
and remove the roof rack when not in use.
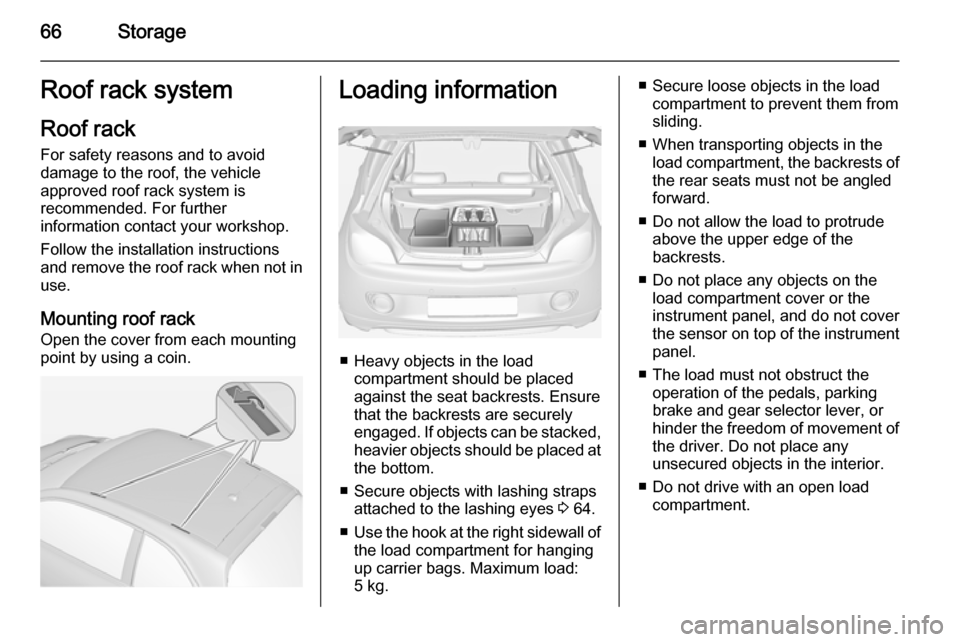
Mounting roof rack Open the cover from each mounting
point by using a coin.Loading information
■ Heavy objects in the load compartment should be placedagainst the seat backrests. Ensure
that the backrests are securely
engaged. If objects can be stacked, heavier objects should be placed at
the bottom.
■ Secure objects with lashing straps attached to the lashing eyes 3 64.
■ Use the hook at the right sidewall of
the load compartment for hanging
up carrier bags. Maximum load: 5 kg.
■ Secure loose objects in the load compartment to prevent them from
sliding.
■ When transporting objects in the load compartment, the backrests ofthe rear seats must not be angled
forward.
■ Do not allow the load to protrude above the upper edge of the
backrests.
■ Do not place any objects on the load compartment cover or theinstrument panel, and do not cover
the sensor on top of the instrument
panel.
■ The load must not obstruct the operation of the pedals, parking
brake and gear selector lever, or
hinder the freedom of movement of the driver. Do not place any
unsecured objects in the interior.
■ Do not drive with an open load compartment.
Page 69 of 217

Storage679Warning
Always make sure that the load in
the vehicle is securely stowed.
Otherwise objects can be thrown
around inside the vehicle and
cause personal injury or damage
to the load or car.
■ The payload is the difference between the permitted gross
vehicle weight (see identification
plate 3 196) and the EC kerb
weight.
To calculate the payload, enter the
data for your vehicle in the Weights
table at the front of this manual.
The EC kerb weight includes
weights for the driver (68 kg),
luggage (7 kg) and all fluids (tank
90 % full).
Optional equipment and
accessories increase the kerb
weight.
■ Driving with a roof load increases the sensitivity of the vehicle to
cross-winds and has a detrimental
effect on vehicle handling due to
the vehicle's higher centre of
gravity. Distribute the load evenly
and secure it properly with retaining
straps. Adjust the tyre pressure and vehicle speed according to the load
conditions. Check and retighten the straps frequently.
Do not drive faster than 75 mph.
The permissible roof load is 50 kg. The roof load is the combined
weight of the roof rack and the load.
Page 70 of 217
68Instruments and controlsInstruments and
controlsControls ....................................... 68
Warning lights, gauges and indi‐
cators ........................................... 76
Information displays .....................86
Vehicle messages ........................ 92
Trip computer ............................... 95
Vehicle personalisation ................97Controls
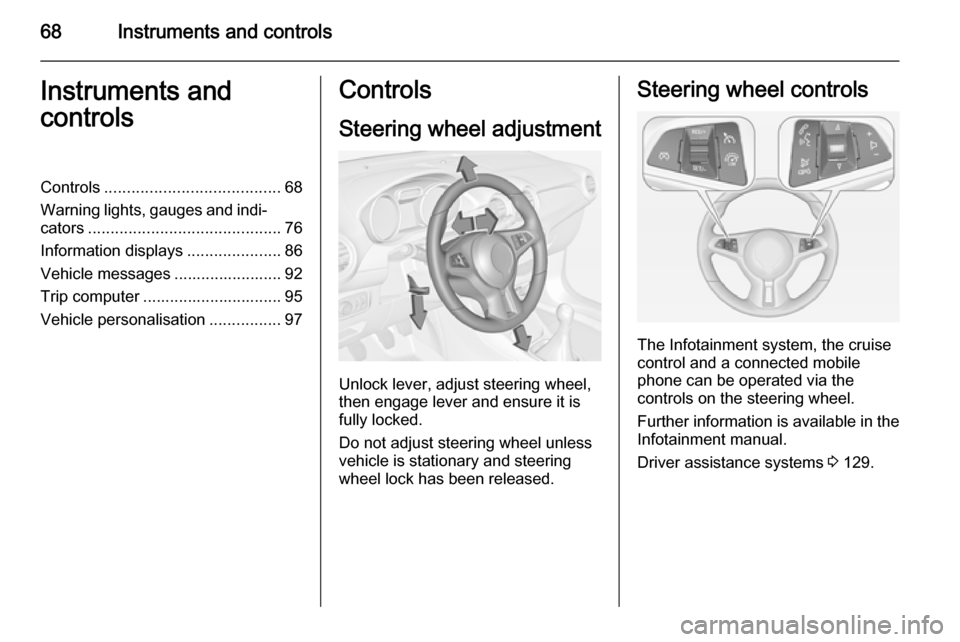
Steering wheel adjustment
Unlock lever, adjust steering wheel,
then engage lever and ensure it is fully locked.
Do not adjust steering wheel unless
vehicle is stationary and steering
wheel lock has been released.
Steering wheel controls
The Infotainment system, the cruise
control and a connected mobile
phone can be operated via the
controls on the steering wheel.
Further information is available in the
Infotainment manual.
Driver assistance systems 3 129.