light VAUXHALL ADAM 2015.5 User Guide
[x] Cancel search | Manufacturer: VAUXHALL, Model Year: 2015.5, Model line: ADAM, Model: VAUXHALL ADAM 2015.5Pages: 233, PDF Size: 6.98 MB
Page 36 of 233
34Seats, restraints
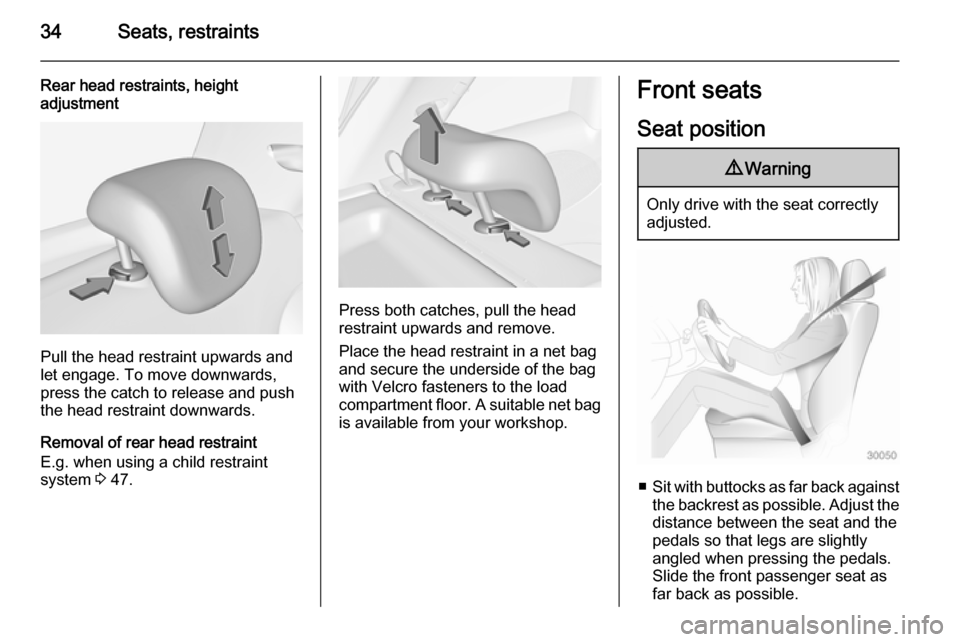
Rear head restraints, height
adjustment
Pull the head restraint upwards and
let engage. To move downwards, press the catch to release and push
the head restraint downwards.
Removal of rear head restraint
E.g. when using a child restraint
system 3 47.
Press both catches, pull the head
restraint upwards and remove.
Place the head restraint in a net bag
and secure the underside of the bag
with Velcro fasteners to the load
compartment floor. A suitable net bag
is available from your workshop.
Front seats
Seat position9 Warning
Only drive with the seat correctly
adjusted.
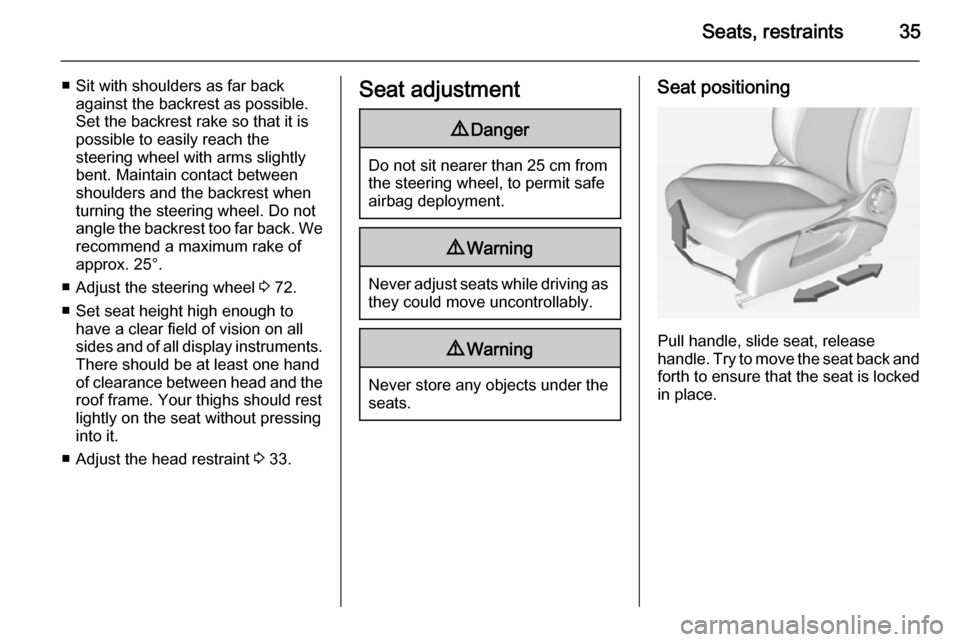
■ Sit with buttocks as far back against
the backrest as possible. Adjust the distance between the seat and the
pedals so that legs are slightly
angled when pressing the pedals.
Slide the front passenger seat as
far back as possible.
Page 37 of 233
Seats, restraints35
■ Sit with shoulders as far backagainst the backrest as possible.
Set the backrest rake so that it is
possible to easily reach the
steering wheel with arms slightly
bent. Maintain contact between
shoulders and the backrest when
turning the steering wheel. Do not
angle the backrest too far back. We
recommend a maximum rake of
approx. 25°.
■ Adjust the steering wheel 3 72.
■ Set seat height high enough to have a clear field of vision on allsides and of all display instruments. There should be at least one hand
of clearance between head and the
roof frame. Your thighs should rest
lightly on the seat without pressing
into it.
■ Adjust the head restraint 3 33.Seat adjustment9 Danger
Do not sit nearer than 25 cm from
the steering wheel, to permit safe
airbag deployment.
9 Warning
Never adjust seats while driving as
they could move uncontrollably.
9 Warning
Never store any objects under the
seats.
Seat positioning
Pull handle, slide seat, release
handle. Try to move the seat back and forth to ensure that the seat is locked
in place.
Page 47 of 233
Seats, restraints459Warning
Keep the area in which the airbag
inflates clear of obstructions.
Notice
Only use protective seat covers that have been approved for the vehicle.Be careful not to cover the airbags.
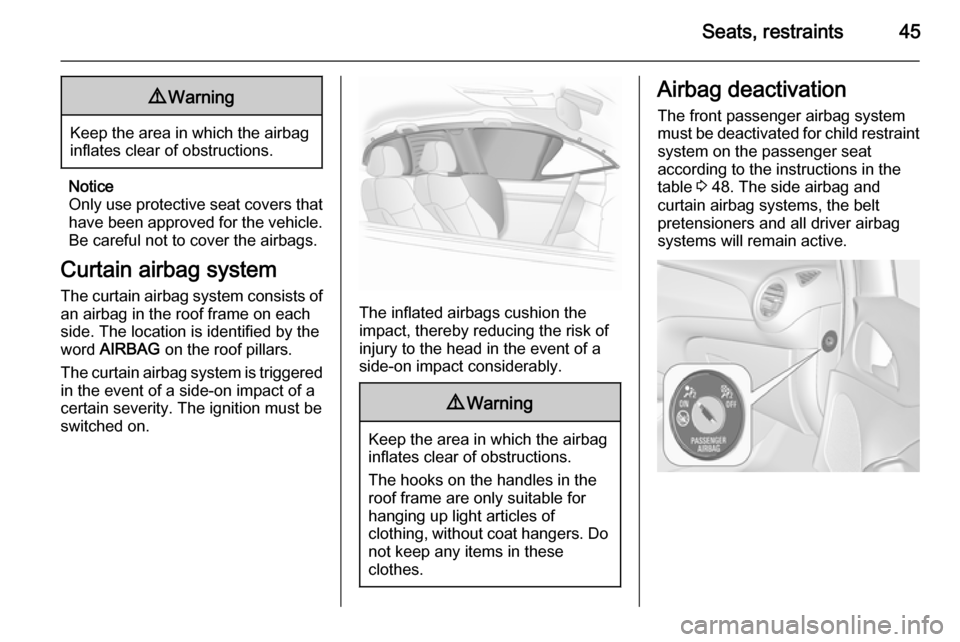
Curtain airbag system
The curtain airbag system consists of an airbag in the roof frame on each
side. The location is identified by the
word AIRBAG on the roof pillars.
The curtain airbag system is triggered
in the event of a side-on impact of a
certain severity. The ignition must be
switched on.
The inflated airbags cushion the
impact, thereby reducing the risk of
injury to the head in the event of a
side-on impact considerably.
9 Warning
Keep the area in which the airbag
inflates clear of obstructions.
The hooks on the handles in the
roof frame are only suitable for
hanging up light articles of
clothing, without coat hangers. Do not keep any items in these
clothes.
Airbag deactivation
The front passenger airbag system
must be deactivated for child restraint system on the passenger seat
according to the instructions in the
table 3 48. The side airbag and
curtain airbag systems, the belt
pretensioners and all driver airbag
systems will remain active.
Page 56 of 233
54Storage
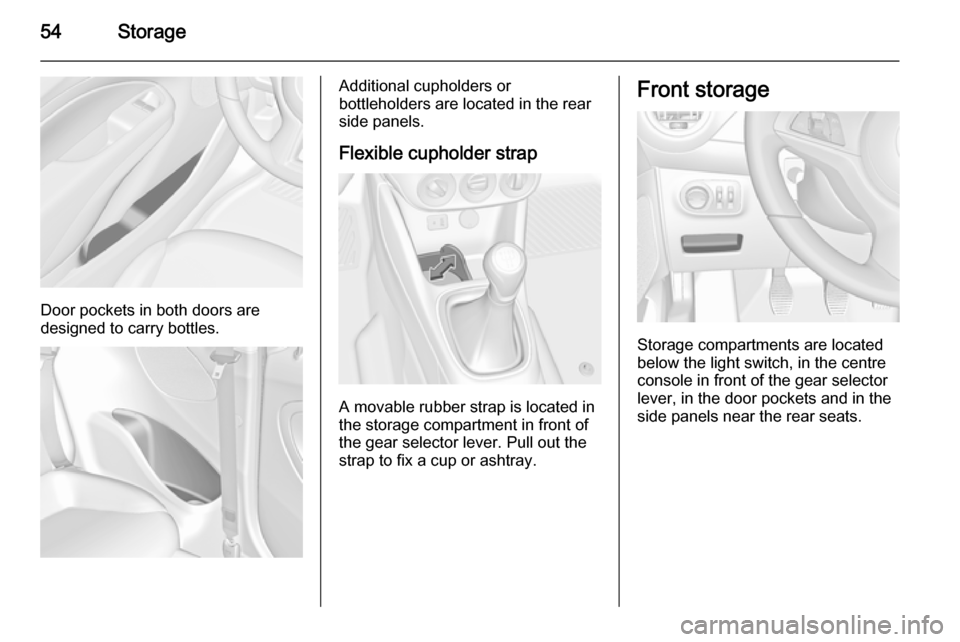
Door pockets in both doors are
designed to carry bottles.
Additional cupholders or
bottleholders are located in the rear
side panels.
Flexible cupholder strap
A movable rubber strap is located in
the storage compartment in front of
the gear selector lever. Pull out the
strap to fix a cup or ashtray.
Front storage
Storage compartments are located
below the light switch, in the centre
console in front of the gear selector
lever, in the door pockets and in the
side panels near the rear seats.
Page 58 of 233
56Storage
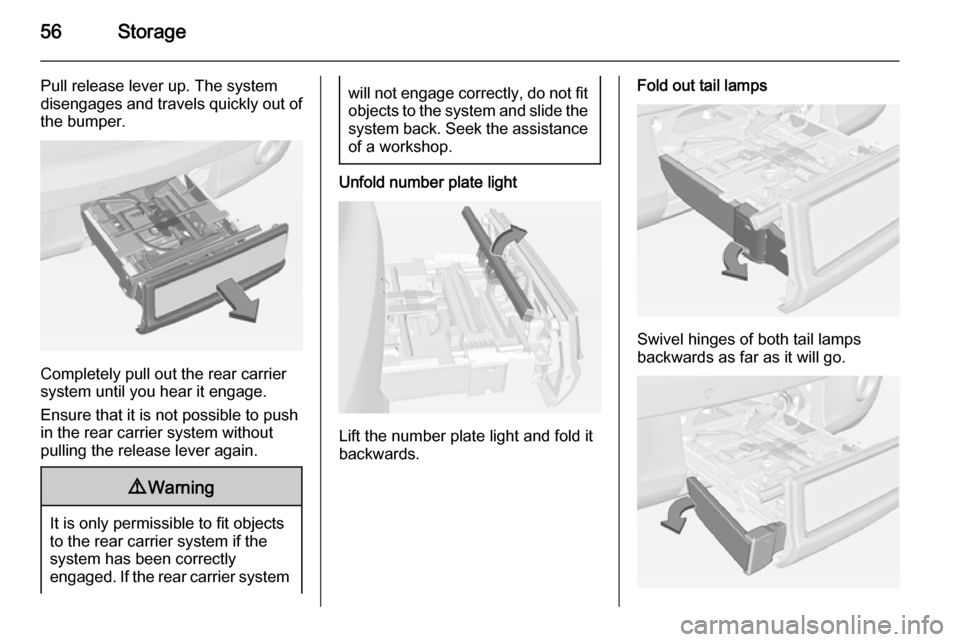
Pull release lever up. The system
disengages and travels quickly out of
the bumper.
Completely pull out the rear carrier
system until you hear it engage.
Ensure that it is not possible to push in the rear carrier system without
pulling the release lever again.
9 Warning
It is only permissible to fit objects
to the rear carrier system if the
system has been correctly
engaged. If the rear carrier system
will not engage correctly, do not fit
objects to the system and slide the system back. Seek the assistance
of a workshop.
Unfold number plate light
Lift the number plate light and fold it
backwards.
Fold out tail lamps
Swivel hinges of both tail lamps
backwards as far as it will go.
Page 63 of 233
Storage61
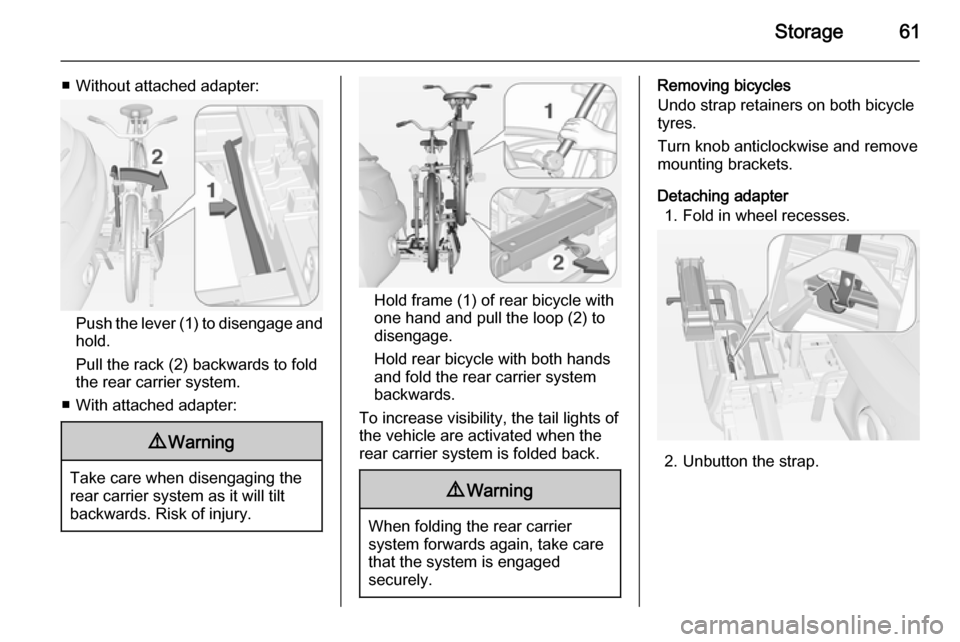
■ Without attached adapter:
Push the lever (1) to disengage andhold.
Pull the rack (2) backwards to fold
the rear carrier system.
■ With attached adapter:
9 Warning
Take care when disengaging the
rear carrier system as it will tilt
backwards. Risk of injury.
Hold frame (1) of rear bicycle with
one hand and pull the loop (2) to
disengage.
Hold rear bicycle with both hands
and fold the rear carrier system
backwards.
To increase visibility, the tail lights of
the vehicle are activated when the
rear carrier system is folded back.
9 Warning
When folding the rear carrier
system forwards again, take care
that the system is engaged
securely.
Removing bicycles
Undo strap retainers on both bicycle
tyres.
Turn knob anticlockwise and remove
mounting brackets.
Detaching adapter 1. Fold in wheel recesses.
2. Unbutton the strap.
Page 66 of 233
64Storage
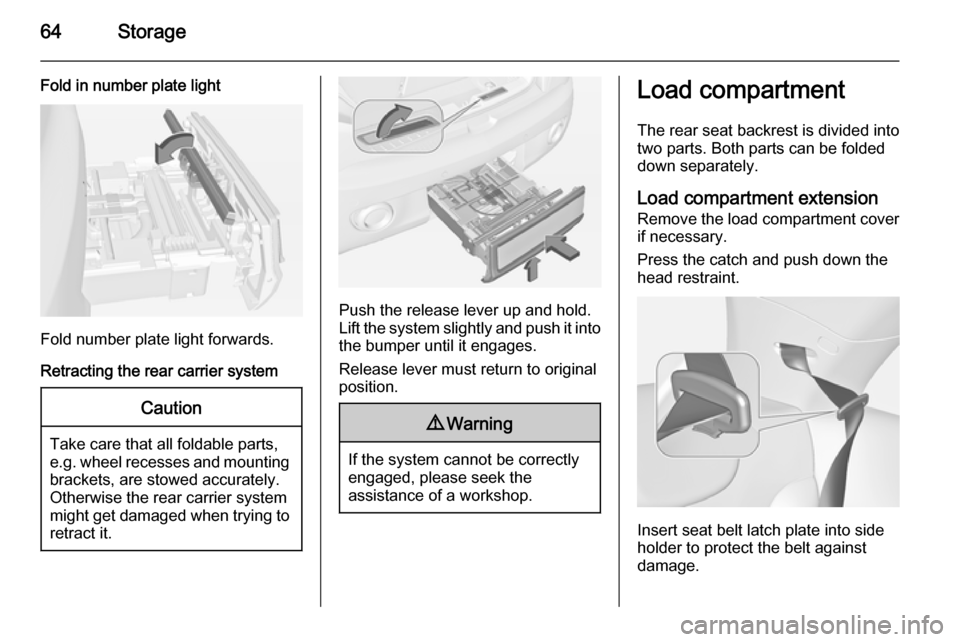
Fold in number plate light
Fold number plate light forwards.
Retracting the rear carrier system
Caution
Take care that all foldable parts,
e.g. wheel recesses and mounting brackets, are stowed accurately.
Otherwise the rear carrier system might get damaged when trying to retract it.
Push the release lever up and hold.
Lift the system slightly and push it into the bumper until it engages.
Release lever must return to original
position.
9 Warning
If the system cannot be correctly
engaged, please seek the
assistance of a workshop.
Load compartment
The rear seat backrest is divided into
two parts. Both parts can be folded
down separately.
Load compartment extension Remove the load compartment cover if necessary.
Press the catch and push down the
head restraint.
Insert seat belt latch plate into side
holder to protect the belt against
damage.
Page 67 of 233
Storage65
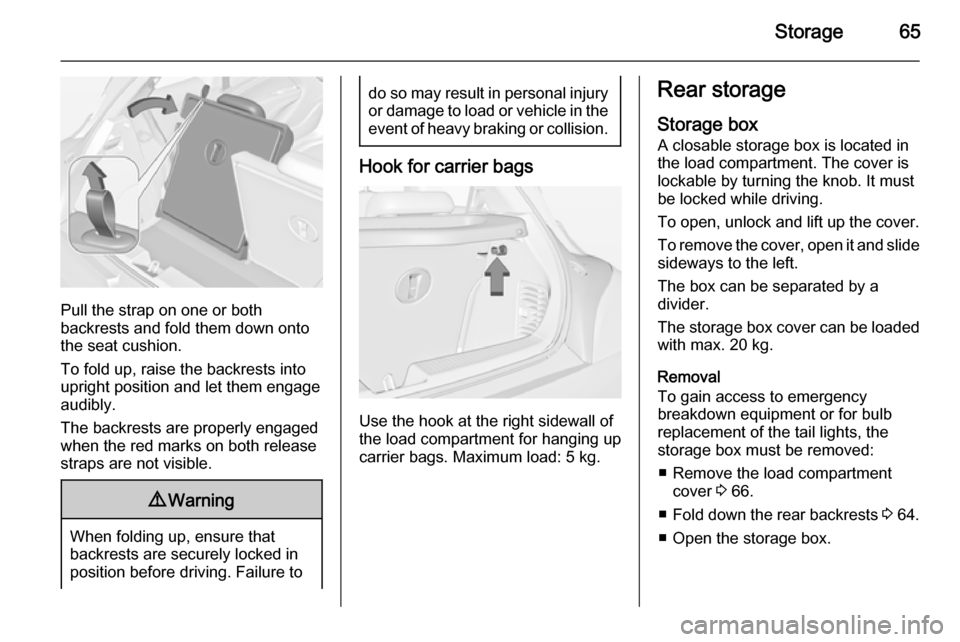
Pull the strap on one or both
backrests and fold them down onto the seat cushion.
To fold up, raise the backrests into
upright position and let them engage
audibly.
The backrests are properly engaged
when the red marks on both release
straps are not visible.
9 Warning
When folding up, ensure that
backrests are securely locked in
position before driving. Failure to
do so may result in personal injury or damage to load or vehicle in the event of heavy braking or collision.
Hook for carrier bags
Use the hook at the right sidewall of
the load compartment for hanging up carrier bags. Maximum load: 5 kg.
Rear storage
Storage box
A closable storage box is located in
the load compartment. The cover is lockable by turning the knob. It mustbe locked while driving.
To open, unlock and lift up the cover. To remove the cover, open it and slide
sideways to the left.
The box can be separated by a
divider.
The storage box cover can be loaded with max. 20 kg.
Removal
To gain access to emergency
breakdown equipment or for bulb
replacement of the tail lights, the
storage box must be removed:
■ Remove the load compartment cover 3 66.
■ Fold down the rear backrests 3 64.
■ Open the storage box.
Page 69 of 233
Storage67Rear floor storage coverRear floor cover
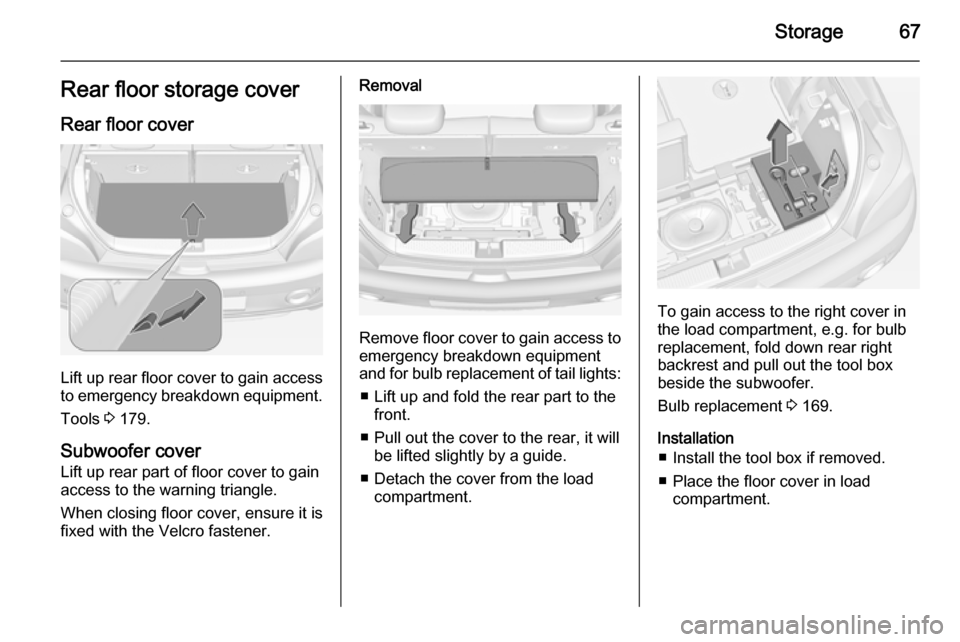
Lift up rear floor cover to gain access
to emergency breakdown equipment.
Tools 3 179.
Subwoofer cover
Lift up rear part of floor cover to gain
access to the warning triangle.
When closing floor cover, ensure it is
fixed with the Velcro fastener.
Removal
Remove floor cover to gain access to
emergency breakdown equipment
and for bulb replacement of tail lights:
■ Lift up and fold the rear part to the front.
■ Pull out the cover to the rear, it will be lifted slightly by a guide.
■ Detach the cover from the load compartment.
To gain access to the right cover in
the load compartment, e.g. for bulb replacement, fold down rear right
backrest and pull out the tool box
beside the subwoofer.
Bulb replacement 3 169.
Installation ■ Install the tool box if removed.
■ Place the floor cover in load compartment.
Page 74 of 233
72Instruments and controlsInstruments and
controlsControls ....................................... 72
Warning lights, gauges and indi‐
cators ........................................... 80
Information displays .....................90
Vehicle messages ........................ 97
Vehicle personalisation ..............100Controls
Steering wheel adjustment
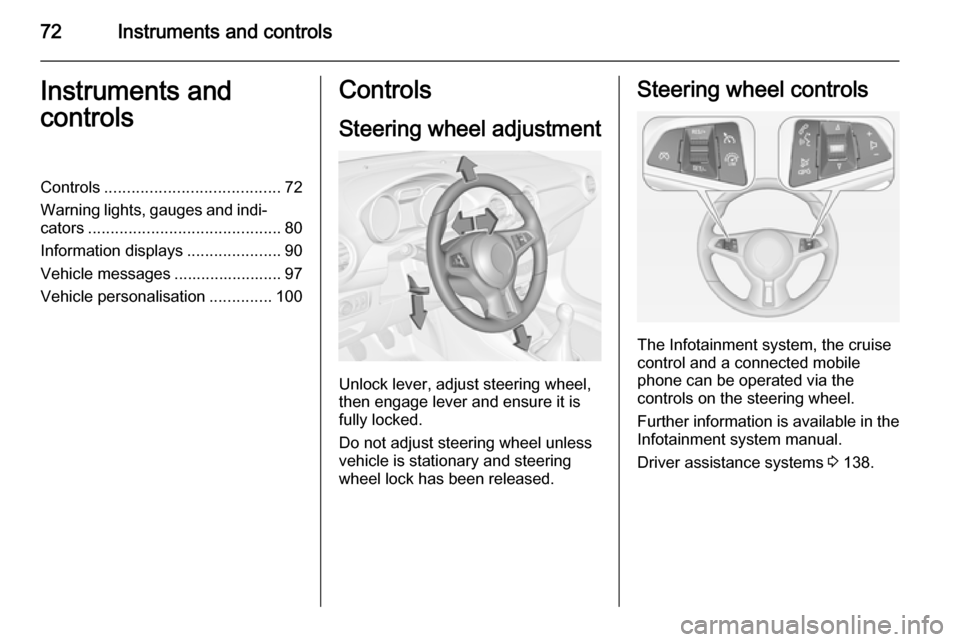
Unlock lever, adjust steering wheel,
then engage lever and ensure it is fully locked.
Do not adjust steering wheel unless
vehicle is stationary and steering
wheel lock has been released.
Steering wheel controls
The Infotainment system, the cruise
control and a connected mobile
phone can be operated via the
controls on the steering wheel.
Further information is available in the
Infotainment system manual.
Driver assistance systems 3 138.