Pedal VAUXHALL ADAM 2015 User Guide
[x] Cancel search | Manufacturer: VAUXHALL, Model Year: 2015, Model line: ADAM, Model: VAUXHALL ADAM 2015Pages: 225, PDF Size: 6.81 MB
Page 126 of 225

124Driving and operating
An Autostop is indicated by the
needle at the AUTOSTOP position in
the tachometer.
During an Autostop, the heating and
brake performance will be
maintained.
Conditions for an Autostop
The stop-start system checks if each
of the following conditions is fulfilled:
■ The stop-start system is not manually deactivated.
■ The bonnet is fully closed.
■ The driver's door is closed or the driver's seat belt is fastened.
■ The vehicle battery is sufficiently charged and in good condition.
■ The engine is warmed up.
■ The engine coolant temperature is not too high.
■ The engine exhaust temperature is
not too high, e.g. after driving with
high engine load.
■ The ambient temperature is above -5 °C.
■ The climate control system allows an Autostop.
■ The brake vacuum is sufficient.
■ The vehicle was driven at least at walking speed since the last
Autostop.
Otherwise an Autostop will be
inhibited.
Certain settings of the climate control
system may inhibit an Autostop. See
Climate control chapter for more
details 3 114.
Immediately after motorway driving
an Autostop may be inhibited.
New vehicle running-in 3 121.Vehicle battery discharge protection
To ensure reliable engine restarts, several vehicle battery discharge
protection features are implemented
as part of the stop-start system.
Power saving measures
During an Autostop, several electrical
features, e.g. the rear window
heating, are disabled or switched into
a power saving mode. The fan speed of the climate control system is
reduced to save power.
Restart of the engine by the
driver
Depress the clutch pedal to restart the
engine.
The engine start is indicated by the
needle at the idle speed position in
the tachometer.
If the selector lever is shifted out of
neutral before depressing the clutch
first, control indicator - illuminates
or is shown as a symbol in the Driver
Information Centre.
Control indicator - 3 86.
Page 129 of 225
Driving and operating127Manual transmission
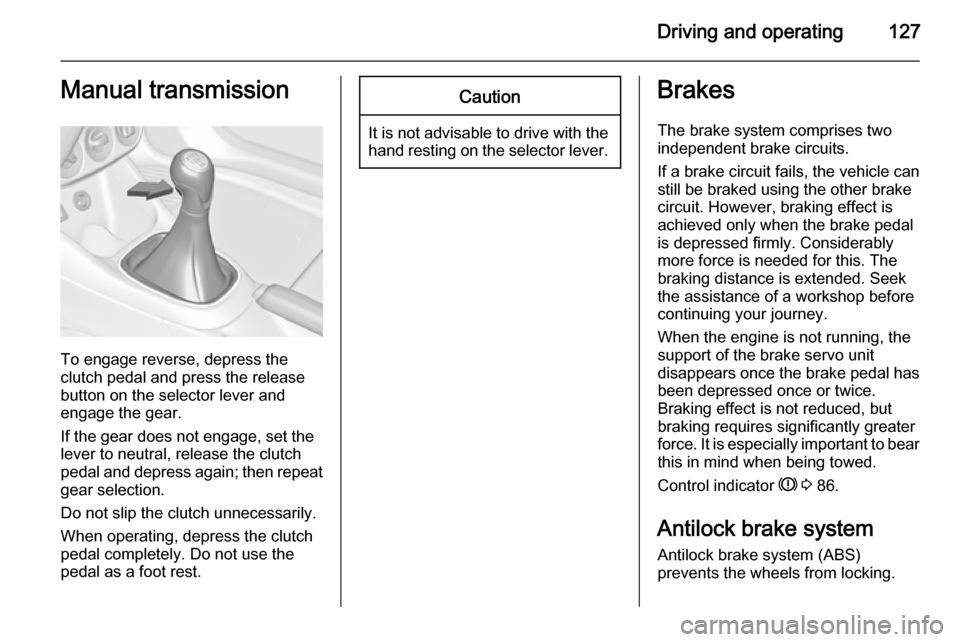
To engage reverse, depress the
clutch pedal and press the release button on the selector lever and
engage the gear.
If the gear does not engage, set the
lever to neutral, release the clutch
pedal and depress again; then repeat
gear selection.
Do not slip the clutch unnecessarily.
When operating, depress the clutch
pedal completely. Do not use the
pedal as a foot rest.
Caution
It is not advisable to drive with the hand resting on the selector lever.
Brakes
The brake system comprises two independent brake circuits.
If a brake circuit fails, the vehicle can
still be braked using the other brake
circuit. However, braking effect is
achieved only when the brake pedal
is depressed firmly. Considerably
more force is needed for this. The
braking distance is extended. Seek the assistance of a workshop before
continuing your journey.
When the engine is not running, the
support of the brake servo unit
disappears once the brake pedal has been depressed once or twice.
Braking effect is not reduced, but
braking requires significantly greater
force. It is especially important to bear
this in mind when being towed.
Control indicator R 3 86.
Antilock brake system
Antilock brake system (ABS)
prevents the wheels from locking.
Page 130 of 225
128Driving and operating
ABS starts to regulate brake pressureas soon as a wheel shows a tendency to lock. The vehicle remains
steerable, even during hard braking.
ABS control is made apparent
through a pulse in the brake pedal
and the noise of the regulation
process.
For optimum braking, keep the brake
pedal fully depressed throughout the
braking process, despite the fact that
the pedal is pulsating. Do not reduce
the pressure on the pedal.
After starting off the system performs
a self-test which may be audible.
Control indicator u 3 86.
Adaptive brake light
During full braking, all three brake
lights flash for the duration of ABS
control.Fault9 Warning
If there is a fault in the ABS, the
wheels may be liable to lock due
to braking that is heavier than
normal. The advantages of ABS are no longer available. During
hard braking, the vehicle can no longer be steered and may
swerve.
Have the cause of the fault remedied
by a workshop.
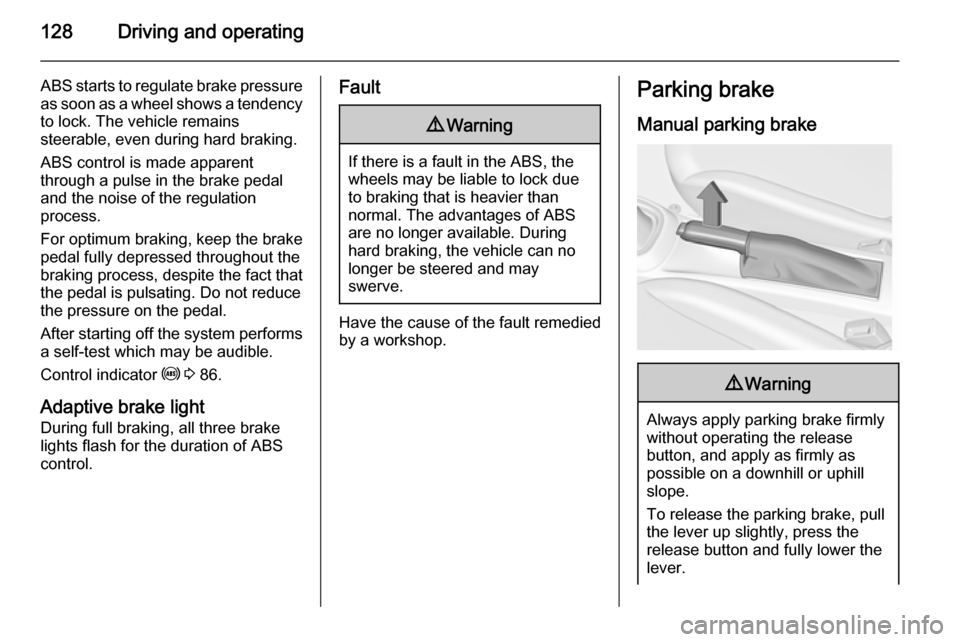
Parking brake
Manual parking brake9 Warning
Always apply parking brake firmly
without operating the release
button, and apply as firmly as
possible on a downhill or uphill
slope.
To release the parking brake, pull
the lever up slightly, press the
release button and fully lower the
lever.
Page 131 of 225

Driving and operating129To reduce the operating forces of
the parking brake, depress the
foot brake at the same time.
Control indicator R 3 86.
Brake assist
If the brake pedal is depressed
quickly and forcefully, maximum
brake force is automatically applied
(full braking).
Maintain steady pressure on the brake pedal for as long as full braking is required. Maximum brake force is
automatically reduced when the
brake pedal is released.
Hill start assist The system helps prevent unintendedmovement when driving away on
inclines.
When releasing the foot brake after
stopping on an incline, the brakes
remain on for a further two seconds.
The brakes release automatically as
soon as the vehicle begins to
accelerate or the two seconds holding
time is over.
The hill start assist is not active during
an Autostop.Ride control systems
Traction Control system
The Traction Control system (TC) is a
component of the Electronic Stability
Control (ESC).
TC improves driving stability when
necessary, regardless of the type of
road surface or tyre grip, by
preventing the drive wheels from
spinning.
As soon as the drive wheels starts to spin, engine output is reduced and
the wheel spinning the most is braked
individually. This considerably
improves the driving stability of the
vehicle on slippery road surfaces.
Page 135 of 225
Driving and operating133
For safety reasons the cruise control
cannot be activated until the foot
brake has been operated once.
Activating in first gear is not possible.
Do not use the cruise control if it is not advisable to maintain a constant
speed.
Control indicator m 3 88.
Switching on
Press button m, control indicator m in
instrument cluster illuminates white.
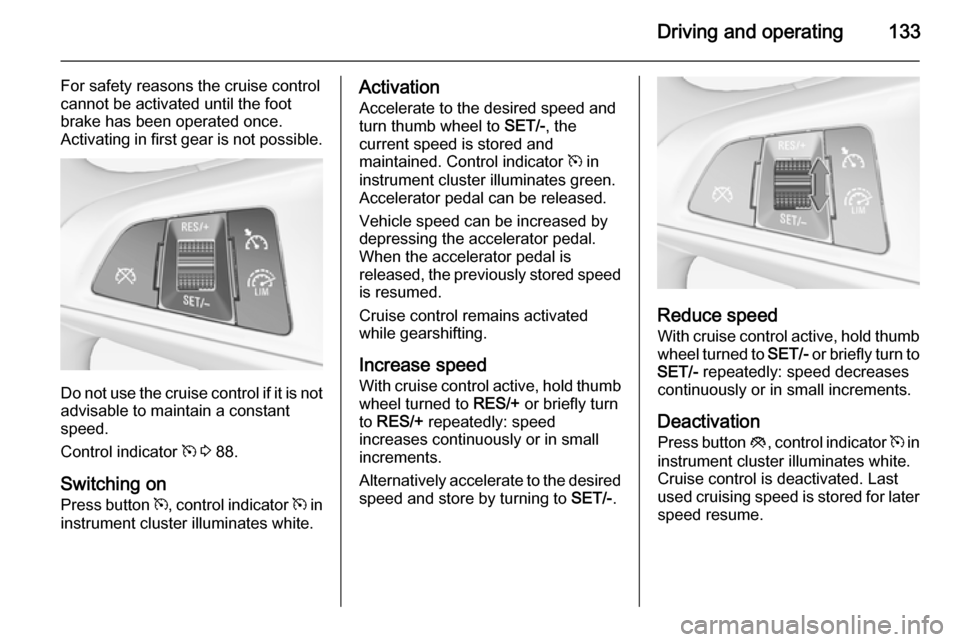
Activation
Accelerate to the desired speed and
turn thumb wheel to SET/-, the
current speed is stored and
maintained. Control indicator m in
instrument cluster illuminates green.
Accelerator pedal can be released.
Vehicle speed can be increased by
depressing the accelerator pedal.
When the accelerator pedal is
released, the previously stored speed
is resumed.
Cruise control remains activated
while gearshifting.
Increase speed With cruise control active, hold thumb
wheel turned to RES/+ or briefly turn
to RES/+ repeatedly: speed
increases continuously or in small
increments.
Alternatively accelerate to the desired speed and store by turning to SET/-.
Reduce speed
With cruise control active, hold thumb wheel turned to SET/- or briefly turn to
SET/- repeatedly: speed decreases
continuously or in small increments.
Deactivation
Press button y, control indicator m in
instrument cluster illuminates white.
Cruise control is deactivated. Last
used cruising speed is stored for later speed resume.
Page 136 of 225
134Driving and operating
Automatic deactivation:■ Vehicle speed is below approx. 20 mph.
■ Vehicle speed is above approx. 125 mph.
■ The brake pedal is depressed.
■ The clutch pedal is depressed for a
few seconds.
■ Engine speed is in a very low range.
■ The Traction Control system or Electronic Stability Control is
operating.
Resume stored speed
Turn thumb wheel to RES/+ at a
speed above 20 mph. The stored
speed will be obtained.
Switching off
Press button m, control indicator m in
instrument cluster extinguishes. The
stored speed is deleted.
Switching off the ignition also
switches off cruise control and
deletes the stored speed.Speed limiter
The speed limiter prevents thevehicle exceeding a preset maximum speed.
The maximum speed can be set at a
speed above 15 mph.
The driver can only accelerate up to
the preset speed. Deviations from the
limited speed may occur when driving
downhill.
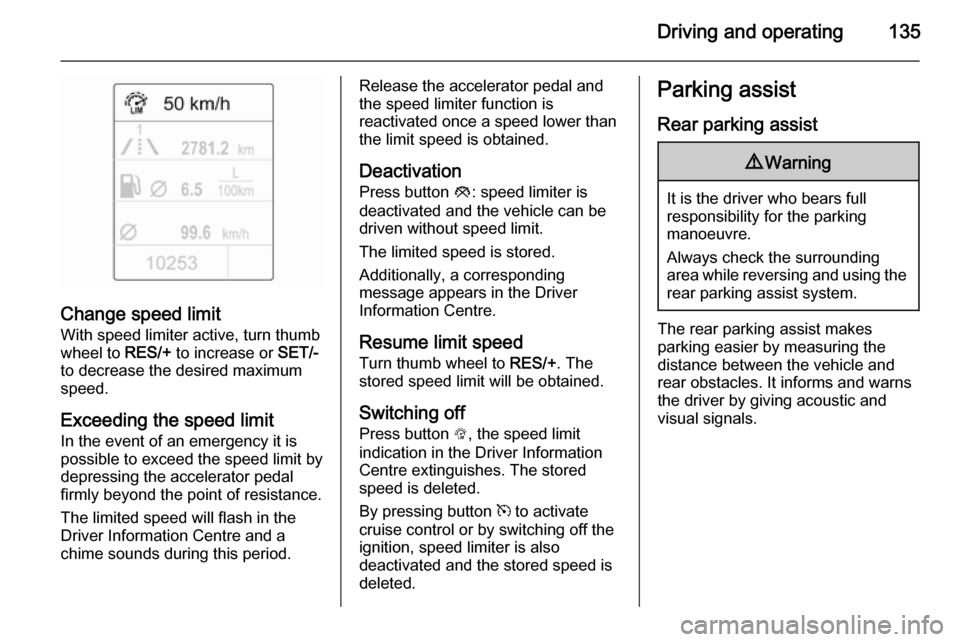
The preset speed limit is displayed in
the top line of the Driver Information
Centre when the system is active.
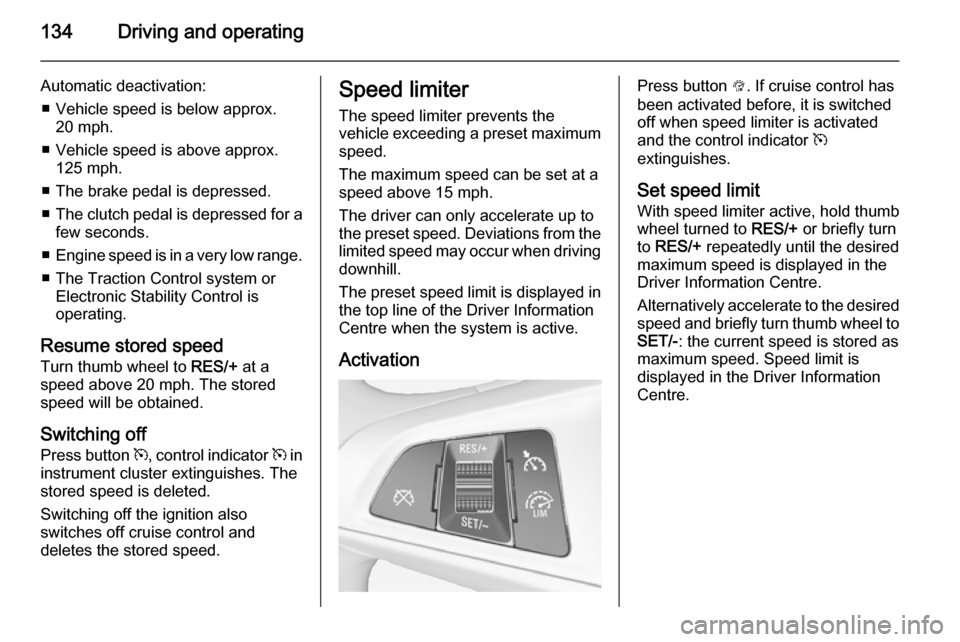
ActivationPress button L. If cruise control has
been activated before, it is switched
off when speed limiter is activated
and the control indicator m
extinguishes.
Set speed limit
With speed limiter active, hold thumb
wheel turned to RES/+ or briefly turn
to RES/+ repeatedly until the desired
maximum speed is displayed in the
Driver Information Centre.
Alternatively accelerate to the desired speed and briefly turn thumb wheel to
SET/- : the current speed is stored as
maximum speed. Speed limit is
displayed in the Driver Information
Centre.
Page 137 of 225
Driving and operating135
Change speed limit
With speed limiter active, turn thumb
wheel to RES/+ to increase or SET/-
to decrease the desired maximum
speed.
Exceeding the speed limit
In the event of an emergency it is possible to exceed the speed limit by
depressing the accelerator pedal
firmly beyond the point of resistance.
The limited speed will flash in the
Driver Information Centre and a
chime sounds during this period.
Release the accelerator pedal and the speed limiter function is
reactivated once a speed lower than
the limit speed is obtained.
Deactivation
Press button y: speed limiter is
deactivated and the vehicle can be
driven without speed limit.
The limited speed is stored.
Additionally, a corresponding
message appears in the Driver
Information Centre.
Resume limit speedTurn thumb wheel to RES/+. The
stored speed limit will be obtained.
Switching off
Press button L, the speed limit
indication in the Driver Information
Centre extinguishes. The stored
speed is deleted.
By pressing button m to activate
cruise control or by switching off the
ignition, speed limiter is also
deactivated and the stored speed is
deleted.Parking assist
Rear parking assist9 Warning
It is the driver who bears full
responsibility for the parking
manoeuvre.
Always check the surrounding
area while reversing and using the rear parking assist system.
The rear parking assist makes
parking easier by measuring the
distance between the vehicle and
rear obstacles. It informs and warns
the driver by giving acoustic and
visual signals.
Page 222 of 225

220
Information displays...................... 89
Instrument cluster ........................79
Instrument panel fuse box .........171
Instrument panel illumination .....168
Instrument panel illumination control .................................... 107
Instrument panel overview ........... 10
Interior care ............................... 199
Interior lighting ............................ 107
Interior lights ...................... 107, 168
Interior mirrors .............................. 28
Introduction .................................... 3
ISOFIX child restraint systems ....51
J Jump starting ............................. 193
K Key, memorised settings ..............21
Keys ............................................. 19
Keys, locks ................................... 19
L
Lashing eyes ............................... 67
Light switch ................................ 103
Load compartment ................24, 63
Load compartment cover .............65
Loading information .....................69
Low fuel ....................................... 88M
Malfunction indicator light ............85
Manual anti-dazzle ......................28
Manual transmission .................. 127
Memorised settings ......................21
Mirror adjustment ........................... 8
Misted light covers .....................107
N
New vehicle running-in ..............121
Number plate light .....................167
O Object detection systems ...........135
Odometer ..................................... 79
Oil, engine .......................... 202, 206
Operate pedal ............................... 86
Outside temperature ....................75
Overrun cut-off ........................... 123
P
Parking ................................ 17, 125
Parking assist ............................ 135
Parking brake ............................ 128
Parking lights ............................. 106
Performance .............................. 210
Performing work ........................153
Pollen filter ................................. 119
Power outlets ............................... 78
Power steering.............................. 87Power windows ............................ 28
Puncture ..................................... 185
R
Radio Frequency Identification (RFID) ..................................... 217
Radio remote control ...................20
Rear carrier system ......................54
Rear floor storage cover ..............66
Rear fog light ............................... 88
Rear fog lights ........................... 106
Rear storage ................................. 64
Rear window wiper/washer .......... 74 Recommended fluids and lubricants ........................ 202, 206
Refuelling ................................... 148 Retained power off .....................122
Reversing lights .........................107
Ride control systems ..................129
Roof load ...................................... 69
Roof rack ..................................... 69
S Safety belts ................................... 36
Seat adjustment ....................... 7, 34
Seat belt ........................................ 8
Seat belt reminder .......................84
Seat belts ..................................... 36
Seat folding .................................. 35
Seat position ................................ 33