mirror VAUXHALL ADAM 2015 Owner's Manual
[x] Cancel search | Manufacturer: VAUXHALL, Model Year: 2015, Model line: ADAM, Model: VAUXHALL ADAM 2015Pages: 225, PDF Size: 6.81 MB
Page 10 of 225
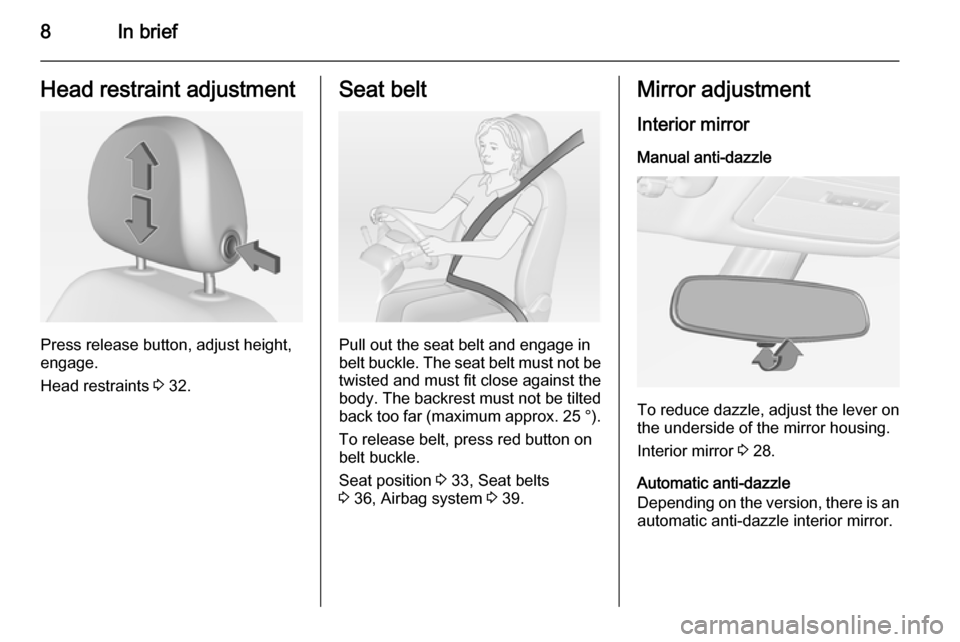
8In briefHead restraint adjustment
Press release button, adjust height,
engage.
Head restraints 3 32.
Seat belt
Pull out the seat belt and engage in
belt buckle. The seat belt must not be twisted and must fit close against the
body. The backrest must not be tilted
back too far (maximum approx. 25 ° ).
To release belt, press red button on belt buckle.
Seat position 3 33, Seat belts
3 36, Airbag system 3 39.
Mirror adjustment
Interior mirror
Manual anti-dazzle
To reduce dazzle, adjust the lever on the underside of the mirror housing.
Interior mirror 3 28.
Automatic anti-dazzle
Depending on the version, there is an
automatic anti-dazzle interior mirror.
Page 11 of 225
In brief9
Dazzle from following vehicles at
night is automatically reduced.
Automatic anti-dazzle interior mirror 3 28.
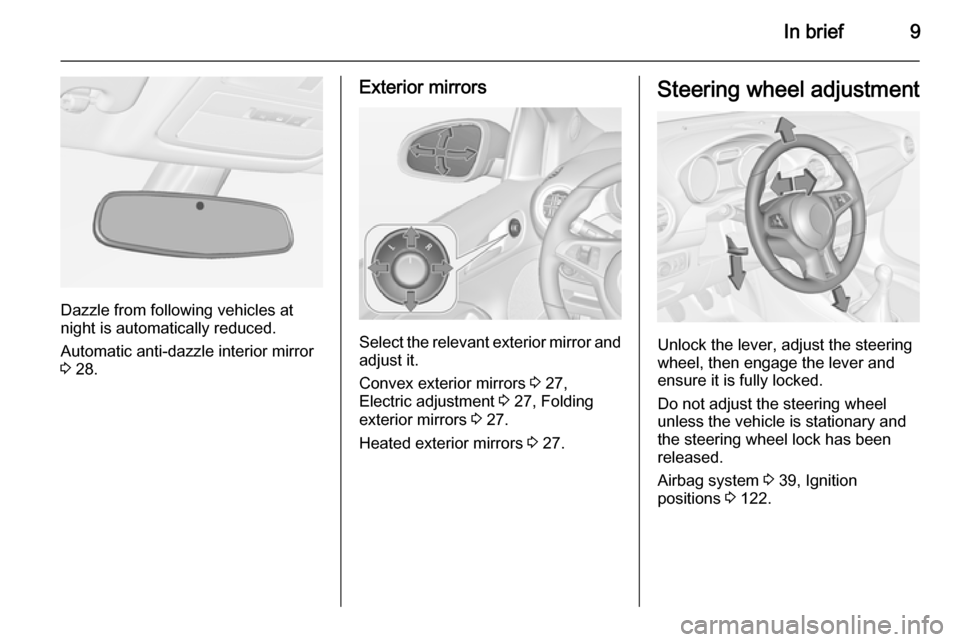
Exterior mirrors
Select the relevant exterior mirror and
adjust it.
Convex exterior mirrors 3 27,
Electric adjustment 3 27, Folding
exterior mirrors 3 27.
Heated exterior mirrors 3 27.
Steering wheel adjustment
Unlock the lever, adjust the steering
wheel, then engage the lever and
ensure it is fully locked.
Do not adjust the steering wheel
unless the vehicle is stationary and the steering wheel lock has been
released.
Airbag system 3 39, Ignition
positions 3 122.
Page 13 of 225

In brief11
1Power windows .....................28
2 Exterior mirrors .....................27
3 Cruise control .....................132
Speed limiter ....................... 134
4 Side air vents ...................... 119
5 Turn and lane-change
signals, headlight flash,
low beam and high beam ....106
Exit lighting ......................... 109
Parking lights ...................... 106
Buttons for Driver
Information Centre ................89
6 Instruments .......................... 79
7 Steering wheel controls .......71
8 Driver Information Centre ...... 89
9 Windscreen wiper,
windscreen washer
system, headlight washer
system, rear wiper, rear
washer system ......................73
10 Central locking system ..........21
City mode ............................ 131
Fuel selector ......................... 80Eco button for stop-start
system ................................. 123
Parking assist ..................... 135
Seat heating .......................... 36
Heated steering wheel ..........72
11 Colour-Info-Display ..............94
Graphic-Info-Display .............95
12 Hazard warning flashers ....105
Control indicator for airbag
deactivation .......................... 85
Control indicator for front
passenger seat belt .............84
13 Anti-theft alarm system
status LED ........................... 25
14 Centre air vents .................. 119
15 Side air vents passenger
side ..................................... 119
16 Glovebox .............................. 52
Fuse box ............................ 171
17 Climate control system ........ 111
18 Power outlet .......................... 78
19 AUX input, USB input ...........1020Selector lever, manual
transmission ....................... 127
21 Parking brake ......................128
22 Ignition switch with
steering wheel lock ............122
23 Horn ..................................... 72
Driver airbag ........................ 42
24 Bonnet release lever ..........154
25 Steering wheel adjustment ..71
26 Light switch ........................ 103
Headlight range
adjustment ......................... 105
Rear fog light ...................... 106
Brightness of instrument
panel illumination ................107
Brightness of ambient light 107
Page 17 of 225
In brief15
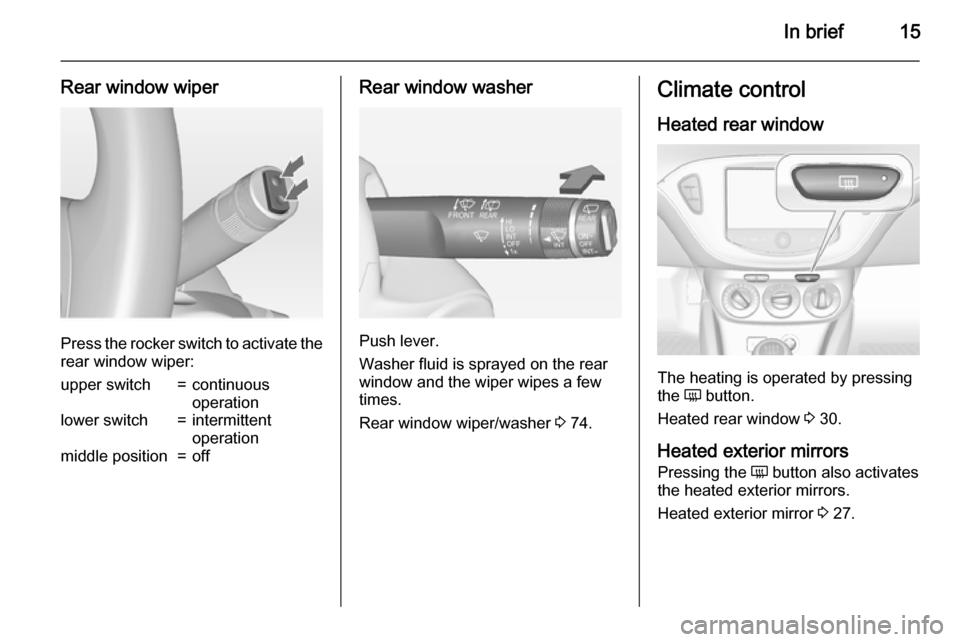
Rear window wiper
Press the rocker switch to activate the
rear window wiper:
upper switch=continuous
operationlower switch=intermittent
operationmiddle position=offRear window washer
Push lever.
Washer fluid is sprayed on the rear
window and the wiper wipes a few
times.
Rear window wiper/washer 3 74.
Climate control
Heated rear window
The heating is operated by pressing
the Ü button.
Heated rear window 3 30.
Heated exterior mirrors
Pressing the Ü button also activates
the heated exterior mirrors.
Heated exterior mirror 3 27.
Page 18 of 225
16In brief
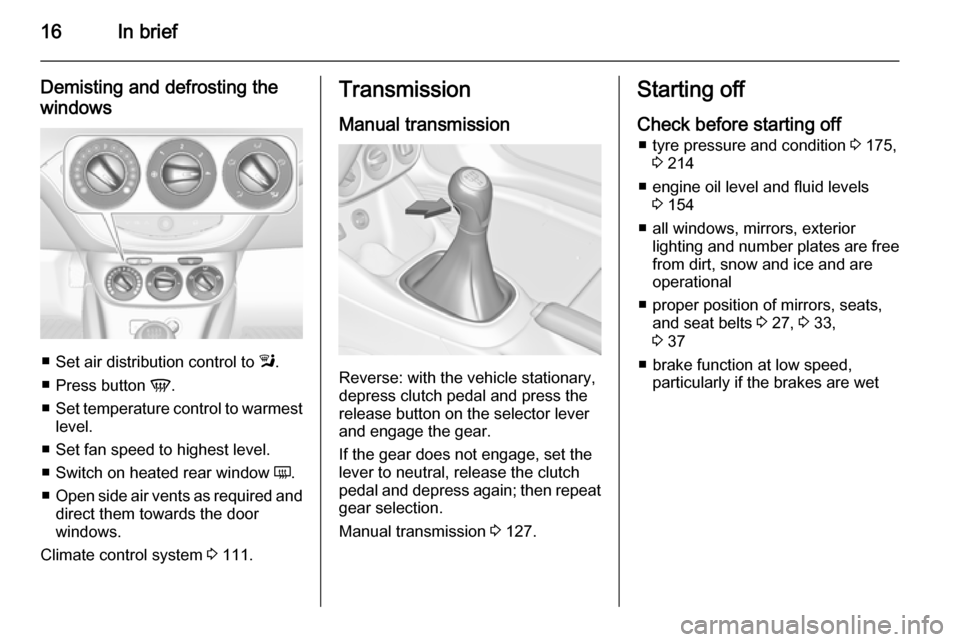
Demisting and defrosting the
windows
■ Set air distribution control to l.
■ Press button V.
■ Set temperature control to warmest
level.
■ Set fan speed to highest level.
■ Switch on heated rear window Ü.
■ Open side air vents as required and
direct them towards the door
windows.
Climate control system 3 111.
Transmission
Manual transmission
Reverse: with the vehicle stationary,
depress clutch pedal and press the release button on the selector lever
and engage the gear.
If the gear does not engage, set the
lever to neutral, release the clutch
pedal and depress again; then repeat
gear selection.
Manual transmission 3 127.
Starting off
Check before starting off ■ tyre pressure and condition 3 175,
3 214
■ engine oil level and fluid levels 3 154
■ all windows, mirrors, exterior lighting and number plates are free
from dirt, snow and ice and are
operational
■ proper position of mirrors, seats, and seat belts 3 27, 3 33,
3 37
■ brake function at low speed, particularly if the brakes are wet
Page 21 of 225
Keys, doors and windows19Keys, doors and
windowsKeys, locks ................................... 19
Doors ........................................... 24
Vehicle security ............................ 25
Exterior mirrors ............................ 27
Interior mirrors ............................. 28
Windows ...................................... 28
Roof ............................................. 30Keys, locks
Keys Replacement keys
The key number is specified in the
Car Pass or on a detachable tag.
The key number must be quoted
when ordering replacement keys as it
is a component of the immobiliser
system.
Locks 3 197.
The code number of the key adapter
for the locking wheel bolts is specified
on a card. It must be quoted when
ordering a replacement key adapter.
Wheel changing 3 185.
Lock cylinders Designed to free-wheel if they are
forcefully rotated without the correct
key or if the correct key is not fully
inserted. To reset, turn cylinder with
the correct key until its slot is vertical,
remove key and then re-insert it. If the
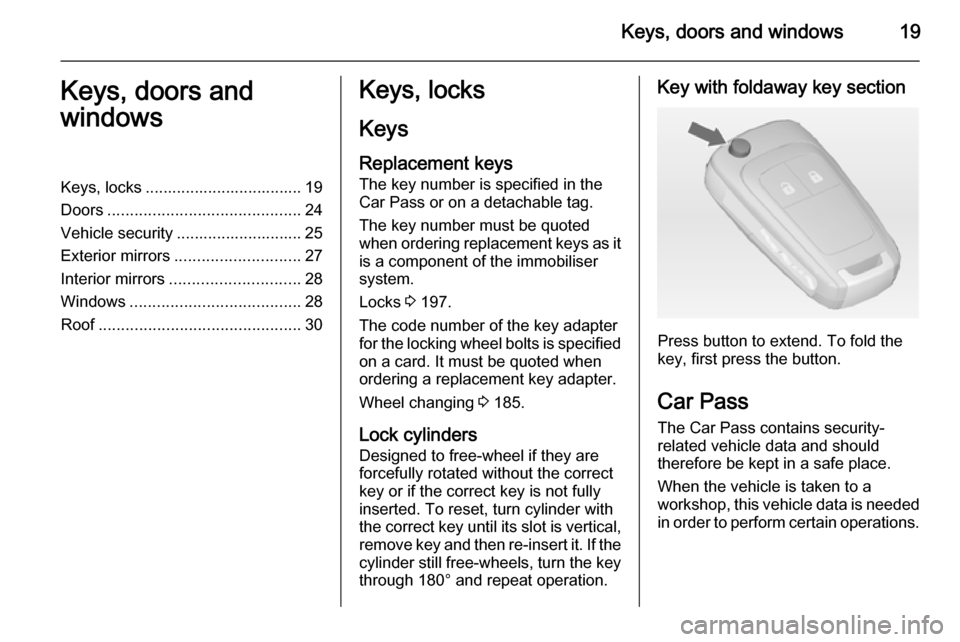
cylinder still free-wheels, turn the key through 180° and repeat operation.Key with foldaway key section
Press button to extend. To fold the
key, first press the button.
Car Pass The Car Pass contains security-
related vehicle data and should
therefore be kept in a safe place.
When the vehicle is taken to a
workshop, this vehicle data is needed
in order to perform certain operations.
Page 29 of 225
Keys, doors and windows27Exterior mirrors
Convex shape
The convex exterior mirror contains
an aspherical area and reduces blind spots. The shape of the mirror makes
objects appear smaller, which will affect the ability to estimate
distances.
Electric adjustment
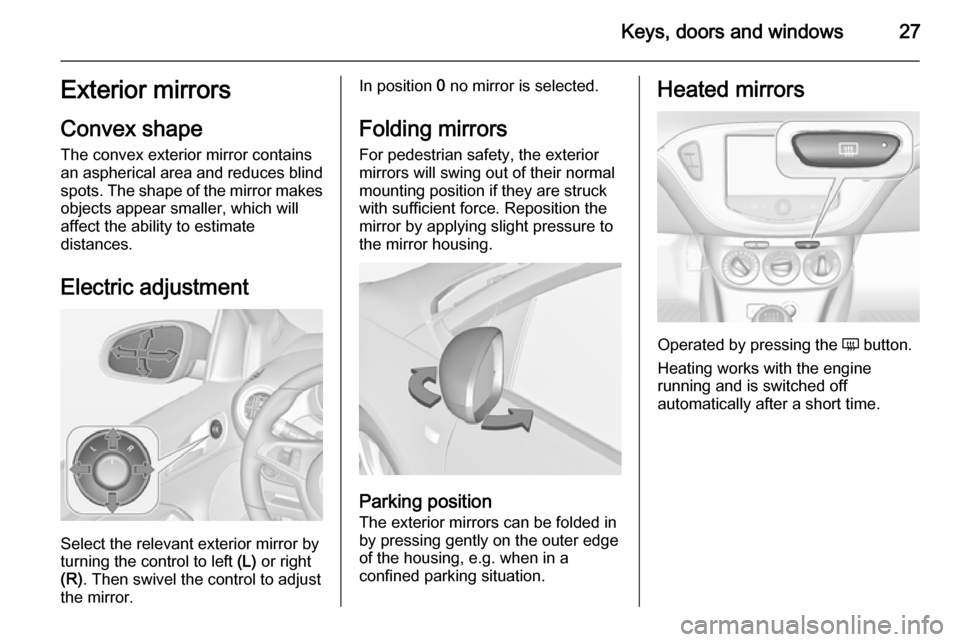
Select the relevant exterior mirror by
turning the control to left (L) or right
(R) . Then swivel the control to adjust
the mirror.
In position 0 no mirror is selected.
Folding mirrors For pedestrian safety, the exterior
mirrors will swing out of their normal
mounting position if they are struck
with sufficient force. Reposition the mirror by applying slight pressure tothe mirror housing.
Parking position
The exterior mirrors can be folded in
by pressing gently on the outer edge
of the housing, e.g. when in a
confined parking situation.
Heated mirrors
Operated by pressing the Ü button.
Heating works with the engine
running and is switched off
automatically after a short time.
Page 30 of 225
28Keys, doors and windowsInterior mirrors
Manual anti-dazzle
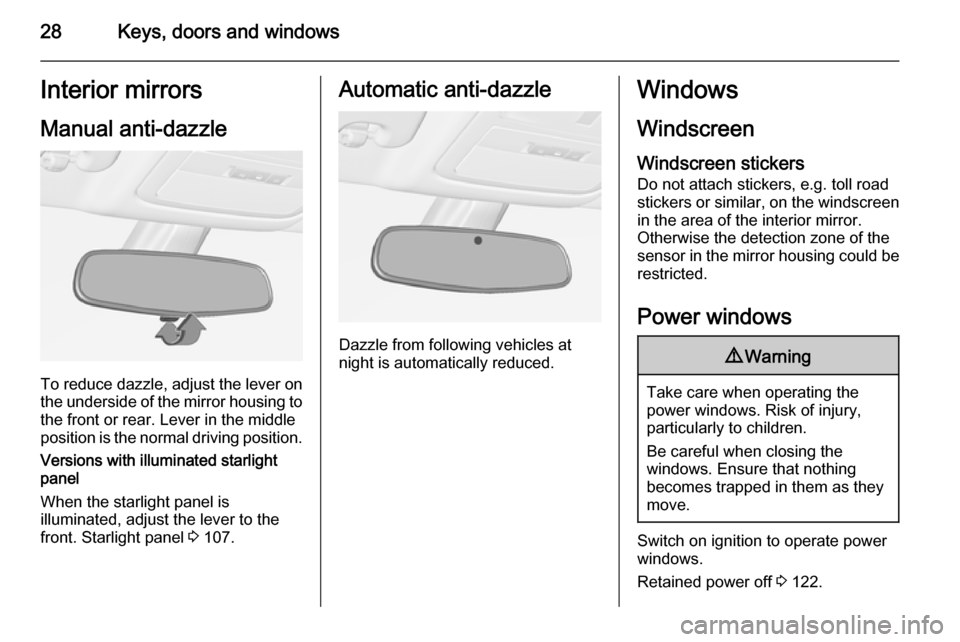
To reduce dazzle, adjust the lever on the underside of the mirror housing to
the front or rear. Lever in the middle
position is the normal driving position.
Versions with illuminated starlight
panel
When the starlight panel is
illuminated, adjust the lever to the
front. Starlight panel 3 107.
Automatic anti-dazzle
Dazzle from following vehicles at
night is automatically reduced.
Windows
Windscreen
Windscreen stickers
Do not attach stickers, e.g. toll road
stickers or similar, on the windscreen in the area of the interior mirror.
Otherwise the detection zone of the
sensor in the mirror housing could be
restricted.
Power windows9 Warning
Take care when operating the
power windows. Risk of injury,
particularly to children.
Be careful when closing the
windows. Ensure that nothing
becomes trapped in them as they
move.
Switch on ignition to operate power
windows.
Retained power off 3 122.
Page 32 of 225
30Keys, doors and windows
Initialising the power windowsIf the windows cannot be closed
automatically (e.g. after
disconnecting the vehicle battery), a
warning message or a warning code
is displayed in the Driver Information
Centre.
Vehicle messages 3 96.
Activate the window electronics as
follows:
1. Close the doors.
2. Switch on the gnition.
3. Pull switch until the window is closed and keep pulling for
additional 2 seconds.
4. Repeat for each window.Heated rear window
Operated by pressing the Ü button.
Heating works with the engine
running and is switched off
automatically after a short time.
Sun visors The sun visors can be folded down orswivelled to the side to prevent
dazzling.
The integral mirrors should be closed
when driving.
A ticket holder is located on the
backside of the sun visor.
Roof
Sunroof Foldable power sunroof9 Warning
Take care when operating the
sunroof. Risk of injury, particularly to children.
Keep a close watch on the
movable parts when operating
them. Ensure that nothing
becomes trapped in them as they
move.
Operable with ignition on (position 2)
3 122.
The foldable power sunroof can be
opened and closed while driving up to a speed of 87 mph.
Retained power off 3 122.
Page 112 of 225
110Lighting
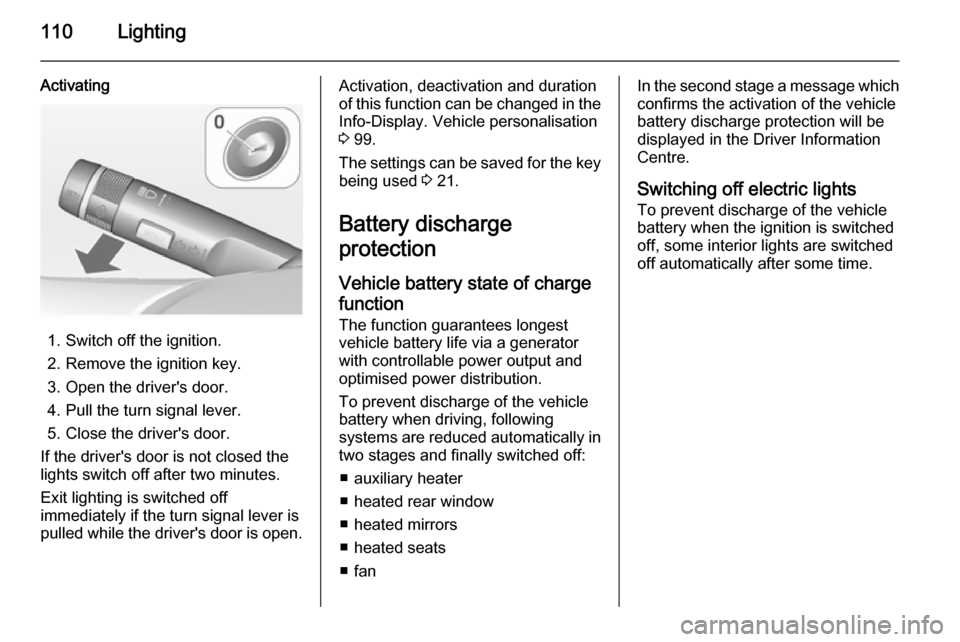
Activating
1. Switch off the ignition.
2. Remove the ignition key.
3. Open the driver's door.
4. Pull the turn signal lever.
5. Close the driver's door.
If the driver's door is not closed the
lights switch off after two minutes.
Exit lighting is switched off
immediately if the turn signal lever is
pulled while the driver's door is open.
Activation, deactivation and duration
of this function can be changed in the Info-Display. Vehicle personalisation
3 99.
The settings can be saved for the key being used 3 21.
Battery discharge
protection
Vehicle battery state of charge
function
The function guarantees longest
vehicle battery life via a generator with controllable power output and
optimised power distribution.
To prevent discharge of the vehicle
battery when driving, following
systems are reduced automatically in two stages and finally switched off:
■ auxiliary heater
■ heated rear window
■ heated mirrors
■ heated seats
■ fanIn the second stage a message which
confirms the activation of the vehicle
battery discharge protection will be
displayed in the Driver Information Centre.
Switching off electric lights To prevent discharge of the vehicle
battery when the ignition is switched
off, some interior lights are switched
off automatically after some time.