stop start VAUXHALL ADAM 2016.5 Owner's Guide
[x] Cancel search | Manufacturer: VAUXHALL, Model Year: 2016.5, Model line: ADAM, Model: VAUXHALL ADAM 2016.5Pages: 239, PDF Size: 7.2 MB
Page 133 of 239
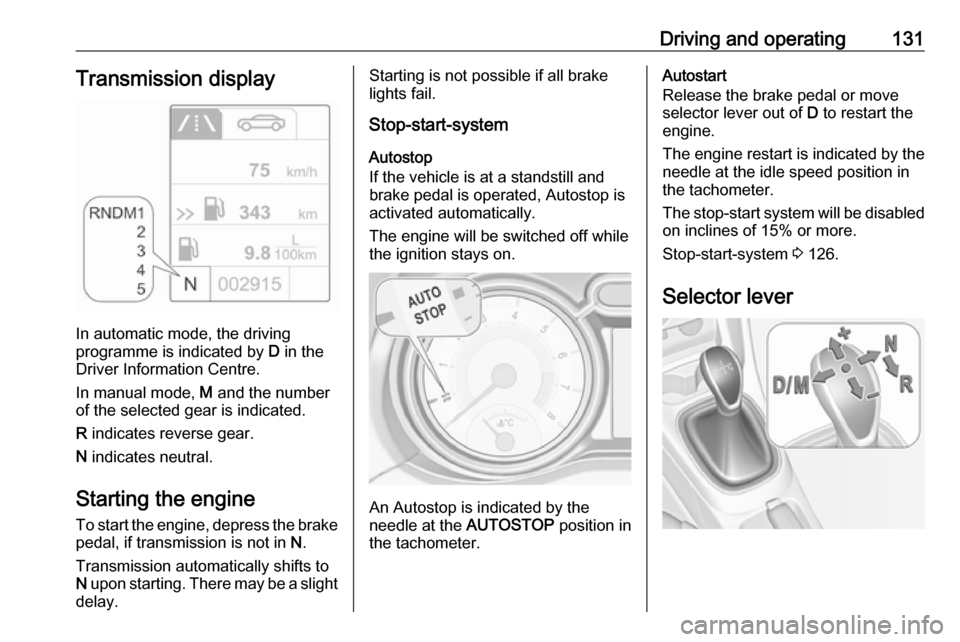
Driving and operating131Transmission display
In automatic mode, the driving
programme is indicated by D in the
Driver Information Centre.
In manual mode, M and the number
of the selected gear is indicated.
R indicates reverse gear.
N indicates neutral.
Starting the engine
To start the engine, depress the brake
pedal, if transmission is not in N.
Transmission automatically shifts to
N upon starting. There may be a slight
delay.
Starting is not possible if all brake
lights fail.
Stop-start-system
Autostop
If the vehicle is at a standstill and
brake pedal is operated, Autostop is
activated automatically.
The engine will be switched off while
the ignition stays on.
An Autostop is indicated by the
needle at the AUTOSTOP position in
the tachometer.
Autostart
Release the brake pedal or move selector lever out of D to restart the
engine.
The engine restart is indicated by the needle at the idle speed position in
the tachometer.
The stop-start system will be disabled
on inclines of 15% or more.
Stop-start-system 3 126.
Selector lever
Page 134 of 239

132Driving and operatingAlways move the selector lever in the
appropriate direction as far as it will
go. Upon release, it automatically
returns to the centre position.N:neutral positionD/M:switch between automatic (D)
and manual (M) shift mode.
The transmission display
shows either D or M with the
selected gear<:upshifting in manual mode]:downshifting in manual modeR:reverse gear. Engage only
when vehicle is stationary
If selector lever is moved from R to the
left, D is directly engaged.
If selector lever is moved from D to
< or ], the manual mode M is
selected and the transmission shifts.
Starting off
Depress the brake pedal and move
the selector lever to D/M or R. If D is
selected, transmission is in automatic mode and first gear is engaged. If R
is selected, reverse gear is engaged.
The vehicle starts to move when the
brake is released.
To start-off without depressing the
foot brake, accelerate immediately
after engaging a gear as long as D or
R flashes.
If neither the accelerator nor the
brake pedal are depressed, no gear is engaged and D or R flashes for a
brief time in the display.
Stopping the vehicle
In D, first gear is engaged and the
clutch is released when the vehicle is
stopped. In R, reverse gear remains
engaged.
Engine braking
Automatic mode
When driving downhill, the manual
transmission automated does not
shift into higher gears until a fairly
high engine speed has been reached. It shifts down in good time when
braking.
Manual mode
To utilise the engine braking effect, select a lower gear in good time when
driving downhill. Changing intomanual mode is only possible while
the engine is running or during an
Autostop.
Rocking the vehicle
Rocking the vehicle is only
permissible if the vehicle is stuck in
sand, mud or snow. Move the selector
lever between R and D in a repeat
pattern. Do not race the engine and
avoid sudden acceleration.
Parking
The most recently engaged gear (see transmission display) remains
engaged when switching off ignition.
With N, no gear is engaged.
Therefore always apply the parking
brake when switching off ignition. If
parking brake is not applied, P flashes
in the transmission display and the
key cannot be removed from the
ignition switch. P stops flashing in the
transmission display as soon as the
parking brake is slightly applied.
When the ignition is switched off, the
transmission no longer responds to
movement of the selector lever.
Page 137 of 239
Driving and operating135Parking brake
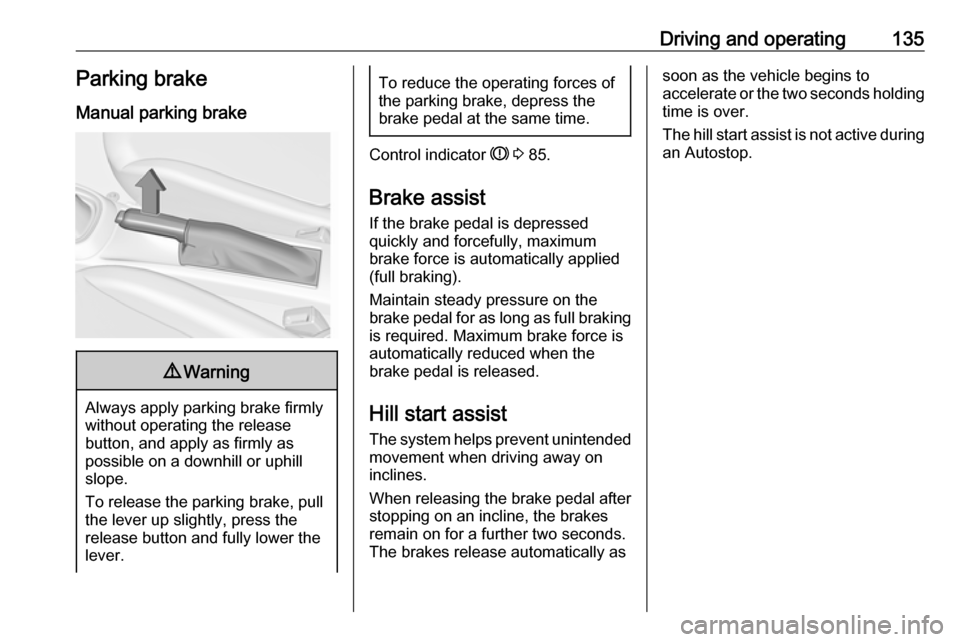
Manual parking brake9 Warning
Always apply parking brake firmly
without operating the release
button, and apply as firmly as
possible on a downhill or uphill
slope.
To release the parking brake, pull
the lever up slightly, press the
release button and fully lower the
lever.
To reduce the operating forces of
the parking brake, depress the
brake pedal at the same time.
Control indicator R 3 85.
Brake assist
If the brake pedal is depressed
quickly and forcefully, maximum
brake force is automatically applied
(full braking).
Maintain steady pressure on the
brake pedal for as long as full braking is required. Maximum brake force is
automatically reduced when the
brake pedal is released.
Hill start assist
The system helps prevent unintended movement when driving away on
inclines.
When releasing the brake pedal after
stopping on an incline, the brakes
remain on for a further two seconds.
The brakes release automatically as
soon as the vehicle begins to
accelerate or the two seconds holding
time is over.
The hill start assist is not active during
an Autostop.
Page 141 of 239
Driving and operating139Stop-start system 3 126.
Deactivation
Press B; LED in the button
extinguishes and a message pops-up in the Driver Information Centre.
Each time the engine is started, City
mode is deactivated.
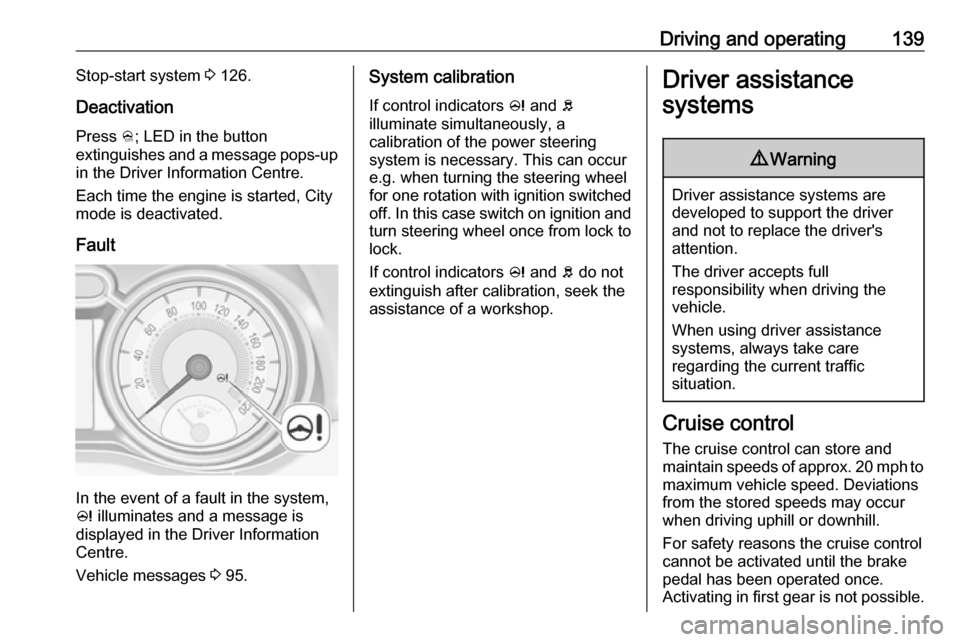
Fault
In the event of a fault in the system,
c illuminates and a message is
displayed in the Driver Information
Centre.
Vehicle messages 3 95.
System calibration
If control indicators c and b
illuminate simultaneously, a
calibration of the power steering
system is necessary. This can occur
e.g. when turning the steering wheel for one rotation with ignition switched
off. In this case switch on ignition and
turn steering wheel once from lock to
lock.
If control indicators c and b do not
extinguish after calibration, seek the
assistance of a workshop.Driver assistance
systems9 Warning
Driver assistance systems are
developed to support the driver
and not to replace the driver's
attention.
The driver accepts full
responsibility when driving the
vehicle.
When using driver assistance
systems, always take care
regarding the current traffic
situation.
Cruise control
The cruise control can store and
maintain speeds of approx. 20 mph to maximum vehicle speed. Deviations
from the stored speeds may occur
when driving uphill or downhill.
For safety reasons the cruise control
cannot be activated until the brake
pedal has been operated once.
Activating in first gear is not possible.
Page 151 of 239
Driving and operating149Select parallel or perpendicular
parking slot by tapping the respective
icon on the display.
Select parking side by tapping the
respective icon on the display.
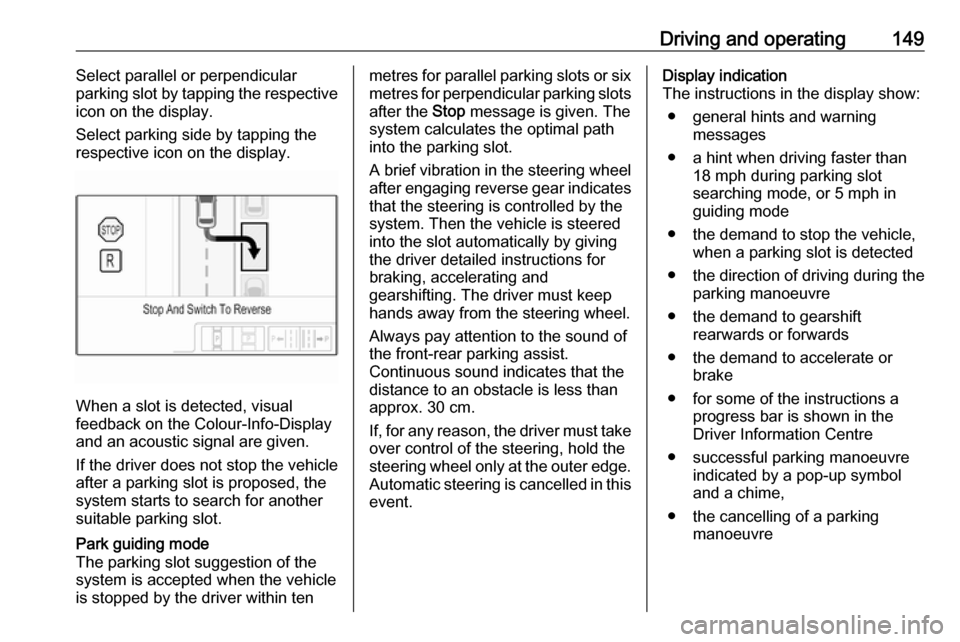
When a slot is detected, visual
feedback on the Colour-Info-Display and an acoustic signal are given.
If the driver does not stop the vehicle
after a parking slot is proposed, the
system starts to search for another
suitable parking slot.
Park guiding mode
The parking slot suggestion of the system is accepted when the vehicle
is stopped by the driver within tenmetres for parallel parking slots or six metres for perpendicular parking slots
after the Stop message is given. The
system calculates the optimal path
into the parking slot.
A brief vibration in the steering wheel
after engaging reverse gear indicates
that the steering is controlled by the system. Then the vehicle is steeredinto the slot automatically by giving
the driver detailed instructions for
braking, accelerating and
gearshifting. The driver must keep
hands away from the steering wheel.
Always pay attention to the sound of the front-rear parking assist.
Continuous sound indicates that the
distance to an obstacle is less than
approx. 30 cm.
If, for any reason, the driver must take over control of the steering, hold the
steering wheel only at the outer edge. Automatic steering is cancelled in thisevent.Display indication
The instructions in the display show:
● general hints and warning messages
● a hint when driving faster than 18 mph during parking slot
searching mode, or 5 mph in
guiding mode
● the demand to stop the vehicle, when a parking slot is detected
● the direction of driving during the
parking manoeuvre
● the demand to gearshift rearwards or forwards
● the demand to accelerate or brake
● for some of the instructions a progress bar is shown in the
Driver Information Centre
● successful parking manoeuvre indicated by a pop-up symbol
and a chime,
● the cancelling of a parking manoeuvre
Page 165 of 239
Vehicle care163If the bonnet is opened during an
Autostop, the engine will be restarted
automatically for safety reasons.
Closing Before closing the bonnet, press the
support into the holder.
Lower the bonnet and allow it to fall
into the latch from a low height
(20-25 cm). Check that the bonnet is
engaged.Caution
Do not press the bonnet into the
latch, to avoid dents.
Engine oil
Check the engine oil level manually
on a regular basis to prevent damage
to the engine. Ensure that the correct specification of oil is used.
Recommended fluids and lubricants
3 210.
The maximum engine oil
consumption is 0.6 l per 1000 km.
Check with the vehicle on a level
surface. The engine must be at
operating temperature and switched
off for at least five minutes.
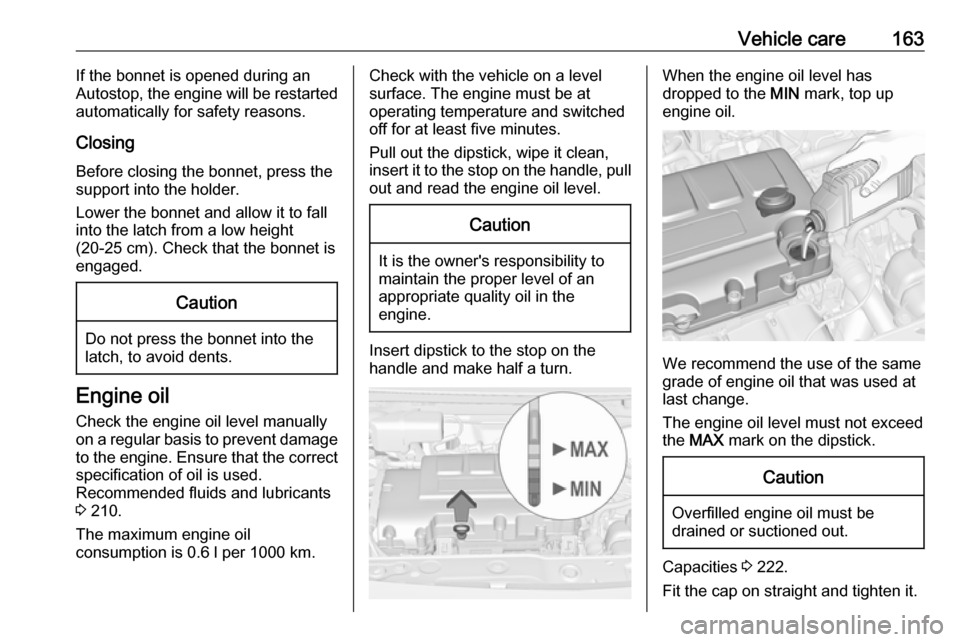
Pull out the dipstick, wipe it clean, insert it to the stop on the handle, pull
out and read the engine oil level.Caution
It is the owner's responsibility to
maintain the proper level of an
appropriate quality oil in the
engine.
Insert dipstick to the stop on the
handle and make half a turn.
When the engine oil level has
dropped to the MIN mark, top up
engine oil.
We recommend the use of the same
grade of engine oil that was used at
last change.
The engine oil level must not exceed
the MAX mark on the dipstick.
Caution
Overfilled engine oil must be
drained or suctioned out.
Capacities 3 222.
Fit the cap on straight and tighten it.
Page 168 of 239
166Vehicle careReplacing the vehicle batteryNotice
Any deviation from the instructions
given in this section may lead to
temporary deactivation of the stop-
start system.
When the vehicle battery is being
replaced, please ensure that there
are no open ventilation holes in the
vicinity of the positive terminal. If a
ventilation hole is open in this area, it
must be closed off with a dummy cap, and the ventilation in the vicinity of the
negative terminal must be opened.
Only use batteries that allow the fuse
box to be mounted above the vehicle
battery.
In vehicles with an AGM (Absorptive
Glass Mat) battery, make sure to
have the battery replaced with
another AGM battery.
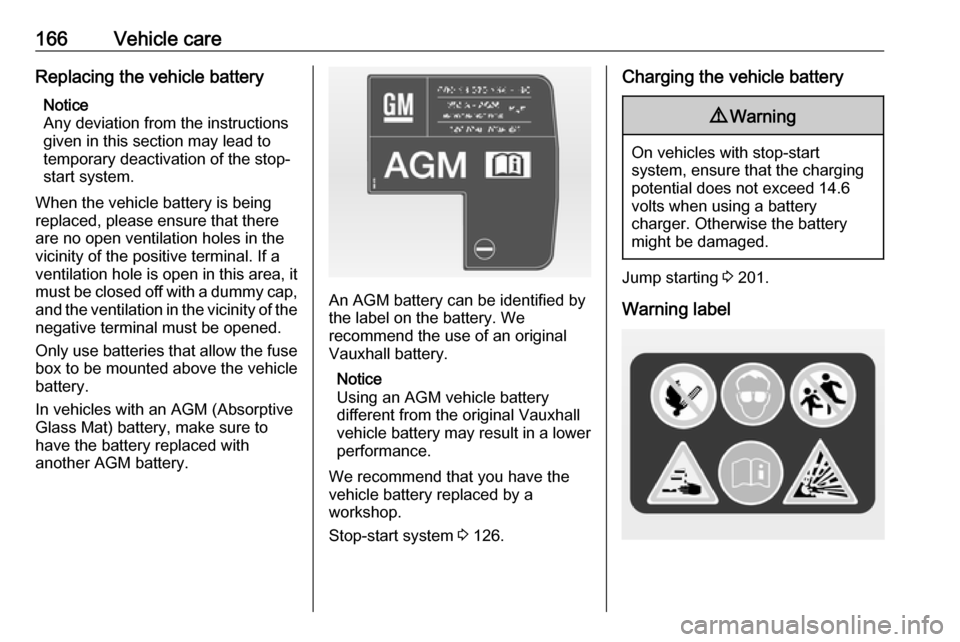
An AGM battery can be identified by the label on the battery. We
recommend the use of an original
Vauxhall battery.
Notice
Using an AGM vehicle battery
different from the original Vauxhall
vehicle battery may result in a lower performance.
We recommend that you have the
vehicle battery replaced by a
workshop.
Stop-start system 3 126.
Charging the vehicle battery9 Warning
On vehicles with stop-start
system, ensure that the charging potential does not exceed 14.6
volts when using a battery
charger. Otherwise the battery
might be damaged.
Jump starting 3 201.
Warning label
Page 189 of 239
Vehicle care187Each time the tyres are replaced, tyre
pressure monitoring system sensors
must be dismounted and serviced. For the screwed sensor; replace
valve core and sealing ring. For the
clipped sensor; replace complete
valve stem.
Vehicle loading status
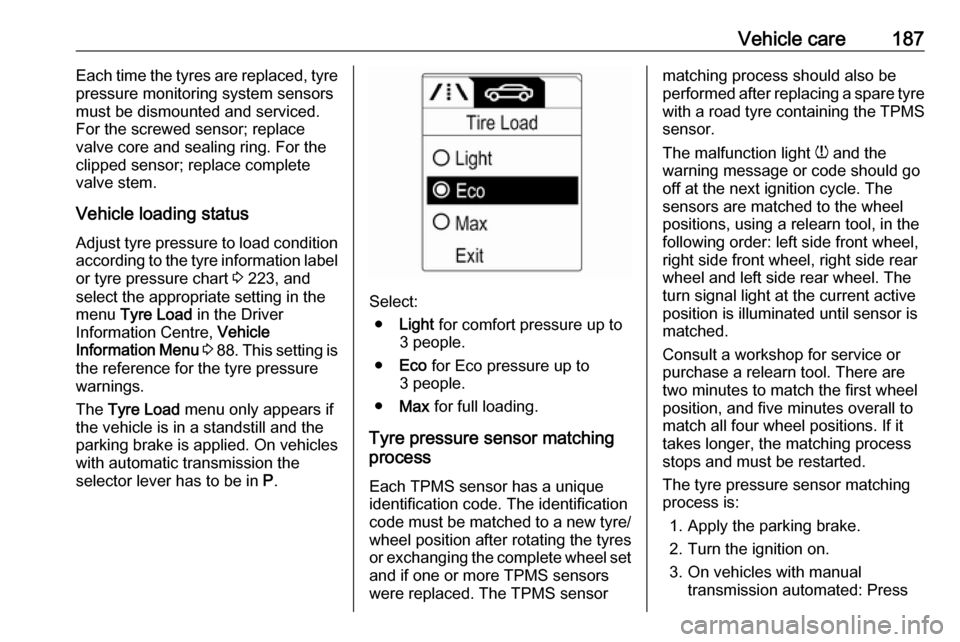
Adjust tyre pressure to load condition according to the tyre information labelor tyre pressure chart 3 223, and
select the appropriate setting in the menu Tyre Load in the Driver
Information Centre, Vehicle
Information Menu 3 88 . This setting is
the reference for the tyre pressure
warnings.
The Tyre Load menu only appears if
the vehicle is in a standstill and the
parking brake is applied. On vehicles
with automatic transmission the
selector lever has to be in P.
Select:
● Light for comfort pressure up to
3 people.
● Eco for Eco pressure up to
3 people.
● Max for full loading.
Tyre pressure sensor matching process
Each TPMS sensor has a unique
identification code. The identification
code must be matched to a new tyre/ wheel position after rotating the tyres
or exchanging the complete wheel set
and if one or more TPMS sensors
were replaced. The TPMS sensor
matching process should also be
performed after replacing a spare tyre with a road tyre containing the TPMS
sensor.
The malfunction light w and the
warning message or code should go off at the next ignition cycle. The
sensors are matched to the wheel
positions, using a relearn tool, in the following order: left side front wheel,
right side front wheel, right side rear
wheel and left side rear wheel. The
turn signal light at the current active
position is illuminated until sensor is
matched.
Consult a workshop for service or
purchase a relearn tool. There are
two minutes to match the first wheel
position, and five minutes overall to
match all four wheel positions. If it
takes longer, the matching process
stops and must be restarted.
The tyre pressure sensor matching
process is:
1. Apply the parking brake.
2. Turn the ignition on.
3. On vehicles with manual transmission automated: Press
Page 237 of 239

235Seat belt ........................................ 8
Seat belt reminder .......................83
Seat belts ..................................... 37
Seat folding .................................. 35
Seat heating ................................. 36
Seat position ................................ 33
Selector lever ............................. 131
Service ....................................... 122
Service display ............................ 80
Service information ....................209
Service vehicle soon .................... 85
Side airbag system ......................43
Side blind spot alert ....................151
Sidelights .................................... 105
Side turn signal lights ................175
Software acknowledgement .......227
Spare wheel ............................... 196
Speed limiter............................... 141
Speedometer ............................... 78
Starting and operating ................124
Starting off ................................... 16
Starting the engine ............125, 131
Steering ...................................... 124
Steering wheel adjustment ......9, 70
Steering wheel controls ...............70
Stop-start system........................ 126
Storage ......................................... 51
Storage compartments .................51
Sunroof ........................................ 31Sun visors .................................... 30
Symbols ......................................... 4
T
Tachometer ................................. 78
Tail lights ................................... 172
Three-point seat belt .................... 38
Tools .......................................... 182
Top-tether fastening eyes ............50
Towing ........................................ 202
Towing another vehicle .............204
Towing the vehicle .....................202
Traction Control system ............. 136
Transmission ............................... 16
Transmission display .................131
Tread depth ............................... 188
Trip odometer .............................. 78
Turn and lane-change signals ...108
Turn signal ................................... 83
Tyre chains ................................ 189
Tyre designations ......................183
Tyre pressure ............................ 184
Tyre pressure monitoring system ............................... 87, 185
Tyre pressures ........................... 223
Tyre repair kit ............................. 190
U Ultrasonic parking assist ...... 86, 142
Upholstery .................................. 207
Uplevel-Display............................. 88Upshift .......................................... 86
Using this manual ..........................3
V Vehicle battery ........................... 165
Vehicle checks............................ 162
Vehicle data ................................ 214
Vehicle data recording and privacy ..................................... 229
Vehicle dimensions .................... 221
Vehicle Identification Number ....212
Vehicle jack ................................ 182
Vehicle messages .......................95
Vehicle personalisation ...............98
Vehicle security ............................ 25
Vehicle specific data ......................3
Vehicle storage ........................... 161
Vehicle tools ............................... 182
Vehicle unlocking ........................... 6
Vehicle weight ........................... 220
Ventilation ................................... 113
W
Warning chimes ........................... 97
Warning lights ............................... 78
Warning triangle .......................... 66
Washer and wiper systems .........14
Washer fluid ............................... 164
Wheel changing .........................194
Wheel covers ............................. 189
Wheels and tyres .......................183