display VAUXHALL ADAM 2016.5 Workshop Manual
[x] Cancel search | Manufacturer: VAUXHALL, Model Year: 2016.5, Model line: ADAM, Model: VAUXHALL ADAM 2016.5Pages: 239, PDF Size: 7.2 MB
Page 146 of 239

144Driving and operatingThe front-rear parking assist
measures the distance between the vehicle and obstacles in front and
behind the vehicle. It informs and
warns the driver by giving acoustic
signals and display indication.
The system has six ultrasonic parking
sensors in both the rear and front
bumper.
It uses two different acoustic warning
signals for the front and rear
monitoring areas, each with a
different tone frequency.
Front-rear parking assist is always
combined with advanced parking
assist, see "Advanced parking assist" section below.
Parking assist button D and
operation logic
Front-rear parking assist and
advanced parking assist both use the same button for activation and
deactivation:
A brief press of D activates or
deactivates the parking assist.
A long press of D (approx.
one second) activates or deactivates
the advanced parking assist, see
separate description.
Button logic operates the systems by
pressing D as follows:
● If only front-rear parking assist is active, a brief press deactivates
front-rear parking assist.
● If only front-rear parking assist is active, a long press activates
advanced parking assist.
● If only advanced parking assist is
active and the system is in
parking slot searching mode, a
brief press activates front-rear
parking assist.
● If only advanced parking assist is
active and the system is in park
guiding mode, a brief press
deactivates advanced parking
assist.
● If advanced parking assist is active, a long press deactivates
advanced parking assist and front-rear parking assist.
Page 147 of 239

Driving and operating145● If a forward gear or neutral isselected, a brief press activates
or deactivates only front parking
assist.
● If reverse gear is selected, a brief
press activates or deactivates
front and rear parking assist.
Activation
The system is activated automatically
at a speed up to 7 mph.
An illuminated LED in the parking
assist button D indicates that the
system is ready to operate.
If D is switched off within an ignition
cycle, the front parking assist is
deactivated. If vehicle speed has
exceeded 15 mph beforehand,
parking assist will be reactivated when speed drops below 7 mph.
When the system is deactivated, the
LED in the button extinguishes and
Park Assist Off pops-up in the Driver
Information Centre.
Indication
The system warns the driver with
acoustic signals against potentially
hazardous obstacles in front of thevehicle in a distance range up to 80
cm and against potentially hazardous
obstacles behind the vehicle in a
distance range up to 1.5 metres.
Depending on which side of the
vehicle is closer to an obstacle, you
will hear acoustic warning signals in the vehicle on the respective side.
The interval between the sounds
becomes shorter as the vehicle gets
closer to that obstacle. When the
distance is less than approx. 30 cm,
the sound is continuous.
Additionally, the distance to obstacles is shown in the Driver Information
Centre 3 88 or, depending on the
version, on the Colour-Info-Display
3 93.
The distance to a front and rear
obstacle is displayed by changing
distance lines in the Driver
Information Centre.
The distance indication can be
inhibited by vehicle messages with a
higher priority. After dismissing the
message distance indication appears again.
Page 148 of 239

146Driving and operating
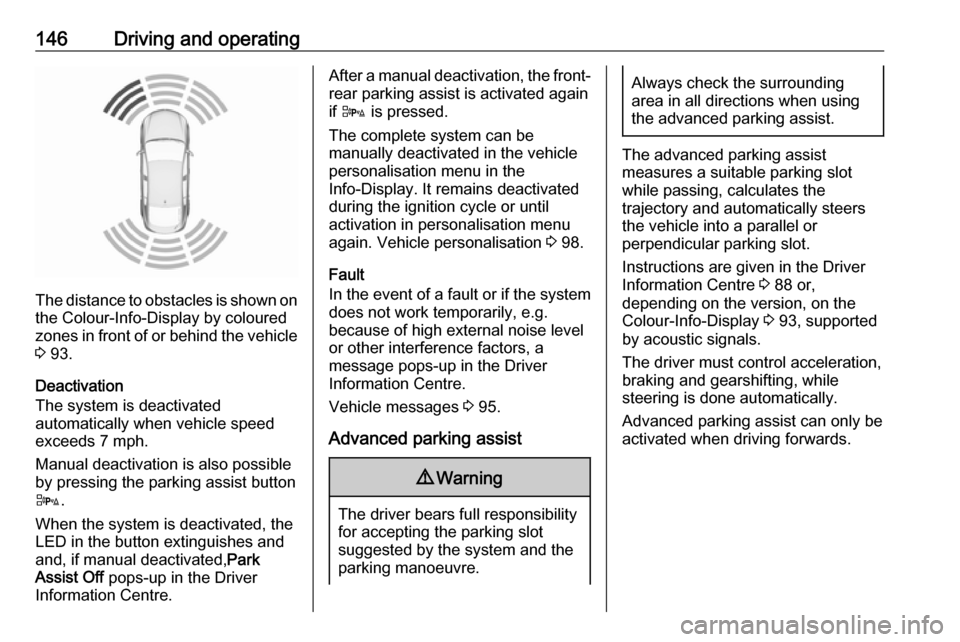
The distance to obstacles is shown onthe Colour-Info-Display by coloured
zones in front of or behind the vehicle
3 93.
Deactivation
The system is deactivated
automatically when vehicle speed
exceeds 7 mph.
Manual deactivation is also possible by pressing the parking assist button D .
When the system is deactivated, the
LED in the button extinguishes and
and, if manual deactivated, Park
Assist Off pops-up in the Driver
Information Centre.
After a manual deactivation, the front- rear parking assist is activated again
if D is pressed.
The complete system can be
manually deactivated in the vehicle
personalisation menu in the
Info-Display. It remains deactivated
during the ignition cycle or until
activation in personalisation menu
again. Vehicle personalisation 3 98.
Fault
In the event of a fault or if the system does not work temporarily, e.g.
because of high external noise level
or other interference factors, a
message pops-up in the Driver
Information Centre.
Vehicle messages 3 95.
Advanced parking assist9 Warning
The driver bears full responsibility
for accepting the parking slot
suggested by the system and the
parking manoeuvre.
Always check the surrounding
area in all directions when using
the advanced parking assist.
The advanced parking assist
measures a suitable parking slot
while passing, calculates the
trajectory and automatically steers
the vehicle into a parallel or
perpendicular parking slot.
Instructions are given in the Driver
Information Centre 3 88 or,
depending on the version, on the
Colour-Info-Display 3 93, supported
by acoustic signals.
The driver must control acceleration,
braking and gearshifting, while
steering is done automatically.
Advanced parking assist can only be activated when driving forwards.
Page 150 of 239

148Driving and operatingThe system can only be activated at
a speed up to 18 mph and the system searches for a parking slot at a speed
up to 18 mph.
The maximum allowed parallel
distance between the vehicle and a
row of parked cars is 1.8 metres for
parallel parking and 2.5 metres for
perpendicular parking.
FunctionalityParking slot searching mode
Indication in the Driver Information
Centre
Select parallel or perpendicular
parking slot in Driver Information
Centre by pressing SET/CLR.
The system is configured to detect parking slots by default on the
passenger side. To detect parking
slots on the driver side, switch on turn
signal indicator on the driver side.When a slot is detected, visual
feedback in the Driver Information
Centre and an acoustic signal are
given.
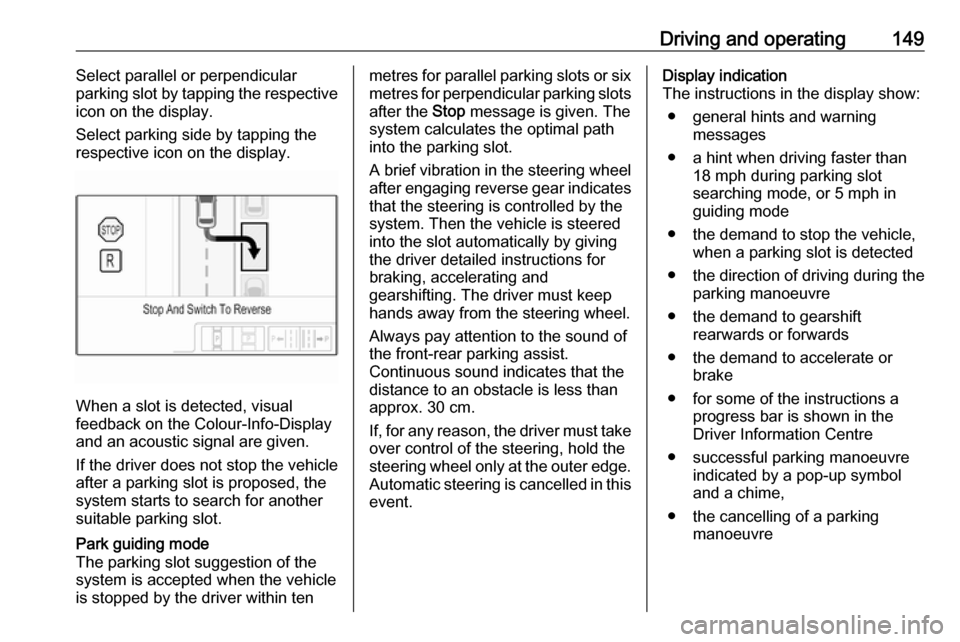
Indication in the Colour-Info-Display
Page 151 of 239

Driving and operating149Select parallel or perpendicular
parking slot by tapping the respective
icon on the display.
Select parking side by tapping the
respective icon on the display.
When a slot is detected, visual
feedback on the Colour-Info-Display and an acoustic signal are given.
If the driver does not stop the vehicle
after a parking slot is proposed, the
system starts to search for another
suitable parking slot.
Park guiding mode
The parking slot suggestion of the system is accepted when the vehicle
is stopped by the driver within tenmetres for parallel parking slots or six metres for perpendicular parking slots
after the Stop message is given. The
system calculates the optimal path
into the parking slot.
A brief vibration in the steering wheel
after engaging reverse gear indicates
that the steering is controlled by the system. Then the vehicle is steeredinto the slot automatically by giving
the driver detailed instructions for
braking, accelerating and
gearshifting. The driver must keep
hands away from the steering wheel.
Always pay attention to the sound of the front-rear parking assist.
Continuous sound indicates that the
distance to an obstacle is less than
approx. 30 cm.
If, for any reason, the driver must take over control of the steering, hold the
steering wheel only at the outer edge. Automatic steering is cancelled in thisevent.Display indication
The instructions in the display show:
● general hints and warning messages
● a hint when driving faster than 18 mph during parking slot
searching mode, or 5 mph in
guiding mode
● the demand to stop the vehicle, when a parking slot is detected
● the direction of driving during the
parking manoeuvre
● the demand to gearshift rearwards or forwards
● the demand to accelerate or brake
● for some of the instructions a progress bar is shown in the
Driver Information Centre
● successful parking manoeuvre indicated by a pop-up symbol
and a chime,
● the cancelling of a parking manoeuvre
Page 152 of 239

150Driving and operatingDisplay priorities
Advanced parking assist indication on the Driver Information Centre can beinhibited by vehicle messages with a
higher priority. After approving the
message by pressing SET/CLR on
the turn signal lever, advanced
parking assist instructions appear
again and the parking manoeuvre can
be continued.
Deactivation
The system is deactivated by:
● a long press of D
● parking manoeuvre successfully ended
● driving faster than 18 mph during
parking slot search
● driving faster than 5 mph during parking guidance
● driver interference on steering wheel detected
● exceeding the maximum number
of gear changes: eight parking
cycles when parallel parking or
five cycles when perpendicular
parking
● switching off the ignitionDeactivation by the driver or by the
system during manoeuvring will be indicated by Parking Deactivated on
the display. Additionally, an acoustic
signal sounds.
Fault
A message appears when:
● there is a fault in the system
● the driver did not successfully complete the parking manoeuvre
● the system is not operational
● any of the deactivation reasons described above apply
If an object is detected during parking instructions, Stop is indicated on the
display. Removing the object will
resume the parking manoeuvre. If the
object is not removed, the system will
be deactivated. A long press of D
will activate the system and search for
a new parking slot.Basic notes on parking assist
systems9 Warning
Under certain circumstances,
various reflective surfaces on
objects or clothing as well as
external noise sources may cause the system to fail to detect
obstacles.
Special attention must be paid to
low obstacles which can damage
the lower part of the bumper.
Caution
Performance of the system can be reduced when sensors are
covered, e.g. by ice or snow.
Performance of the parking assist
system can be reduced due to
heavy loading.
Special conditions apply if there
are taller vehicles in the vicinity
(e.g. off-road vehicles, mini vans,
vans). Object identification and
Page 154 of 239

152Driving and operatingWhen the system detects a vehicle inthe side blind zone while driving
forwards, either while passing a
vehicle or being passed, a yellow
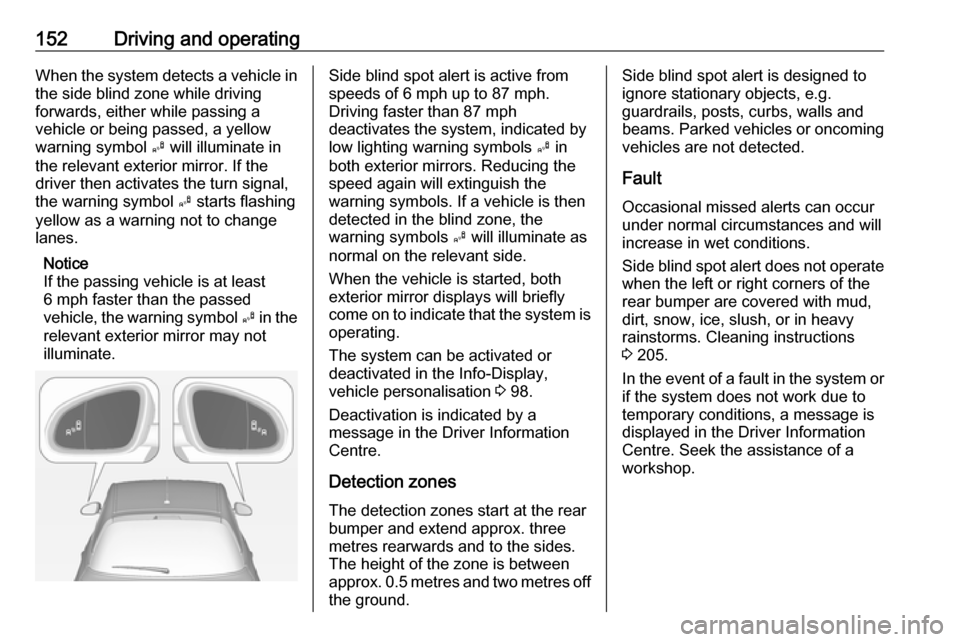
warning symbol B will illuminate in
the relevant exterior mirror. If the
driver then activates the turn signal,
the warning symbol B starts flashing
yellow as a warning not to change
lanes.
Notice
If the passing vehicle is at least
6 mph faster than the passed
vehicle, the warning symbol B in the
relevant exterior mirror may not
illuminate.Side blind spot alert is active from
speeds of 6 mph up to 87 mph.
Driving faster than 87 mph
deactivates the system, indicated by
low lighting warning symbols B in
both exterior mirrors. Reducing the speed again will extinguish the
warning symbols. If a vehicle is then
detected in the blind zone, the
warning symbols B will illuminate as
normal on the relevant side.
When the vehicle is started, both exterior mirror displays will briefly
come on to indicate that the system is operating.
The system can be activated or
deactivated in the Info-Display,
vehicle personalisation 3 98.
Deactivation is indicated by a
message in the Driver Information
Centre.
Detection zones The detection zones start at the rear
bumper and extend approx. three metres rearwards and to the sides.
The height of the zone is between
approx. 0.5 metres and two metres off
the ground.Side blind spot alert is designed to
ignore stationary objects, e.g.
guardrails, posts, curbs, walls and
beams. Parked vehicles or oncoming
vehicles are not detected.
Fault
Occasional missed alerts can occur under normal circumstances and will
increase in wet conditions.
Side blind spot alert does not operate when the left or right corners of the
rear bumper are covered with mud,
dirt, snow, ice, slush, or in heavy
rainstorms. Cleaning instructions
3 205.
In the event of a fault in the system or if the system does not work due to
temporary conditions, a message is
displayed in the Driver Information
Centre. Seek the assistance of a
workshop.
Page 156 of 239

154Driving and operatingPressing LPG switches between
petrol and liquid gas operation as
soon as the required parameters (coolant temperature, gas
temperature and minimum engine
speed) have been reached. The
requirements are usually fulfilled after
approx. 60 seconds (depending on
exterior temperature) and the first firm press on the accelerator. The LED
status shows the current operating
mode.LED off:petrol operationLED
flashes:checking conditions for
fuel transition to liquid
gas operation.
Illuminates if conditions
are fulfilled.LED illu‐
minates:liquid gas operationLED
flashes
five
times
and
extin‐
guishes:liquid gas tank is empty
or failure in liquid gas
system. A message is
displayed in the Driver
Information Centre.
If the fuel tank is empty, the engine
will not start.
The selected fuel mode is stored and reactivated at the next ignition cycle if
conditions allow.
As soon as the liquid gas tanks are
empty, petrol operation is
automatically engaged until the
ignition is switched off.
When switching automatically
between petrol or gas operation, a
brief delay of engine tractive power
may be noticeable.
Every six months, run the petrol tank
down until control indicator Y
illuminates, then refuel. This helps
maintain fuel quality and system
function for petrol operation.
Fill the tank completely at regular
intervals to prevent corrosion in the
tank.
Faults and remedies
If gas mode is not possible, check the following:
● Is there enough liquid gas present?
● Is there enough petrol present for
starting?Due to extreme temperatures in
combination with the gas
composition, it may take slightly
longer before the system switches
from petrol to gas mode.
In extreme situations, the system may
also switch back to petrol mode if the
minimum requirements are not
fulfilled. If conditions allow, it might be
possible to manually switch back to
liquid gas operation.
Seek the assistance of a workshop in the event of all other faults.Caution
Repairs and adjustments may onlybe made by trained specialists in
order to maintain the safety and
warranty on the LPG system.
Liquid gas is given a particular odour
(odorised) so that any leaks can be
detected easily.
Page 183 of 239

Vehicle care181No.Circuit1–2–3Power windows4Voltage transformer5Body control module 16Body control module 27Body control module 38Body control module 49Body control module 510Body control module 611Body control module 712Body control module 813–14Tailgate15Diagnostic connector16Data link connection17IgnitionNo.Circuit18Air conditioning system19Audio amplifier20Parking assist21Brake switch22Audio system23Display24–25Onstar26Instrument panel27Seat heating, driver28–29–30Instrument panel31Horn32Seat heating, passenger33Heated steering wheel34–No.Circuit35–36–37Rear wiper38Cigarette lighter39–40–
Page 187 of 239

Vehicle care185If the tyre pressure must be reduced
or increased, switch off ignition. After
adjusting tyre pressure switch on
ignition and select the relevant setting on the page Tyre load in the Driver
Information Centre 3 88.
Temperature dependency The tyre pressure depends on the
temperature of the tyre. During
driving, tyre temperature and
pressure increase. Tyre pressure
values provided on the tyre
information label and tyre pressure
chart are valid for cold tyres, which means at 20 °C.
The pressure increases by nearly
1.5 psi for a 10 °C temperature
increase. This must be considered
when warm tyres are checked.
The tyre pressure value displayed in
the Driver Information Centre shows
the real tyre pressure. A cooled down tyre will show a decreased value,
which does not indicate an air leak.Tyre pressure monitoring
system
The tyre pressure monitoring system
checks the pressure of all four tyres
once a minute when vehicle speed
exceeds a certain limit.Caution
Tyre pressure monitoring system
warns only about low tyre pressure condition and does not replace
regular tyre maintenance by the
driver.
All wheels must be equipped with pressure sensors and the tyres must
have the prescribed pressure.
Notice
In countries where the tyre pressure
monitoring system is legally
required, the use of wheels without
pressure sensors will invalidate the
vehicle type approval.
The current tyre pressures can be
shown in the Vehicle Information
Menu in the Driver Information
Centre.
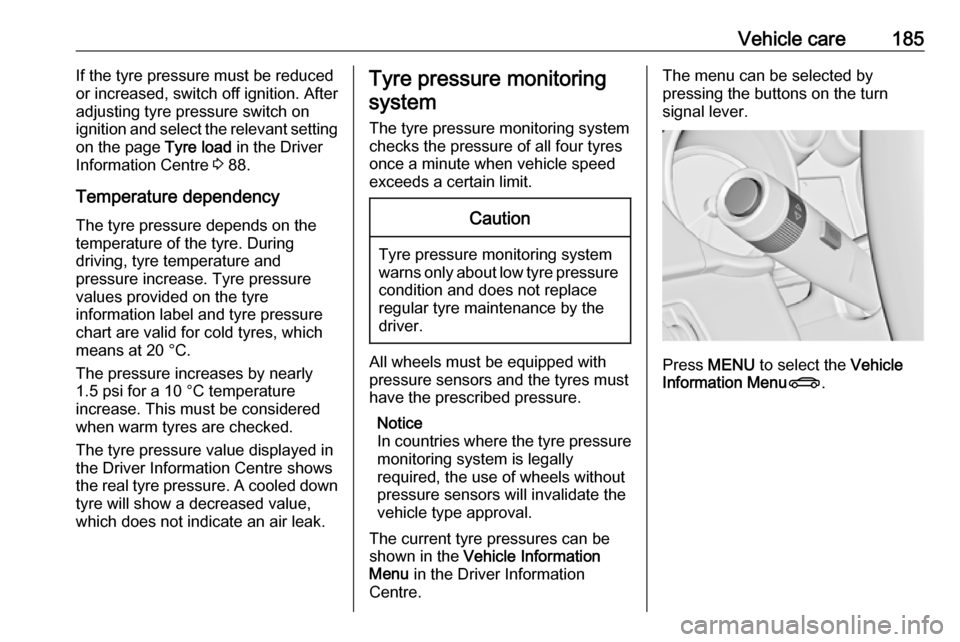
The menu can be selected by
pressing the buttons on the turn
signal lever.
Press MENU to select the Vehicle
Information Menu X.