winter tyres VAUXHALL ADAM 2016.5 Owner's Manual
[x] Cancel search | Manufacturer: VAUXHALL, Model Year: 2016.5, Model line: ADAM, Model: VAUXHALL ADAM 2016.5Pages: 239, PDF Size: 7.2 MB
Page 98 of 239

96Instruments and controlsNo.Vehicle message9Turn steering wheel, start
engine again12Vehicle overloaded13Compressor overheated15Centre high-mounted brake
light failure16Brake light failure17Headlight levelling malfunction18Left low beam failure19Rear fog light failure20Right low beam failure21Left sidelight failure22Right sidelight failure23Reversing light failure24Number plate light failure25Left front turn signal failure26Left rear turn signal failure27Right front turn signal failureNo.Vehicle message28Right rear turn signal failure35Replace battery in radio remote
control48Clean side blind spot alert
system53Tighten fuel filler cap56Tyre pressure imbalance on
front axle57Tyre pressure imbalance on
rear axle58Winter tyres detection59Open then close driver window60Open then close front
passenger window66Service theft alarm system67Service steering wheel lock68Service power steering75Service air conditioningNo.Vehicle message76Service side blind spot alert
system79Top up engine oil82Change engine oil soon84Engine power reduced89Service vehicle soon95Service airbag128Bonnet open134Parking assist fault, clean
bumper136Service parking assist174Low vehicle battery151Press clutch to start258Parking assist off
Page 162 of 239

160Vehicle careVehicle careGeneral Information...................160
Accessories and vehicle modifications .......................... 160
Vehicle storage ........................161
End-of-life vehicle recovery .....161
Vehicle checks ........................... 162
Performing work ......................162
Bonnet ..................................... 162
Engine oil ................................. 163
Engine coolant ......................... 164
Washer fluid ............................ 164
Brakes ..................................... 165
Brake fluid ............................... 165
Vehicle battery ......................... 165
Wiper blade replacement ........167
Bulb replacement .......................168
Halogen headlights ..................168
Front turn signal lights .............170
Tail lights ................................. 172
Side turn signal lights ..............175
Number plate light ...................175
Interior lights ............................ 176
Instrument panel illumination ...176
Electrical system ........................177
Fuses ....................................... 177Engine compartment fuse box . 178
Instrument panel fuse box .......180
Vehicle tools .............................. 182
Tools ........................................ 182
Wheels and tyres .......................183
Winter tyres ............................. 183
Tyre designations ....................183
Tyre pressure .......................... 184
Tyre pressure monitoring system .................................... 185
Tread depth ............................. 188
Changing tyre and wheel size . 189
Wheel covers ........................... 189
Tyre chains .............................. 189
Tyre repair kit .......................... 190
Wheel changing .......................194
Spare wheel ............................ 196
Jump starting ............................. 201
Towing ....................................... 202
Towing the vehicle ...................202
Towing another vehicle ...........204
Appearance care .......................205
Exterior care ............................ 205
Interior care ............................. 207General Information
Accessories and vehicle modifications
We recommend the use of genuine
parts and accessories and factory approved parts specific for your
vehicle type. We cannot assess or guarantee reliability of other products
- even if they have a regulatory or
otherwise granted approval.
Do not make any modifications to the
electrical system, e.g. changes of
electronic control units (chip tuning).Caution
When transporting the vehicle on
a train or on a recovery vehicle, the
mud flaps might be damaged.
Page 185 of 239
Vehicle care183On version with subwoofer box, the
tools and the towing eye are located
together with the tyre repair kit and
the warning triangle in the box below
the floor cover. To gain access,
remove floor cover: fold rear part to
the front and pull out the cover to the
rear 3 64.
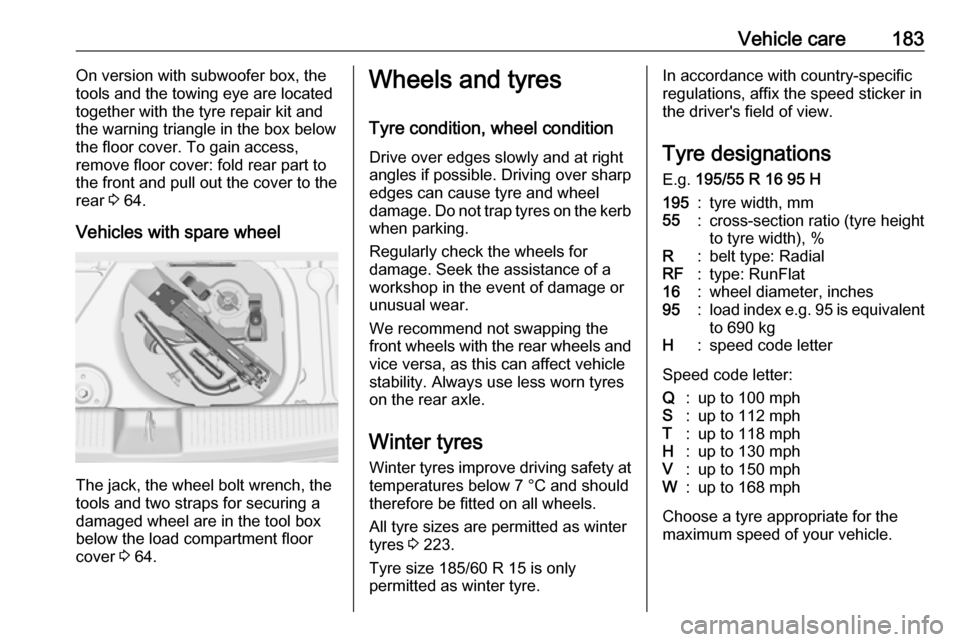
Vehicles with spare wheel
The jack, the wheel bolt wrench, the
tools and two straps for securing a
damaged wheel are in the tool box
below the load compartment floor
cover 3 64.
Wheels and tyres
Tyre condition, wheel condition Drive over edges slowly and at right
angles if possible. Driving over sharp
edges can cause tyre and wheel
damage. Do not trap tyres on the kerb when parking.
Regularly check the wheels for
damage. Seek the assistance of a
workshop in the event of damage or
unusual wear.
We recommend not swapping the
front wheels with the rear wheels and vice versa, as this can affect vehicle
stability. Always use less worn tyres
on the rear axle.
Winter tyres
Winter tyres improve driving safety at temperatures below 7 °C and should
therefore be fitted on all wheels.
All tyre sizes are permitted as winter
tyres 3 223.
Tyre size 185/60 R 15 is only
permitted as winter tyre.In accordance with country-specific
regulations, affix the speed sticker in
the driver's field of view.
Tyre designations
E.g. 195/55 R 16 95 H195:tyre width, mm55:cross-section ratio (tyre height
to tyre width), %R:belt type: RadialRF:type: RunFlat16:wheel diameter, inches95:load index e.g. 95 is equivalent
to 690 kgH:speed code letter
Speed code letter:
Q:up to 100 mphS:up to 112 mphT:up to 118 mphH:up to 130 mphV:up to 150 mphW:up to 168 mph
Choose a tyre appropriate for the
maximum speed of your vehicle.
Page 186 of 239
184Vehicle careThe maximum speed is achievable atkerb weight with driver (75 kg) plus
125 kg payload. Optional equipment
could reduce the maximum speed of
the vehicle.
Performance 3 219.
Directional tyres
Directional tyres must be mounted so that they rotate in the correct
direction. The proper rotation
direction is indicated by a symbol
(e.g. an arrow) on the sidewall.
Tyre pressure
Check the pressure of cold tyres at
least every 14 days and before any
long journey. Do not forget the spare
wheel.
This also applies to vehicles with tyre
pressure monitoring system.
Unscrew the valve cap.
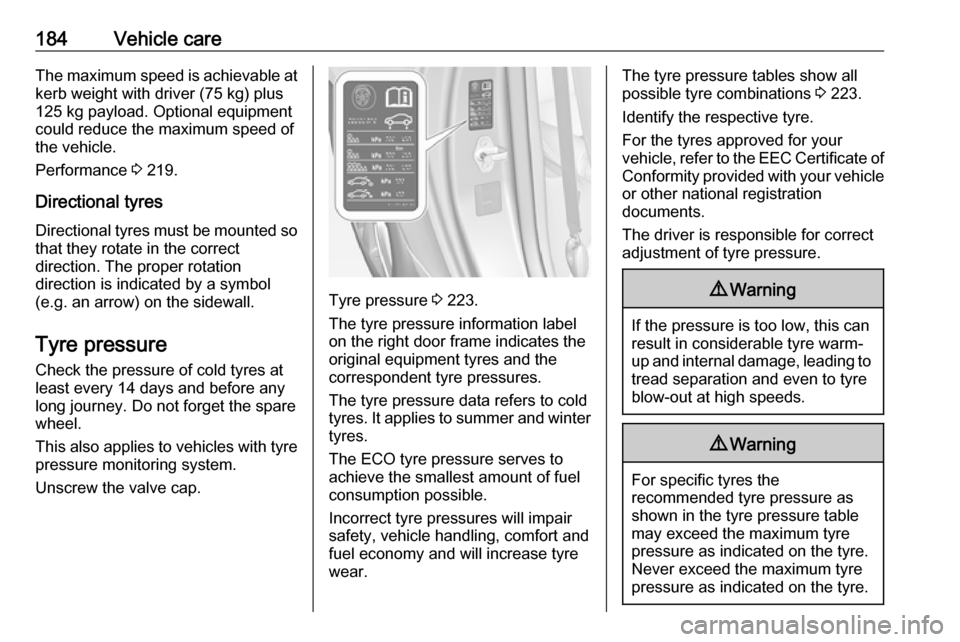
Tyre pressure 3 223.
The tyre pressure information label
on the right door frame indicates the
original equipment tyres and the
correspondent tyre pressures.
The tyre pressure data refers to cold
tyres. It applies to summer and winter tyres.
The ECO tyre pressure serves to
achieve the smallest amount of fuel
consumption possible.
Incorrect tyre pressures will impair
safety, vehicle handling, comfort and fuel economy and will increase tyre
wear.
The tyre pressure tables show all
possible tyre combinations 3 223.
Identify the respective tyre.
For the tyres approved for your
vehicle, refer to the EEC Certificate of Conformity provided with your vehicle
or other national registration
documents.
The driver is responsible for correct
adjustment of tyre pressure.9 Warning
If the pressure is too low, this can
result in considerable tyre warm-
up and internal damage, leading to tread separation and even to tyre
blow-out at high speeds.
9 Warning
For specific tyres the
recommended tyre pressure as
shown in the tyre pressure table
may exceed the maximum tyre
pressure as indicated on the tyre.
Never exceed the maximum tyre
pressure as indicated on the tyre.
Page 190 of 239
188Vehicle careand hold brake pedal. Move and
hold the selector lever for five
seconds in position N until P is
displayed in the Driver Information Centre. P indicates
that the sensor matching process
can be started.
On vehicles with manual
transmission: select neutral.
4. Use MENU on the turn signal
lever to select the Vehicle
Information Menu in the Driver
Information Centre.
5. Turn the adjuster wheel to scroll to
the tyre pressure menu.
6. Press SET/CLR to begin the
sensor matching process. A
message requesting acceptance
of the process should be
displayed.
7. Press SET/CLR again to confirm
the selection. The horn sounds
twice to indicate that the receiver
is in relearn mode.
8. Start with the left side front wheel.
9. Place the relearn tool against the tyre sidewall, near the valve stem.Then press the button to activatethe tyre pressure sensor. A horn
chirp confirms that the sensor
identification code has been
matched to this wheel position.
10. Proceed to the right side front wheel, and repeat the procedure
in Step 9.
11. Proceed to the right side rear wheel, and repeat the procedure
in Step 9.
12. Proceed to the left side rear wheel, and repeat the procedure
in Step 9. The horn sounds twice
to indicate that the sensor
identification code has been
matched to the left side rear
wheel, and the tyre pressure
sensor matching process is no
longer active.
13. Turn off the ignition.
14. Set all four tyres to the recommended air pressure level
as indicated on the tyre
information label.
15. Ensure the tyre loading status is set according to the selected
pressure 3 88.Tread depth
Check tread depth at regular
intervals.
Tyres should be replaced for safety
reasons at a tread depth of 2-3 mm (4 mm for winter tyres).
For safety reasons it is recommended
that the tread depth of the tyres on
one axle should not vary by more than 2 mm.
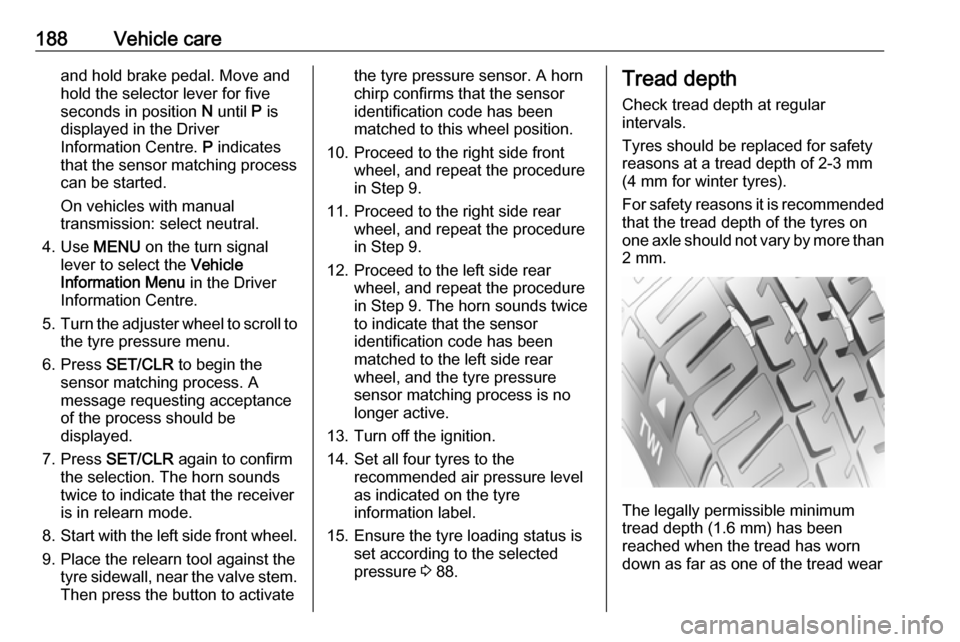
The legally permissible minimum
tread depth (1.6 mm) has been
reached when the tread has worn
down as far as one of the tread wear
Page 199 of 239
Vehicle care197Caution
The use of a spare wheel that issmaller than the other wheels or in combination with winter tyres
could affect driveability. Have the defective tyre replaced as soon as
possible.
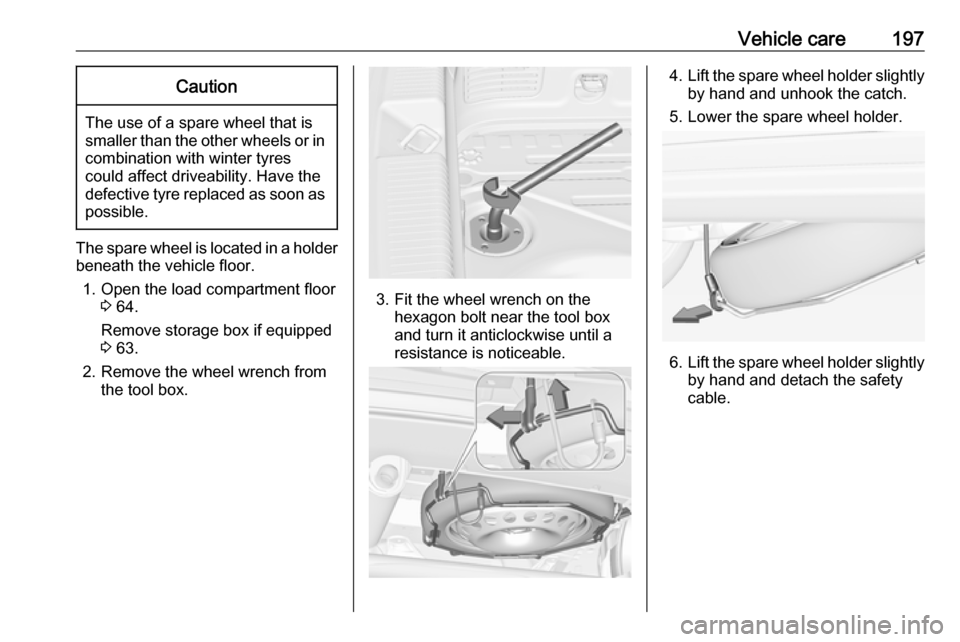
The spare wheel is located in a holder
beneath the vehicle floor.
1. Open the load compartment floor 3 64.
Remove storage box if equipped
3 63.
2. Remove the wheel wrench from the tool box.
3. Fit the wheel wrench on the hexagon bolt near the tool box
and turn it anticlockwise until a
resistance is noticeable.
4. Lift the spare wheel holder slightly
by hand and unhook the catch.
5. Lower the spare wheel holder.
6. Lift the spare wheel holder slightly
by hand and detach the safety
cable.
Page 209 of 239
Vehicle care207Glass panelNever clean with solvents or abrasive
agents, fuels, aggressive media
(e.g. paint cleaner, acetone-
containing solutions etc.), acidic or
highly alkaline media or abrasive
pads. Do not apply wax or polishing
agents to the glass panel.
Wheels and tyres Do not use high-pressure jet
cleaners.
Clean rims with a pH-neutral wheel
cleaner.
Rims are painted and can be treated
with the same agents as the body.
Paintwork damage
Rectify minor paintwork damage with
a touch-up pen before rust forms.
Have more extensive damage or rust areas repaired by a workshop.
Underbody Some areas of the vehicle underbody
have a PVC undercoating while other
critical areas have a durable
protective wax coating.After the underbody is washed, check
the underbody and have it waxed if
necessary.
Bitumen/rubber materials could
damage the PVC coating. Have
underbody work carried out by a
workshop.
Before and after winter, wash the
underbody and have the protective
wax coating checked.
Liquid gas system9 Danger
Liquid gas is heavier than air and
can collect in sink points.
Take care when performing work
at the underbody in a pit.
For painting work and when using a
drying booth at a temperature above
60 °C, the liquid gas tank must be
removed.
Do not make any modifications to the
liquid gas system.
Rear carrier system
Clean the rear carrier system with a
steam-jet or high-pressure jet cleaner
at least once a year.
Operate the rear carrier system
periodically if not in regular use, in
particular during winter.
Interior care
Interior and upholstery
Only clean the vehicle interior,
including the instrument panel fascia
and panelling, with a dry cloth or
interior cleaner.
Clean the leather upholstery with
clear water and a soft cloth. In case of heavy soiling, use leather care.
The instrument cluster and the
displays should only be cleaned using
a soft damp cloth. If necessary use a
weak soap solution.
Clean fabric upholstery with a
vacuum cleaner and brush. Remove
stains with an upholstery cleaner.
Page 238 of 239

236Windows....................................... 29
Windscreen................................... 29
Windscreen wiper/washer ...........71
Winter tyres ............................... 183
Wiper blade replacement ..........167