ignition VAUXHALL ADAM 2017.5 Owner's Manual
[x] Cancel search | Manufacturer: VAUXHALL, Model Year: 2017.5, Model line: ADAM, Model: VAUXHALL ADAM 2017.5Pages: 241, PDF Size: 7.33 MB
Page 11 of 241
In brief9Exterior mirrors
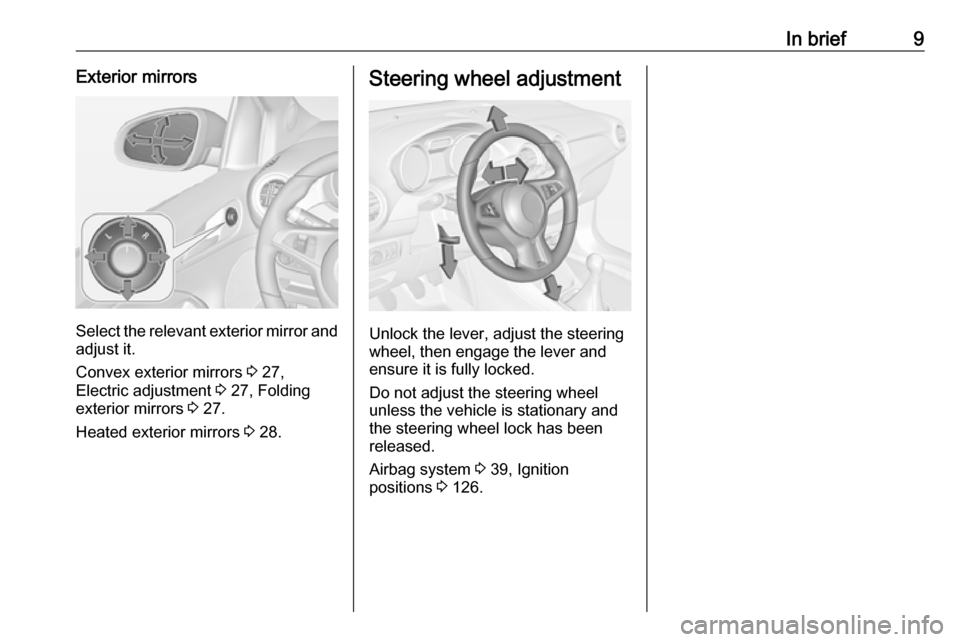
Select the relevant exterior mirror andadjust it.
Convex exterior mirrors 3 27,
Electric adjustment 3 27, Folding
exterior mirrors 3 27.
Heated exterior mirrors 3 28.
Steering wheel adjustment
Unlock the lever, adjust the steering
wheel, then engage the lever and
ensure it is fully locked.
Do not adjust the steering wheel
unless the vehicle is stationary and the steering wheel lock has been
released.
Airbag system 3 39, Ignition
positions 3 126.
Page 13 of 241

In brief111Power windows .....................29
2 Exterior mirrors .....................27
3 Cruise control .....................142
Speed limiter ....................... 143
4 Side air vents ...................... 123
5 Turn and lane-change
signals, headlight flash,
low beam and high beam ....110
Exit lighting ......................... 113
Parking lights ...................... 110
Buttons for Driver
Information Centre ................89
6 Instruments .......................... 78
7 Steering wheel controls .......71
8 Driver Information Centre ...... 89
9 Windscreen wiper,
windscreen washer
system, headlight washer
system, rear wiper, rear
washer system ......................72
10 Central locking system ..........22
City mode ............................ 140
Fuel selector ......................... 80Eco button for stop-start
system ................................. 128
Traction Control system .....138
Electronic Stability Control . 139
Parking assist ..................... 145
Seat heating .......................... 36
Heated steering wheel ..........71
11 Colour-Info-Display ..............94
Graphic-Info-Display .............95
12 Hazard warning flashers ....109
Control indicator for airbag
deactivation .......................... 85
Control indicator for front
passenger seat belt .............84
13 Anti-theft alarm system
status LED ........................... 25
14 Centre air vents .................. 123
15 Side air vents passenger
side ..................................... 123
16 Glovebox .............................. 51
Fuse box ............................ 183
17 Climate control system ........ 115
18 Power outlet .......................... 7719AUX input, USB input ...........10
20 Selector lever,
transmission ....................... 132
21 Parking brake ......................137
22 Ignition switch with
steering wheel lock ............126
23 Horn ..................................... 72
Driver airbag ........................ 42
24 Bonnet release lever ..........165
25 Steering wheel adjustment ..71
26 Light switch ........................ 107
Headlight range
adjustment ......................... 109
Rear fog light ...................... 110
Brightness of instrument
panel illumination ................111
Brightness of ambient light 111
Page 20 of 241

18In briefParking9Warning
● Do not park the vehicle on an
easily ignitable surface. The
high temperature of the
exhaust system could ignite the
surface.
● Always apply the parking brake. Activate the parking
brake without pressing the
release button. Apply as firmly
as possible on a downhill slope
or uphill slope. Depress brake
pedal at the same time to
reduce operating force.
● Switch off the engine.
● If the vehicle is on a level surface or uphill slope, engage
first gear before removing the ignition key. On an uphill slope, turn the front wheels away from
the kerb.
If the vehicle is on a downhill
slope, engage reverse gear
before removing the ignition
key. Turn the front wheels
towards the kerb.
● Close the windows and the sunroof.
● Remove the ignition key from the ignition switch. Turn the
steering wheel until the
steering wheel lock is felt to
engage.
For vehicles with manual
transmission automated, the key can only be removed from
the ignition switch when the
parking brake is applied.
● Lock the vehicle by pressing e on
the radio remote control.
Activate the anti-theft alarm
system 3 25.
● The engine cooling fans may run
after the engine has been
switched off 3 165.
Caution
After running at high engine
speeds or with high engine loads,
operate the engine briefly at a low load or run in neutral for
approx. 30 seconds before
switching off, in order to protect
the turbocharger.
Keys, locks 3 19, Laying-up the
vehicle for a long period of time
3 164.
Page 21 of 241

Keys, doors and windows19Keys, doors and
windowsKeys, locks ................................... 19
Keys .......................................... 19
Car Pass .................................... 20
Radio remote control .................20
Memorised settings ...................21
Central locking system ..............22
Automatic locking ......................23
Doors ........................................... 24
Load compartment ....................24
Vehicle security ............................ 25
Anti-theft locking system ...........25
Anti-theft alarm system ..............25
Immobiliser ................................ 26
Exterior mirrors ............................ 27
Convex shape ........................... 27
Electric adjustment ....................27
Folding mirrors .......................... 27
Heated mirrors ........................... 28
Interior mirrors ............................. 28
Manual anti-dazzle ....................28
Automatic anti-dazzle ................28
Windows ...................................... 29
Windscreen ............................... 29Power windows......................... 29
Heated rear window ..................30
Sun visors .................................. 30
Roof ............................................. 31
Sunroof ...................................... 31
Glass panel ............................... 31Keys, locks
KeysCaution
Do not attach heavy or bulky items to the ignition key.
Replacement keys
The key number is specified in the
Car Pass or on a detachable tag.
The key number must be quoted
when ordering replacement keys as it
is a component of the immobiliser
system.
Locks 3 208.
The code number of the adapter for
the locking wheel bolts is specified on a card. It must be quoted when
ordering a replacement adapter.
Wheel changing 3 197.
Page 23 of 241
Keys, doors and windows21Basic settingsSome settings can be changed in theInfo-Display.
Vehicle personalisation 3 99.
Radio remote control battery
replacement
Replace the battery as soon as the
range reduces.
Batteries do not belong in household
waste. They must be disposed of at
an appropriate recycling collection
point.
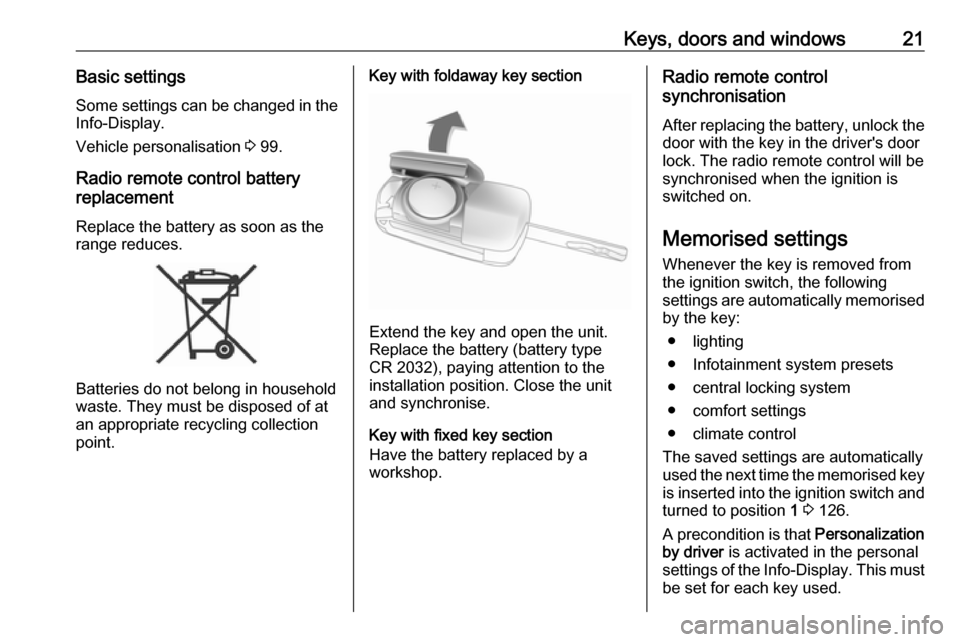
Key with foldaway key section
Extend the key and open the unit.
Replace the battery (battery type CR 2032), paying attention to the
installation position. Close the unit
and synchronise.
Key with fixed key section
Have the battery replaced by a
workshop.
Radio remote control
synchronisation
After replacing the battery, unlock the
door with the key in the driver's door
lock. The radio remote control will be
synchronised when the ignition is
switched on.
Memorised settings Whenever the key is removed from
the ignition switch, the following
settings are automatically memorised by the key:
● lighting
● Infotainment system presets
● central locking system
● comfort settings
● climate control
The saved settings are automatically
used the next time the memorised key
is inserted into the ignition switch and
turned to position 1 3 126.
A precondition is that Personalization
by driver is activated in the personal
settings of the Info-Display. This must
be set for each key used.
Page 25 of 241
Keys, doors and windows23
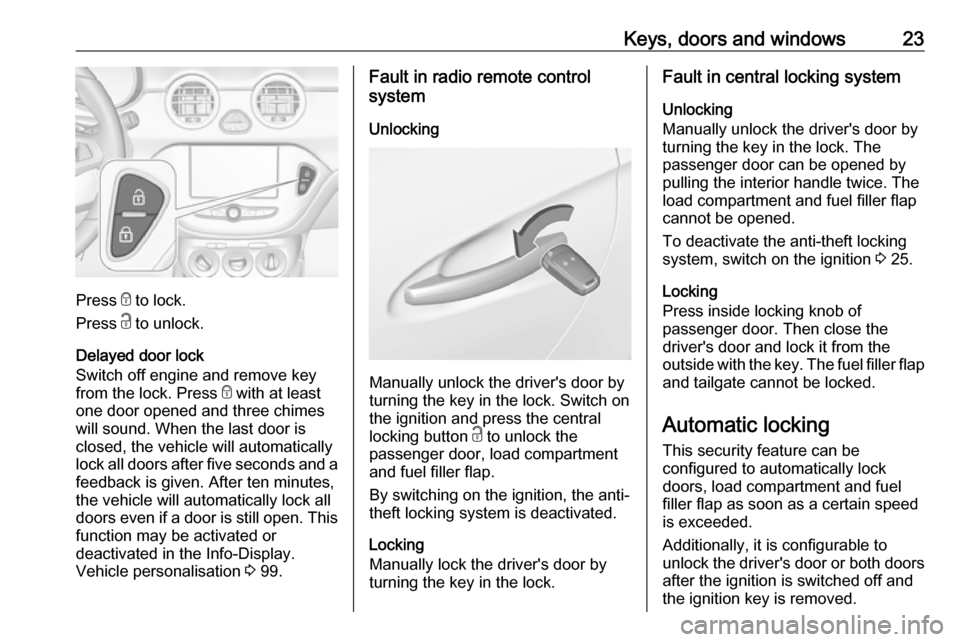
Press e to lock.
Press c to unlock.
Delayed door lock
Switch off engine and remove key from the lock. Press e with at least
one door opened and three chimes
will sound. When the last door is
closed, the vehicle will automatically
lock all doors after five seconds and a feedback is given. After ten minutes,
the vehicle will automatically lock all
doors even if a door is still open. This
function may be activated or
deactivated in the Info-Display.
Vehicle personalisation 3 99.
Fault in radio remote control
system
Unlocking
Manually unlock the driver's door by
turning the key in the lock. Switch on
the ignition and press the central
locking button c to unlock the
passenger door, load compartment and fuel filler flap.
By switching on the ignition, the anti-
theft locking system is deactivated.
Locking
Manually lock the driver's door by
turning the key in the lock.
Fault in central locking system
Unlocking
Manually unlock the driver's door by
turning the key in the lock. The
passenger door can be opened by
pulling the interior handle twice. The
load compartment and fuel filler flap
cannot be opened.
To deactivate the anti-theft locking system, switch on the ignition 3 25.
Locking
Press inside locking knob of
passenger door. Then close the
driver's door and lock it from the
outside with the key. The fuel filler flap
and tailgate cannot be locked.
Automatic locking
This security feature can be
configured to automatically lock
doors, load compartment and fuel
filler flap as soon as a certain speed
is exceeded.
Additionally, it is configurable to
unlock the driver's door or both doors after the ignition is switched off and
the ignition key is removed.
Page 27 of 241
Keys, doors and windows25gases, which cannot be seen or
smelled, could enter the vehicle.
This can cause unconsciousness
and even death.Caution
Before opening the tailgate, check overhead obstructions, e.g. a
garage door, to avoid damage to
the tailgate. Always check the
moving area above and behind the
tailgate.
Notice
The installation of certain heavy
accessories onto the tailgate may
affect its ability to remain open.
Vehicle security
Anti-theft locking system9 Warning
Do not use the system if there are
people in the vehicle! The doorscannot be unlocked from the
inside.
The system deadlocks all the doors. All doors must be closed otherwise
the system cannot be activated.
If the ignition was on, the driver's door
must be opened and closed once so
that the vehicle can be secured.
Unlocking the vehicle disables the
mechanical anti-theft locking system.
This is not possible with the central
locking button in the passenger
compartment.
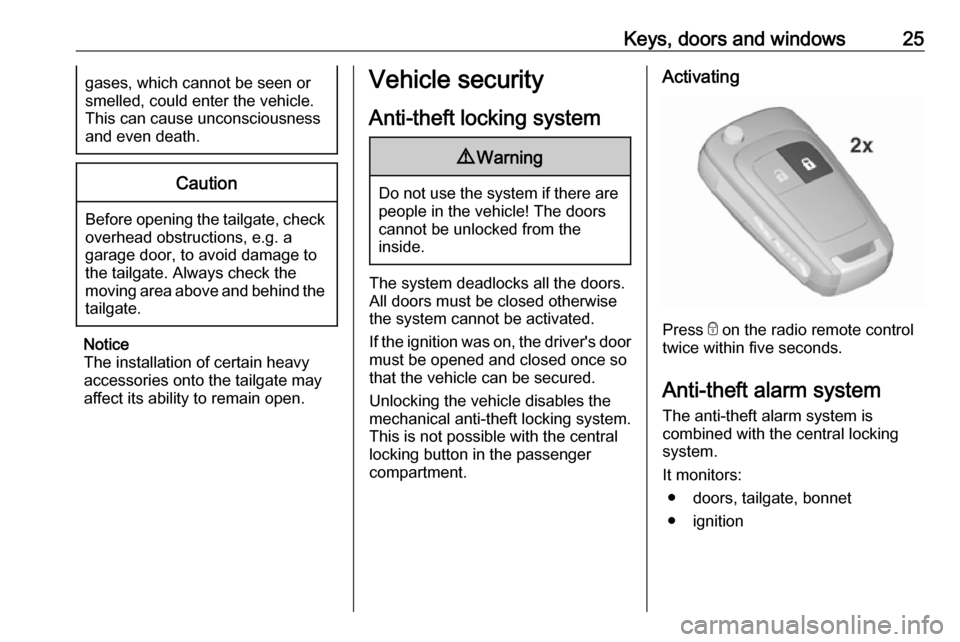
Activating
Press e on the radio remote control
twice within five seconds.
Anti-theft alarm system
The anti-theft alarm system is
combined with the central locking
system.
It monitors: ● doors, tailgate, bonnet
● ignition
Page 28 of 241
26Keys, doors and windowsActivation● Self-activated 30 seconds after locking the vehicle by pressing e
once.
● Directly by pressing e twice
within five seconds.
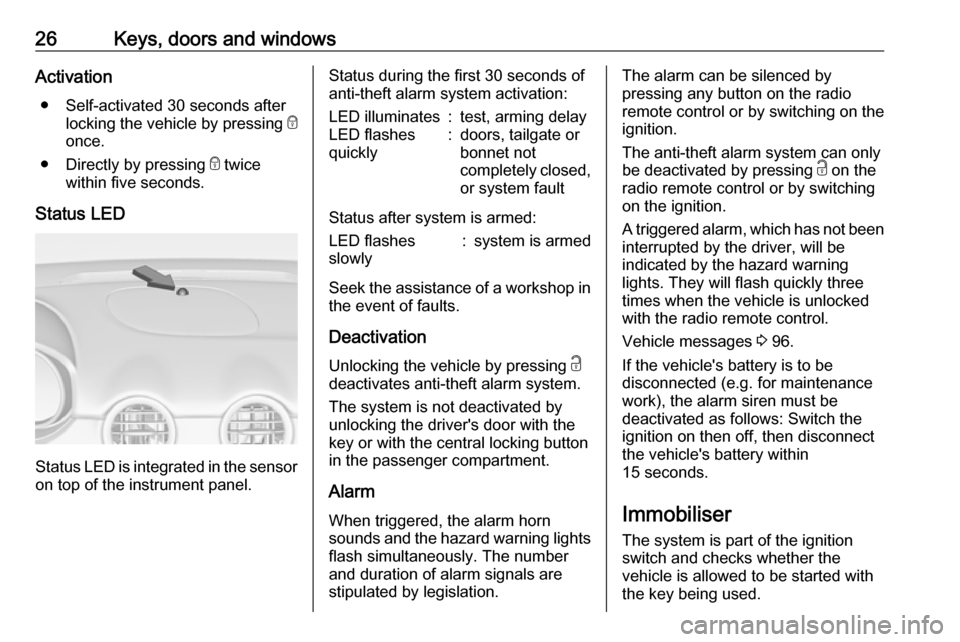
Status LED
Status LED is integrated in the sensor
on top of the instrument panel.
Status during the first 30 seconds of
anti-theft alarm system activation:LED illuminates:test, arming delayLED flashes
quickly:doors, tailgate or
bonnet not
completely closed,
or system fault
Status after system is armed:
LED flashes
slowly:system is armed
Seek the assistance of a workshop in the event of faults.
Deactivation Unlocking the vehicle by pressing c
deactivates anti-theft alarm system.
The system is not deactivated by
unlocking the driver's door with the
key or with the central locking button
in the passenger compartment.
Alarm When triggered, the alarm horn
sounds and the hazard warning lights
flash simultaneously. The number
and duration of alarm signals are
stipulated by legislation.
The alarm can be silenced by
pressing any button on the radio
remote control or by switching on the
ignition.
The anti-theft alarm system can only
be deactivated by pressing c on the
radio remote control or by switching
on the ignition.
A triggered alarm, which has not been interrupted by the driver, will be
indicated by the hazard warning
lights. They will flash quickly three
times when the vehicle is unlocked
with the radio remote control.
Vehicle messages 3 96.
If the vehicle's battery is to be
disconnected (e.g. for maintenance
work), the alarm siren must be
deactivated as follows: Switch the
ignition on then off, then disconnect
the vehicle's battery within
15 seconds.
Immobiliser The system is part of the ignition
switch and checks whether the
vehicle is allowed to be started with
the key being used.
Page 29 of 241
Keys, doors and windows27The immobiliser is activated
automatically after the key has been removed from the ignition switch.
If the control indicator d flashes when
the ignition is on, there is a fault in the
system; the engine cannot be started. Switch off the ignition and repeat the
start attempt.
If the control indicator continues
flashing, attempt to start the engine
using the spare key and seek the
assistance of a workshop.
Notice
The immobiliser does not lock the
doors. You should always lock the
vehicle after leaving it.
Switch on the anti-theft alarm
system 3 22, 3 25.
Control indicator d 3 89.Exterior mirrors
Convex shape The convex exterior mirror contains
an aspherical area and reduces blind spots. The shape of the mirror makes
objects appear smaller, which will
affect the ability to estimate
distances.
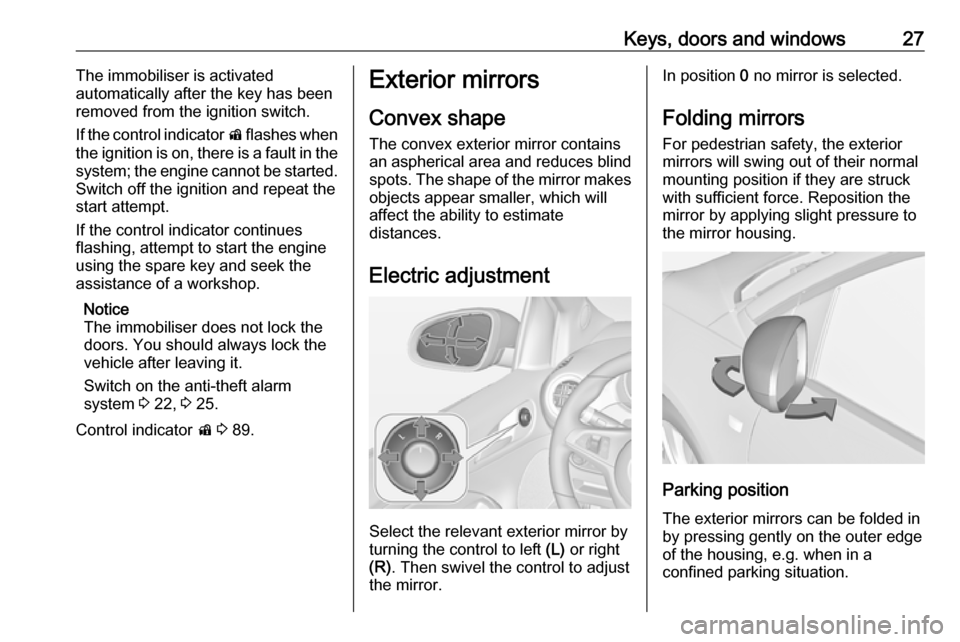
Electric adjustment
Select the relevant exterior mirror by
turning the control to left (L) or right
(R) . Then swivel the control to adjust
the mirror.
In position 0 no mirror is selected.
Folding mirrors
For pedestrian safety, the exterior mirrors will swing out of their normal
mounting position if they are struck
with sufficient force. Reposition the
mirror by applying slight pressure to
the mirror housing.
Parking position
The exterior mirrors can be folded in
by pressing gently on the outer edge
of the housing, e.g. when in a
confined parking situation.
Page 31 of 241
Keys, doors and windows29Windows
Windscreen
Windscreen stickers
Do not attach stickers, e.g. toll road stickers or similar, on the windscreen
in the area of the interior mirror.
Otherwise the detection zone of the
sensor in the mirror housing could be
restricted.
Power windows9 Warning
Take care when operating the
power windows. Risk of injury,
particularly to children.
Be careful when closing the
windows. Ensure that nothing
becomes trapped in them as they
move.
Switch on ignition to operate power
windows.
Retained power off 3 126.
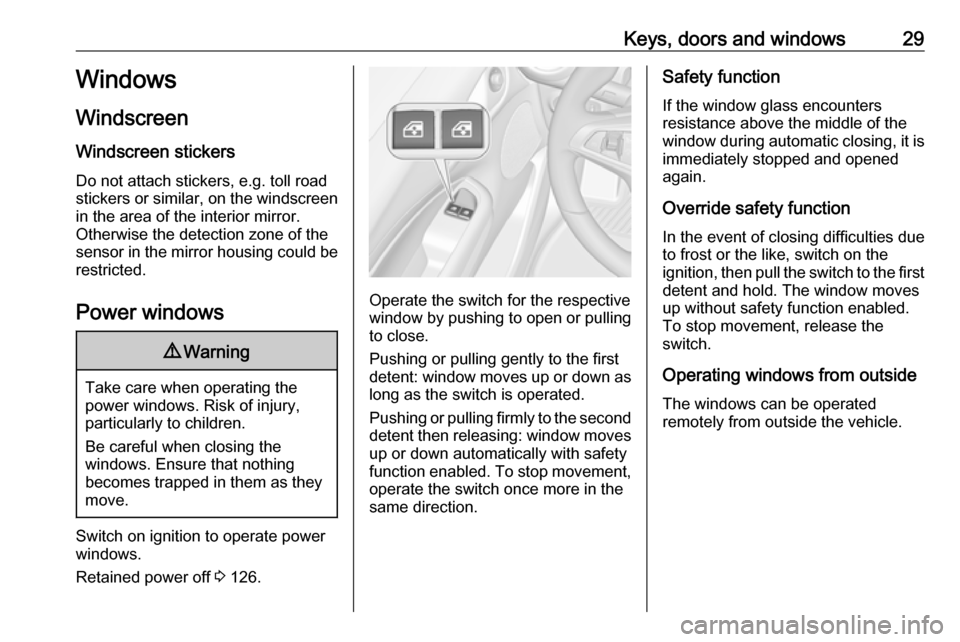
Operate the switch for the respective
window by pushing to open or pulling to close.
Pushing or pulling gently to the first
detent: window moves up or down as long as the switch is operated.
Pushing or pulling firmly to the second
detent then releasing: window moves
up or down automatically with safety
function enabled. To stop movement,
operate the switch once more in the
same direction.
Safety function
If the window glass encounters
resistance above the middle of the
window during automatic closing, it is
immediately stopped and opened again.
Override safety function
In the event of closing difficulties due
to frost or the like, switch on the
ignition, then pull the switch to the first
detent and hold. The window moves
up without safety function enabled.
To stop movement, release the
switch.
Operating windows from outside
The windows can be operated
remotely from outside the vehicle.