warning VAUXHALL ADAM 2017 Owner's Guide
[x] Cancel search | Manufacturer: VAUXHALL, Model Year: 2017, Model line: ADAM, Model: VAUXHALL ADAM 2017Pages: 241, PDF Size: 7.33 MB
Page 70 of 241
68StorageLoading information
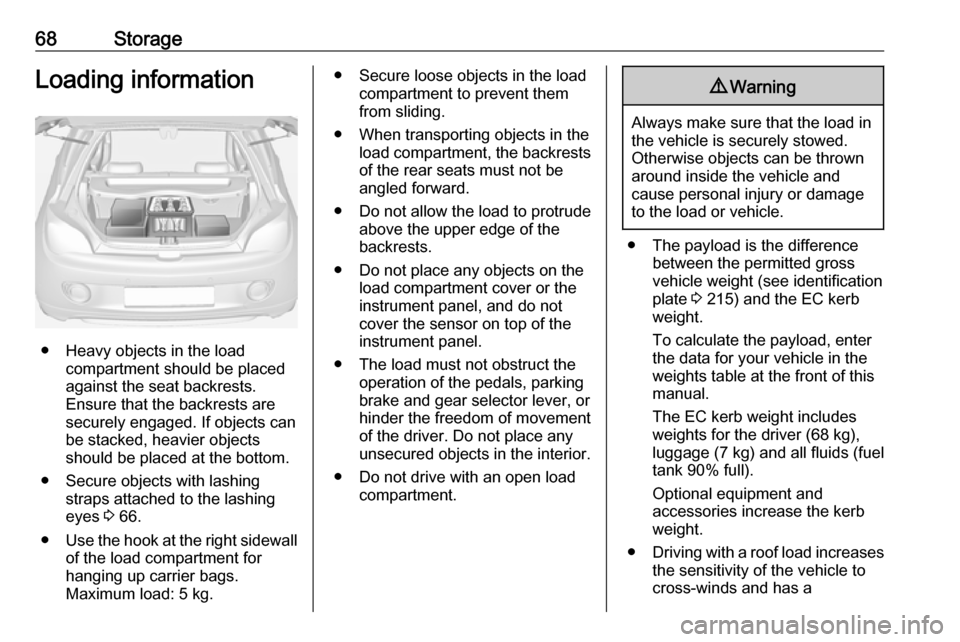
● Heavy objects in the loadcompartment should be placed
against the seat backrests.
Ensure that the backrests are
securely engaged. If objects can
be stacked, heavier objects
should be placed at the bottom.
● Secure objects with lashing straps attached to the lashing
eyes 3 66.
● Use the hook at the right sidewall
of the load compartment for
hanging up carrier bags.
Maximum load: 5 kg.
● Secure loose objects in the load compartment to prevent themfrom sliding.
● When transporting objects in the load compartment, the backrestsof the rear seats must not be
angled forward.
● Do not allow the load to protrude above the upper edge of the
backrests.
● Do not place any objects on the load compartment cover or theinstrument panel, and do not
cover the sensor on top of the instrument panel.
● The load must not obstruct the operation of the pedals, parking
brake and gear selector lever, or
hinder the freedom of movement of the driver. Do not place any
unsecured objects in the interior.
● Do not drive with an open load compartment.9Warning
Always make sure that the load in
the vehicle is securely stowed.
Otherwise objects can be thrown
around inside the vehicle and
cause personal injury or damage
to the load or vehicle.
● The payload is the difference between the permitted gross
vehicle weight (see identification
plate 3 215) and the EC kerb
weight.
To calculate the payload, enter
the data for your vehicle in the
weights table at the front of this
manual.
The EC kerb weight includes
weights for the driver (68 kg),
luggage (7 kg) and all fluids (fuel
tank 90% full).
Optional equipment and
accessories increase the kerb
weight.
● Driving with a roof load increases
the sensitivity of the vehicle to
cross-winds and has a
Page 72 of 241

70Instruments and controlsInstruments and
controlsControls ....................................... 71
Steering wheel adjustment ........71
Steering wheel controls .............71
Heated steering wheel ...............71
Horn ........................................... 72
Windscreen wiper/washer .........72
Rear window wiper/washer .......74
Outside temperature ..................74
Clock ......................................... 75
Power outlets ............................. 77
Inductive charging .....................77
Cigarette lighter ......................... 78
Ashtrays .................................... 78
Warning lights, gauges and indi‐ cators ........................................... 79
Instrument cluster ......................79
Speedometer ............................. 79
Odometer .................................. 79
Trip odometer ............................ 79
Tachometer ............................... 79
Fuel gauge ................................ 80
Fuel selector .............................. 80
Engine coolant temperature gauge ....................................... 81Service display.......................... 81
Control indicators ......................82
Turn signal ................................. 84
Seat belt reminder .....................84
Airbag and belt tensioners .........85
Airbag deactivation ....................85
Charging system .......................85
Malfunction indicator light ..........86
Service vehicle soon .................86
Brake and clutch system ...........86
Operate pedal ............................ 86
Antilock brake system (ABS) .....87
Upshift ....................................... 87
Power steering .......................... 87
Ultrasonic parking assist ...........87
Electronic Stability Control off ...87
Electronic Stability Control and Traction Control system ...........87
Tyre pressure monitoring system ...................................... 88
Engine oil pressure ....................88
Low fuel ..................................... 88
Immobiliser ................................ 89
Exterior light .............................. 89
High beam ................................. 89
Rear fog light ............................. 89
Cruise control ............................ 89
Door open .................................. 89
Information displays .....................89
Driver Information Centre ..........89Colour-Info-Display ....................94
Graphic-Info-Display ..................95
Vehicle messages ........................96
Warning chimes .........................98
Battery voltage .......................... 98
Vehicle personalisation ................99
Telematics service .....................102
OnStar ..................................... 102
Page 77 of 241
Instruments and controls75
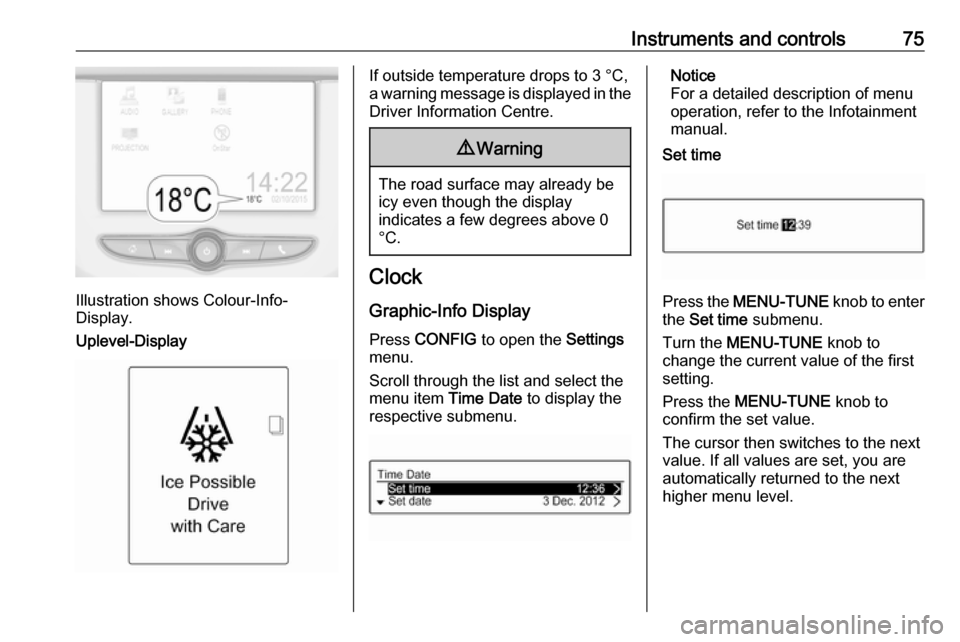
Illustration shows Colour-Info-
Display.
Uplevel-Display
If outside temperature drops to 3 °C,
a warning message is displayed in the Driver Information Centre.9 Warning
The road surface may already be
icy even though the display
indicates a few degrees above 0
°C.
Clock
Graphic-Info Display
Press CONFIG to open the Settings
menu.
Scroll through the list and select the
menu item Time Date to display the
respective submenu.
Notice
For a detailed description of menu
operation, refer to the Infotainment
manual.
Set time
Press the MENU-TUNE knob to enter
the Set time submenu.
Turn the MENU-TUNE knob to
change the current value of the first setting.
Press the MENU-TUNE knob to
confirm the set value.
The cursor then switches to the next
value. If all values are set, you are
automatically returned to the next
higher menu level.
Page 79 of 241
Instruments and controls77Set time and date
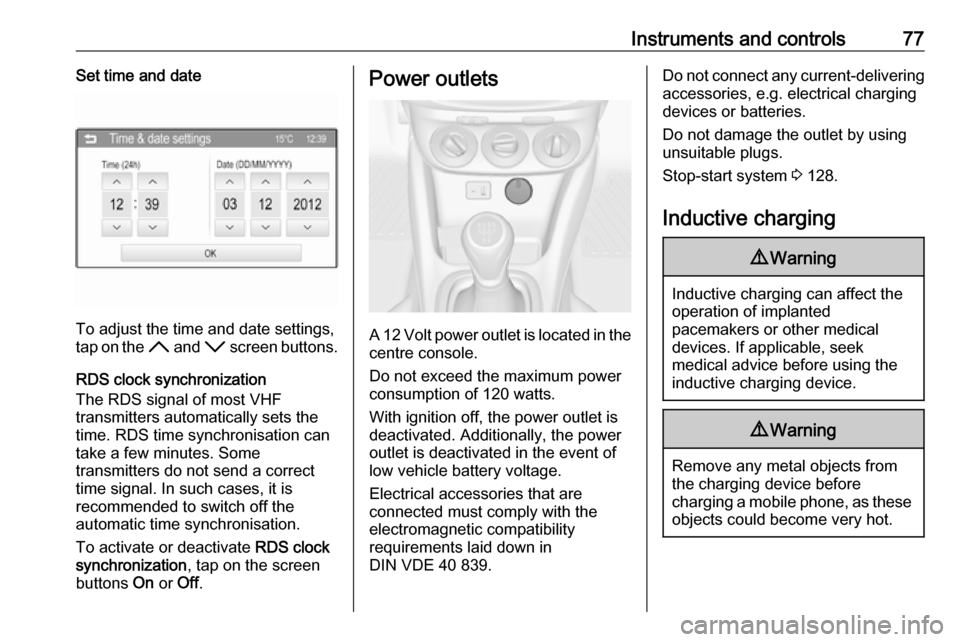
To adjust the time and date settings,
tap on the H and I screen buttons.
RDS clock synchronization
The RDS signal of most VHF
transmitters automatically sets the
time. RDS time synchronisation can take a few minutes. Some
transmitters do not send a correct
time signal. In such cases, it is
recommended to switch off the
automatic time synchronisation.
To activate or deactivate RDS clock
synchronization , tap on the screen
buttons On or Off.
Power outlets
A 12 Volt power outlet is located in the
centre console.
Do not exceed the maximum power
consumption of 120 watts.
With ignition off, the power outlet is
deactivated. Additionally, the power outlet is deactivated in the event of
low vehicle battery voltage.
Electrical accessories that are
connected must comply with the
electromagnetic compatibility
requirements laid down in
DIN VDE 40 839.
Do not connect any current-delivering accessories, e.g. electrical charging
devices or batteries.
Do not damage the outlet by using
unsuitable plugs.
Stop-start system 3 128.
Inductive charging9 Warning
Inductive charging can affect the
operation of implanted
pacemakers or other medical
devices. If applicable, seek
medical advice before using the
inductive charging device.
9 Warning
Remove any metal objects from
the charging device before
charging a mobile phone, as these
objects could become very hot.
Page 81 of 241
Instruments and controls79Warning lights, gauges
and indicators
Instrument cluster
The needles of the instruments briefly
rotate to the end position when the
ignition is switched on.
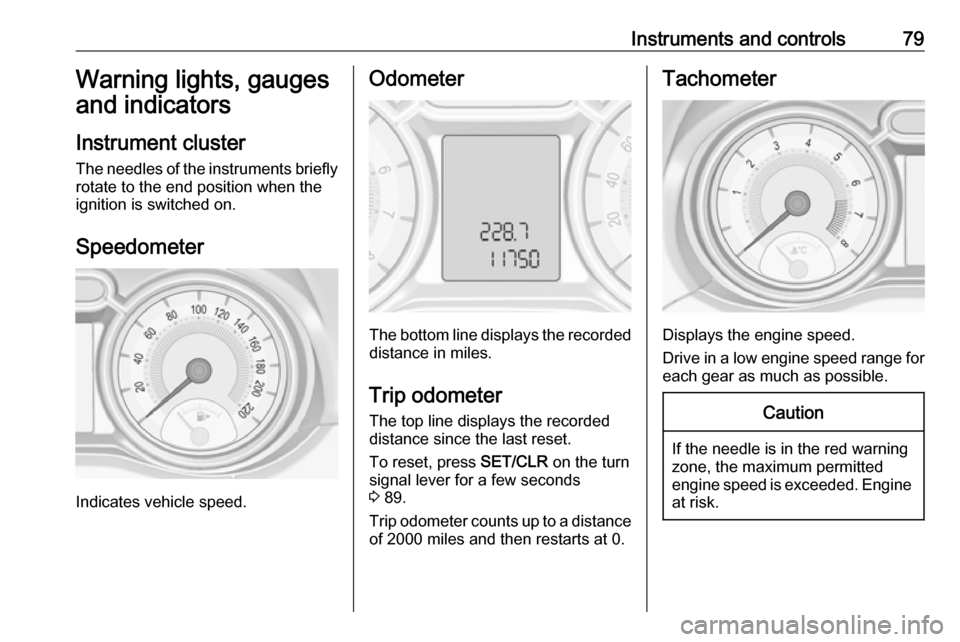
Speedometer
Indicates vehicle speed.
Odometer
The bottom line displays the recorded distance in miles.
Trip odometer The top line displays the recordeddistance since the last reset.
To reset, press SET/CLR on the turn
signal lever for a few seconds
3 89.
Trip odometer counts up to a distance
of 2000 miles and then restarts at 0.
Tachometer
Displays the engine speed.
Drive in a low engine speed range for each gear as much as possible.
Caution
If the needle is in the red warning
zone, the maximum permitted
engine speed is exceeded. Engine at risk.
Page 84 of 241
82Instruments and controls
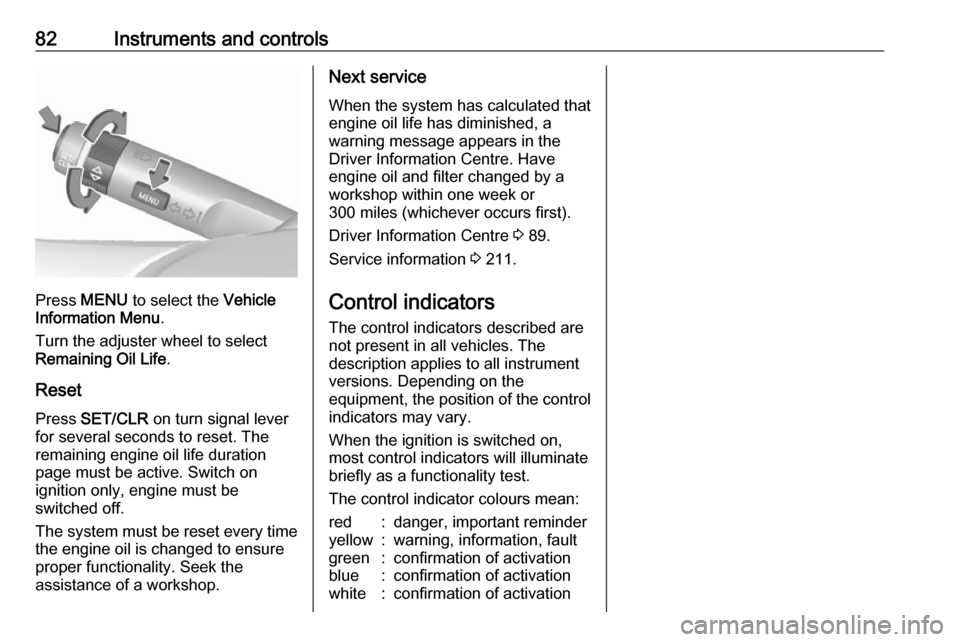
Press MENU to select the Vehicle
Information Menu .
Turn the adjuster wheel to select
Remaining Oil Life .
Reset Press SET/CLR on turn signal lever
for several seconds to reset. The
remaining engine oil life duration
page must be active. Switch on
ignition only, engine must be
switched off.
The system must be reset every time
the engine oil is changed to ensure
proper functionality. Seek the
assistance of a workshop.
Next service
When the system has calculated that
engine oil life has diminished, a
warning message appears in the
Driver Information Centre. Have
engine oil and filter changed by a
workshop within one week or
300 miles (whichever occurs first).
Driver Information Centre 3 89.
Service information 3 211.
Control indicators
The control indicators described are
not present in all vehicles. The
description applies to all instrument
versions. Depending on the
equipment, the position of the control indicators may vary.
When the ignition is switched on,
most control indicators will illuminate
briefly as a functionality test.
The control indicator colours mean:red:danger, important reminderyellow:warning, information, faultgreen:confirmation of activationblue:confirmation of activationwhite:confirmation of activation
Page 86 of 241
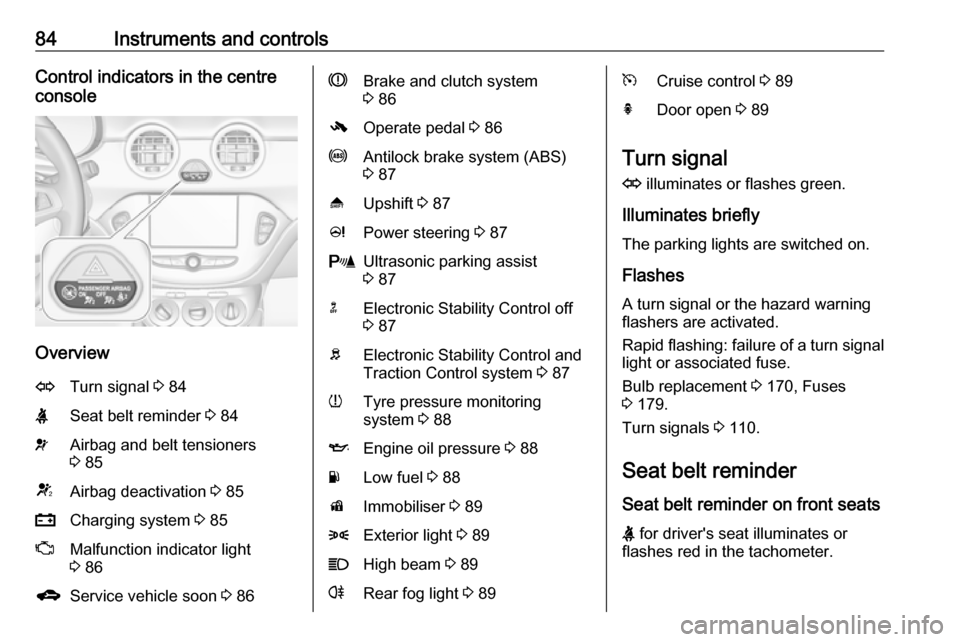
84Instruments and controlsControl indicators in the centre
console
Overview
OTurn signal 3 84XSeat belt reminder 3 84vAirbag and belt tensioners
3 85VAirbag deactivation 3 85pCharging system 3 85ZMalfunction indicator light
3 86gService vehicle soon 3 86RBrake and clutch system
3 86-Operate pedal 3 86uAntilock brake system (ABS)
3 87[Upshift 3 87cPower steering 3 87rUltrasonic parking assist
3 87nElectronic Stability Control off
3 87bElectronic Stability Control and
Traction Control system 3 87wTyre pressure monitoring
system 3 88IEngine oil pressure 3 88YLow fuel 3 88dImmobiliser 3 898Exterior light 3 89CHigh beam 3 89rRear fog light 3 89mCruise control 3 89hDoor open 3 89
Turn signal
O illuminates or flashes green.
Illuminates briefly
The parking lights are switched on.
Flashes
A turn signal or the hazard warning flashers are activated.
Rapid flashing: failure of a turn signal light or associated fuse.
Bulb replacement 3 170, Fuses
3 179.
Turn signals 3 110.
Seat belt reminder
Seat belt reminder on front seats
X for driver's seat illuminates or
flashes red in the tachometer.
Page 87 of 241
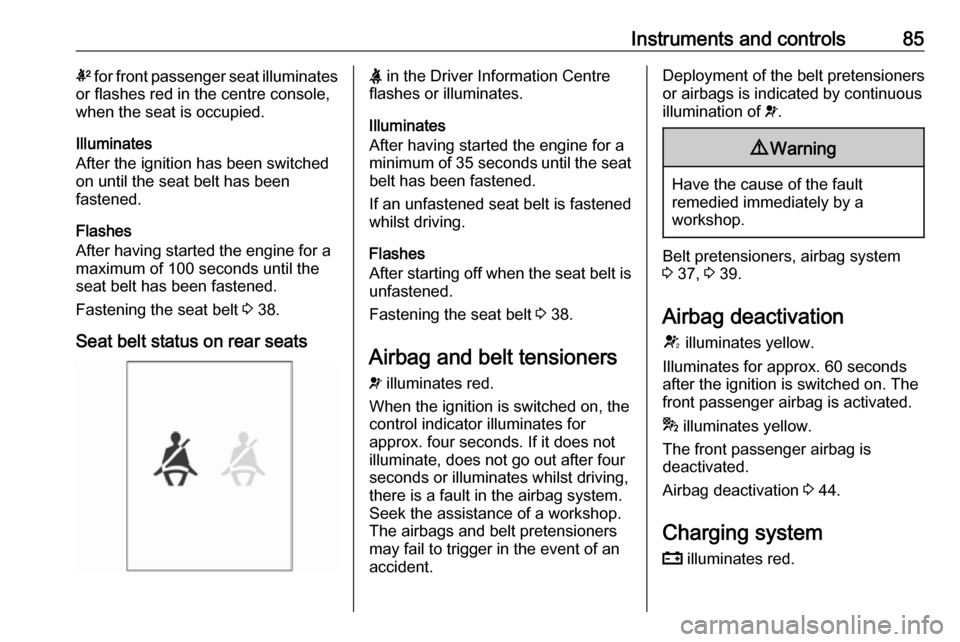
Instruments and controls85k for front passenger seat illuminates
or flashes red in the centre console,
when the seat is occupied.
Illuminates
After the ignition has been switched on until the seat belt has been
fastened.
Flashes
After having started the engine for a
maximum of 100 seconds until the
seat belt has been fastened.
Fastening the seat belt 3 38.
Seat belt status on rear seatsX in the Driver Information Centre
flashes or illuminates.
Illuminates
After having started the engine for a
minimum of 35 seconds until the seat
belt has been fastened.
If an unfastened seat belt is fastened
whilst driving.
Flashes
After starting off when the seat belt is unfastened.
Fastening the seat belt 3 38.
Airbag and belt tensioners
v illuminates red.
When the ignition is switched on, the control indicator illuminates for
approx. four seconds. If it does not
illuminate, does not go out after four
seconds or illuminates whilst driving,
there is a fault in the airbag system.
Seek the assistance of a workshop.
The airbags and belt pretensioners
may fail to trigger in the event of an
accident.Deployment of the belt pretensioners
or airbags is indicated by continuous
illumination of v.9 Warning
Have the cause of the fault
remedied immediately by a
workshop.
Belt pretensioners, airbag system
3 37, 3 39.
Airbag deactivation
V illuminates yellow.
Illuminates for approx. 60 seconds
after the ignition is switched on. The
front passenger airbag is activated.
* illuminates yellow.
The front passenger airbag is
deactivated.
Airbag deactivation 3 44.
Charging system p illuminates red.
Page 88 of 241

86Instruments and controlsIlluminates when the ignition is
switched on and extinguishes shortly
after the engine starts.
Illuminates when the engine is
running
Stop, switch off engine. Vehicle
battery is not charging. Engine
cooling may be interrupted. The
brake servo unit may cease to be
effective. Seek the assistance of a
workshop.
Malfunction indicator light Z illuminates or flashes yellow.
Illuminates when the ignition is
switched on and extinguishes shortly
after the engine starts.
Illuminates when the engine is
running
Fault in the emission control system. The permitted emission limits may be
exceeded. Seek the assistance of a
workshop immediately.Flashes when the engine is
running
Fault that could lead to catalytic converter damage. Ease up on the
accelerator until the flashing stops.
Seek the assistance of a workshop
immediately.
Service vehicle soon g illuminates yellow.
Additionally, a warning message is
displayed in the Driver Information Centre.
The vehicle needs a service.
Seek the assistance of a workshop. Vehicle messages 3 96.
Brake and clutch system R illuminates red.
The brake and clutch fluid level is too low, when manual parking brake is
not applied 3 167.9 Warning
Stop. Do not continue your
journey. Consult a workshop.
Illuminates when the manual parking
brake is applied and ignition is
switched on 3 137.
Operate pedal - illuminates or flashes yellow.
Illuminates
Clutch pedal must be depressed to
start the engine in Autostop mode.
Stop-start system 3 128.
Flashes
Clutch pedal must be depressed for a
main start of the engine 3 16, 3 127.
On some versions, the operate pedal message is indicated in the Driver
Information Display 3 96.
Page 89 of 241

Instruments and controls87Antilock brake system
(ABS)
u illuminates yellow.
Illuminates for a few seconds after the ignition is switched on. The system is
ready for operation when the control
indicator extinguishes.
If the control indicator does not go out after a few seconds, or if it illuminates while driving, there is a fault in the
ABS. The brake system remains
operational but without ABS
regulation.
Antilock brake system 3 136.
Upshift [ illuminates green as control
indicator or is shown as a symbol in
the Driver Information Centre with
Uplevel-Display, when upshifting is
recommended for fuel saving
reasons.
Eco information menu
The gear shift indication is popped-up
as a full page in the Driver Information Centre.EcoFlex drive assistant 3 89.
Power steering
c illuminates yellow.
Illuminates with power steering
disabled
Failure in the power steering system.
Consult a workshop.
Illumination of c and b
simultaneously
Power steering system must be
calibrated, system calibration 3 140.
Ultrasonic parking assist
r illuminates yellow.
Fault in system
or
Fault due to sensors that are dirty or covered by ice or snow
or
Interference due to external sources of ultrasound. Once the source of
interference is removed, the system
will operate normally.Have the cause of the fault in the
system remedied by a workshop.
Ultrasonic parking assist 3 145.
Electronic Stability Control
off
t illuminates yellow.
The system is deactivated.
Electronic Stability Control
and Traction Control system
b flashes or illuminates yellow.
Flashes
The system is actively engaged.
Engine output may be reduced and
the vehicle may be braked
automatically to a small degree.
Illuminates
A fault in the system is present. A
warning message appears in the
Driver Information Centre. Continued
driving is possible. The system is not