Automatic VAUXHALL ADAM 2017 Repair Manual
[x] Cancel search | Manufacturer: VAUXHALL, Model Year: 2017, Model line: ADAM, Model: VAUXHALL ADAM 2017Pages: 241, PDF Size: 7.33 MB
Page 151 of 241
Driving and operating149After a manual deactivation, the front-
rear parking assist is activated again
if D is pressed.
The complete system can be
manually deactivated in the vehicle
personalisation menu in the
Info-Display. It remains deactivated
during the ignition cycle or until
activation in personalisation menu
again. Vehicle personalisation 3 99.
Fault
In the event of a fault or if the system does not work temporarily, e.g.
because of high external noise level
or other interference factors, a
message pops-up in the Driver
Information Centre.
Vehicle messages 3 96.
Advanced parking assist9 Warning
The driver bears full responsibility
for accepting the parking slot
suggested by the system and the
parking manoeuvre.
Always check the surrounding
area in all directions when using
the advanced parking assist.
The advanced parking assist
measures a suitable parking slot
while passing, calculates the
trajectory and automatically steers
the vehicle into a parallel or
perpendicular parking slot.
Instructions are given in the Driver
Information Centre 3 89 or,
depending on the version, on the
Colour-Info-Display 3 94, supported
by acoustic signals.
The driver must control acceleration,
braking and gearshifting, while
steering is done automatically.
Advanced parking assist can only be activated when driving forwards.
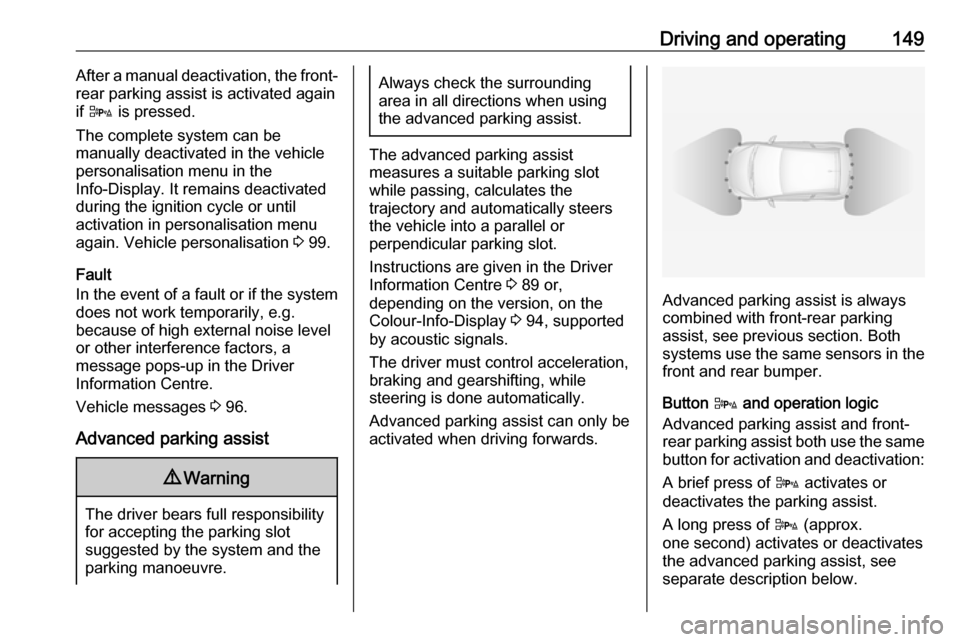
Advanced parking assist is always
combined with front-rear parking
assist, see previous section. Both
systems use the same sensors in the front and rear bumper.
Button D and operation logic
Advanced parking assist and front-
rear parking assist both use the same
button for activation and deactivation:
A brief press of D activates or
deactivates the parking assist.
A long press of D (approx.
one second) activates or deactivates
the advanced parking assist, see
separate description below.
Page 154 of 241

152Driving and operatingmetres for parallel parking slots or sixmetres for perpendicular parking slots
after the Stop message is given. The
system calculates the optimal path
into the parking slot.
A brief vibration in the steering wheel
after engaging reverse gear indicates
that the steering is controlled by the system. Then the vehicle is steeredinto the slot automatically by giving
the driver detailed instructions for
braking, accelerating and
gearshifting. The driver must keep
hands away from the steering wheel.
Always pay attention to the sound of the front-rear parking assist.
Continuous sound indicates that the
distance to an obstacle is less than
approx. 30 cm.
If, for any reason, the driver must take over control of the steering, hold the
steering wheel only at the outer edge. Automatic steering is cancelled in thisevent.Display indication
The instructions in the display show:
● general hints and warning messages
● a hint when driving faster than 18 mph during parking slot
searching mode, or 5 mph in
guiding mode
● the demand to stop the vehicle, when a parking slot is detected
● the direction of driving during the
parking manoeuvre
● the demand to gearshift rearwards or forwards
● the demand to accelerate or brake
● for some of the instructions a progress bar is shown in the
Driver Information Centre
● successful parking manoeuvre indicated by a pop-up symbol
and a chime,
● the cancelling of a parking manoeuvreDisplay priorities
Advanced parking assist indication on the Driver Information Centre can beinhibited by vehicle messages with a
higher priority. After approving the
message by pressing SET/CLR on
the turn signal lever, advanced
parking assist instructions appear
again and the parking manoeuvre can
be continued.
Deactivation
The system is deactivated by:
● a long press of D
● parking manoeuvre successfully ended
● driving faster than 18 mph during
parking slot search
● driving faster than 5 mph during parking guidance
● driver interference on steering wheel detected
● exceeding the maximum number
of gear changes: eight parking
cycles when parallel parking or
five cycles when perpendicular
parking
● switching off the ignition
Page 159 of 241

Driving and operating157LED off:petrol operationLED
flashes:checking conditions for
fuel transition to liquid
gas operation.
Illuminates if conditions
are fulfilled.LED illu‐
minates:liquid gas operationLED
flashes
five
times
and
extin‐
guishes:liquid gas tank is empty
or failure in liquid gas
system. A message is
displayed in the Driver
Information Centre.
If the fuel tank is empty, the engine
will not start.
The selected fuel mode is stored and
reactivated at the next ignition cycle if
conditions allow.
As soon as the liquid gas tanks are
empty, petrol operation is
automatically engaged until the
ignition is switched off.
When switching automatically
between petrol or gas operation, a
brief delay of engine tractive power
may be noticeable.
Every six months, run the petrol tank
down until control indicator Y
illuminates, then refuel. This helps
maintain fuel quality and system
function for petrol operation.
Fill the tank completely at regular intervals to prevent corrosion in the
tank.
Faults and remedies
If gas mode is not possible, check the following:
● Is there enough liquid gas present?
● Is there enough petrol present for
starting?
Due to extreme temperatures in
combination with the gas
composition, it may take slightly
longer before the system switches
from petrol to gas mode.
In extreme situations, the system may
also switch back to petrol mode if the
minimum requirements are not
fulfilled. If conditions allow, it might be possible to manually switch back to
liquid gas operation.Seek the assistance of a workshop in
the event of all other faults.Caution
Repairs and adjustments may only be made by trained specialists in
order to maintain the safety and
warranty on the LPG system.
Liquid gas is given a particular odour
(odorised) so that any leaks can be
detected easily.
9 Warning
If you smell gas in the vehicle or in
the immediate vicinity, switch to petrol mode immediately. No
smoking. No naked flames or
ignition sources.
If the gas odour persists, do not start
the engine. Have the cause of the
fault remedied by a workshop.
When using underground car parks,
follow the instructions of the operator
and local laws.
Page 160 of 241
158Driving and operatingNotice
In the event of an accident, switch off
the ignition and lights.
Refuelling9 Danger
Before refuelling, switch off the
ignition.
Follow the operating and safety
instructions of the filling station
when refuelling.
9 Danger
Fuel is flammable and explosive.
No smoking. No naked flames or
sparks.
If you can smell fuel in your
vehicle, have the cause of this
remedied immediately by a
workshop.
Caution
In case of misfuelling, do not
switch on ignition.
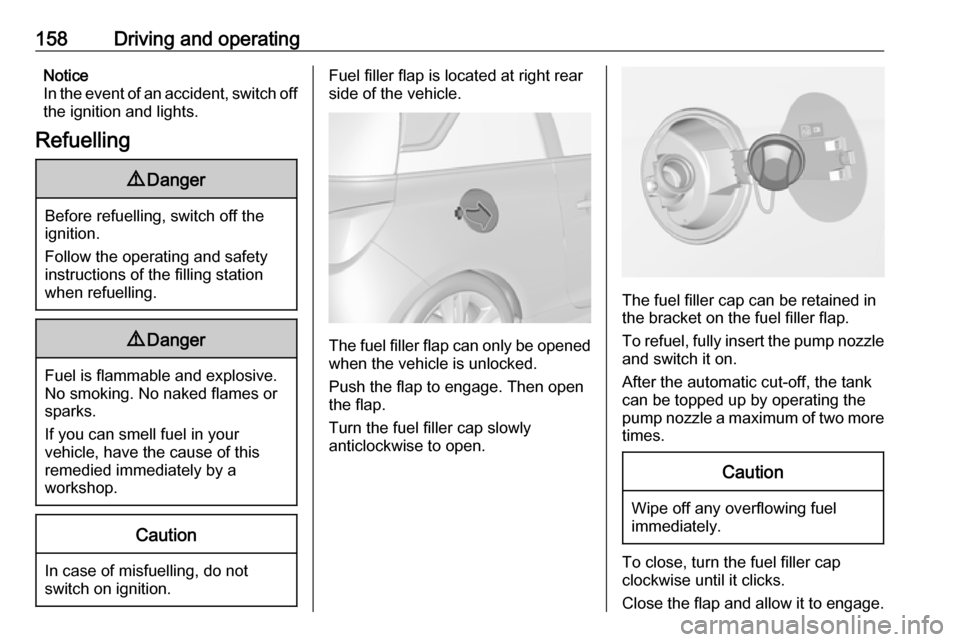
Fuel filler flap is located at right rear
side of the vehicle.
The fuel filler flap can only be opened
when the vehicle is unlocked.
Push the flap to engage. Then open
the flap.
Turn the fuel filler cap slowly
anticlockwise to open.
The fuel filler cap can be retained in
the bracket on the fuel filler flap.
To refuel, fully insert the pump nozzle
and switch it on.
After the automatic cut-off, the tank
can be topped up by operating the pump nozzle a maximum of two more times.
Caution
Wipe off any overflowing fuel
immediately.
To close, turn the fuel filler cap
clockwise until it clicks.
Close the flap and allow it to engage.
Page 162 of 241

160Driving and operatingFit protective cap to prevent the
penetration of foreign bodies into the
filler opening and the system.9 Warning
Due to the system design, an
escape of liquid gas after
releasing the locking lever is
unavoidable. Avoid inhaling.
9 Warning
The liquid gas tank should only be
filled to 80% capacity, for safety
reasons.
The multivalve on the liquid gas tank
automatically limits the fill quantity. If
a larger quantity is added, we
recommend not exposing the vehicle
to the sun until the excess amount
has been used up.
Filling adapter
As filling systems are not
standardised, different adapters are
required which are available from
Vauxhall Distributors and from
Vauxhall Authorised Repairers.
ACME adapter: Belgium, Germany,
Ireland, Luxembourg, Switzerland
Bayonet adapter: Netherlands,
Norway, Spain, United Kingdom
EURO adapter: Spain
Page 167 of 241
Vehicle care165If the bonnet is opened during an
Autostop, the engine will be restarted
automatically for safety reasons.
Closing Before closing the bonnet, press the
support into the holder.
Lower the bonnet and allow it to fall
into the latch from a low height
(20-25 cm). Check that the bonnet is
engaged.Caution
Do not press the bonnet into the
latch, to avoid dents.
Engine oil
Check the engine oil level manually
on a regular basis to prevent damage
to the engine. Ensure that the correct specification of oil is used.
Recommended fluids and lubricants
3 212.
The maximum engine oil
consumption is 0.6 l per 1000 km.
Check with the vehicle on a level
surface. The engine must be at
operating temperature and switched
off for at least five minutes.
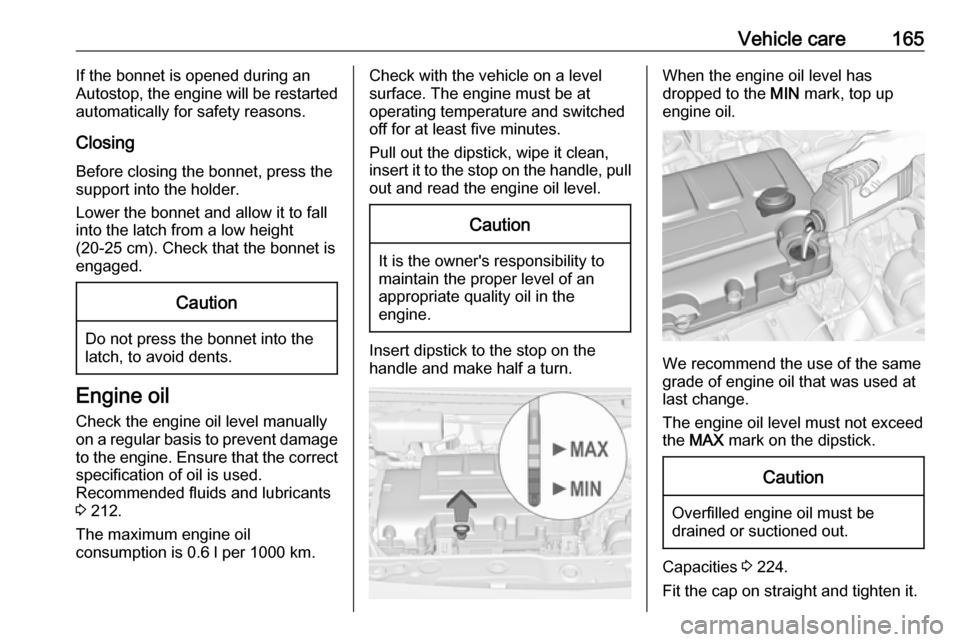
Pull out the dipstick, wipe it clean, insert it to the stop on the handle, pull
out and read the engine oil level.Caution
It is the owner's responsibility to
maintain the proper level of an
appropriate quality oil in the
engine.
Insert dipstick to the stop on the
handle and make half a turn.
When the engine oil level has
dropped to the MIN mark, top up
engine oil.
We recommend the use of the same
grade of engine oil that was used at
last change.
The engine oil level must not exceed
the MAX mark on the dipstick.
Caution
Overfilled engine oil must be
drained or suctioned out.
Capacities 3 224.
Fit the cap on straight and tighten it.
Page 191 of 241
Vehicle care189Each time the tyres are replaced, tyre
pressure monitoring system sensors
must be dismounted and serviced. For the screwed sensor; replace
valve core and sealing ring. For the
clipped sensor; replace complete
valve stem.
Vehicle loading status
Adjust tyre pressure to load condition according to the tyre information labelor tyre pressure chart 3 225, and
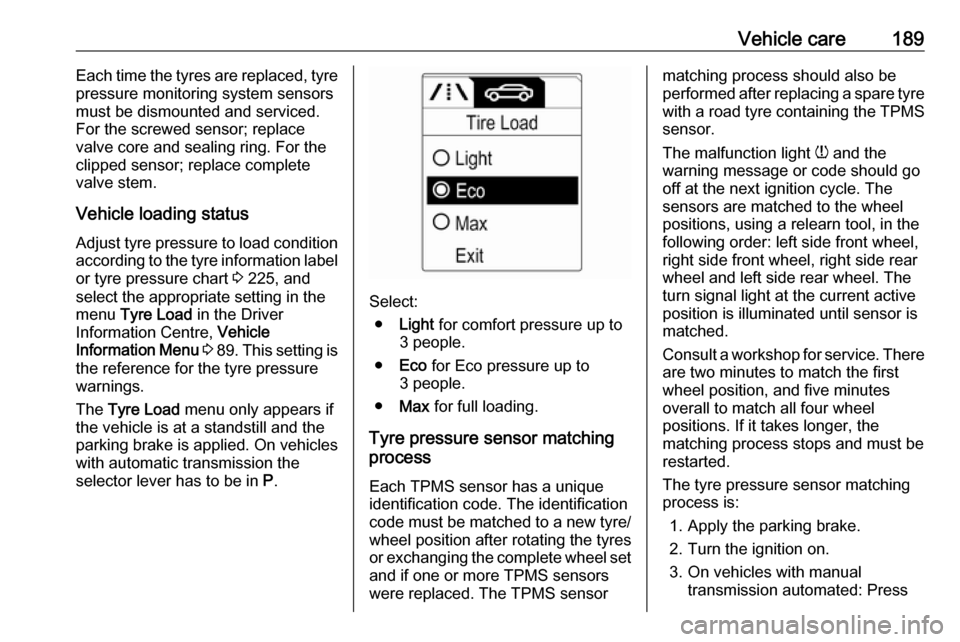
select the appropriate setting in the menu Tyre Load in the Driver
Information Centre, Vehicle
Information Menu 3 89 . This setting is
the reference for the tyre pressure
warnings.
The Tyre Load menu only appears if
the vehicle is at a standstill and the parking brake is applied. On vehicles
with automatic transmission the
selector lever has to be in P.
Select:
● Light for comfort pressure up to
3 people.
● Eco for Eco pressure up to
3 people.
● Max for full loading.
Tyre pressure sensor matching process
Each TPMS sensor has a unique
identification code. The identification
code must be matched to a new tyre/ wheel position after rotating the tyres
or exchanging the complete wheel set
and if one or more TPMS sensors
were replaced. The TPMS sensor
matching process should also be
performed after replacing a spare tyre with a road tyre containing the TPMS
sensor.
The malfunction light w and the
warning message or code should go off at the next ignition cycle. The
sensors are matched to the wheel
positions, using a relearn tool, in the following order: left side front wheel,
right side front wheel, right side rear
wheel and left side rear wheel. The
turn signal light at the current active
position is illuminated until sensor is
matched.
Consult a workshop for service. There
are two minutes to match the first
wheel position, and five minutes
overall to match all four wheel
positions. If it takes longer, the
matching process stops and must be
restarted.
The tyre pressure sensor matching
process is:
1. Apply the parking brake.
2. Turn the ignition on.
3. On vehicles with manual transmission automated: Press
Page 209 of 241
Vehicle care207Appearance care
Exterior care LocksThe locks are lubricated at the factoryusing a high quality lock cylinder
grease. Use a de-icing agent only
when absolutely necessary, as this
has a degreasing effect and impairs
lock function. After using a de-icing
agent, have the locks regreased by a
workshop.
WashingAdam without foldable sunroof:
The paintwork of your vehicle is
exposed to environmental influences. Wash and wax your vehicle regularly.
When using automatic vehicle
washes, select a programme that
includes waxing. Restrictions for
filmed or matt painted body parts or
decor tapes, see "Polishing and
waxing".Adam with foldable sunroof:
The paintwork of your vehicle is
exposed to environmental influences,
therefore wash your vehicle regularly.
When using automatic vehicle
washes, select one with textile
brushes and select a programme
without wax additives.
Restrictions for filmed or matt painted
body parts or decor tapes, see
"Polishing and waxing".
When hand washing the vehicle, use
clear water and a soft brush, cleaning
in grain direction of the textile sun
roof.
Never use a steam-jet or high-
pressure jet cleaner for the sunroof.
Wax painted parts of the vehicle
regularly, but not the textile of the
sunroof.Caution
After washing or cleaning, the
foldable sunroof must be
completely dried before opening. If a wet sunroof remains opened for
a longer time, it would be
damaged by water spotting and
mould growth.All variants:
Bird droppings, dead insects, resin,
pollen and the like should be cleaned
off immediately, as they contain
aggressive constituents which can
cause paint damage.
If using a car wash, comply with the
car wash manufacturer's instructions.
The windscreen wiper and rear
window wiper must be switched off.
Remove antenna and external
accessories such as roof racks etc.
If you wash your vehicle by hand,
make sure that the insides of the
wheel housings are also thoroughly
rinsed out.
Clean edges and folds on opened
doors and the bonnet as well as the
areas they cover.
Clean bright metal mouldings with a
cleaning solution approved for
aluminium to avoid damages.
Page 210 of 241

208Vehicle careCaution
Always use a cleaning agent with
a pH value of four to nine.
Do not use cleaning agents on hot surfaces.
Have the door hinges of all doors
greased by a workshop.
Do not clean the engine compartment with a steam-jet or high-pressure jet
cleaner.
On vehicles with emblem touchpad:
when cleaning with a high-pressure
jet cleaner ensure a minimum
distance of 30 cm when working
around the tailgate to prevent
unintended unlocking.
Thoroughly rinse and leather-off the
vehicle. Rinse leather frequently. Use
separate leathers for painted and
glass surfaces: remnants of wax on
the windows will impair vision.
Exterior lights
Headlight and other light covers are
made of plastic. Do not use any
abrasive or caustic agents, do not use
an ice scraper, and do not clean them
dry.
Polishing and waxing
Wax painted parts of the vehicle
regularly (at the latest when water no longer beads). Otherwise, the
paintwork will dry out.
The foldable sunroof must not be
polished or waxed. When using
automatic car washes, select a
programme without wax additives.
Polishing is necessary only if the paint
has become dull or if solid deposits
have become attached to it.
Paintwork polish with silicone forms a
protective film, making waxing
unnecessary.
Unpainted plastic body parts must not be treated with wax or polishing
agents.
Matt filmed body parts or decor tapes must not be polished, to avoid
gleaming. Do not use hot waxprogrammes in automatic car washes
if the vehicle is equipped with these
parts.
Matt painted decor parts, e.g. mirror
housing cover, must not be polished.
Otherwise these parts would become agleam or the colour would be
dissolved.
Windows and windscreen wiper
blades
Use a soft lint-free cloth or chamois leather together with window cleaner
and insect remover.
When cleaning the rear window from
inside, always wipe in parallel to the
heating element to prevent damage.
For mechanical removal of ice, use a
sharp-edged ice scraper. Press the
scraper firmly against the glass so
that no dirt can get under it and
scratch the glass.
Clean smearing wiper blades with a
soft cloth and window cleaner.
Page 236 of 241

234IndexAAccessories and vehicle modifications .......................... 162
Adjustable air vents ...................123
Airbag and belt tensioners ...........85
Airbag deactivation ................44, 85
Airbag label................................... 39 Airbag system .............................. 39
Air conditioning regular operation ................................ 124
Air conditioning system .............. 116
Air intake .................................... 123
Air vents...................................... 123
Antilock brake system ................ 136
Antilock brake system (ABS) .......87
Anti-theft alarm system ................25
Anti-theft locking system .............. 25
Appearance care ........................207
Ashtrays ....................................... 78
Automatic anti-dazzle ..................28
Automatic light control ...............108
Automatic locking ........................23
Autostop ..................................... 128
B Battery discharge protection ......114
Battery voltage ............................. 98 Belts.............................................. 37
Bicycle rack .................................. 53
Bonnet ....................................... 164Brake and clutch fluid.................212
Brake and clutch system .............86
Brake assist ............................... 137
Brake fluid .................................. 167
Brakes ............................... 136, 167
Breakdown.................................. 204
Bulb replacement ....................... 170
C Capacities .................................. 224
Car Pass ...................................... 20
Catalytic converter .....................131
Central locking system ................22
Changing tyre and wheel size ...191
Charging system .......................... 85
Child restraint installation locations ................................... 47
Child restraints.............................. 45
Child restraint systems ................45
Cigarette lighter ........................... 78
City mode ................................... 140
Climate control ............................. 15
Climate control systems .............115
Clock ............................................ 75
Code ............................................. 96
Collision damage repair ..............229
Colour-Info-Display .......................94
Control indicators.......................... 82
Control of the vehicle .................125
Controls ........................................ 71