Fuel VAUXHALL ADAM 2017 Owner's Manual
[x] Cancel search | Manufacturer: VAUXHALL, Model Year: 2017, Model line: ADAM, Model: VAUXHALL ADAM 2017Pages: 241, PDF Size: 7.33 MB
Page 13 of 241

In brief111Power windows .....................29
2 Exterior mirrors .....................27
3 Cruise control .....................142
Speed limiter ....................... 143
4 Side air vents ...................... 123
5 Turn and lane-change
signals, headlight flash,
low beam and high beam ....110
Exit lighting ......................... 113
Parking lights ...................... 110
Buttons for Driver
Information Centre ................89
6 Instruments .......................... 79
7 Steering wheel controls .......71
8 Driver Information Centre ...... 89
9 Windscreen wiper,
windscreen washer
system, headlight washer
system, rear wiper, rear
washer system ......................72
10 Central locking system ..........22
City mode ............................ 140
Fuel selector ......................... 80Eco button for stop-start
system ................................. 128
Traction Control system .....138
Electronic Stability Control . 139
Parking assist ..................... 145
Seat heating .......................... 36
Heated steering wheel ..........71
11 Colour-Info-Display ..............94
Graphic-Info-Display .............95
12 Hazard warning flashers ....109
Control indicator for airbag
deactivation .......................... 85
Control indicator for front
passenger seat belt .............84
13 Anti-theft alarm system
status LED ........................... 25
14 Centre air vents .................. 123
15 Side air vents passenger
side ..................................... 123
16 Glovebox .............................. 51
Fuse box ............................ 182
17 Climate control system ........ 115
18 Power outlet .......................... 7719AUX input, USB input ...........10
20 Selector lever,
transmission ....................... 132
21 Parking brake ......................137
22 Ignition switch with
steering wheel lock ............126
23 Horn ..................................... 72
Driver airbag ........................ 42
24 Bonnet release lever ..........164
25 Steering wheel adjustment ..71
26 Light switch ........................ 107
Headlight range
adjustment ......................... 109
Rear fog light ...................... 110
Brightness of instrument
panel illumination ................111
Brightness of ambient light 111
Page 24 of 241
22Keys, doors and windowsVehicle personalisation 3 99.
Central locking system Unlocks and locks doors, load
compartment and fuel filler flap.
A pull on an interior door handle
unlocks the respective door. Pulling the handle once more opens the door.
Notice
In the event of an accident in which
airbags or belt pretensioners are
deployed, the vehicle is
automatically unlocked.
Notice
Three minutes after unlocking with
the remote control, the doors are
relocked automatically if no door has
been opened.Unlocking
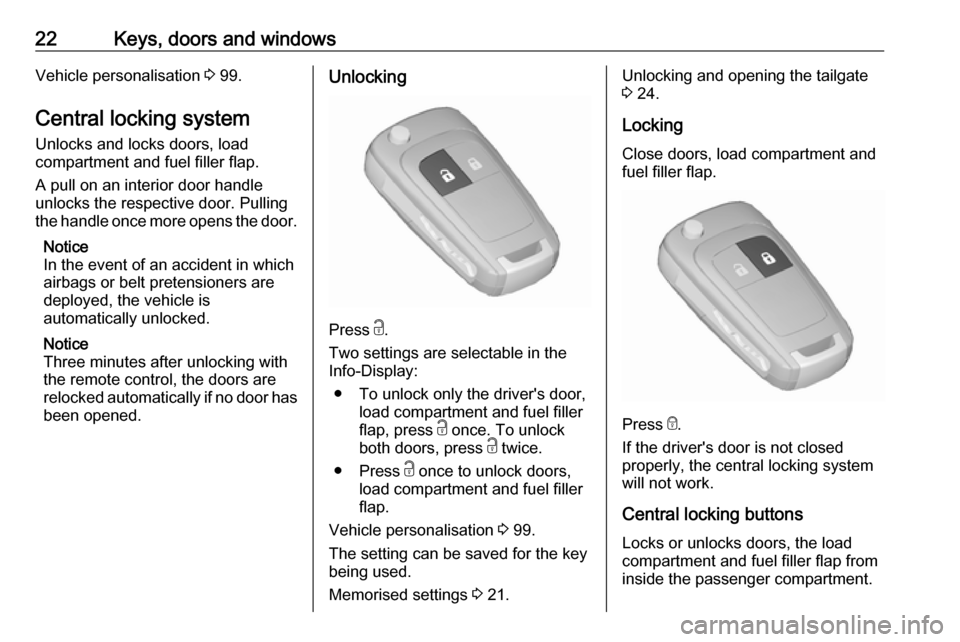
Press c.
Two settings are selectable in the
Info-Display:
● To unlock only the driver's door, load compartment and fuel filler
flap, press c once. To unlock
both doors, press c twice.
● Press c once to unlock doors,
load compartment and fuel filler
flap.
Vehicle personalisation 3 99.
The setting can be saved for the key being used.
Memorised settings 3 21.
Unlocking and opening the tailgate
3 24.
Locking
Close doors, load compartment and
fuel filler flap.
Press e
.
If the driver's door is not closed
properly, the central locking system will not work.
Central locking buttons Locks or unlocks doors, the load
compartment and fuel filler flap from
inside the passenger compartment.
Page 25 of 241
Keys, doors and windows23
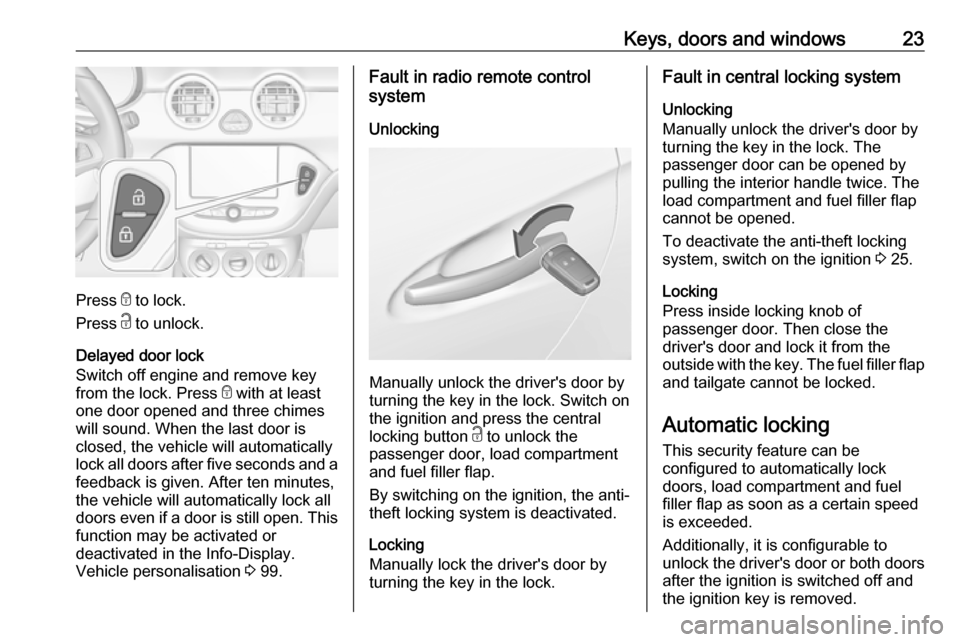
Press e to lock.
Press c to unlock.
Delayed door lock
Switch off engine and remove key from the lock. Press e with at least
one door opened and three chimes
will sound. When the last door is
closed, the vehicle will automatically
lock all doors after five seconds and a feedback is given. After ten minutes,
the vehicle will automatically lock all
doors even if a door is still open. This
function may be activated or
deactivated in the Info-Display.
Vehicle personalisation 3 99.
Fault in radio remote control
system
Unlocking
Manually unlock the driver's door by
turning the key in the lock. Switch on
the ignition and press the central
locking button c to unlock the
passenger door, load compartment and fuel filler flap.
By switching on the ignition, the anti-
theft locking system is deactivated.
Locking
Manually lock the driver's door by
turning the key in the lock.
Fault in central locking system
Unlocking
Manually unlock the driver's door by
turning the key in the lock. The
passenger door can be opened by
pulling the interior handle twice. The
load compartment and fuel filler flap
cannot be opened.
To deactivate the anti-theft locking system, switch on the ignition 3 25.
Locking
Press inside locking knob of
passenger door. Then close the
driver's door and lock it from the
outside with the key. The fuel filler flap
and tailgate cannot be locked.
Automatic locking
This security feature can be
configured to automatically lock
doors, load compartment and fuel
filler flap as soon as a certain speed
is exceeded.
Additionally, it is configurable to
unlock the driver's door or both doors after the ignition is switched off and
the ignition key is removed.
Page 70 of 241
68StorageLoading information
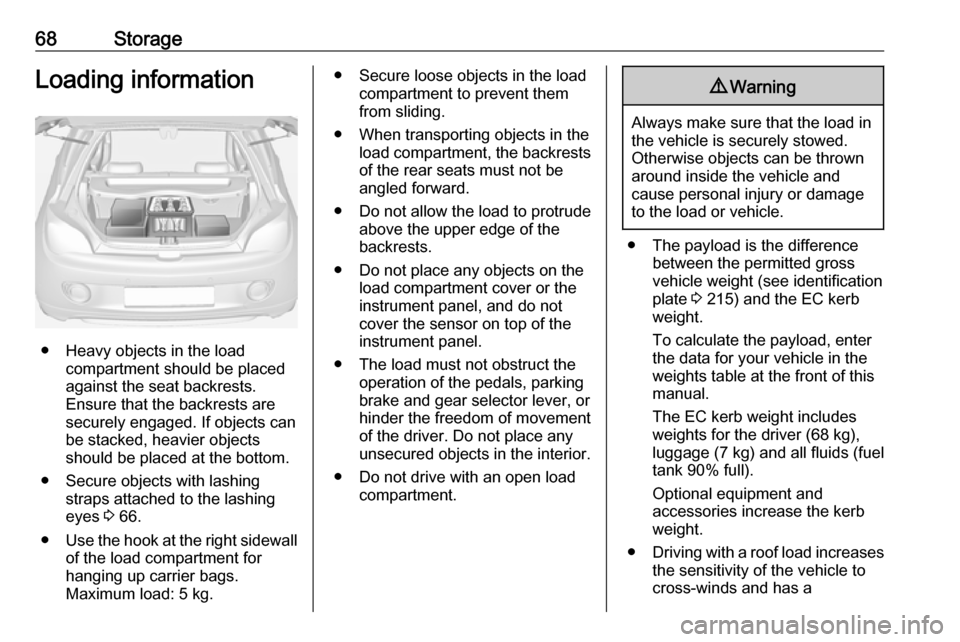
● Heavy objects in the loadcompartment should be placed
against the seat backrests.
Ensure that the backrests are
securely engaged. If objects can
be stacked, heavier objects
should be placed at the bottom.
● Secure objects with lashing straps attached to the lashing
eyes 3 66.
● Use the hook at the right sidewall
of the load compartment for
hanging up carrier bags.
Maximum load: 5 kg.
● Secure loose objects in the load compartment to prevent themfrom sliding.
● When transporting objects in the load compartment, the backrestsof the rear seats must not be
angled forward.
● Do not allow the load to protrude above the upper edge of the
backrests.
● Do not place any objects on the load compartment cover or theinstrument panel, and do not
cover the sensor on top of the instrument panel.
● The load must not obstruct the operation of the pedals, parking
brake and gear selector lever, or
hinder the freedom of movement of the driver. Do not place any
unsecured objects in the interior.
● Do not drive with an open load compartment.9Warning
Always make sure that the load in
the vehicle is securely stowed.
Otherwise objects can be thrown
around inside the vehicle and
cause personal injury or damage
to the load or vehicle.
● The payload is the difference between the permitted gross
vehicle weight (see identification
plate 3 215) and the EC kerb
weight.
To calculate the payload, enter
the data for your vehicle in the
weights table at the front of this
manual.
The EC kerb weight includes
weights for the driver (68 kg),
luggage (7 kg) and all fluids (fuel
tank 90% full).
Optional equipment and
accessories increase the kerb
weight.
● Driving with a roof load increases
the sensitivity of the vehicle to
cross-winds and has a
Page 72 of 241

70Instruments and controlsInstruments and
controlsControls ....................................... 71
Steering wheel adjustment ........71
Steering wheel controls .............71
Heated steering wheel ...............71
Horn ........................................... 72
Windscreen wiper/washer .........72
Rear window wiper/washer .......74
Outside temperature ..................74
Clock ......................................... 75
Power outlets ............................. 77
Inductive charging .....................77
Cigarette lighter ......................... 78
Ashtrays .................................... 78
Warning lights, gauges and indi‐ cators ........................................... 79
Instrument cluster ......................79
Speedometer ............................. 79
Odometer .................................. 79
Trip odometer ............................ 79
Tachometer ............................... 79
Fuel gauge ................................ 80
Fuel selector .............................. 80
Engine coolant temperature gauge ....................................... 81Service display.......................... 81
Control indicators ......................82
Turn signal ................................. 84
Seat belt reminder .....................84
Airbag and belt tensioners .........85
Airbag deactivation ....................85
Charging system .......................85
Malfunction indicator light ..........86
Service vehicle soon .................86
Brake and clutch system ...........86
Operate pedal ............................ 86
Antilock brake system (ABS) .....87
Upshift ....................................... 87
Power steering .......................... 87
Ultrasonic parking assist ...........87
Electronic Stability Control off ...87
Electronic Stability Control and Traction Control system ...........87
Tyre pressure monitoring system ...................................... 88
Engine oil pressure ....................88
Low fuel ..................................... 88
Immobiliser ................................ 89
Exterior light .............................. 89
High beam ................................. 89
Rear fog light ............................. 89
Cruise control ............................ 89
Door open .................................. 89
Information displays .....................89
Driver Information Centre ..........89Colour-Info-Display ....................94
Graphic-Info-Display ..................95
Vehicle messages ........................96
Warning chimes .........................98
Battery voltage .......................... 98
Vehicle personalisation ................99
Telematics service .....................102
OnStar ..................................... 102
Page 82 of 241
80Instruments and controlsFuel gauge
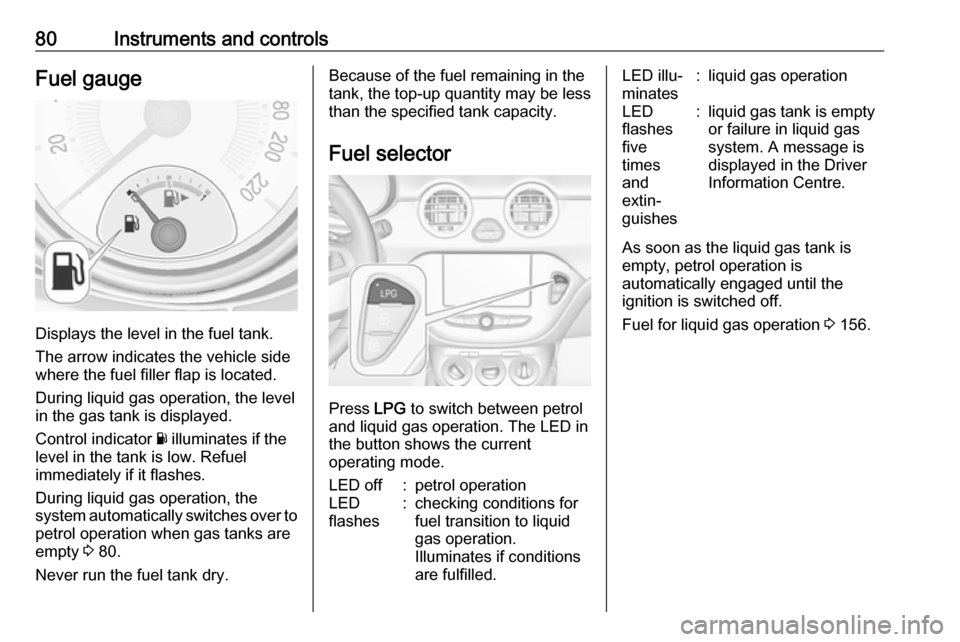
Displays the level in the fuel tank.
The arrow indicates the vehicle side
where the fuel filler flap is located.
During liquid gas operation, the level
in the gas tank is displayed.
Control indicator Y illuminates if the
level in the tank is low. Refuel
immediately if it flashes.
During liquid gas operation, the
system automatically switches over to
petrol operation when gas tanks are
empty 3 80.
Never run the fuel tank dry.
Because of the fuel remaining in the
tank, the top-up quantity may be less
than the specified tank capacity.
Fuel selector
Press LPG
to switch between petrol
and liquid gas operation. The LED in
the button shows the current
operating mode.
LED off:petrol operationLED
flashes:checking conditions for
fuel transition to liquid
gas operation.
Illuminates if conditions
are fulfilled.LED illu‐
minates:liquid gas operationLED
flashes
five
times
and
extin‐
guishes:liquid gas tank is empty
or failure in liquid gas
system. A message is
displayed in the Driver
Information Centre.
As soon as the liquid gas tank is
empty, petrol operation is
automatically engaged until the
ignition is switched off.
Fuel for liquid gas operation 3 156.
Page 86 of 241
84Instruments and controlsControl indicators in the centre
console
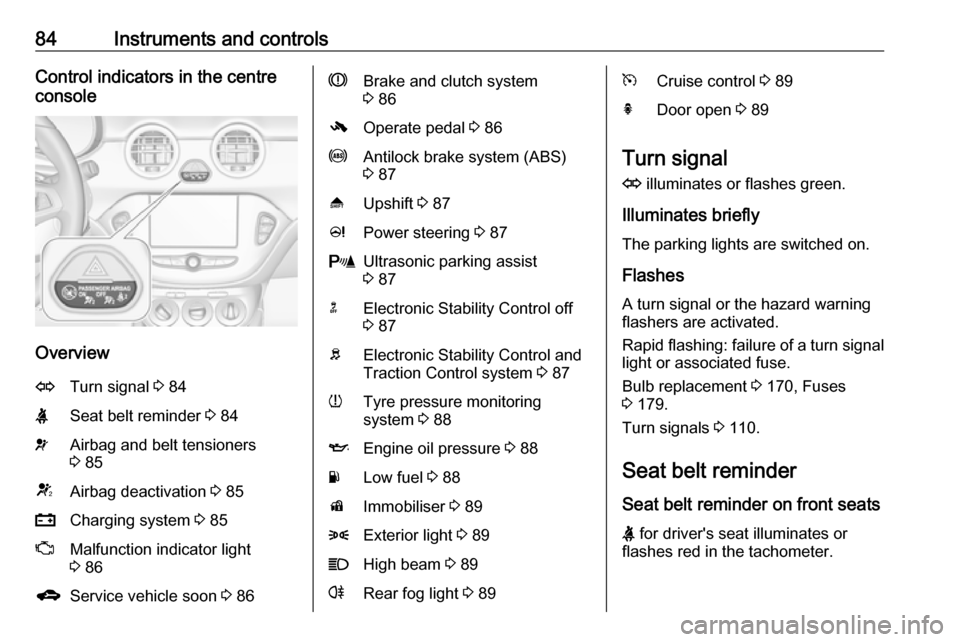
Overview
OTurn signal 3 84XSeat belt reminder 3 84vAirbag and belt tensioners
3 85VAirbag deactivation 3 85pCharging system 3 85ZMalfunction indicator light
3 86gService vehicle soon 3 86RBrake and clutch system
3 86-Operate pedal 3 86uAntilock brake system (ABS)
3 87[Upshift 3 87cPower steering 3 87rUltrasonic parking assist
3 87nElectronic Stability Control off
3 87bElectronic Stability Control and
Traction Control system 3 87wTyre pressure monitoring
system 3 88IEngine oil pressure 3 88YLow fuel 3 88dImmobiliser 3 898Exterior light 3 89CHigh beam 3 89rRear fog light 3 89mCruise control 3 89hDoor open 3 89
Turn signal
O illuminates or flashes green.
Illuminates briefly
The parking lights are switched on.
Flashes
A turn signal or the hazard warning flashers are activated.
Rapid flashing: failure of a turn signal light or associated fuse.
Bulb replacement 3 170, Fuses
3 179.
Turn signals 3 110.
Seat belt reminder
Seat belt reminder on front seats
X for driver's seat illuminates or
flashes red in the tachometer.
Page 89 of 241

Instruments and controls87Antilock brake system
(ABS)
u illuminates yellow.
Illuminates for a few seconds after the ignition is switched on. The system is
ready for operation when the control
indicator extinguishes.
If the control indicator does not go out after a few seconds, or if it illuminates while driving, there is a fault in the
ABS. The brake system remains
operational but without ABS
regulation.
Antilock brake system 3 136.
Upshift [ illuminates green as control
indicator or is shown as a symbol in
the Driver Information Centre with
Uplevel-Display, when upshifting is
recommended for fuel saving
reasons.
Eco information menu
The gear shift indication is popped-up
as a full page in the Driver Information Centre.EcoFlex drive assistant 3 89.
Power steering
c illuminates yellow.
Illuminates with power steering
disabled
Failure in the power steering system.
Consult a workshop.
Illumination of c and b
simultaneously
Power steering system must be
calibrated, system calibration 3 140.
Ultrasonic parking assist
r illuminates yellow.
Fault in system
or
Fault due to sensors that are dirty or covered by ice or snow
or
Interference due to external sources of ultrasound. Once the source of
interference is removed, the system
will operate normally.Have the cause of the fault in the
system remedied by a workshop.
Ultrasonic parking assist 3 145.
Electronic Stability Control
off
t illuminates yellow.
The system is deactivated.
Electronic Stability Control
and Traction Control system
b flashes or illuminates yellow.
Flashes
The system is actively engaged.
Engine output may be reduced and
the vehicle may be braked
automatically to a small degree.
Illuminates
A fault in the system is present. A
warning message appears in the
Driver Information Centre. Continued
driving is possible. The system is not
Page 90 of 241
88Instruments and controlsoperational. Driving stability,
however, may deteriorate depending
on road surface conditions.
Have the cause of the fault remedied
by a workshop.
Electronic Stability Control 3 139,
Traction Control system 3 138.
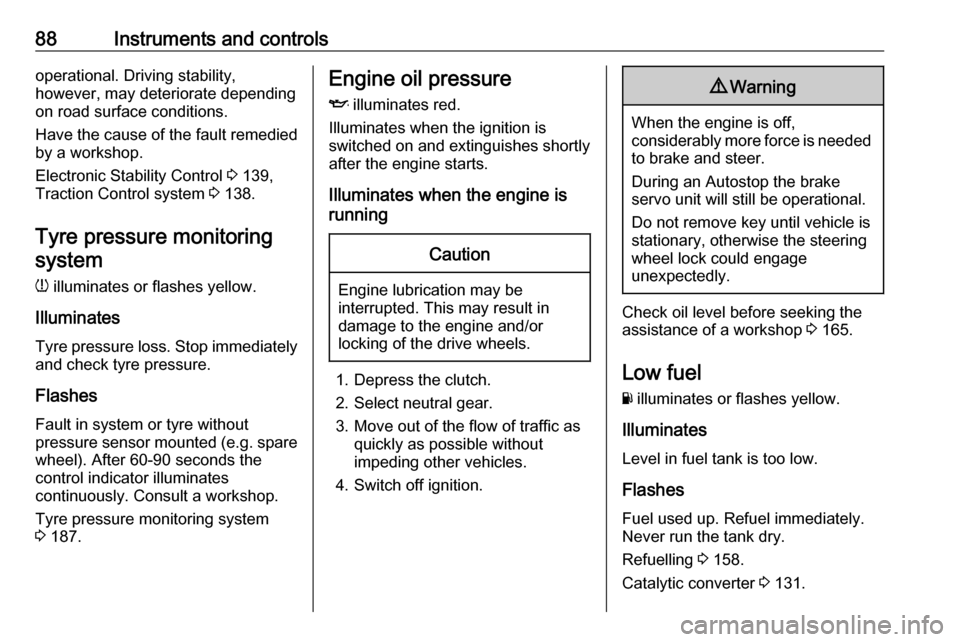
Tyre pressure monitoring system
w illuminates or flashes yellow.
Illuminates
Tyre pressure loss. Stop immediately
and check tyre pressure.
Flashes
Fault in system or tyre without
pressure sensor mounted (e.g. spare
wheel). After 60-90 seconds the
control indicator illuminates
continuously. Consult a workshop.
Tyre pressure monitoring system 3 187.Engine oil pressure
I illuminates red.
Illuminates when the ignition is
switched on and extinguishes shortly
after the engine starts.
Illuminates when the engine is
runningCaution
Engine lubrication may be
interrupted. This may result in
damage to the engine and/or
locking of the drive wheels.
1. Depress the clutch.
2. Select neutral gear.
3. Move out of the flow of traffic as quickly as possible without
impeding other vehicles.
4. Switch off ignition.
9 Warning
When the engine is off,
considerably more force is needed
to brake and steer.
During an Autostop the brake
servo unit will still be operational.
Do not remove key until vehicle is stationary, otherwise the steeringwheel lock could engage
unexpectedly.
Check oil level before seeking the
assistance of a workshop 3 165.
Low fuel
Y illuminates or flashes yellow.
Illuminates
Level in fuel tank is too low.
Flashes
Fuel used up. Refuel immediately.
Never run the tank dry.
Refuelling 3 158.
Catalytic converter 3 131.
Page 92 of 241
90Instruments and controls● trip/fuel information menu, seefollowing
● vehicle messages, displayed as code numbers 3 96.
Select menu pages by pressing
MENU or turning the adjuster wheel
on the turn signal lever.
Some of the displayed functions differ
when the vehicle is being driven or at
a standstill. Some functions are only
available when the vehicle is being
driven.
Vehicle information menu and trip/ fuel information menu are selectable
pages, while vehicle messages and
control indicators pop-up when
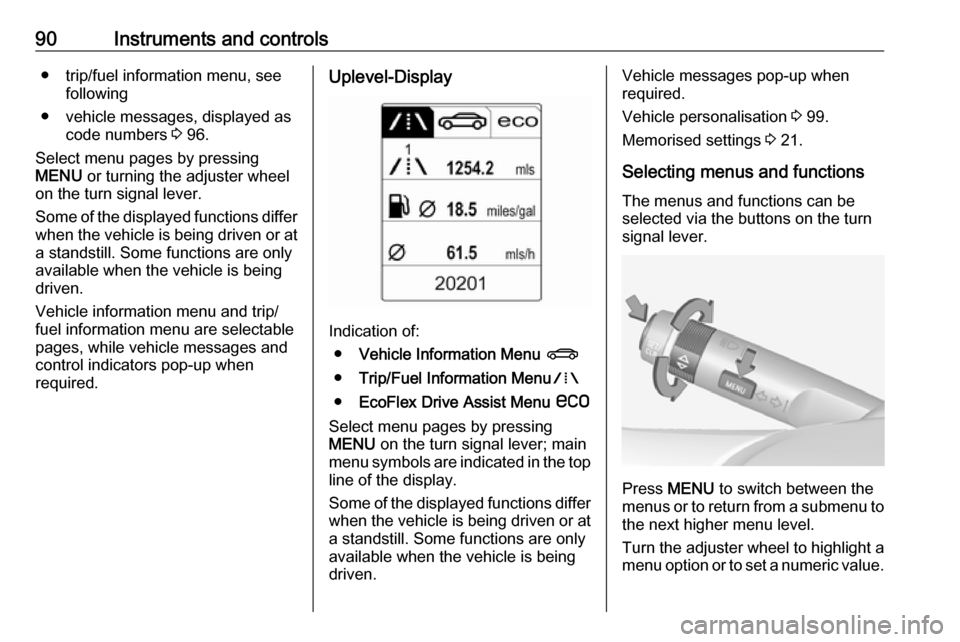
required.Uplevel-Display
Indication of:
● Vehicle Information Menu X
● Trip/Fuel Information Menu W
● EcoFlex Drive Assist Menu s
Select menu pages by pressing
MENU on the turn signal lever; main
menu symbols are indicated in the top line of the display.
Some of the displayed functions differ
when the vehicle is being driven or at
a standstill. Some functions are only
available when the vehicle is being
driven.
Vehicle messages pop-up when
required.
Vehicle personalisation 3 99.
Memorised settings 3 21.
Selecting menus and functions The menus and functions can be
selected via the buttons on the turn
signal lever.
Press MENU to switch between the
menus or to return from a submenu to
the next higher menu level.
Turn the adjuster wheel to highlight a
menu option or to set a numeric value.