brake sensor VAUXHALL ADAM 2017 Owner's Manual
[x] Cancel search | Manufacturer: VAUXHALL, Model Year: 2017, Model line: ADAM, Model: VAUXHALL ADAM 2017Pages: 241, PDF Size: 7.33 MB
Page 70 of 241

68StorageLoading information
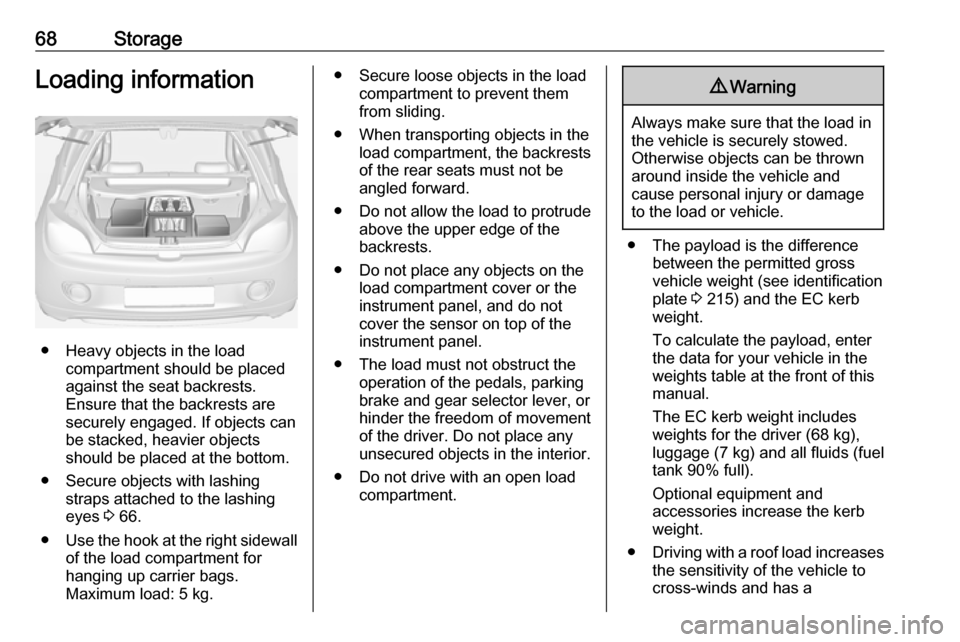
● Heavy objects in the loadcompartment should be placed
against the seat backrests.
Ensure that the backrests are
securely engaged. If objects can
be stacked, heavier objects
should be placed at the bottom.
● Secure objects with lashing straps attached to the lashing
eyes 3 66.
● Use the hook at the right sidewall
of the load compartment for
hanging up carrier bags.
Maximum load: 5 kg.
● Secure loose objects in the load compartment to prevent themfrom sliding.
● When transporting objects in the load compartment, the backrestsof the rear seats must not be
angled forward.
● Do not allow the load to protrude above the upper edge of the
backrests.
● Do not place any objects on the load compartment cover or theinstrument panel, and do not
cover the sensor on top of the instrument panel.
● The load must not obstruct the operation of the pedals, parking
brake and gear selector lever, or
hinder the freedom of movement of the driver. Do not place any
unsecured objects in the interior.
● Do not drive with an open load compartment.9Warning
Always make sure that the load in
the vehicle is securely stowed.
Otherwise objects can be thrown
around inside the vehicle and
cause personal injury or damage
to the load or vehicle.
● The payload is the difference between the permitted gross
vehicle weight (see identification
plate 3 215) and the EC kerb
weight.
To calculate the payload, enter
the data for your vehicle in the
weights table at the front of this
manual.
The EC kerb weight includes
weights for the driver (68 kg),
luggage (7 kg) and all fluids (fuel
tank 90% full).
Optional equipment and
accessories increase the kerb
weight.
● Driving with a roof load increases
the sensitivity of the vehicle to
cross-winds and has a
Page 89 of 241

Instruments and controls87Antilock brake system
(ABS)
u illuminates yellow.
Illuminates for a few seconds after the ignition is switched on. The system is
ready for operation when the control
indicator extinguishes.
If the control indicator does not go out after a few seconds, or if it illuminates while driving, there is a fault in the
ABS. The brake system remains
operational but without ABS
regulation.
Antilock brake system 3 136.
Upshift [ illuminates green as control
indicator or is shown as a symbol in
the Driver Information Centre with
Uplevel-Display, when upshifting is
recommended for fuel saving
reasons.
Eco information menu
The gear shift indication is popped-up
as a full page in the Driver Information Centre.EcoFlex drive assistant 3 89.
Power steering
c illuminates yellow.
Illuminates with power steering
disabled
Failure in the power steering system.
Consult a workshop.
Illumination of c and b
simultaneously
Power steering system must be
calibrated, system calibration 3 140.
Ultrasonic parking assist
r illuminates yellow.
Fault in system
or
Fault due to sensors that are dirty or covered by ice or snow
or
Interference due to external sources of ultrasound. Once the source of
interference is removed, the system
will operate normally.Have the cause of the fault in the
system remedied by a workshop.
Ultrasonic parking assist 3 145.
Electronic Stability Control
off
t illuminates yellow.
The system is deactivated.
Electronic Stability Control
and Traction Control system
b flashes or illuminates yellow.
Flashes
The system is actively engaged.
Engine output may be reduced and
the vehicle may be braked
automatically to a small degree.
Illuminates
A fault in the system is present. A
warning message appears in the
Driver Information Centre. Continued
driving is possible. The system is not
Page 90 of 241

88Instruments and controlsoperational. Driving stability,
however, may deteriorate depending
on road surface conditions.
Have the cause of the fault remedied
by a workshop.
Electronic Stability Control 3 139,
Traction Control system 3 138.
Tyre pressure monitoring system
w illuminates or flashes yellow.
Illuminates
Tyre pressure loss. Stop immediately
and check tyre pressure.
Flashes
Fault in system or tyre without
pressure sensor mounted (e.g. spare
wheel). After 60-90 seconds the
control indicator illuminates
continuously. Consult a workshop.
Tyre pressure monitoring system 3 187.Engine oil pressure
I illuminates red.
Illuminates when the ignition is
switched on and extinguishes shortly
after the engine starts.
Illuminates when the engine is
runningCaution
Engine lubrication may be
interrupted. This may result in
damage to the engine and/or
locking of the drive wheels.
1. Depress the clutch.
2. Select neutral gear.
3. Move out of the flow of traffic as quickly as possible without
impeding other vehicles.
4. Switch off ignition.
9 Warning
When the engine is off,
considerably more force is needed
to brake and steer.
During an Autostop the brake
servo unit will still be operational.
Do not remove key until vehicle is stationary, otherwise the steeringwheel lock could engage
unexpectedly.
Check oil level before seeking the
assistance of a workshop 3 165.
Low fuel
Y illuminates or flashes yellow.
Illuminates
Level in fuel tank is too low.
Flashes
Fuel used up. Refuel immediately.
Never run the tank dry.
Refuelling 3 158.
Catalytic converter 3 131.
Page 130 of 241

128Driving and operatingStop-start systemThe stop-start system helps to save
fuel and to reduce the exhaust
emissions. When conditions allow, it
switches off the engine as soon as the
vehicle is at a low speed or at a
standstill, e.g. at a traffic light or in a
traffic jam.
On vehicles with manual
transmission, the engine is started automatically as soon as the clutch is
depressed.
On vehicles with manual transmission
automated, the engine is started
automatically as soon as the brake
pedal is released.
A vehicle battery sensor ensures that
an Autostop is only performed if the
vehicle battery is sufficiently charged
for a restart.
Activation
The stop-start system is available as soon as the engine is started, the
vehicle starts-off and the conditions
as stated below in this section are
fulfilled.Deactivation
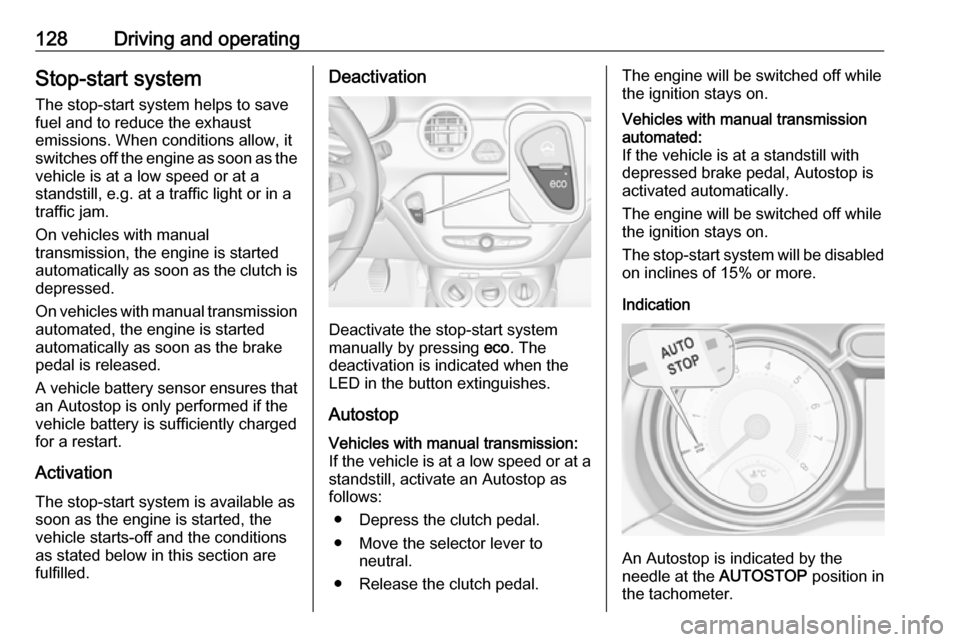
Deactivate the stop-start system
manually by pressing eco. The
deactivation is indicated when the
LED in the button extinguishes.
Autostop
Vehicles with manual transmission:
If the vehicle is at a low speed or at a
standstill, activate an Autostop as
follows:
● Depress the clutch pedal.
● Move the selector lever to neutral.
● Release the clutch pedal.The engine will be switched off while
the ignition stays on.Vehicles with manual transmission
automated:
If the vehicle is at a standstill with
depressed brake pedal, Autostop is
activated automatically.
The engine will be switched off while
the ignition stays on.
The stop-start system will be disabled
on inclines of 15% or more.
Indication
An Autostop is indicated by the
needle at the AUTOSTOP position in
the tachometer.
Page 137 of 241

Driving and operating135ParkingThe most recently engaged gear (see
transmission display) remains
engaged when switching off ignition. With N, no gear is engaged.
Therefore always apply the parking
brake when switching off ignition. If
parking brake is not applied, P flashes
in the transmission display and the
key cannot be removed from the
ignition switch. P stops flashing in the
transmission display as soon as the
parking brake is slightly applied.
When the ignition is switched off, the
transmission no longer responds to
movement of the selector lever.
Tyre pressure monitoring system
To start the sensor matching process of the tyre pressure monitoring
system, the selector lever must be
moved and held in position N for
five seconds. P illuminates in the
transmission display to indicate that
the sensor matching process can be
started.
Tyre pressure monitoring system
3 187.Manual mode
If a higher gear is selected when theengine speed is too low, or a lower
gear when the speed is too high, the
shift is not executed. This prevents
the engine from running at too low or too high an engine speed. A warning
message is displayed in the Driver
Information Centre. Vehicle
messages 3 96.
If engine speed is too low, the
transmission automatically shifts to a
lower gear.
If engine speed is too high, the
transmission only switches to a higher gear via kickdown.
When + or - is selected in automatic
mode, the transmission switches to
manual mode and shifts accordingly.
Gear shift indication
The symbol R, with a number
alongside it, is indicated when
gearshifting is recommended for fuel
saving reasons.
Shift indication appears only in
manual mode.Electronic driving
programmes
● Following a cold start, the operating temperature
programme increases engine
speed to quickly bring the
catalytic converter to the required
temperature.
● The adaptive programme tailors gearshifting to the driving
conditions, e.g. greater load or gradients.
Kickdown If the accelerator pedal is pressed
down completely in automatic mode, the transmission shifts to a lower gear
depending on engine speed.
Fault
To prevent damage to the manual transmission automated, the clutch is
engaged automatically at high clutch
temperatures.
Page 191 of 241

Vehicle care189Each time the tyres are replaced, tyre
pressure monitoring system sensors
must be dismounted and serviced. For the screwed sensor; replace
valve core and sealing ring. For the
clipped sensor; replace complete
valve stem.
Vehicle loading status
Adjust tyre pressure to load condition according to the tyre information labelor tyre pressure chart 3 225, and
select the appropriate setting in the menu Tyre Load in the Driver
Information Centre, Vehicle
Information Menu 3 89 . This setting is
the reference for the tyre pressure
warnings.
The Tyre Load menu only appears if
the vehicle is at a standstill and the parking brake is applied. On vehicles
with automatic transmission the
selector lever has to be in P.
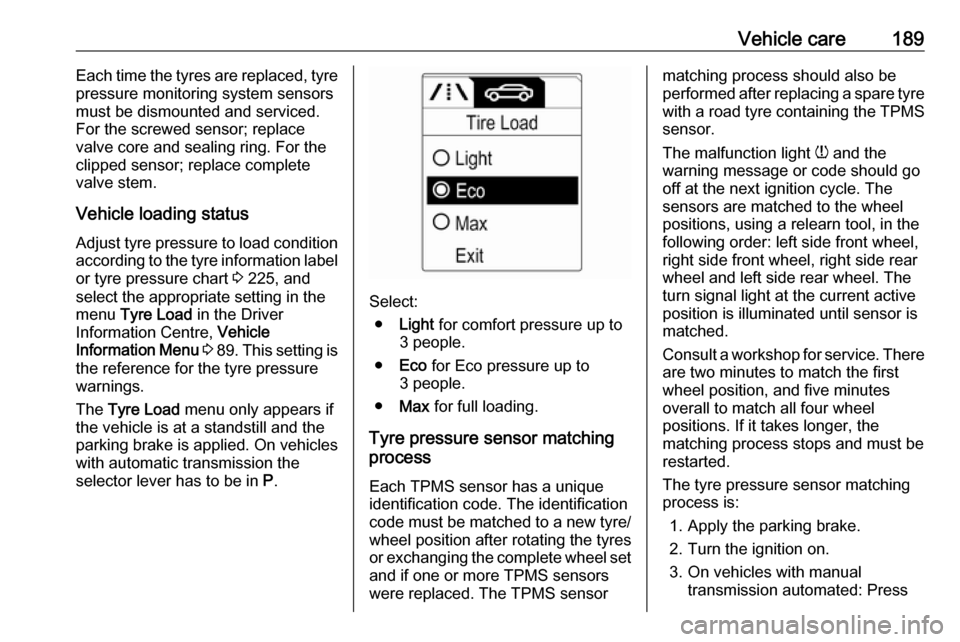
Select:
● Light for comfort pressure up to
3 people.
● Eco for Eco pressure up to
3 people.
● Max for full loading.
Tyre pressure sensor matching process
Each TPMS sensor has a unique
identification code. The identification
code must be matched to a new tyre/ wheel position after rotating the tyres
or exchanging the complete wheel set
and if one or more TPMS sensors
were replaced. The TPMS sensor
matching process should also be
performed after replacing a spare tyre with a road tyre containing the TPMS
sensor.
The malfunction light w and the
warning message or code should go off at the next ignition cycle. The
sensors are matched to the wheel
positions, using a relearn tool, in the following order: left side front wheel,
right side front wheel, right side rear
wheel and left side rear wheel. The
turn signal light at the current active
position is illuminated until sensor is
matched.
Consult a workshop for service. There
are two minutes to match the first
wheel position, and five minutes
overall to match all four wheel
positions. If it takes longer, the
matching process stops and must be
restarted.
The tyre pressure sensor matching
process is:
1. Apply the parking brake.
2. Turn the ignition on.
3. On vehicles with manual transmission automated: Press
Page 192 of 241

190Vehicle careand hold brake pedal. Move and
hold the selector lever for five
seconds in position N until P is
displayed in the Driver Information Centre. P indicates
that the sensor matching process
can be started.
On vehicles with manual
transmission: select neutral.
4. Use MENU on the turn signal
lever to select the Vehicle
Information Menu in the Driver
Information Centre.
5. Turn the adjuster wheel to scroll to
the tyre pressure menu.
6. Press SET/CLR to begin the
sensor matching process. A
message requesting acceptance
of the process should be
displayed.
7. Press SET/CLR again to confirm
the selection. The horn sounds
twice to indicate that the receiver
is in relearn mode.
8. Start with the left side front wheel.
9. Place the relearn tool against the tyre sidewall, near the valve stem.Then press the button to activatethe tyre pressure sensor. A horn
chirp confirms that the sensor
identification code has been
matched to this wheel position.
10. Proceed to the right side front wheel, and repeat the procedure
in Step 9.
11. Proceed to the right side rear wheel, and repeat the procedure
in Step 9.
12. Proceed to the left side rear wheel, and repeat the procedure
in Step 9. The horn sounds twice
to indicate that the sensor
identification code has been
matched to the left side rear
wheel, and the tyre pressure
sensor matching process is no
longer active.
13. Turn off the ignition.
14. Set all four tyres to the recommended air pressure level
as indicated on the tyre
information label.
15. Ensure the tyre loading status is set according to the selected
pressure 3 89.Tread depth
Check tread depth at regular
intervals.
Tyres should be replaced for safety
reasons at a tread depth of 2-3 mm (4 mm for winter tyres).
For safety reasons it is recommended
that the tread depth of the tyres on
one axle should not vary by more than 2 mm.
The legally permissible minimum
tread depth (1.6 mm) has been
reached when the tread has worn
down as far as one of the tread wear