warning VAUXHALL ADAM 2019 Owner's Guide
[x] Cancel search | Manufacturer: VAUXHALL, Model Year: 2019, Model line: ADAM, Model: VAUXHALL ADAM 2019Pages: 223, PDF Size: 6.54 MB
Page 55 of 223

Storage53Load compartment
The rear seat backrest is divided into
two parts. Both parts can be folded
down separately.
Load compartment extension
Remove the load compartment cover
if necessary.
Press the catch and push down the
head restraint.
Insert seat belt latch plate into side
holder to protect the belt against
damage.
Pull the loop on one or both backrests and fold them down onto the seat
cushion.
To fold up, raise the backrests into
upright position and let them engage
audibly.
The backrests are properly engaged
when the red marks on both release
loops are not visible.
9 Warning
When folding up, ensure that
backrests are securely locked in
position before driving. Failure to
do so may result in personal injury or damage to load or vehicle in the event of heavy braking or collision.
Hook for carrier bags
Use the hook at the right sidewall of
the load compartment for hanging up carrier bags. Maximum load: 5 kg.
Page 57 of 223
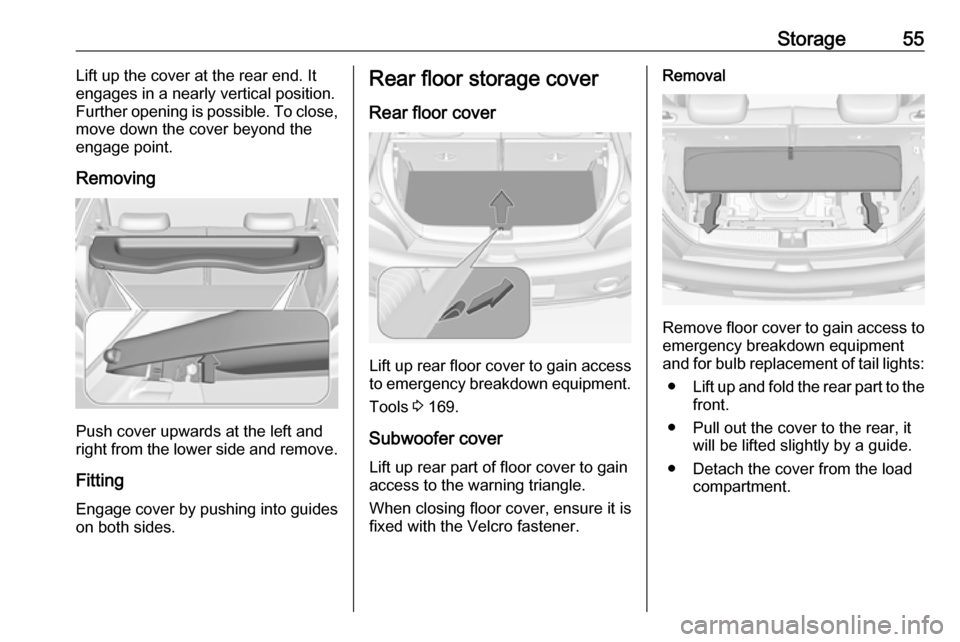
Storage55Lift up the cover at the rear end. It
engages in a nearly vertical position.
Further opening is possible. To close,
move down the cover beyond the
engage point.
Removing
Push cover upwards at the left and
right from the lower side and remove.
Fitting Engage cover by pushing into guides
on both sides.
Rear floor storage cover
Rear floor cover
Lift up rear floor cover to gain access
to emergency breakdown equipment.
Tools 3 169.
Subwoofer cover
Lift up rear part of floor cover to gain
access to the warning triangle.
When closing floor cover, ensure it is
fixed with the Velcro fastener.
Removal
Remove floor cover to gain access to
emergency breakdown equipment
and for bulb replacement of tail lights:
● Lift up and fold the rear part to the
front.
● Pull out the cover to the rear, it will be lifted slightly by a guide.
● Detach the cover from the load compartment.
Page 58 of 223
56Storage
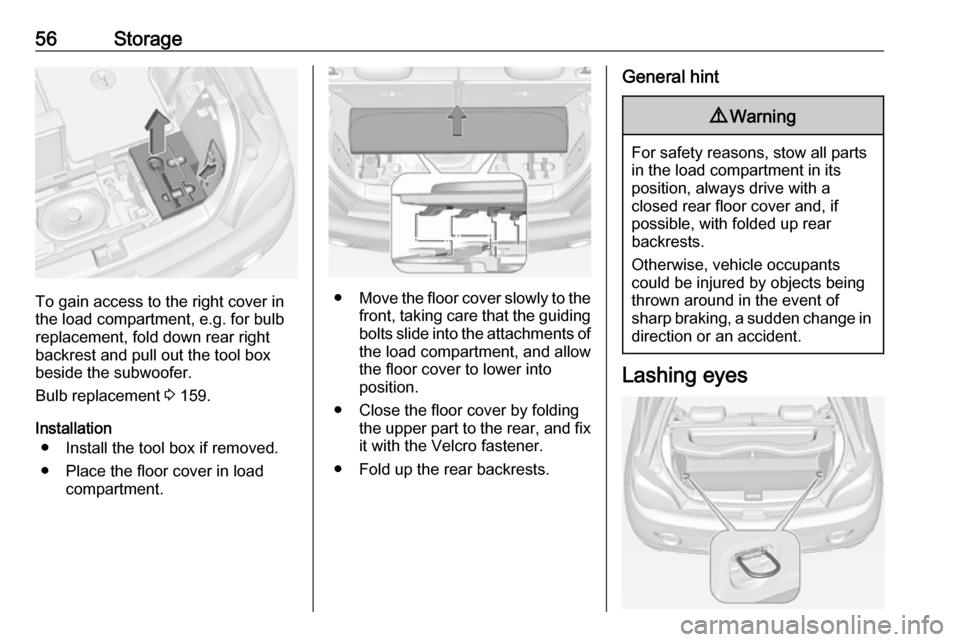
To gain access to the right cover in
the load compartment, e.g. for bulb replacement, fold down rear right
backrest and pull out the tool box
beside the subwoofer.
Bulb replacement 3 159.
Installation ● Install the tool box if removed.
● Place the floor cover in load compartment.●Move the floor cover slowly to the
front, taking care that the guiding bolts slide into the attachments of the load compartment, and allowthe floor cover to lower into
position.
● Close the floor cover by folding the upper part to the rear, and fix
it with the Velcro fastener.
● Fold up the rear backrests.
General hint9 Warning
For safety reasons, stow all parts
in the load compartment in its
position, always drive with a
closed rear floor cover and, if
possible, with folded up rear
backrests.
Otherwise, vehicle occupants
could be injured by objects being
thrown around in the event of
sharp braking, a sudden change in direction or an accident.
Lashing eyes
Page 59 of 223
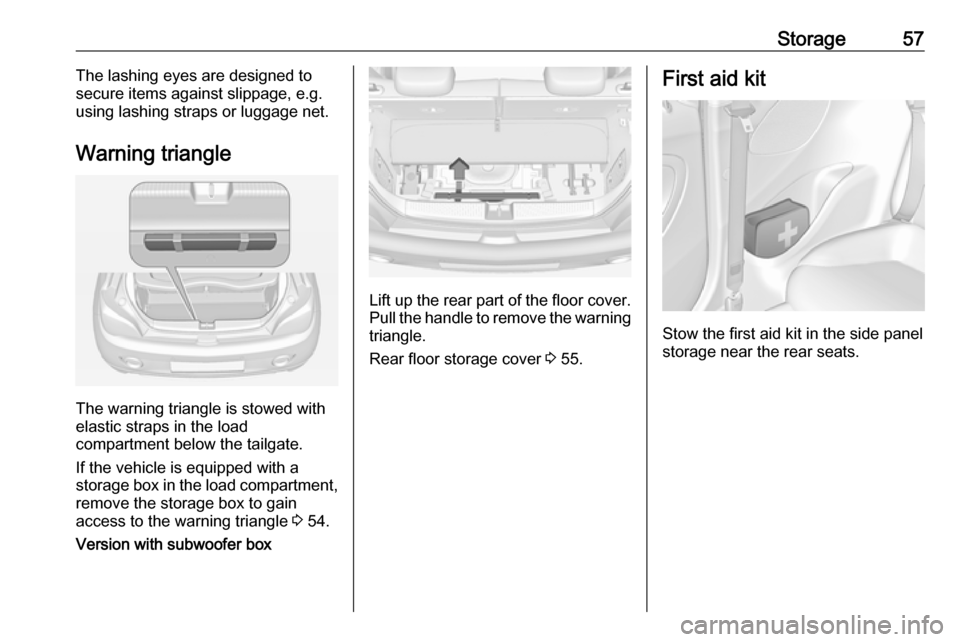
Storage57The lashing eyes are designed to
secure items against slippage, e.g.
using lashing straps or luggage net.
Warning triangle
The warning triangle is stowed with
elastic straps in the load
compartment below the tailgate.
If the vehicle is equipped with a
storage box in the load compartment,
remove the storage box to gain
access to the warning triangle 3 54.
Version with subwoofer box
Lift up the rear part of the floor cover. Pull the handle to remove the warning
triangle.
Rear floor storage cover 3 55.
First aid kit
Stow the first aid kit in the side panel
storage near the rear seats.
Page 61 of 223

Storage599Warning
Always make sure that the load in
the vehicle is securely stowed.
Otherwise objects can be thrown
around inside the vehicle and
cause personal injury or damage
to the load or vehicle.
● The payload is the difference between the permitted gross
vehicle weight (see identification
plate 3 199) and the EC kerb
weight.
To calculate the payload, enter
the data for your vehicle in the
weights table at the front of this
manual.
The EC kerb weight includes
weights for the driver (68 kg),
luggage (7 kg) and all fluids (fuel
tank 90% full).
Optional equipment and
accessories increase the kerb
weight.
● Driving with a roof load increases
the sensitivity of the vehicle to
cross-winds and has a
detrimental effect on vehicle
handling due to the vehicle's
higher centre of gravity.
Distribute the load evenly and secure it properly with retaining
straps. Adjust the tyre pressure
and vehicle speed according to
the load conditions. Check and
retighten the straps frequently.
Do not drive faster than 75 mph.
The permissible roof load is
50 kg. The roof load is the
combined weight of the roof rack and the load.
Page 62 of 223

60Instruments and controlsInstruments and
controlsControls ....................................... 61
Steering wheel adjustment ........61
Steering wheel controls .............61
Heated steering wheel ...............61
Horn ........................................... 62
Windscreen wiper and washer ..62
Rear window wiper and washer ...................................... 63
Outside temperature ..................64
Clock ......................................... 65
Power outlets ............................. 66
Cigarette lighter ......................... 67
Ashtrays .................................... 67
Warning lights, gauges and indi‐ cators ........................................... 68
Instrument cluster ......................68
Speedometer ............................. 68
Odometer .................................. 68
Trip odometer ............................ 68
Tachometer ............................... 68
Fuel gauge ................................ 69
Fuel selector .............................. 69
Engine coolant temperature gauge ....................................... 70Service display.......................... 71
Control indicators ......................72
Turn lights .................................. 74
Seat belt reminder .....................74
Airbag and belt tensioners .........75
Airbag deactivation ....................75
Charging system .......................75
Malfunction indicator light ..........76
Service vehicle soon .................76
Brake and clutch system ...........76
Operate pedal ............................ 76
Antilock brake system (ABS) .....77
Gear shifting .............................. 77
Power steering .......................... 77
Parking assist ............................ 77
Electronic Stability Control off ...77
Electronic Stability Control and Traction Control system ...........77
Exhaust filter .............................. 78
Tyre pressure monitoring system ...................................... 78
Engine oil pressure ....................78
Low fuel ..................................... 79
Immobiliser ................................ 79
Exterior light .............................. 79
High beam ................................. 79
Rear fog light ............................. 79
Cruise control ............................ 79
Door open .................................. 79Displays....................................... 80
Driver Information Centre ..........80
Info Display ................................ 85
Vehicle messages ........................87
Warning chimes .........................89
Battery voltage .......................... 89
Vehicle personalisation ................90
Telematics service .......................93
OnStar ....................................... 93
Page 67 of 223
Instruments and controls65If outside temperature drops to 3 °C,
a warning message is displayed in the
Driver Information Centre.9 Warning
The road surface may already be
icy even though the display
indicates a few degrees above 0
°C.
Clock
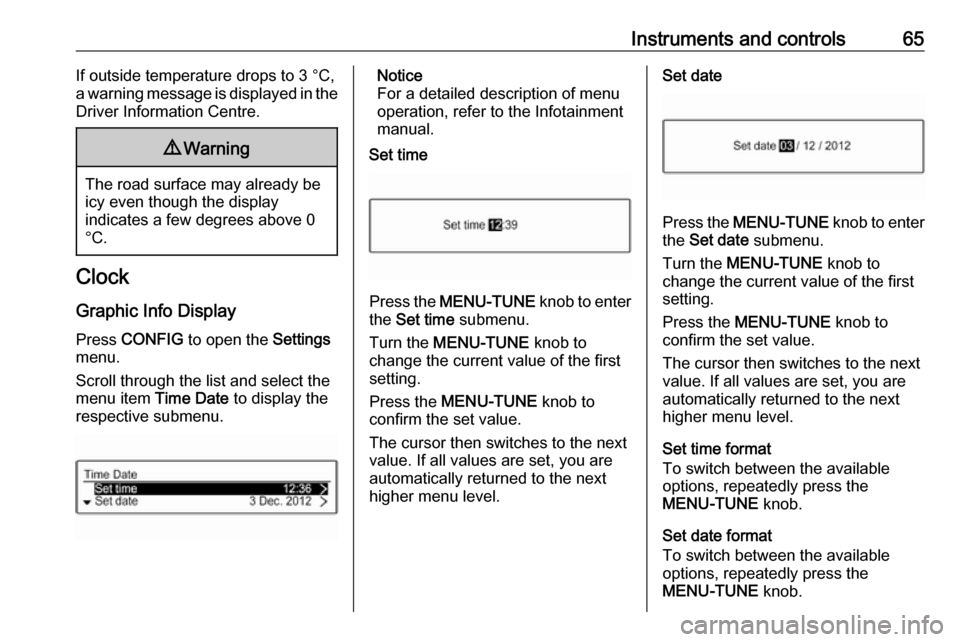
Graphic Info Display
Press CONFIG to open the Settings
menu.
Scroll through the list and select the
menu item Time Date to display the
respective submenu.
Notice
For a detailed description of menu
operation, refer to the Infotainment
manual.
Set time
Press the MENU-TUNE knob to enter
the Set time submenu.
Turn the MENU-TUNE knob to
change the current value of the first setting.
Press the MENU-TUNE knob to
confirm the set value.
The cursor then switches to the next
value. If all values are set, you are
automatically returned to the next
higher menu level.
Set date
Press the MENU-TUNE knob to enter
the Set date submenu.
Turn the MENU-TUNE knob to
change the current value of the first setting.
Press the MENU-TUNE knob to
confirm the set value.
The cursor then switches to the next
value. If all values are set, you are
automatically returned to the next
higher menu level.
Set time format
To switch between the available
options, repeatedly press the
MENU-TUNE knob.
Set date format
To switch between the available
options, repeatedly press the
MENU-TUNE knob.
Page 70 of 223
68Instruments and controlsWarning lights, gauges
and indicators
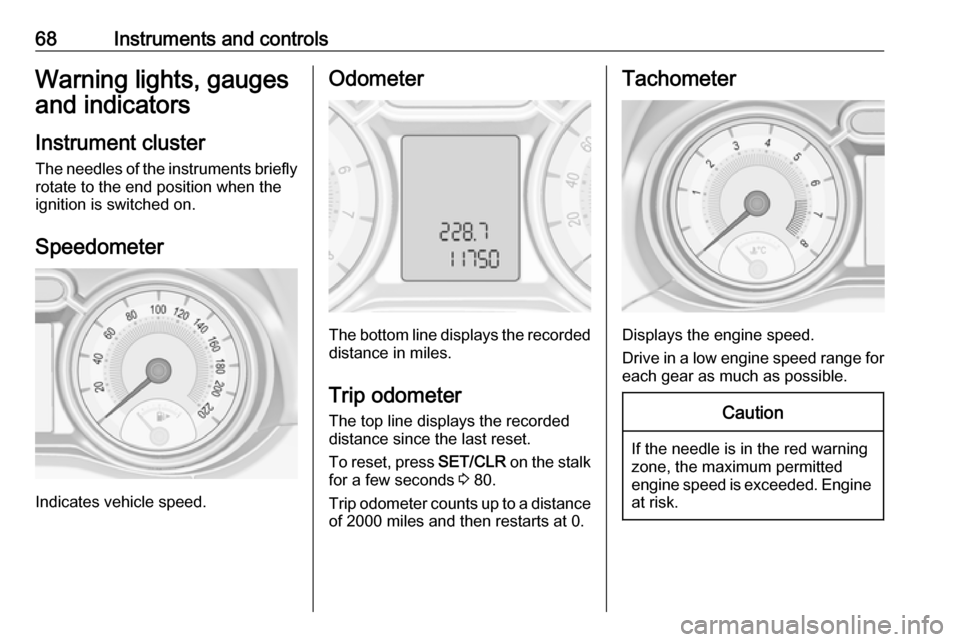
Instrument cluster
The needles of the instruments briefly
rotate to the end position when the
ignition is switched on.
Speedometer
Indicates vehicle speed.
Odometer
The bottom line displays the recorded distance in miles.
Trip odometer The top line displays the recordeddistance since the last reset.
To reset, press SET/CLR on the stalk
for a few seconds 3 80.
Trip odometer counts up to a distance
of 2000 miles and then restarts at 0.
Tachometer
Displays the engine speed.
Drive in a low engine speed range for each gear as much as possible.
Caution
If the needle is in the red warning
zone, the maximum permitted
engine speed is exceeded. Engine at risk.
Page 72 of 223
70Instruments and controlsWhen petrol fuel tank is empty, the
engine will not start.
Every six months, run the petrol tank
down until control indicator Y
illuminates, then refuel. This helps
maintain fuel quality and system
function for petrol operation.
Fill the tank completely at regular
intervals to prevent corrosion in the
tank.
Faults and remedies
If gas mode is not possible, check
whether there is enough liquid gas or petrol present for starting.
Due to extreme temperatures in
combination with the gas
composition, it may take slightly
longer before the system switches
from petrol to gas mode.
In extreme situations, the system may
also switch back to petrol mode if the
minimum requirements are not
fulfilled. If conditions allow, it might be
possible to manually switch back to
liquid gas operation.
Seek the assistance of a workshop in the event of all other faults.Caution
Repairs and adjustments may onlybe made by trained specialists in
order to maintain the safety and
warranty on the LPG system.
Liquid gas is given a particular odour
(odorised) so that any leaks can be
detected easily.
9 Warning
If you smell gas in the vehicle or in
the immediate vicinity, switch to petrol mode immediately. No
smoking. No naked flames or
ignition sources.
If the gas odour persists, do not start
the engine. Have the cause of the
fault remedied by a workshop.
When using underground car parks,
follow the instructions of the operator
and local laws.
Notice
In the event of an accident, switch off
the ignition.
Fuel for liquid gas operation 3 144.
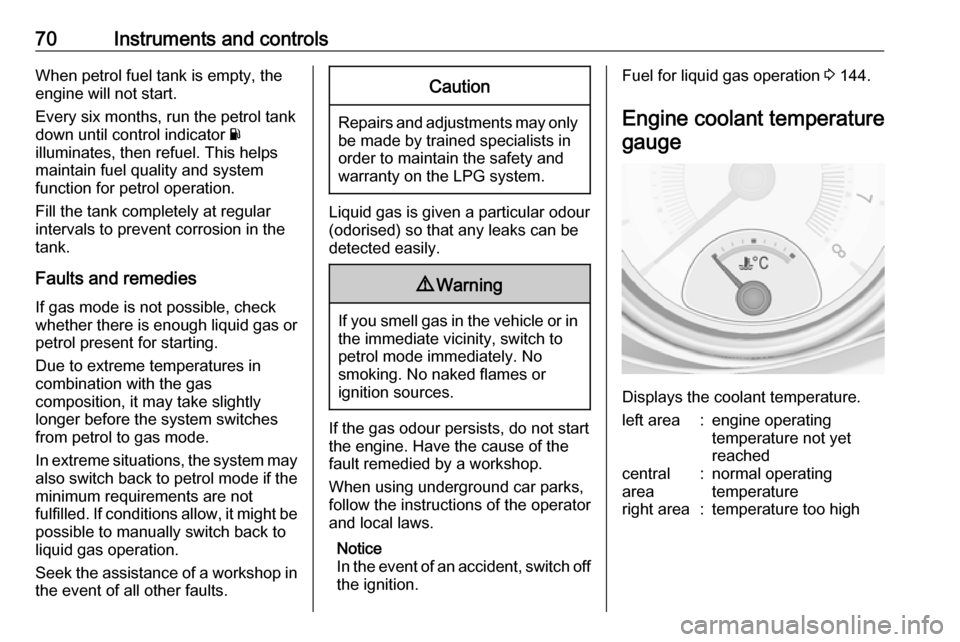
Engine coolant temperature gauge
Displays the coolant temperature.
left area:engine operating
temperature not yet
reachedcentral
area:normal operating
temperatureright area:temperature too high
Page 73 of 223
Instruments and controls71Caution
If engine coolant temperature is
too high, stop vehicle, switch off
engine. Danger to engine. Check
coolant level.
Service display
The engine oil life system lets you
know when to change the engine oil
and filter. Based on driving
conditions, the interval at which an
engine oil and filter change will be
indicated can vary considerably.
When the system has calculated that
engine oil life has been diminished, a warning message appears in theDriver Information Centre. Have
engine oil and filter changed by a
workshop within one week or
300 miles, whichever occurs first.
This can be an additional engine oil
and filter change or part of a regular
service.
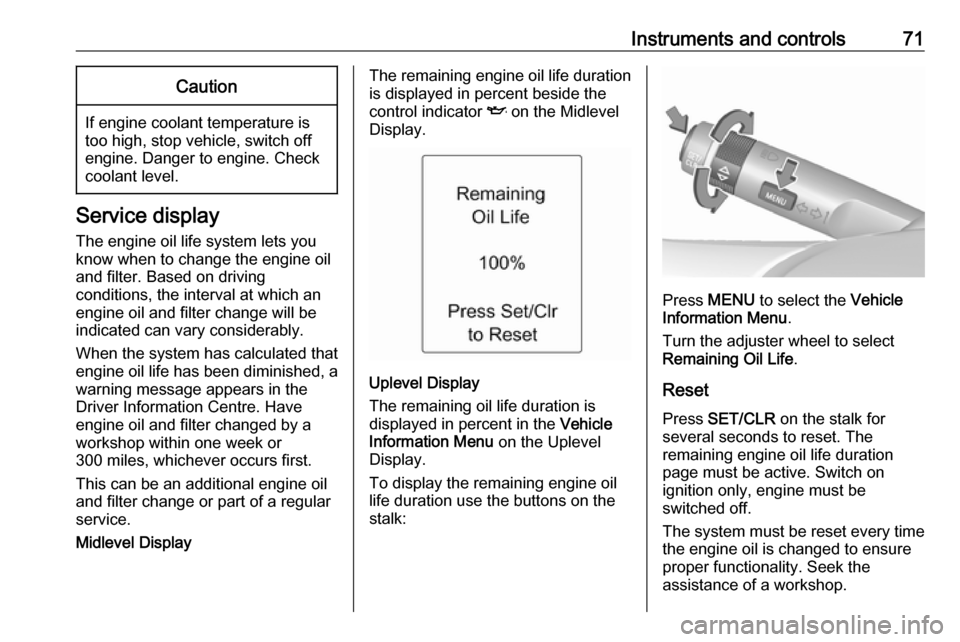
Midlevel Display
The remaining engine oil life duration
is displayed in percent beside the
control indicator I on the Midlevel
Display.
Uplevel Display
The remaining oil life duration is
displayed in percent in the Vehicle
Information Menu on the Uplevel
Display.
To display the remaining engine oil
life duration use the buttons on the
stalk:
Press MENU to select the Vehicle
Information Menu .
Turn the adjuster wheel to select Remaining Oil Life .
Reset Press SET/CLR on the stalk for
several seconds to reset. The
remaining engine oil life duration
page must be active. Switch on
ignition only, engine must be
switched off.
The system must be reset every time
the engine oil is changed to ensure
proper functionality. Seek the
assistance of a workshop.