VAUXHALL ADAM 2019 Workshop Manual
Manufacturer: VAUXHALL, Model Year: 2019, Model line: ADAM, Model: VAUXHALL ADAM 2019Pages: 223, PDF Size: 6.54 MB
Page 51 of 223

Seats, restraints49Permissible options for fitting an ISOFIX child restraint systemWeight classSize classFixtureOn front passenger seatOn rear seatsGroup 0: up to 10 kgEISO/R1XIL *Group 0+: up to 13 kgEISO/R1XIL *DISO/R2XXCISO/R3XXGroup I: 9 to 18 kgDISO/R2XXCISO/R3XXBISO/F2XIL, IUF**B1ISO/F2XXIL, IUF**AISO/F3XIL, IUF**Group II: 15 to 25 kgXILGroup III: 22 to 36 kgXILIL:suitable for particular ISOFIX restraint systems of the "specific-vehicle", "restricted" or "semi-universal" categories.
The ISOFIX restraint system must be approved for the specific vehicle typeIUF:suitable for ISOFIX forward-facing child restraint systems of universal category approved for use in this weight classX:no ISOFIX child restraint system approved in this weight class*:move the respective front seat ahead of the child restraint system to one of the foremost adjustment positions**:remove respective rear head restraint when using child restraint systems in this size class 3 31
Page 52 of 223

50Seats, restraintsISOFIX size class and seat deviceA – ISO/F3:forward-facing child restraint system for children of maximum size in the weight class 9 to 18 kgB – ISO/F2:forward-facing child restraint system for smaller children in the weight class 9 to 18 kgB1 – ISO/F2X:forward-facing child restraint system for smaller children in the weight class 9 to 18 kgC – ISO/R3:rear-facing child restraint system for children of maximum size in the weight class up to 18 kgD – ISO/R2:rear-facing child restraint system for smaller children in the weight class up to 18 kgE – ISO/R1:rear-facing child restraint system for young children in the weight class up to 13 kg
Page 53 of 223
Storage51StorageStorage compartments................51
Glovebox ................................... 51
Cupholders ................................ 51
Front storage ............................. 52
Load compartment .......................53
Rear storage .............................. 54
Load compartment cover ...........54
Rear floor storage cover ............55
Lashing eyes ............................. 56
Warning triangle ........................57
First aid kit ................................. 57
Roof rack system .........................58
Roof rack ................................... 58
Loading information .....................58Storage compartments9Warning
Do not store heavy or sharp
objects in the storage
compartments. Otherwise, the
storage compartment lid could
open and vehicle occupants could be injured by objects being thrown
around in the event of hard
braking, a sudden change in
direction or an accident.
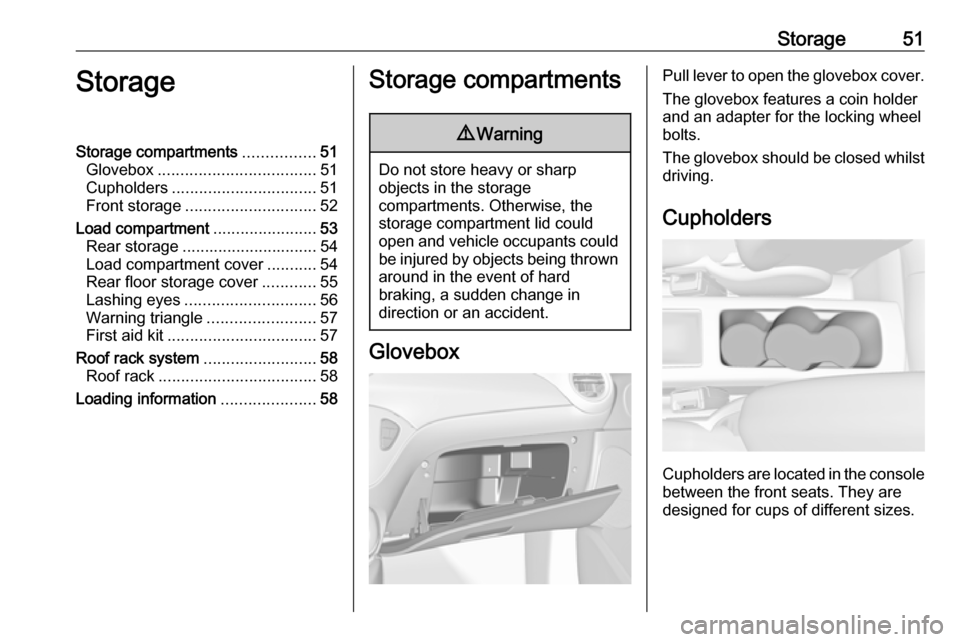
Glovebox
Pull lever to open the glovebox cover.
The glovebox features a coin holder
and an adapter for the locking wheel
bolts.
The glovebox should be closed whilst
driving.
Cupholders
Cupholders are located in the console between the front seats. They are
designed for cups of different sizes.
Page 54 of 223
52Storage
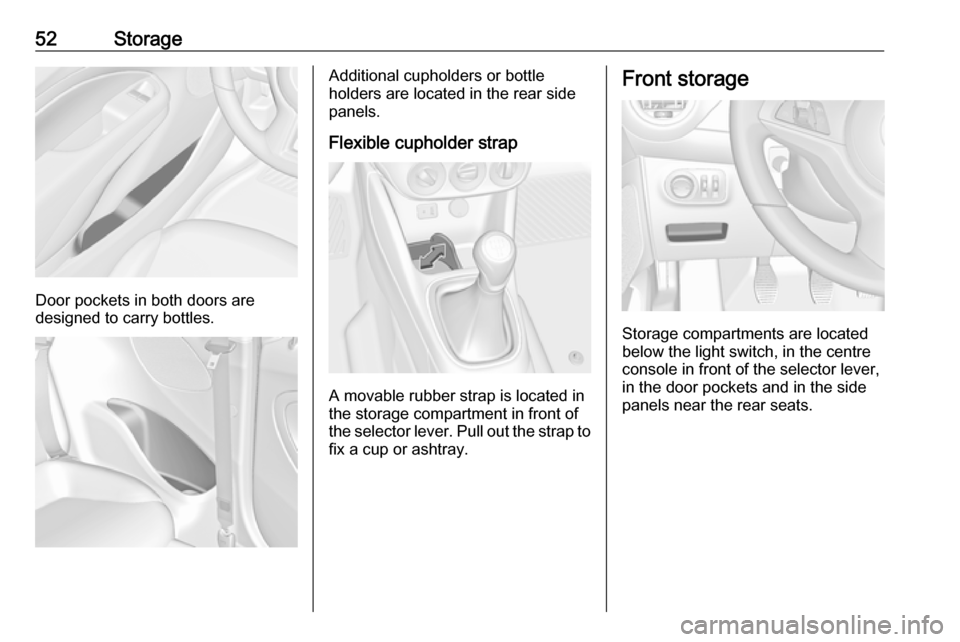
Door pockets in both doors are
designed to carry bottles.
Additional cupholders or bottle
holders are located in the rear side
panels.
Flexible cupholder strap
A movable rubber strap is located in
the storage compartment in front of
the selector lever. Pull out the strap to fix a cup or ashtray.
Front storage
Storage compartments are located
below the light switch, in the centre
console in front of the selector lever,
in the door pockets and in the side
panels near the rear seats.
Page 55 of 223

Storage53Load compartment
The rear seat backrest is divided into
two parts. Both parts can be folded
down separately.
Load compartment extension
Remove the load compartment cover
if necessary.
Press the catch and push down the
head restraint.
Insert seat belt latch plate into side
holder to protect the belt against
damage.
Pull the loop on one or both backrests and fold them down onto the seat
cushion.
To fold up, raise the backrests into
upright position and let them engage
audibly.
The backrests are properly engaged
when the red marks on both release
loops are not visible.
9 Warning
When folding up, ensure that
backrests are securely locked in
position before driving. Failure to
do so may result in personal injury or damage to load or vehicle in the event of heavy braking or collision.
Hook for carrier bags
Use the hook at the right sidewall of
the load compartment for hanging up carrier bags. Maximum load: 5 kg.
Page 56 of 223
54StorageRear storage
Storage box A closable storage box is located in
the load compartment. The cover is
lockable by turning the knob. It must be locked while driving.
To open, unlock and lift up the cover.
To remove the cover, open it and slide
sideways to the left.
The box can be separated by a
divider.
The storage box cover can be loaded with max. 20 kg.
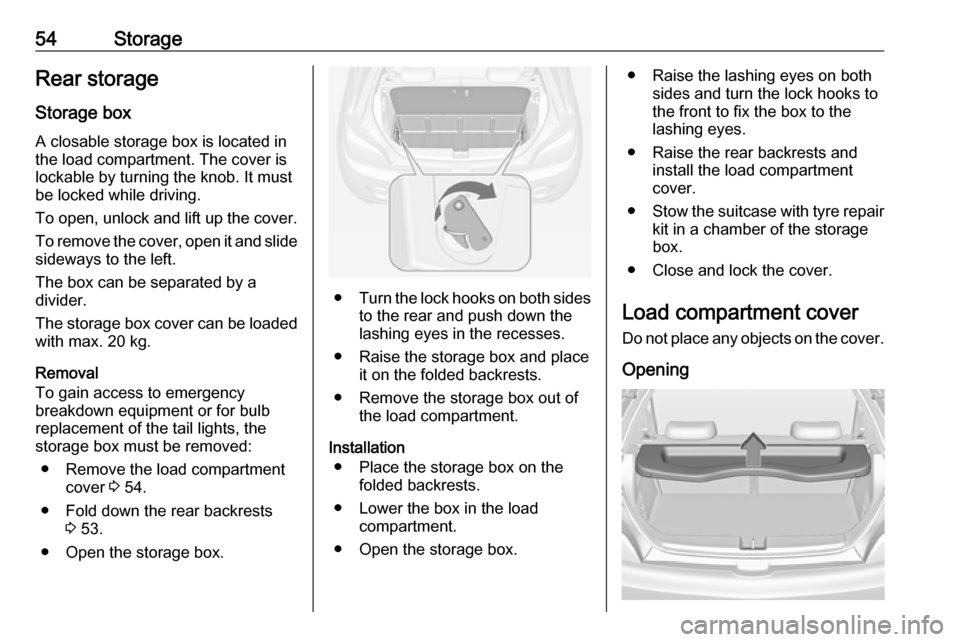
Removal
To gain access to emergency
breakdown equipment or for bulb
replacement of the tail lights, the
storage box must be removed:
● Remove the load compartment cover 3 54.
● Fold down the rear backrests 3 53.
● Open the storage box.
● Turn the lock hooks on both sides
to the rear and push down the
lashing eyes in the recesses.
● Raise the storage box and place it on the folded backrests.
● Remove the storage box out of the load compartment.
Installation ● Place the storage box on the folded backrests.
● Lower the box in the load compartment.
● Open the storage box.
● Raise the lashing eyes on both sides and turn the lock hooks to
the front to fix the box to the
lashing eyes.
● Raise the rear backrests and install the load compartment
cover.
● Stow the suitcase with tyre repair
kit in a chamber of the storage
box.
● Close and lock the cover.
Load compartment cover
Do not place any objects on the cover.
Opening
Page 57 of 223
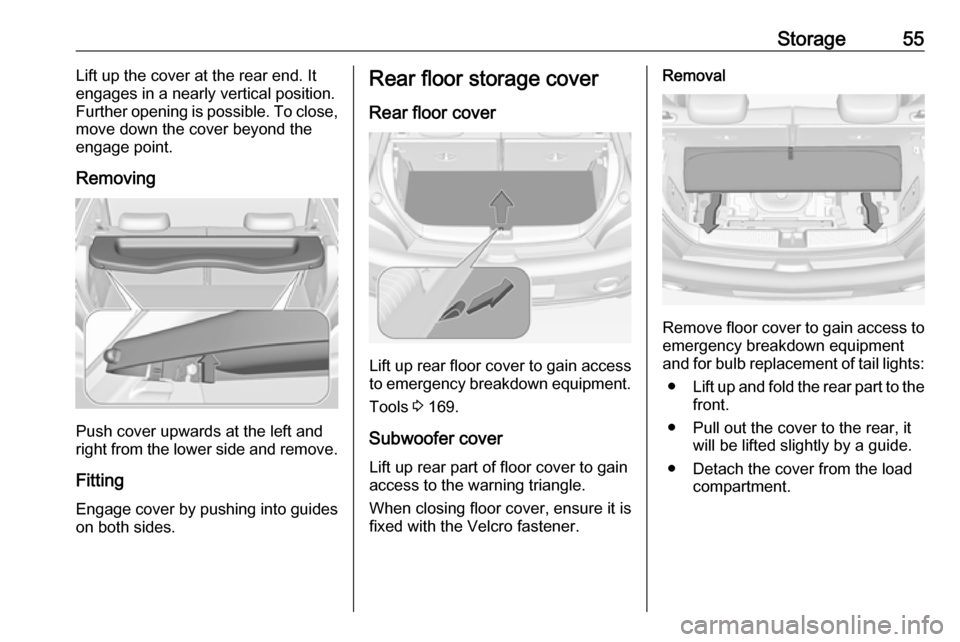
Storage55Lift up the cover at the rear end. It
engages in a nearly vertical position.
Further opening is possible. To close,
move down the cover beyond the
engage point.
Removing
Push cover upwards at the left and
right from the lower side and remove.
Fitting Engage cover by pushing into guides
on both sides.
Rear floor storage cover
Rear floor cover
Lift up rear floor cover to gain access
to emergency breakdown equipment.
Tools 3 169.
Subwoofer cover
Lift up rear part of floor cover to gain
access to the warning triangle.
When closing floor cover, ensure it is
fixed with the Velcro fastener.
Removal
Remove floor cover to gain access to
emergency breakdown equipment
and for bulb replacement of tail lights:
● Lift up and fold the rear part to the
front.
● Pull out the cover to the rear, it will be lifted slightly by a guide.
● Detach the cover from the load compartment.
Page 58 of 223
56Storage
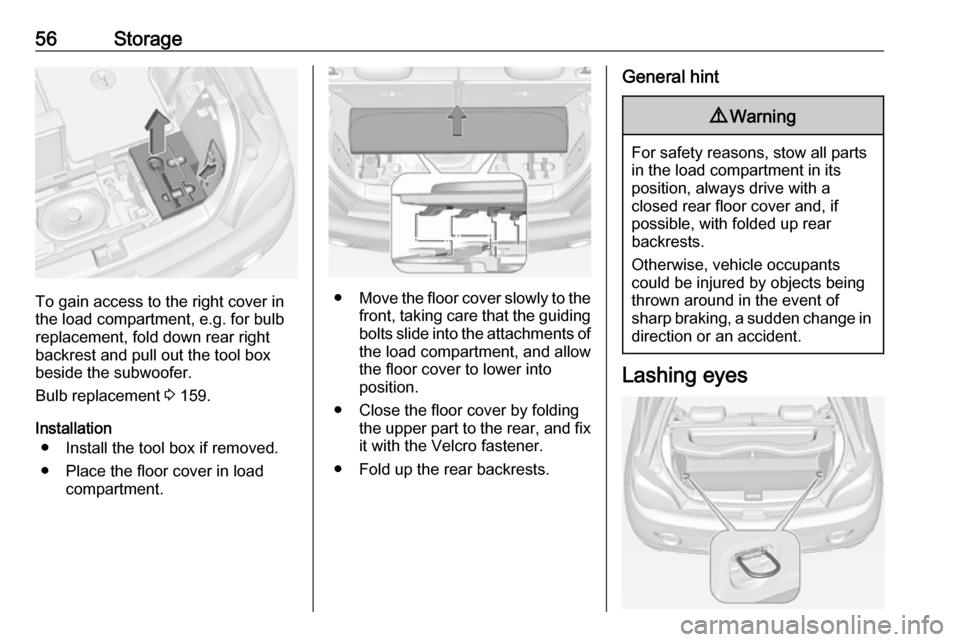
To gain access to the right cover in
the load compartment, e.g. for bulb replacement, fold down rear right
backrest and pull out the tool box
beside the subwoofer.
Bulb replacement 3 159.
Installation ● Install the tool box if removed.
● Place the floor cover in load compartment.●Move the floor cover slowly to the
front, taking care that the guiding bolts slide into the attachments of the load compartment, and allowthe floor cover to lower into
position.
● Close the floor cover by folding the upper part to the rear, and fix
it with the Velcro fastener.
● Fold up the rear backrests.
General hint9 Warning
For safety reasons, stow all parts
in the load compartment in its
position, always drive with a
closed rear floor cover and, if
possible, with folded up rear
backrests.
Otherwise, vehicle occupants
could be injured by objects being
thrown around in the event of
sharp braking, a sudden change in direction or an accident.
Lashing eyes
Page 59 of 223
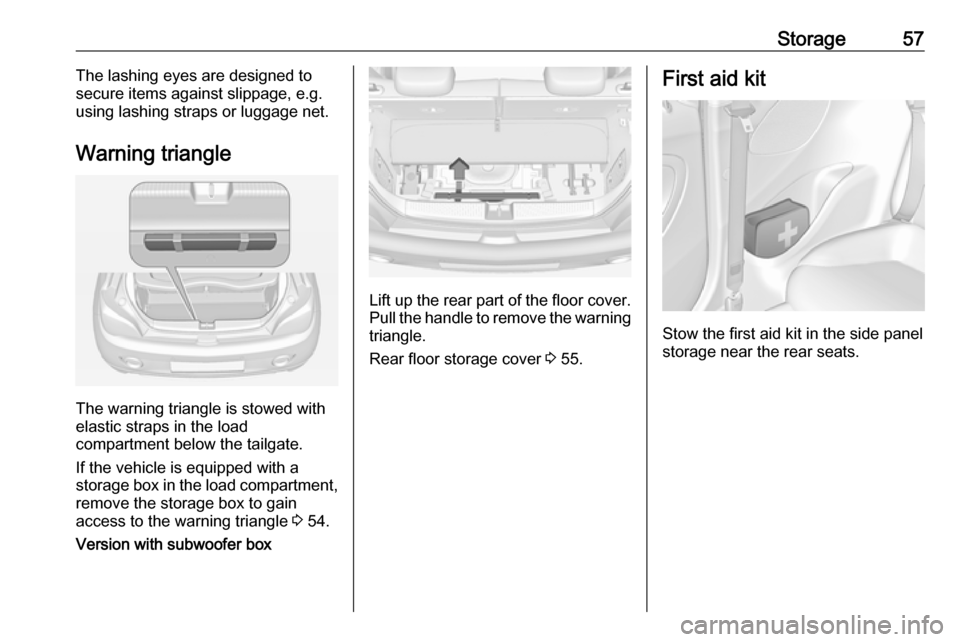
Storage57The lashing eyes are designed to
secure items against slippage, e.g.
using lashing straps or luggage net.
Warning triangle
The warning triangle is stowed with
elastic straps in the load
compartment below the tailgate.
If the vehicle is equipped with a
storage box in the load compartment,
remove the storage box to gain
access to the warning triangle 3 54.
Version with subwoofer box
Lift up the rear part of the floor cover. Pull the handle to remove the warning
triangle.
Rear floor storage cover 3 55.
First aid kit
Stow the first aid kit in the side panel
storage near the rear seats.
Page 60 of 223
58StorageRoof rack systemRoof rackFor safety reasons and to avoid
damage to the roof, the vehicle
approved roof rack system is
recommended. For further
information contact your workshop.
Follow the installation instructions
and remove the roof rack when not in
use.
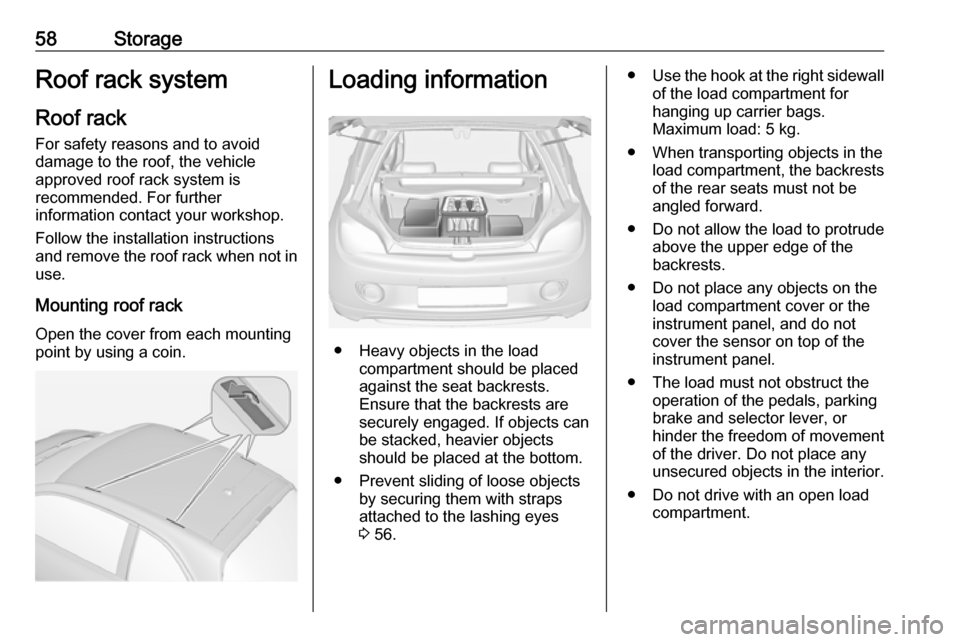
Mounting roof rack Open the cover from each mounting
point by using a coin.Loading information
● Heavy objects in the load compartment should be placed
against the seat backrests.
Ensure that the backrests are
securely engaged. If objects can
be stacked, heavier objects
should be placed at the bottom.
● Prevent sliding of loose objects by securing them with straps
attached to the lashing eyes
3 56.
● Use the hook at the right sidewall
of the load compartment for
hanging up carrier bags.
Maximum load: 5 kg.
● When transporting objects in the load compartment, the backrestsof the rear seats must not be
angled forward.
● Do not allow the load to protrude above the upper edge of the
backrests.
● Do not place any objects on the load compartment cover or the
instrument panel, and do not
cover the sensor on top of the instrument panel.
● The load must not obstruct the operation of the pedals, parking
brake and selector lever, or
hinder the freedom of movement of the driver. Do not place any
unsecured objects in the interior.
● Do not drive with an open load compartment.