key VAUXHALL ANTARA 2015 Infotainment system
[x] Cancel search | Manufacturer: VAUXHALL, Model Year: 2015, Model line: ANTARA, Model: VAUXHALL ANTARA 2015Pages: 151, PDF Size: 2.82 MB
Page 62 of 151
62Navigation
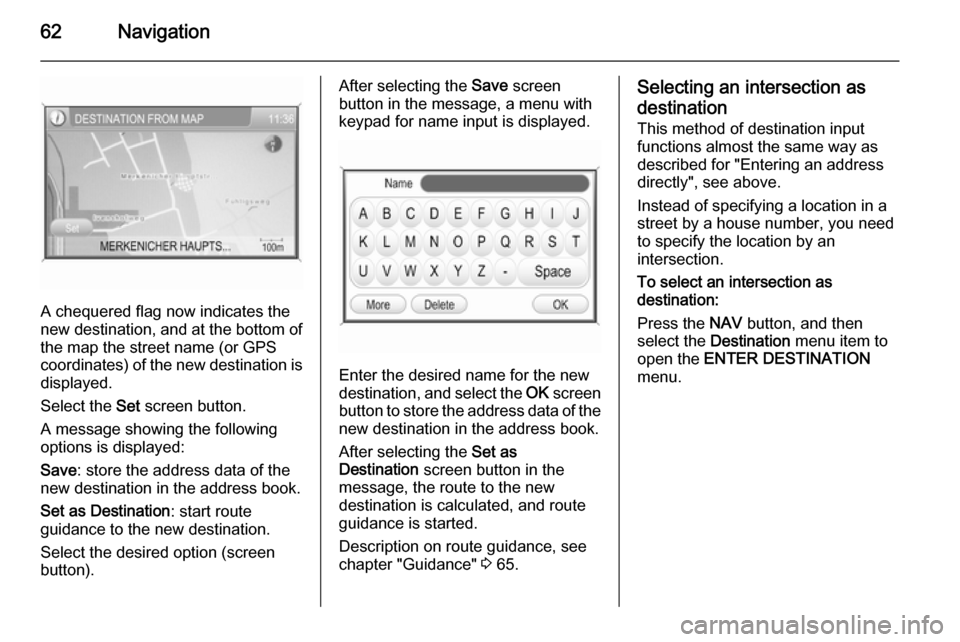
A chequered flag now indicates the
new destination, and at the bottom of the map the street name (or GPS
coordinates) of the new destination is displayed.
Select the Set screen button.
A message showing the following
options is displayed:
Save : store the address data of the
new destination in the address book.
Set as Destination : start route
guidance to the new destination.
Select the desired option (screen
button).
After selecting the Save screen
button in the message, a menu with
keypad for name input is displayed.
Enter the desired name for the new
destination, and select the OK screen
button to store the address data of the new destination in the address book.
After selecting the Set as
Destination screen button in the
message, the route to the new
destination is calculated, and route
guidance is started.
Description on route guidance, see
chapter "Guidance" 3 65.
Selecting an intersection as
destination
This method of destination input
functions almost the same way as
described for "Entering an address
directly", see above.
Instead of specifying a location in a
street by a house number, you need
to specify the location by an
intersection.
To select an intersection as
destination:
Press the NAV button, and then
select the Destination menu item to
open the ENTER DESTINATION
menu.
Page 63 of 151
Navigation63
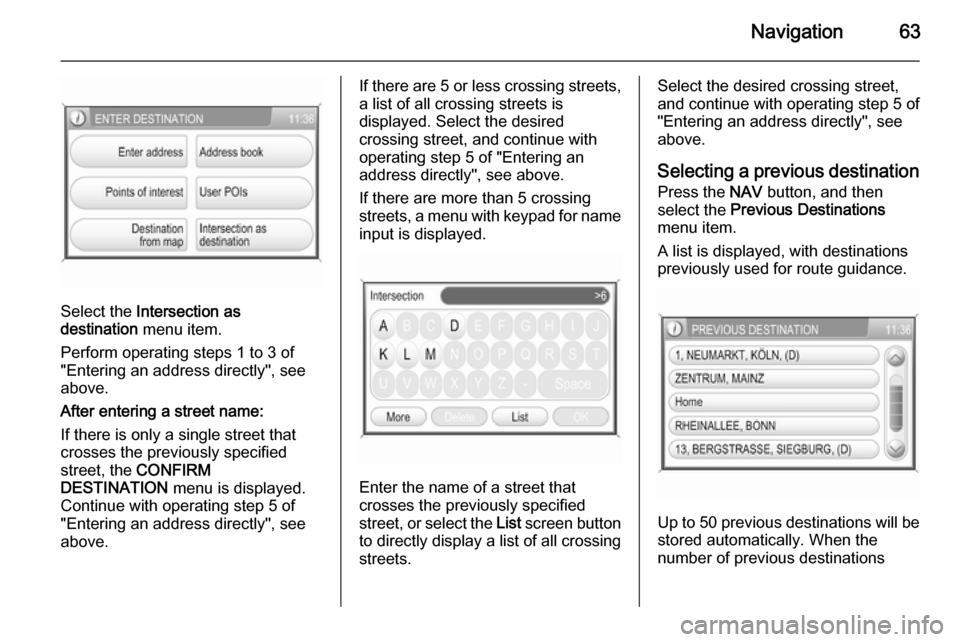
Select the Intersection as
destination menu item.
Perform operating steps 1 to 3 of
"Entering an address directly", see
above.
After entering a street name:
If there is only a single street that
crosses the previously specified
street, the CONFIRM
DESTINATION menu is displayed.
Continue with operating step 5 of
"Entering an address directly", see
above.
If there are 5 or less crossing streets,
a list of all crossing streets is
displayed. Select the desired
crossing street, and continue with
operating step 5 of "Entering an
address directly", see above.
If there are more than 5 crossing streets, a menu with keypad for name input is displayed.
Enter the name of a street that
crosses the previously specified
street, or select the List screen button
to directly display a list of all crossing streets.
Select the desired crossing street,
and continue with operating step 5 of
"Entering an address directly", see
above.
Selecting a previous destination
Press the NAV button, and then
select the Previous Destinations
menu item.
A list is displayed, with destinations
previously used for route guidance.
Up to 50 previous destinations will be
stored automatically. When the
number of previous destinations
Page 82 of 151
82Phone
Enter the first letters of the contact
name you are searching for (select
the Delete screen button once or
several times to delete already
entered letters).
As soon as the system finds a contact
name whose first letters match the
entered letters, the entire name of the corresponding phone book entry is
displayed (see image above).
Select the OK screen button to
display a menu with all phone
numbers stored for the selected
contact.
Notice
If you search for a phone book entry
that was stored by using the phone
number only, or that contains special characters, select the 123ÄÖ screen
button to change the keypad type.
Using the call lists
All incoming, outgoing, or missed
calls are registered in corresponding
call lists.
In the PHONE menu: select the Call
lists screen button to open the CALL
LIST menu.
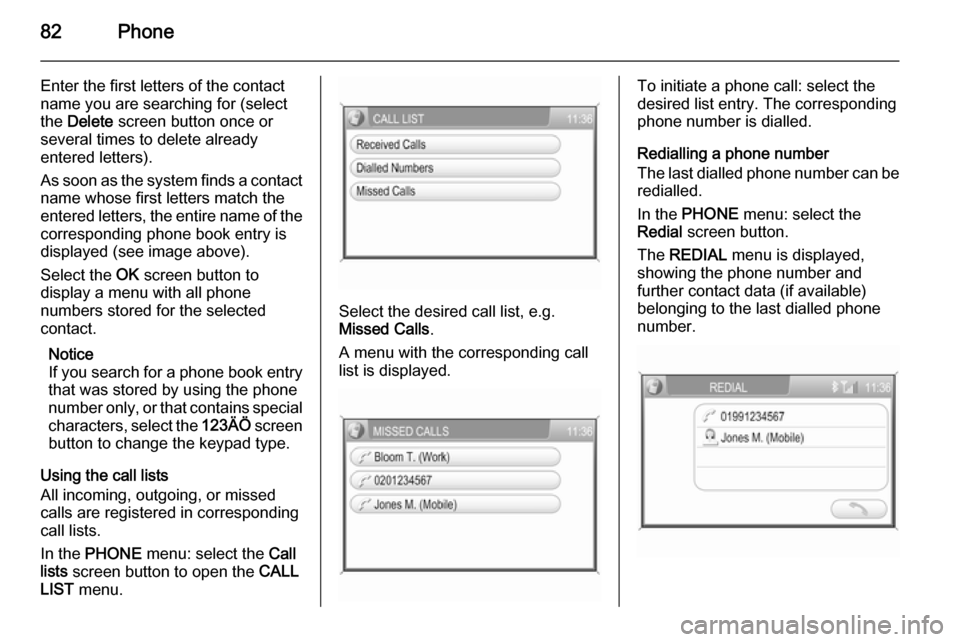
Select the desired call list, e.g.
Missed Calls .
A menu with the corresponding call
list is displayed.
To initiate a phone call: select the
desired list entry. The corresponding
phone number is dialled.
Redialling a phone number
The last dialled phone number can be
redialled.
In the PHONE menu: select the
Redial screen button.
The REDIAL menu is displayed,
showing the phone number and
further contact data (if available)
belonging to the last dialled phone
number.
Page 94 of 151
94Introduction
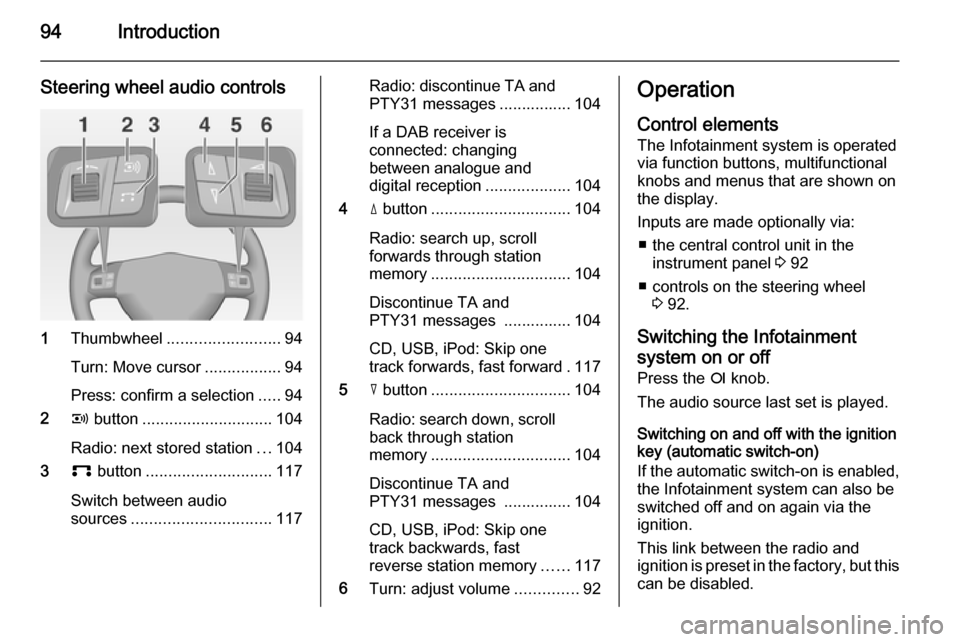
Steering wheel audio controls
1Thumbwheel ......................... 94
Turn: Move cursor .................94
Press: confirm a selection .....94
2 q button ............................. 104
Radio: next stored station ...104
3 p button ............................ 117
Switch between audio
sources ............................... 117
Radio: discontinue TA and
PTY31 messages ................ 104
If a DAB receiver is
connected: changing
between analogue and
digital reception ...................104
4 d button ............................... 104
Radio: search up, scroll
forwards through station
memory ............................... 104
Discontinue TA and
PTY31 messages ............... 104
CD, USB, iPod: Skip one
track forwards, fast forward . 117
5 c button ............................... 104
Radio: search down, scroll back through station
memory ............................... 104
Discontinue TA and
PTY31 messages ............... 104
CD, USB, iPod: Skip one
track backwards, fast
reverse station memory ......117
6 Turn: adjust volume ..............92Operation
Control elements The Infotainment system is operated
via function buttons, multifunctional
knobs and menus that are shown on
the display.
Inputs are made optionally via: ■ the central control unit in the instrument panel 3 92
■ controls on the steering wheel 3 92.
Switching the Infotainment
system on or off
Press the e knob.
The audio source last set is played.
Switching on and off with the ignition
key (automatic switch-on)
If the automatic switch-on is enabled,
the Infotainment system can also be
switched off and on again via the ignition.
This link between the radio and
ignition is preset in the factory, but this can be disabled.
Page 135 of 151
Introduction135
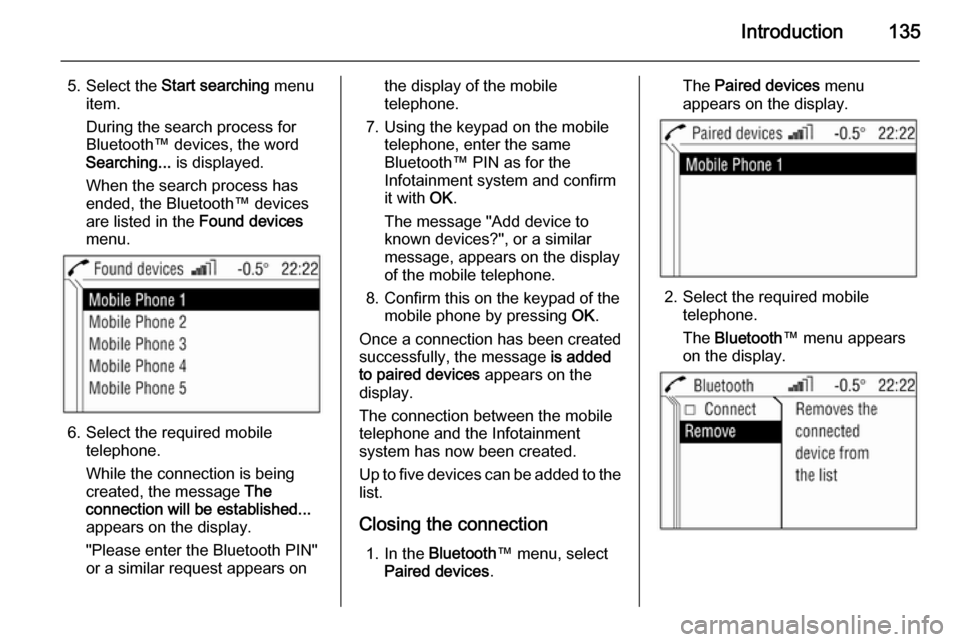
5. Select the Start searching menu
item.
During the search process for
Bluetooth™ devices, the word
Searching... is displayed.
When the search process has
ended, the Bluetooth™ devices
are listed in the Found devices
menu.
6. Select the required mobile telephone.
While the connection is being
created, the message The
connection will be established...
appears on the display.
"Please enter the Bluetooth PIN"
or a similar request appears on
the display of the mobile
telephone.
7. Using the keypad on the mobile telephone, enter the same
Bluetooth™ PIN as for the
Infotainment system and confirm
it with OK.
The message "Add device to
known devices?", or a similar
message, appears on the display
of the mobile telephone.
8. Confirm this on the keypad of the mobile phone by pressing OK.
Once a connection has been created successfully, the message is added
to paired devices appears on the
display.
The connection between the mobile
telephone and the Infotainment
system has now been created.
Up to five devices can be added to the
list.
Closing the connection 1. In the Bluetooth ™ menu, select
Paired devices .The Paired devices menu
appears on the display.
2. Select the required mobile telephone.
The Bluetooth ™ menu appears
on the display.
Page 137 of 151

Introduction137functions are active. You can
enquire about this with the local
network operators.
The emergency call number can
differ depending on the region and country. Please enquire
beforehand about the correct
emergency call number for the
relevant region.
Making emergency calls
Dial the emergency number (e.g.
112).
The connection to the emergency call centre is created.
Answer if the service staff ask you
about the emergency.
Ending emergency calls Select the Hang-up menu item.
Or:
Press the p key.
9Warning
Do not end the call until you are
requested to do so by the
emergency call centre.
Operation
Introduction As soon as a connection is created
between the mobile telephone and
the Infotainment system via the
telephone-specific adapter or via Bluetooth™, you can also operate
many of the mobile telephone's
functions via the Infotainment system.
For example, via the Infotainment
system you can create a connection
with the telephone numbers saved in
the mobile telephone or change the
telephone numbers.
As a rule, you can also continue
operating the system using the
mobile telephone, e.g. by accepting a call or setting the sound level.
After a connection has been created
between the mobile telephone and
the Infotainment system, data is
transferred from the mobile telephone to the Infotainment system. This may
take some time, depending on the
brand of telephone. During this period
of time, the mobile telephone can only be operated to a limited extent via the Infotainment system.
Some telephones do not support all of
the Mobile phone portal's functions.
As a result of this, these specific
telephones may work differently from
the functional content described in
the manual. For further information,
see the instructions on the telephone- specific adapter.
Calls which arrive or are being made
when the mobile telephone is being
slotted into the telephone-specific
adapter, are kept and are transmitted
as soon as the mobile telephone has
been slotted into the adapter.
Page 139 of 151
Introduction139
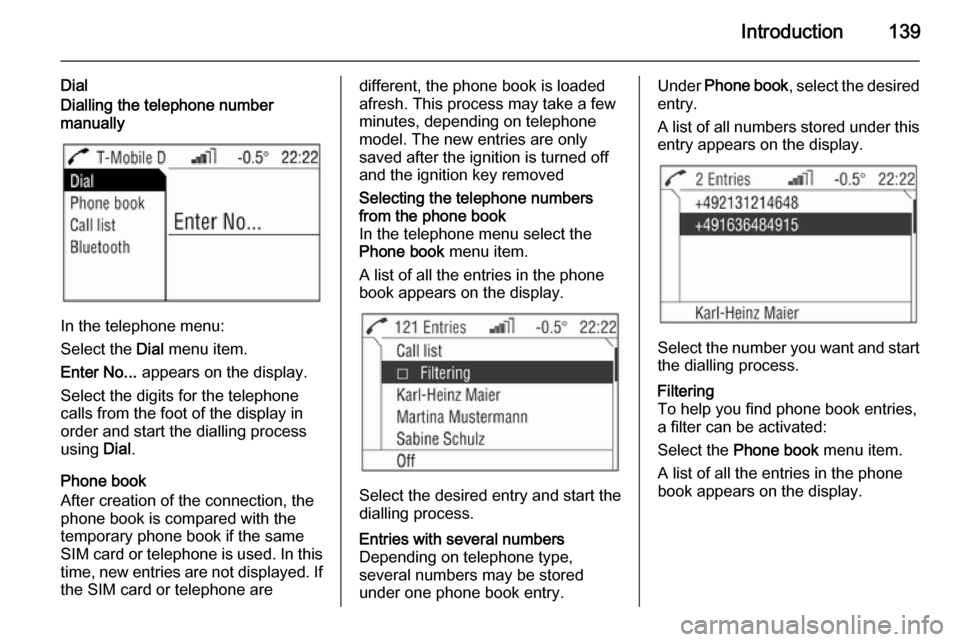
DialDialling the telephone number
manually
In the telephone menu:
Select the Dial menu item.
Enter No... appears on the display.
Select the digits for the telephone
calls from the foot of the display in
order and start the dialling process
using Dial.
Phone book
After creation of the connection, the
phone book is compared with the
temporary phone book if the same
SIM card or telephone is used. In this time, new entries are not displayed. If
the SIM card or telephone are
different, the phone book is loaded
afresh. This process may take a few
minutes, depending on telephone
model. The new entries are only
saved after the ignition is turned off
and the ignition key removedSelecting the telephone numbers
from the phone book
In the telephone menu select the
Phone book menu item.
A list of all the entries in the phone book appears on the display.
Select the desired entry and start the
dialling process.
Entries with several numbers
Depending on telephone type,
several numbers may be stored
under one phone book entry.Under Phone book , select the desired
entry.
A list of all numbers stored under this
entry appears on the display.
Select the number you want and start
the dialling process.
Filtering
To help you find phone book entries,
a filter can be activated:
Select the Phone book menu item.
A list of all the entries in the phone
book appears on the display.
Page 140 of 151
140Introduction
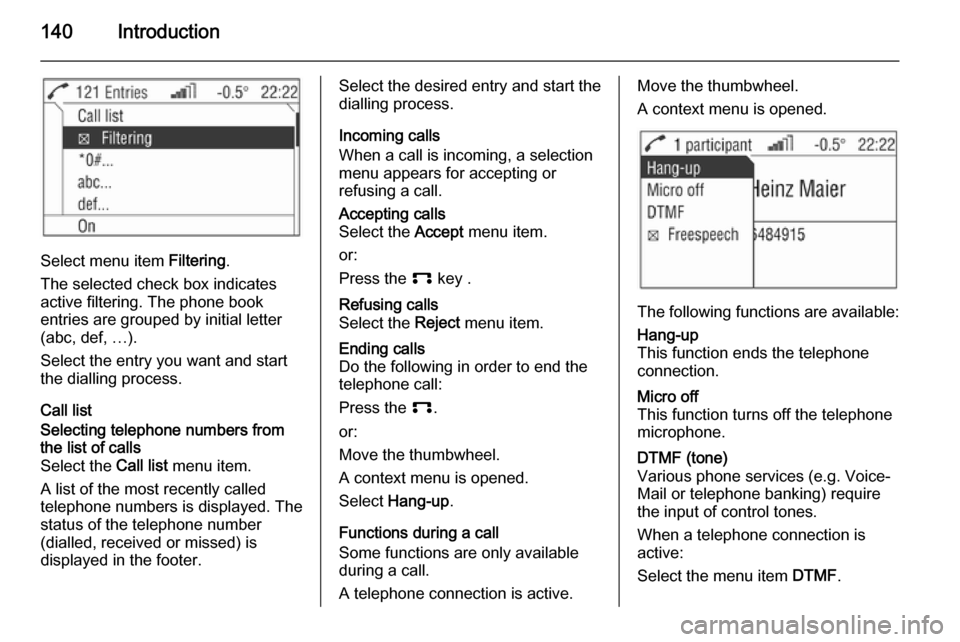
Select menu item Filtering.
The selected check box indicates
active filtering. The phone book
entries are grouped by initial letter
(abc, def, …).
Select the entry you want and start
the dialling process.
Call list
Selecting telephone numbers from
the list of calls
Select the Call list menu item.
A list of the most recently called
telephone numbers is displayed. The
status of the telephone number
(dialled, received or missed) is
displayed in the footer.Select the desired entry and start the
dialling process.
Incoming calls
When a call is incoming, a selection
menu appears for accepting or
refusing a call.Accepting calls
Select the Accept menu item.
or:
Press the p key .Refusing calls
Select the Reject menu item.Ending calls
Do the following in order to end the
telephone call:
Press the p.
or:
Move the thumbwheel.
A context menu is opened.
Select Hang-up .
Functions during a call
Some functions are only available during a call.
A telephone connection is active.
Move the thumbwheel.
A context menu is opened.
The following functions are available:
Hang-up
This function ends the telephone
connection.Micro off
This function turns off the telephone
microphone.DTMF (tone)
Various phone services (e.g. Voice- Mail or telephone banking) require the input of control tones.
When a telephone connection is active:
Select the menu item DTMF.