VAUXHALL ANTARA 2015 Infotainment system
Manufacturer: VAUXHALL, Model Year: 2015, Model line: ANTARA, Model: VAUXHALL ANTARA 2015Pages: 151, PDF Size: 2.82 MB
Page 61 of 151
Navigation61
To return to the user POI list: selectthe List screen button.
To start route guidance to the
selected user POI: select the Start
screen button.
Description on route guidance, see
chapter "Guidance" 3 65.
Selecting a destination from the
map
This method of destination input
allows you to search for a new
destination by moving the visible map section, and to set the desired
location of the new destination by
tapping on the map.
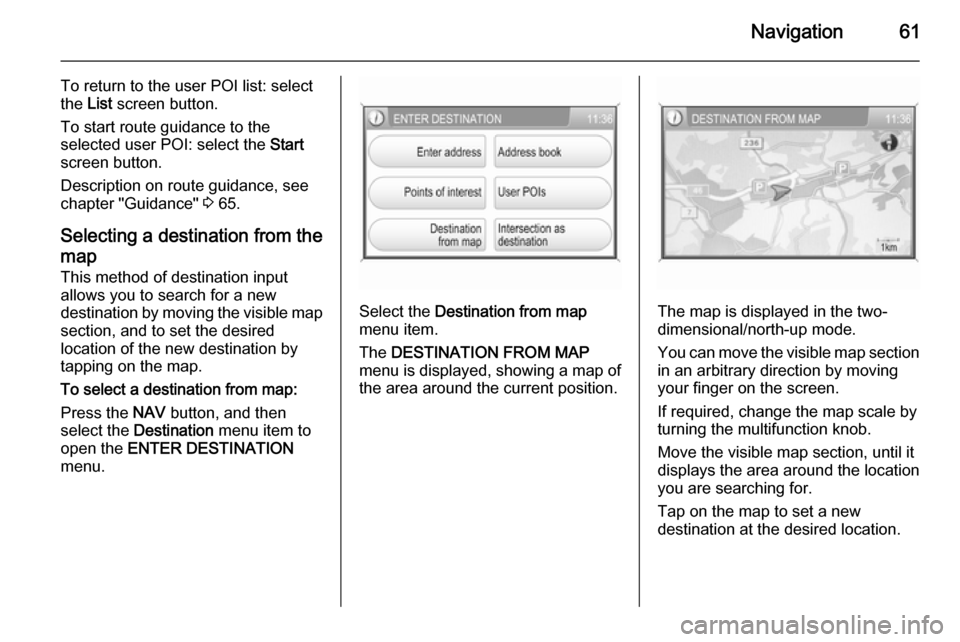
To select a destination from map:
Press the NAV button, and then
select the Destination menu item to
open the ENTER DESTINATION
menu.
Select the Destination from map
menu item.
The DESTINATION FROM MAP
menu is displayed, showing a map of
the area around the current position.The map is displayed in the two-
dimensional/north-up mode.
You can move the visible map section
in an arbitrary direction by moving
your finger on the screen.
If required, change the map scale by
turning the multifunction knob.
Move the visible map section, until it
displays the area around the location
you are searching for.
Tap on the map to set a new
destination at the desired location.
Page 62 of 151
62Navigation
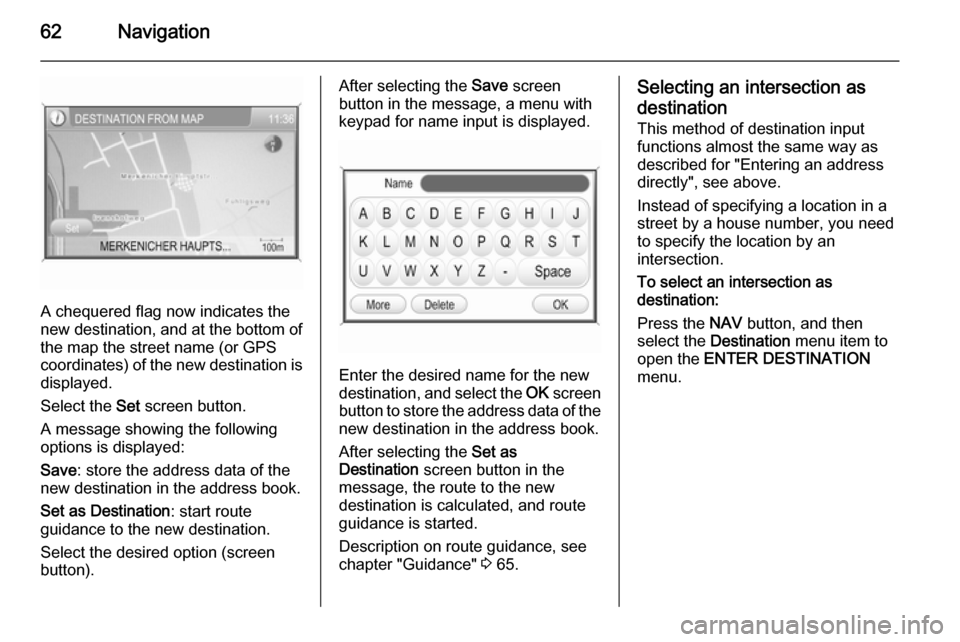
A chequered flag now indicates the
new destination, and at the bottom of the map the street name (or GPS
coordinates) of the new destination is displayed.
Select the Set screen button.
A message showing the following
options is displayed:
Save : store the address data of the
new destination in the address book.
Set as Destination : start route
guidance to the new destination.
Select the desired option (screen
button).
After selecting the Save screen
button in the message, a menu with
keypad for name input is displayed.
Enter the desired name for the new
destination, and select the OK screen
button to store the address data of the new destination in the address book.
After selecting the Set as
Destination screen button in the
message, the route to the new
destination is calculated, and route
guidance is started.
Description on route guidance, see
chapter "Guidance" 3 65.
Selecting an intersection as
destination
This method of destination input
functions almost the same way as
described for "Entering an address
directly", see above.
Instead of specifying a location in a
street by a house number, you need
to specify the location by an
intersection.
To select an intersection as
destination:
Press the NAV button, and then
select the Destination menu item to
open the ENTER DESTINATION
menu.
Page 63 of 151
Navigation63
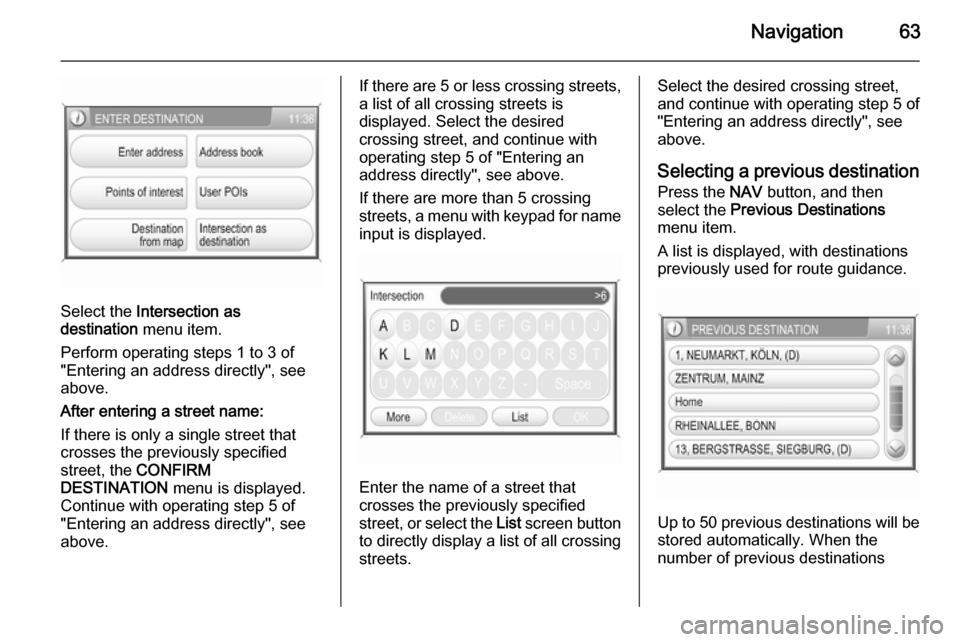
Select the Intersection as
destination menu item.
Perform operating steps 1 to 3 of
"Entering an address directly", see
above.
After entering a street name:
If there is only a single street that
crosses the previously specified
street, the CONFIRM
DESTINATION menu is displayed.
Continue with operating step 5 of
"Entering an address directly", see
above.
If there are 5 or less crossing streets,
a list of all crossing streets is
displayed. Select the desired
crossing street, and continue with
operating step 5 of "Entering an
address directly", see above.
If there are more than 5 crossing streets, a menu with keypad for name input is displayed.
Enter the name of a street that
crosses the previously specified
street, or select the List screen button
to directly display a list of all crossing streets.
Select the desired crossing street,
and continue with operating step 5 of
"Entering an address directly", see
above.
Selecting a previous destination
Press the NAV button, and then
select the Previous Destinations
menu item.
A list is displayed, with destinations
previously used for route guidance.
Up to 50 previous destinations will be
stored automatically. When the
number of previous destinations
Page 64 of 151
64Navigation
exceeds 50, the oldest one will beremoved from the list, and the new
one will be added.
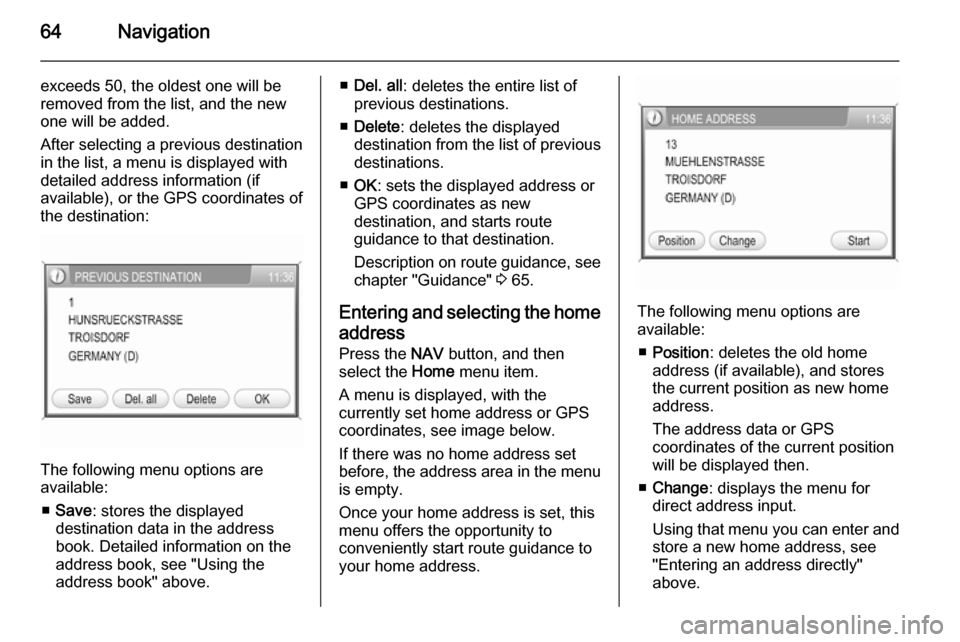
After selecting a previous destination in the list, a menu is displayed with
detailed address information (if
available), or the GPS coordinates of
the destination:
The following menu options are
available:
■ Save : stores the displayed
destination data in the address
book. Detailed information on the
address book, see "Using the
address book" above.
■ Del. all : deletes the entire list of
previous destinations.
■ Delete : deletes the displayed
destination from the list of previous
destinations.
■ OK : sets the displayed address or
GPS coordinates as new
destination, and starts route
guidance to that destination.
Description on route guidance, see
chapter "Guidance" 3 65.
Entering and selecting the home
address
Press the NAV button, and then
select the Home menu item.
A menu is displayed, with the
currently set home address or GPS
coordinates, see image below.
If there was no home address set
before, the address area in the menu is empty.
Once your home address is set, this menu offers the opportunity to
conveniently start route guidance to
your home address.
The following menu options are
available:
■ Position : deletes the old home
address (if available), and stores
the current position as new home
address.
The address data or GPS
coordinates of the current position
will be displayed then.
■ Change : displays the menu for
direct address input.
Using that menu you can enter and
store a new home address, see
"Entering an address directly"
above.
Page 65 of 151
Navigation65
The old home address (if available)
will be deleted.
■ Start : sets the displayed home
address or GPS coordinates as
new destination, and starts route
guidance to that destination.
Description on route guidance, see
chapter "Guidance" 3 65.
Guidance General information
Route guidance is provided by the
navigation system by visual
instructions and voice commands
(voice guidance).
Visual instructions
Visual instructions are displayed on
the map display, in the TRAFFIC
INFO menu, in all audio main menus,
e.g. the CD menu, and in the
PHONE menu.
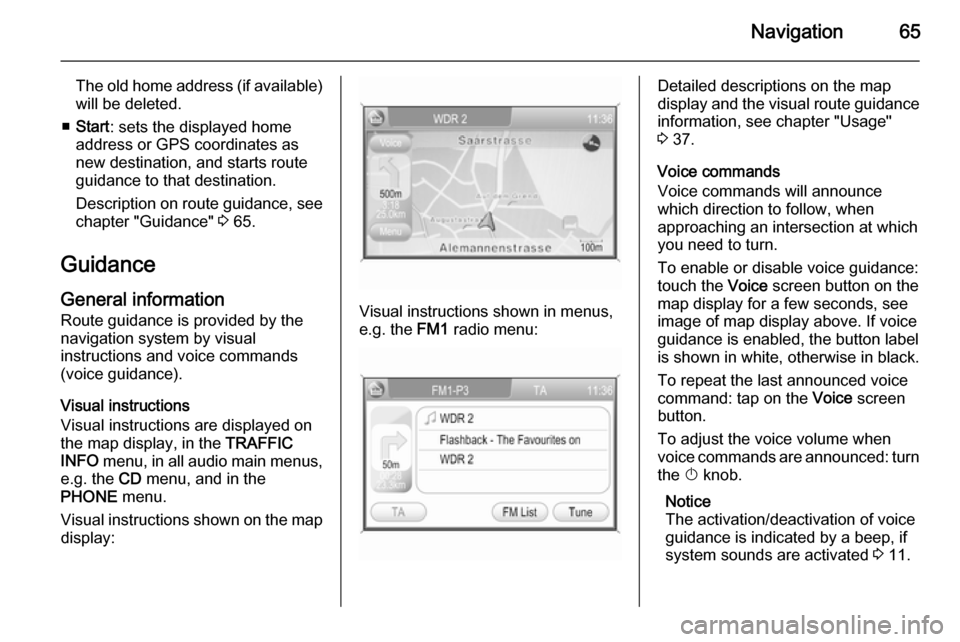
Visual instructions shown on the map display:
Visual instructions shown in menus,
e.g. the FM1 radio menu:
Detailed descriptions on the map
display and the visual route guidance information, see chapter "Usage"3 37.
Voice commands
Voice commands will announce
which direction to follow, when
approaching an intersection at which you need to turn.
To enable or disable voice guidance:
touch the Voice screen button on the
map display for a few seconds, see
image of map display above. If voice
guidance is enabled, the button label
is shown in white, otherwise in black.
To repeat the last announced voice
command: tap on the Voice screen
button.
To adjust the voice volume when
voice commands are announced: turn
the X knob.
Notice
The activation/deactivation of voice
guidance is indicated by a beep, if system sounds are activated 3 11.
Page 66 of 151
66Navigation
Controlling route guidance via
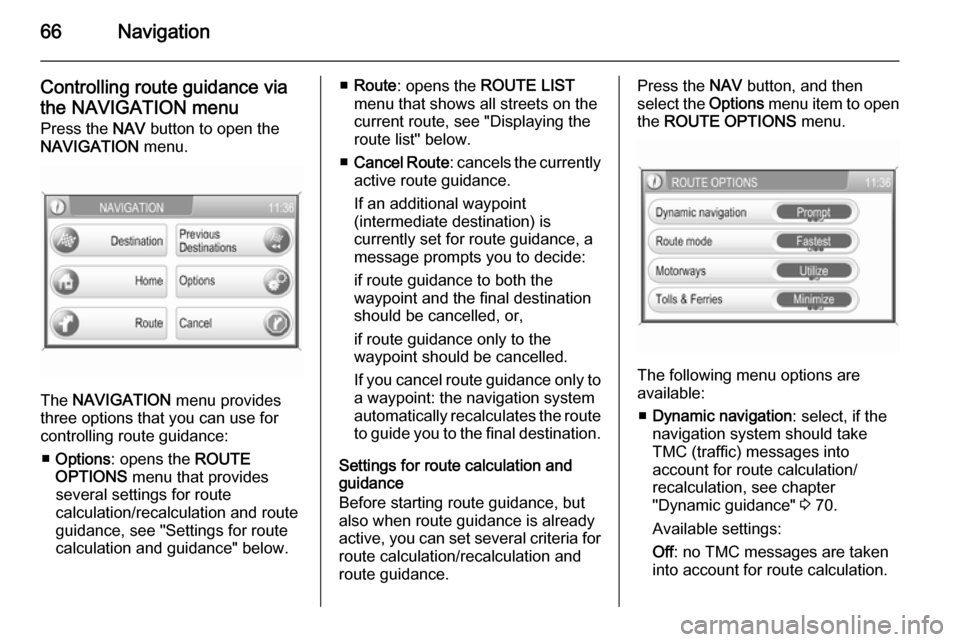
the NAVIGATION menu Press the NAV button to open the
NAVIGATION menu.
The NAVIGATION menu provides
three options that you can use for controlling route guidance:
■ Options : opens the ROUTE
OPTIONS menu that provides
several settings for route
calculation/recalculation and route
guidance, see "Settings for route
calculation and guidance" below.
■ Route : opens the ROUTE LIST
menu that shows all streets on the
current route, see "Displaying the
route list" below.
■ Cancel Route : cancels the currently
active route guidance.
If an additional waypoint
(intermediate destination) is
currently set for route guidance, a
message prompts you to decide:
if route guidance to both the
waypoint and the final destination should be cancelled, or,
if route guidance only to the
waypoint should be cancelled.
If you cancel route guidance only to a waypoint: the navigation system
automatically recalculates the route to guide you to the final destination.
Settings for route calculation and
guidance
Before starting route guidance, but also when route guidance is already
active, you can set several criteria for route calculation/recalculation and
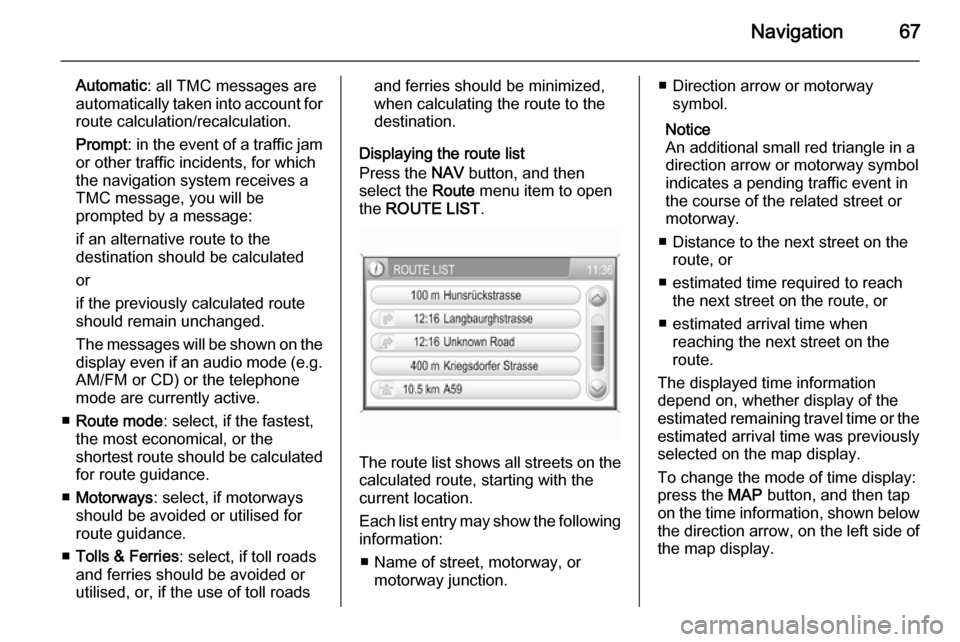
route guidance.Press the NAV button, and then
select the Options menu item to open
the ROUTE OPTIONS menu.
The following menu options are
available:
■ Dynamic navigation : select, if the
navigation system should take
TMC (traffic) messages into
account for route calculation/
recalculation, see chapter
"Dynamic guidance" 3 70.
Available settings:
Off : no TMC messages are taken
into account for route calculation.
Page 67 of 151
Navigation67
Automatic: all TMC messages are
automatically taken into account for
route calculation/recalculation.
Prompt : in the event of a traffic jam
or other traffic incidents, for which
the navigation system receives a
TMC message, you will be
prompted by a message:
if an alternative route to the
destination should be calculated
or
if the previously calculated route
should remain unchanged.
The messages will be shown on the display even if an audio mode (e.g.
AM/FM or CD) or the telephone
mode are currently active.
■ Route mode : select, if the fastest,
the most economical, or the
shortest route should be calculated for route guidance.
■ Motorways : select, if motorways
should be avoided or utilised for
route guidance.
■ Tolls & Ferries : select, if toll roads
and ferries should be avoided or
utilised, or, if the use of toll roadsand ferries should be minimized,
when calculating the route to the
destination.
Displaying the route list
Press the NAV button, and then
select the Route menu item to open
the ROUTE LIST .
The route list shows all streets on the
calculated route, starting with the
current location.
Each list entry may show the following
information:
■ Name of street, motorway, or motorway junction.
■ Direction arrow or motorwaysymbol.
Notice
An additional small red triangle in a
direction arrow or motorway symbol
indicates a pending traffic event in
the course of the related street or
motorway.
■ Distance to the next street on the route, or
■ estimated time required to reach the next street on the route, or
■ estimated arrival time when reaching the next street on the
route.
The displayed time information
depend on, whether display of the
estimated remaining travel time or the estimated arrival time was previously
selected on the map display.
To change the mode of time display:
press the MAP button, and then tap
on the time information, shown below the direction arrow, on the left side of
the map display.
Page 68 of 151
68Navigation
To show all available information on aparticular route list item: select that
list item.
Controlling route guidance via
the TRAFFIC MESSAGES
menu
Press the TRAF button to open the
TRAFFIC MESSAGES menu.
The TRAFFIC MESSAGES menu
displays the closest traffic event (if
existent), e.g. a traffic jam, on the
current route.
The following menu options are
available:
■ Block : using this menu item you can
exclude streets from route
guidance, see "Excluding streets
from route guidance" below.
■ TA : enables or disables the
reception of traffic announcements
3 22.
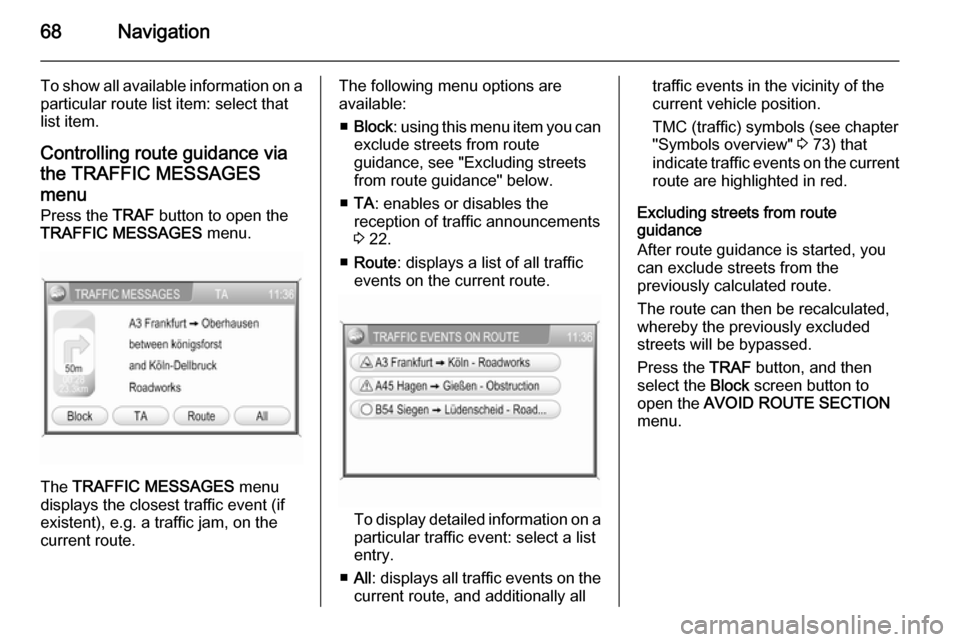
■ Route : displays a list of all traffic
events on the current route.
To display detailed information on a
particular traffic event: select a list
entry.
■ All : displays all traffic events on the
current route, and additionally all
traffic events in the vicinity of the current vehicle position.
TMC (traffic) symbols (see chapter
"Symbols overview" 3 73) that
indicate traffic events on the current route are highlighted in red.
Excluding streets from route
guidance
After route guidance is started, you can exclude streets from the
previously calculated route.
The route can then be recalculated,
whereby the previously excluded
streets will be bypassed.
Press the TRAF button, and then
select the Block screen button to
open the AVOID ROUTE SECTION
menu.
Page 69 of 151
Navigation69
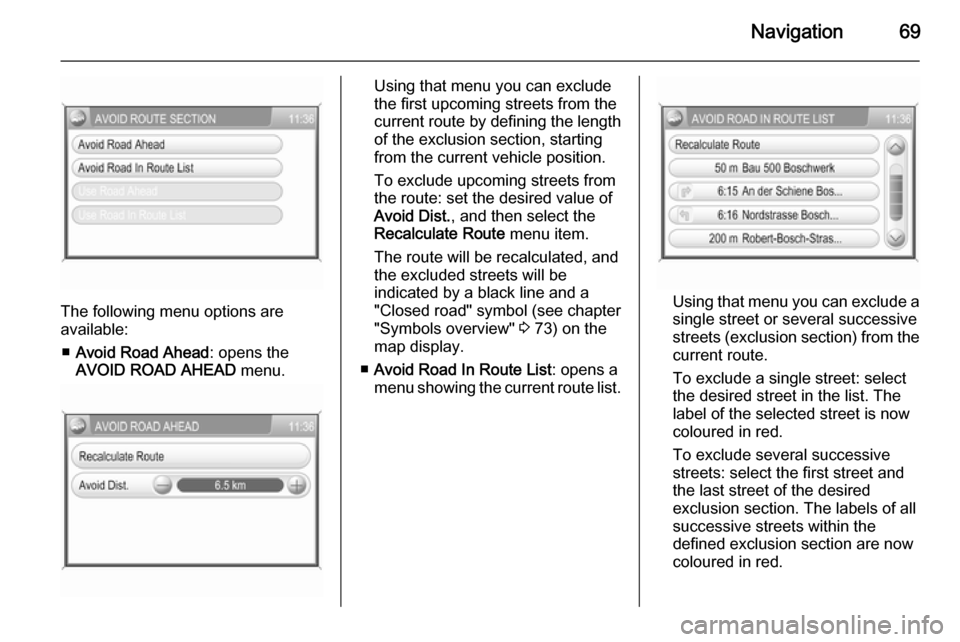
The following menu options are
available:
■ Avoid Road Ahead : opens the
AVOID ROAD AHEAD menu.
Using that menu you can exclude
the first upcoming streets from the
current route by defining the length
of the exclusion section, starting from the current vehicle position.
To exclude upcoming streets from
the route: set the desired value of
Avoid Dist. , and then select the
Recalculate Route menu item.
The route will be recalculated, and
the excluded streets will be
indicated by a black line and a
"Closed road" symbol (see chapter
"Symbols overview" 3 73) on the
map display.
■ Avoid Road In Route List : opens a
menu showing the current route list.
Using that menu you can exclude a
single street or several successive
streets (exclusion section) from the current route.
To exclude a single street: select
the desired street in the list. The
label of the selected street is now coloured in red.
To exclude several successive streets: select the first street and
the last street of the desired
exclusion section. The labels of all
successive streets within the
defined exclusion section are now coloured in red.
Page 70 of 151

70Navigation
Notice
You can only define one single
exclusion street or one exclusion
section at a time in the route list.
To perform the street exclusion:select the Recalculate Route menu
item (first entry in route list).
The route will be recalculated, and
the excluded streets will be
indicated by a black line and a
"Closed road" symbol (see chapter
"Symbols overview" 3 73) on the
map display.
■ Use Road Ahead : cancels the
street exclusion previously
performed via Avoid Road Ahead .
■ Use Road In Route List : cancels the
street exclusion previously
performed via Avoid Road In Route
List .
Adding a waypoint (intermediate destination) to the routeAt any time during active route
guidance you can add a waypoint to
your route.Press the NAV button, and then
select the Destination menu item or
the Previous Destinations menu item.
In the message that is displayed now, select the Add waypoint screen
button.
Enter or select a destination for the
waypoint, see chapter "Destination
input" 3 48.
After adding the desired waypoint, the
navigation system will calculate the
route from the current position to that new intermediate destination, and the
route from the intermediate
destination to the final destination.
The waypoint will be indicated on the
map by a red chequered flag.
After reaching the waypoint, the route
guidance will automatically proceed
with guidance to the final destination.
Notice
For every trip you can set only one
waypoint at a time. If there is a
waypoint already active when
setting a new waypoint, route
guidance to the old waypoint will be
cancelled.Enabling user defined POI
warnings
You can define "POI warnings" for
POIs that you want to be warned of
(e.g. very sharp turns on a road),
before reaching the corresponding
location.
Defining your personal POI warnings,
and downloading them to the
Infotainment system, see chapter
"Usage" 3 37.
Enabling POI warnings:
Press the SETUP button, select the
Navigation menu item, and then set
POI Warning to On.
Dynamic guidance If dynamic route guidance is active,
the entire current traffic situation that the Infotainment system receives via
TMC is included in the calculation of
the route. The route is suggested
taking into account all traffic problems
or restrictions as per preset criteria
(e.g. "shortest route", "avoid
motorways" etc.).