navigation system VAUXHALL ASTRA J 2014.5 Owner's Manual
[x] Cancel search | Manufacturer: VAUXHALL, Model Year: 2014.5, Model line: ASTRA J, Model: VAUXHALL ASTRA J 2014.5Pages: 131, PDF Size: 2.24 MB
Page 7 of 131

Introduction7doubt, stop the vehicle and
operate the Infotainment system
while the vehicle is stationary.9 Warning
The usage of the navigation
system does not release the driver
from the responsibility for a
correct, vigilant attitude in road
traffic.The related traffic
regulations must always be
followed.
Only make entries (e.g. addresses) with the vehicle
stationary.
If a navigation instruction
contradicts traffic regulations, the
traffic regulations always apply.
9 Warning
Areas such as one-way streets
and pedestrian zones are not
marked on the navigation system map. In such areas, the system
may issue a warning that must be
accepted. Therefore, pay
particular attention to one-way
streets and other roads and
entrances that must not be driven
into.
Radio reception
Radio reception may be disrupted by
static, noise, distortion or loss of
reception due to:
■ changes in distance from the transmitter,
■ multi-path reception due to reflection,
■ shadowing.
Theft-deterrent feature
The Infotainment system is equipped
with an electronic security system for the purpose of theft deterrence.
The Infotainment system therefore
functions only in your vehicle and is
worthless to a thief.
Page 9 of 131

Introduction9
1; button
Access Home Page ..............16
2 SRCE (Source) button
Press to toggle through the different audio sources
CD/MP3 player ...................... 30
USB ....................................... 32
AUX ....................................... 32
Bluetooth ............................... 32
AM ......................................... 24
FM ......................................... 24
DAB ....................................... 24
3 s button
Radio: search backwards .....24
CD/MP3/WMA: skip track
backwards ............................. 31
External devices: skip
track backwards ....................344Station buttons 1...6
Short press: select station ....26
Long press: save station .......26
5 m knob
Press: switch on/off
Infotainment system ..............14
Turn: adjust volume ..............14
6 u button
Radio: search forwards .........24
CD/MP3/WMA: skip track
forwards ................................ 31
External devices: skip
track forwards ....................... 34
7 AS 1/2 button
Short press: open
autostore list .......................... 25
Long press: save
autostore stations
automatically ......................... 25
8 FAV 1/2/3 button
Open favourites list ...............269 TP button
Activate or deactivate
radio traffic service ................27
10 d button
Eject CD ................................ 31
11 CONFIG button
Open settings menu ..............21
12 r button
CD/MP3/WMA: start/
pause playback .....................31
External devices: start/
pause playback .....................34
13 INFO button
Radio: information on
current station
CD/MP3/WMA, external
devices: information on
current track
Navigation: information,
e.g. on current location
Page 14 of 131

14Introduction
or close call list ...................... 63or activate/deactivate mute ...14
or deactivate speech
recognition ............................ 56Usage
Control elements
The Infotainment system is operated
via function buttons, a multifunction
knob and menus that are shown on
the display.
Inputs are made optionally via: ■ the central control unit on the instrument panel 3 8
■ controls on the steering wheel 3 8
■ the speech recognition system 3 56
Notice
Only the most direct ways for menu operation are described in the
subsequent chapters. In some
cases, there may be other options.
Switching the Infotainment
system on or off Press the X knob briefly. After
switching on, the last selected
Infotainment source becomes active.Automatic switch-off
If the Infotainment system is switched
on using the X knob while the ignition
is switched off, it switches off again
automatically after 10 minutes.
Setting the volume Turn the X knob. The current setting
is shown in a pop-up at the bottom of
the screen.
When the Infotainment system is
switched on, the last selected volume
is set, provided that the volume is
lower than the maximum start-up
volume.
The following volume settings can be
set separately:
■ the maximum start-up volume 3 20
■ the volume of the traffic announcements 3 20
■ the volume of the navigation messages 3 39.
Page 15 of 131

Introduction15
Auto volume
When auto volume is activated
3 20, the volume is adapted
automatically to compensate for the
road and wind noise as you drive.
Mute
Press the PHONE button (if Phone
portal is available: press for a few
seconds) to mute the audio sources.
To cancel mute again: turn the X
knob or press the PHONE button
again (if Phone portal is available:
press for a few seconds).
Volume limitation at high
temperatures
At very high temperatures inside the vehicle, the Infotainment system
limits the maximum adjustable
volume. If necessary, the volume is
decreased automatically.Modes of operation
Audio players
Repeatedly press the SRCE button to
toggle between the AM, FM, CD,
USB, AUX, Bluetooth or DAB main
menus.
For detailed descriptions of: ■ CD/MP3 player 3 30
■ USB port 3 32
■ AUX input 3 32
■ Bluetooth audio 3 32
■ AM radio 3 24
■ FM radio 3 24
■ DAB radio 3 29.
Navigation
Press the NAVI button to display the
map of the navigation application.
Press the multifunction knob to open
a submenu with options for the input
of destinations and the structuring of
a route.
For a detailed description of the
navigation functions 3 38.Phone
Press the PHONE button to display
the phone main menu with options for the input or selection of numbers.
For a detailed description of the
mobile phone functions 3 60.
Notice
Brief information on the audio
sources and the current navigation
session may be displayed via the
Quick Info application.
Page 16 of 131

16Basic operationBasic operationBasic operation............................ 16
Tone settings ............................... 19
Volume settings ........................... 20
System settings ........................... 21Basic operation
Multifunction knob
The multifunction knob is the central
control element for the menus.
Turn the multifunction knob: ■ To mark a menu option.
■ To set an alphanumeric value.
Press the multifunction knob
(Navi 950 / Navi 650: press the outer
ring):
■ To select or activate the marked option.
■ To confirm a set value.
■ To switch a system function on/off.
■ To open the audio or navigation menu within the respective
application.
; button
Press the ; button to access the
Home Page .
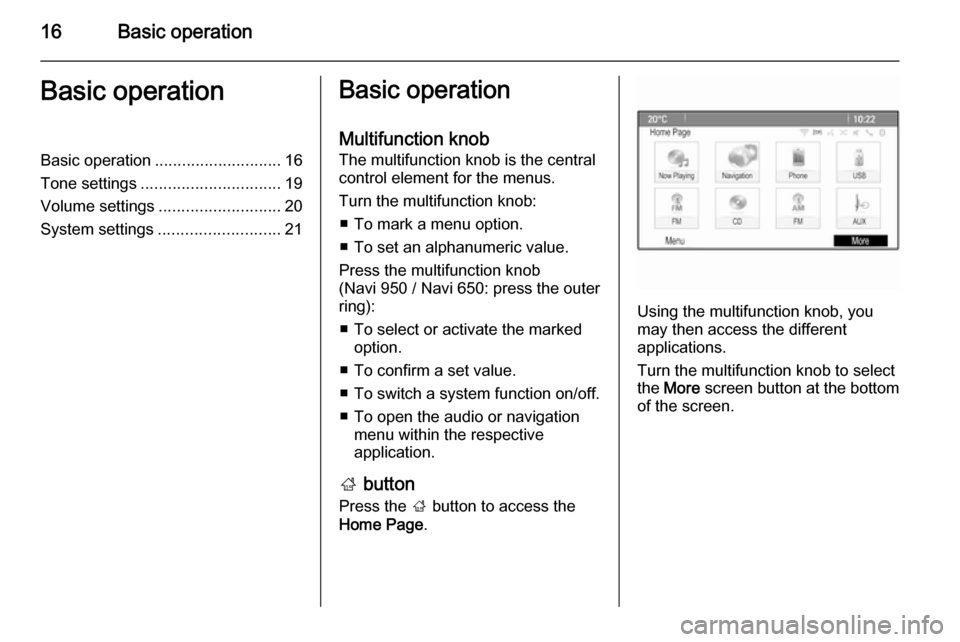
Using the multifunction knob, you
may then access the different
applications.
Turn the multifunction knob to select
the More screen button at the bottom
of the screen.
Page 21 of 131

Basic operation21
Adjusting the Chime VolumeWhen operating the controls in thevehicle, beeping sounds confirm your
actions. The volume of the beeping
sounds may be adjusted.
Press the CONFIG button and then
select the Vehicle Settings menu
item.
Select Comfort and Convenience and
then Chime Volume to display the
respective submenu. Select Normal
or High .
Adjusting the Navigation
Volume Press the CONFIG button and then
select the Navigation Settings menu
item.
Select the Navigation Volume menu
item. The respective submenu is
displayed.
To adjust the volume of the
announcements, select
Announcement and then adjust the
setting as desired.To adjust the volume of the audio
source possibly playing in the
background, select Background and
then adjust the setting as desired.
Select Volume Test to get an audio
example of the settings.
Notice
While an announcement is given
out, the volume may simply be
adjusted using the m knob.
System settings
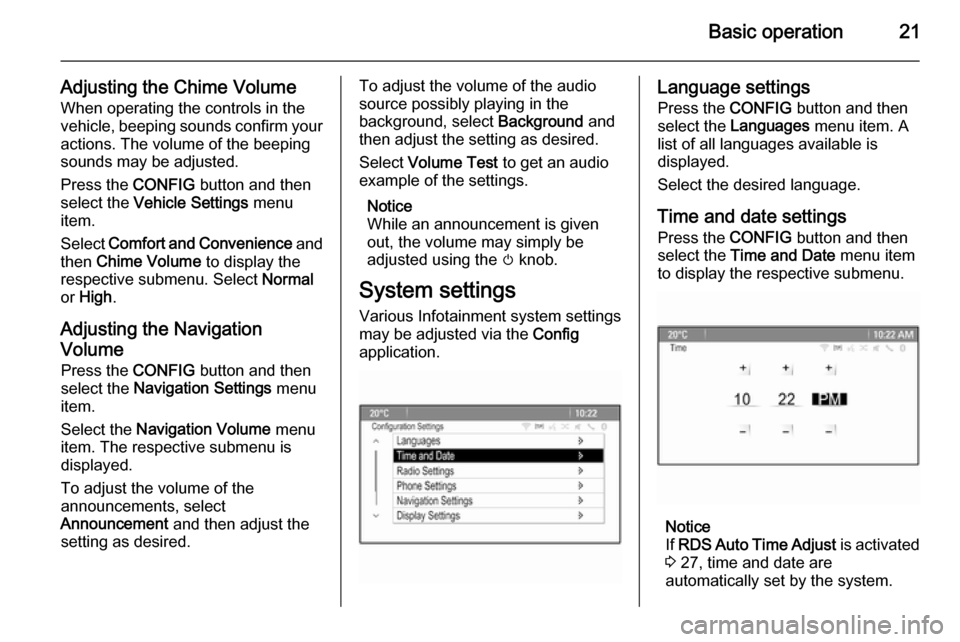
Various Infotainment system settings
may be adjusted via the Config
application.Language settings
Press the CONFIG button and then
select the Languages menu item. A
list of all languages available is
displayed.
Select the desired language.
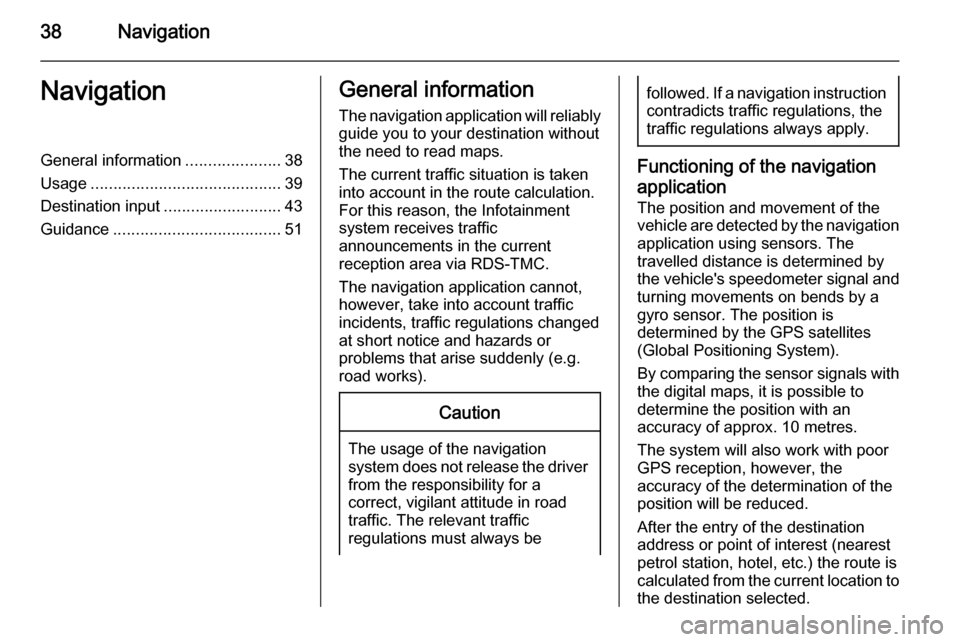
Time and date settings
Press the CONFIG button and then
select the Time and Date menu item
to display the respective submenu.
Notice
If RDS Auto Time Adjust is activated
3 27, time and date are
automatically set by the system.
Page 38 of 131

38NavigationNavigationGeneral information.....................38
Usage .......................................... 39
Destination input ..........................43
Guidance ..................................... 51General information
The navigation application will reliably guide you to your destination without
the need to read maps.
The current traffic situation is taken
into account in the route calculation.
For this reason, the Infotainment
system receives traffic
announcements in the current
reception area via RDS-TMC.
The navigation application cannot,
however, take into account traffic
incidents, traffic regulations changed at short notice and hazards or
problems that arise suddenly (e.g.
road works).Caution
The usage of the navigation
system does not release the driver
from the responsibility for a
correct, vigilant attitude in road
traffic. The relevant traffic
regulations must always be
followed. If a navigation instruction contradicts traffic regulations, the
traffic regulations always apply.
Functioning of the navigation
application
The position and movement of the
vehicle are detected by the navigation
application using sensors. The
travelled distance is determined by
the vehicle's speedometer signal and turning movements on bends by a
gyro sensor. The position is
determined by the GPS satellites
(Global Positioning System).
By comparing the sensor signals with the digital maps, it is possible to
determine the position with an
accuracy of approx. 10 metres.
The system will also work with poor
GPS reception, however, the
accuracy of the determination of the
position will be reduced.
After the entry of the destination
address or point of interest (nearest
petrol station, hotel, etc.) the route is
calculated from the current location to
the destination selected.
Page 41 of 131

Navigation41
Map modes
Press the multifunction knob to
display the Navigation Menu . Select
the Map Modes menu item to display
the respective submenu.
The following options are available: ■ Full Map ("Normal" view described
above): Full screen map view, all
function and indication screen
buttons displayed.
■ Full Glory : Full screen map view,
most functions and indication
screen buttons hidden.
■ Split with Turn List : Divided screen
with map on the left and turn list on the right side.
■ Split with Turn Arrow : Divided
screen with map on the left side and
turn arrow for the next turning
manoeuvre on the right side.
■ Split with Media : Divided screen
with map on the left side and audio
source currently active on the right
side.
Select the desired option.Map display
Press the multifunction knob to
display the Navigation Menu . Select
the Map Settings menu item and then
Map Display to display the respective
submenu.
Depending on the external lighting
conditions, activate the Day or Night
menu item.
For an automatic adaption by the
system, activate Automatic.
Displaying POIs
Press the multifunction knob to
display the Navigation Menu .
Select the Show POIs menu item to
display the respective submenu.
If you wish all POIs available in the
system to be displayed on the map, activate Show all POIs .
If you do not wish POIs to be
displayed on the map, activate Hide
all POIs .
To only display specific POIs, activate
the User Defined menu item and then
activate the POI categories you wish
to be displayed.Changing screen information
The route information displayed on
the screen during active route
guidance may be customised.
Press the multifunction knob to
display the Navigation Menu . Scroll
through the list and select the Switch
Route Time/Destination menu item.Time information
If you wish to change the time
information displayed, select Switch
Arrival/Travel Time to display the
respective submenu.
Activate the information setting you
wish to be displayed.Destination information
If you are in a waypoint trip, you may
want to display the route information
for a waypoint instead of those for the final destination.
To change the setting, select Switch
Waypoint/Destination . A list of all
destinations in the waypoint trip
currently active is displayed.
Activate the information setting you
wish to be displayed.
Page 42 of 131

42Navigation
Position informationCurrent position
Press the multifunction knob to
display the Navigation Menu . Select
the Current Position Info menu item.
On the right side of the screen, the
current position is displayed on the
map. On the left side, the GPS
coordinates of the current position are
shown.
Destination position
If route guidance is active, you may
display information on the destination entered.
Press the multifunction knob to
display the Navigation Menu . Select
the Destination Position Info menu
item.
On the right side of the screen, the
destination is displayed on the map.
On the left side, the address and the
GPS coordinates of the destination
are shown.Saving a position
The current position or a destination
position may be saved in the address
book.
Select the Save screen button. For a
detailed description on saving
addresses in the address book
3 43.
Route simulation The Infotainment system features a
route simulation mode for test
purposes.
To start the simulation mode, press
the CONFIG button and then select
the Navigation Settings menu item.
Scroll through the list and select
Route Simulation to display the
respective submenu.
Starting position
Since the simulation mode does not
draw on the GPS signal providing the current position of the vehicle, a start
position must be set manually.Use Last Known Position
To set the last position provided by a
GPS signal as starting point, select
the Use Last Known Position menu
item.Use Previous Destination
To use one of the last destinations
entered as starting point, select the
Use Previous Destination menu item.
The previous destinations list is
displayed.
Select the desired address.Use Specified Location
To use a specific location as starting
point, select the Use Specified
Location menu item.
Enter an address. For a detailed
description 3 43.
Simulation mode is started.
Cancelling simulation mode
To leave the simulation mode, press
the CONFIG button and then select
the Navigation Settings menu item.
Scroll through the list and select
Route Simulation to display the
respective submenu.
Page 44 of 131

44Navigation
Notice
If a house number is not stored in the system database, the house number
closest to the destination entered is
used for route calculation.
If required, confirm your input.
A confirmation menu is displayed. Select the Start Guidance menu item
to start route guidance.
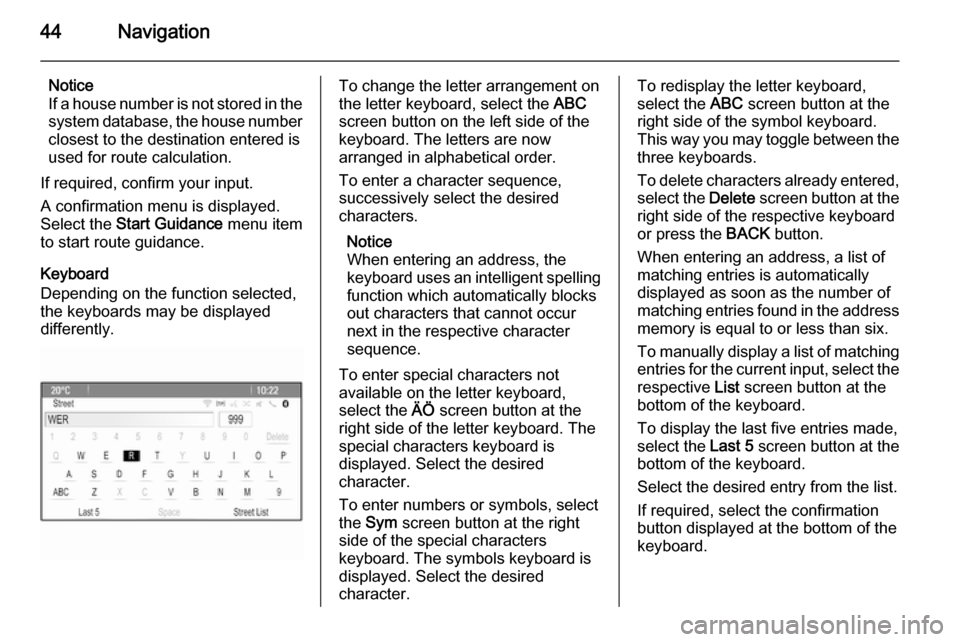
Keyboard
Depending on the function selected,
the keyboards may be displayed
differently.To change the letter arrangement on
the letter keyboard, select the ABC
screen button on the left side of the
keyboard. The letters are now
arranged in alphabetical order.
To enter a character sequence,
successively select the desired
characters.
Notice
When entering an address, the
keyboard uses an intelligent spelling
function which automatically blocks
out characters that cannot occur
next in the respective character
sequence.
To enter special characters not
available on the letter keyboard,
select the ÄÖ screen button at the
right side of the letter keyboard. The special characters keyboard is
displayed. Select the desired
character.
To enter numbers or symbols, select
the Sym screen button at the right
side of the special characters
keyboard. The symbols keyboard is
displayed. Select the desired
character.To redisplay the letter keyboard,
select the ABC screen button at the
right side of the symbol keyboard.
This way you may toggle between the three keyboards.
To delete characters already entered,
select the Delete screen button at the
right side of the respective keyboard
or press the BACK button.
When entering an address, a list of
matching entries is automatically
displayed as soon as the number of
matching entries found in the address memory is equal to or less than six.
To manually display a list of matching entries for the current input, select the
respective List screen button at the
bottom of the keyboard.
To display the last five entries made, select the Last 5 screen button at the
bottom of the keyboard.
Select the desired entry from the list.
If required, select the confirmation
button displayed at the bottom of the
keyboard.