start stop button VAUXHALL ASTRA J 2014 Owner's Manual
[x] Cancel search | Manufacturer: VAUXHALL, Model Year: 2014, Model line: ASTRA J, Model: VAUXHALL ASTRA J 2014Pages: 329, PDF Size: 10.07 MB
Page 15 of 329

In brief13
1Power windows .....................33
2 Exterior mirrors .....................31
3 Cruise control .....................179
Speed limiter ....................... 181
Adaptive cruise control .......182
Forward collision alert .........189
4 Side air vents ...................... 158
5 Windscreen wiper,
windscreen washer
system, headlight washer
system, rear wiper, rear
washer system ....................102
6 Instruments ........................ 108
7 Steering wheel controls .....100
8 Driver Information Centre .... 119
9 Turn and lane-change
signals, headlight flash,
low beam and high beam,
high beam assist .................145
Exit lighting ......................... 149
Parking lights ...................... 146
Buttons for Driver
Information Centre ..............11910Sport mode ........................ 177
Central locking system ..........23
Hazard warning flashers ....145
Fuel selector ....................... 109
Control indicator for airbag
deactivation ........................ 113
Control indicator for front
passenger seat belt ...........113
Tour mode .......................... 177
11 Info-Display ........................ 124
12 Anti-theft alarm system
status LED ........................... 29
13 Centre air vents .................. 158
14 Glovebox .............................. 60
15 Sport mode ........................ 177
Tour mode .......................... 177
Traction Control system .....174
Electronic Stability Control . 175
Parking assist ..................... 195Lane departure warning .....207
Eco button for stop-start
system ................................. 163
16 Climate control system ........ 151
17 AUX input, USB input ..........12
18 Power outlet ........................ 106
19 Selector lever, manual
transmission ....................... 171
Automatic transmission ......167
20 Electric parking brake .........172
21 Ignition switch with
steering wheel lock ............161
22 Horn ................................... 101
Driver airbag ........................ 50
23 Bonnet release lever ..........223
24 Storage compartment,
fuse box ............................. 252
25 Steering wheel adjustment 100
26 Light switch ........................ 138
Headlight range
adjustment ......................... 140
Front fog lights ...................145
Page 48 of 329

46Seats, restraints
Adjustable thigh support
Pull the lever and slide the thigh
support.
Overload
If the seat setting is electrically
overloaded, the power supply is
automatically cut-off for a short time.
Armrest
The armrest can be slid forwards by
10 cm. Under the armrest there is a
storage compartment.
Armrest storage 3 62.
Heating
Adjust heating to the desired setting
by pressing the ß button for the
respective seat one or more times.
The control indicator in the button
indicates the setting.
Prolonged use of the highest setting
for people with sensitive skin is not
recommended.
Seat heating is operational when engine is running and during an
Autostop.
Stop-start system 3 163.
Page 103 of 329

Instruments and controls101Heated steering wheel
Activate heating by pressing *
button. Activation is indicated by the
LED in the button.
The recommended grip areas of the
steering wheel are heated quicker
and to a higher temperature than the
other areas.
Heating is operational when the
engine is running and during an
Autostop.
Stop-start system 3 163.
Horn
Press j.
Page 137 of 329

Instruments and controls135
Stop door lock if door open:
Activates or deactivates the
automatic door locking function
while a door is open.
Delayed door lock : Activates or
deactivates the delayed door
locking function.
■ Remote locking, unlocking, starting
Remote unlock feedback : Activates
or deactivates the hazard warning
flasher feedback whilst unlocking.
Remote door unlock : Changes the
configuration to unlock only the driver's door or the whole vehicle
whilst unlocking.
Auto relock doors : Activates or
deactivates the automatic relock
function after unlocking without
opening the vehicle.
■ Restore factory settings
Restore factory settings : Resets all
settings to the default settings.
Settings in the Colour-Info-
Display
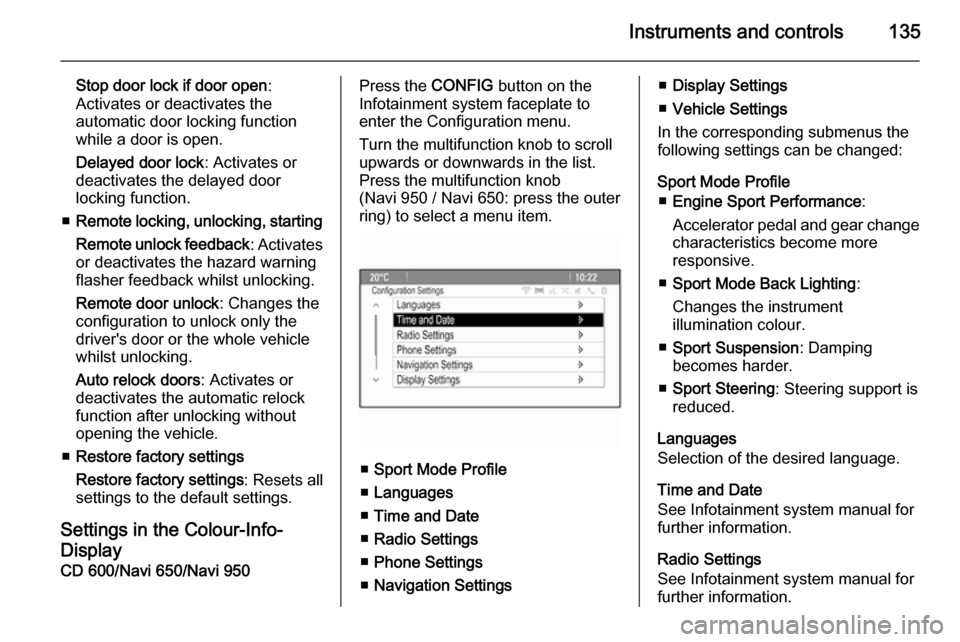
CD 600/Navi 650/Navi 950Press the CONFIG button on the
Infotainment system faceplate to enter the Configuration menu.
Turn the multifunction knob to scroll
upwards or downwards in the list.
Press the multifunction knob
(Navi 950 / Navi 650: press the outer
ring) to select a menu item.
■ Sport Mode Profile
■ Languages
■ Time and Date
■ Radio Settings
■ Phone Settings
■ Navigation Settings
■Display Settings
■ Vehicle Settings
In the corresponding submenus the
following settings can be changed:
Sport Mode Profile ■ Engine Sport Performance :
Accelerator pedal and gear change
characteristics become more
responsive.
■ Sport Mode Back Lighting :
Changes the instrument
illumination colour.
■ Sport Suspension : Damping
becomes harder.
■ Sport Steering : Steering support is
reduced.
Languages
Selection of the desired language.
Time and Date
See Infotainment system manual for
further information.
Radio Settings
See Infotainment system manual for
further information.
Page 156 of 329

154Climate control
Demisting and defrosting the
windows V
■
Press button V: fan automatically
switches to higher speed, the air distribution is directed towards the
windscreen.
■ Switch cooling n on.
■ Set temperature control to warmest
level.
■ Switch on heated rear window Ü.
■ Open side air vents as required and
direct them towards the door
windows.
Notice
If the V button is pressed while the
engine is running, an Autostop will
be inhibited until the V button is
pressed again.
If the V button is pressed while the
engine is in an Autostop, the engine will restart automatically.
Stop-start system 3 163.
Electronic climate control
system
The dual zone climate control allows
different climatisation temperatures
for driver and front passenger side.
In Automatic mode temperature, fan
speed and air distribution are
regulated automatically.
Controls for:
■ Temperature on driver side■ Air distribution
■ Fan speed
■ Temperature on front passenger side
n=coolingAUTO=automatic mode4=manual air recirculationV=demisting and defrosting
Heated rear window Ü 3 35, Heated
seats ß 3 46, Heated steering wheel
* 3 101.
Page 158 of 329

156Climate control
If the minimum temperature Lo is set,
the climate control system runs at
maximum cooling, if cooling n is
switched on.
If the maximum temperature Hi is set,
the climate control system runs at
maximum heating.
Notice
If n is switched on, reducing the set
cabin temperature can cause the
engine to restart from an Autostop or inhibit an Autostop.
Demisting and defrosting the
windows V■
Press button V. Activation is
indicated by the LED in the button.
■ Press cooling button n. Activation
is indicated by the LED in the button.
■ Temperature and air distribution are set automatically and the fan
runs at high speed.
■ Switch on heated rear window Ü.
■ To return to previous mode: press button V, to return to automatic
mode: press button AUTO.
Setting of automatic rear window
heating can be changed in the menu
Settings in the Info-Display. Vehicle
personalisation 3 132.
Notice
If the V button is pressed while the
engine is running, an Autostop will
be inhibited until the V button is
pressed again.
If the V button is pressed while the
engine is in an Autostop, the engine will restart automatically.
Stop-start system 3 163.Manual settings
Climate control system settings can
be changed by activating the buttons
and rotary knobs as follows.
Changing a setting will deactivate the automatic mode.
Fan speed Z
Press lower button to decrease or
upper button to increase fan speed as
shown in the illustration. The fan
speed is indicated by the number of
segments in the display.
Pressing the lower button longer: fan and cooling are switched off.
Page 159 of 329

Climate control157
Pressing the upper button longer: thefan runs at maximum speed.
To return to automatic mode: Press
AUTO button.
Air distribution s, M , K
Press appropriate button for desired
adjustment. Activation is indicated by the LED in the button.
s=to windscreen and front door
windows.M=to head area via adjustable air
ventsK=to foot well.
All combinations are possible.
Return to automatic air distribution:
press button AUTO.
Cooling n
Press button
n to switch on cooling.
Activation is indicated by the LED in
the button. Cooling is only functional
when the engine is running and
climate control fan is switched on.
Press button n again to switch off
cooling.
The air conditioning system cools and
dehumidifies (dries) when outside
temperature is above a specific level. Therefore condensation may form
and drip from under the vehicle.
If no cooling or drying is required,
switch off the cooling system for fuel
saving reasons. When the cooling
system is switched off, no engine
restart will be requested by the
climate control system during an
Autostop. Exception: defrost system
is activated and outside temperature
above 0° C requests a restart.
The display will indicate ACON when
cooling is activated or ACOFF when
the cooling is deactivated.
Activation or deactivation of cooling
operation after engine start can be
changed in the menu Settings in the
Info-Display. Vehicle personalisation
3 132.
Page 165 of 329

Driving and operating163Stop-start system
The stop-start system helps to save
fuel and to reduce the exhaust
emissions. When conditions allow, it
switches off the engine as soon as the vehicle is at a low speed or at a
standstill, e.g. at a traffic light or in a
traffic jam. It starts the engine
automatically as soon as the clutch is
depressed. A battery sensor ensures
that an Autostop is only performed if
the vehicle battery is sufficiently
charged for a restart.
Activation The stop-start system is available assoon as the engine is started, the
vehicle starts-off and the conditions
as stated below in this section are
fulfilled.Deactivation
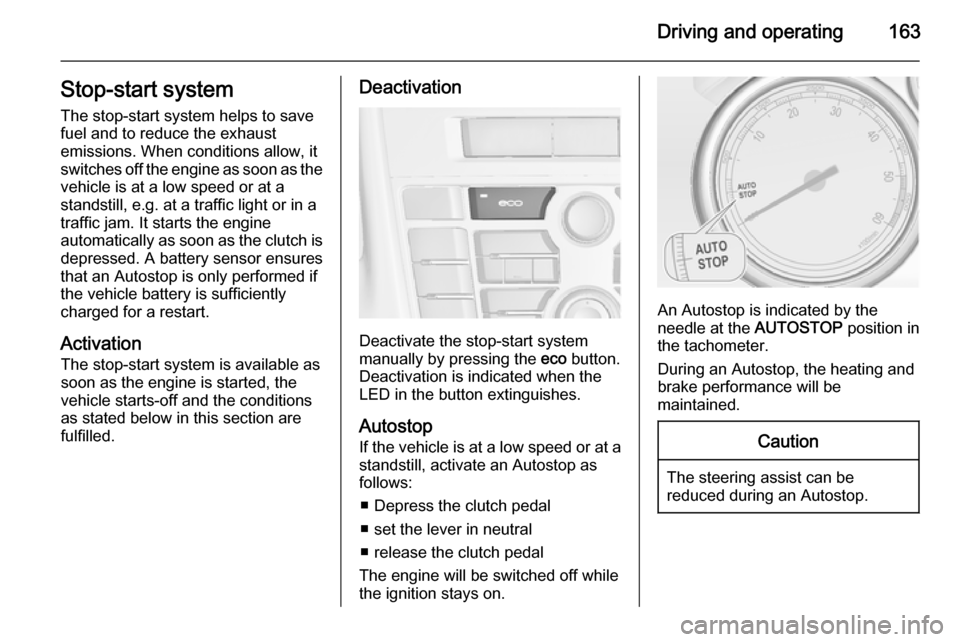
Deactivate the stop-start system
manually by pressing the eco button.
Deactivation is indicated when the
LED in the button extinguishes.
Autostop
If the vehicle is at a low speed or at a standstill, activate an Autostop as
follows:
■ Depress the clutch pedal
■ set the lever in neutral
■ release the clutch pedal
The engine will be switched off while
the ignition stays on.
An Autostop is indicated by the
needle at the AUTOSTOP position in
the tachometer.
During an Autostop, the heating and
brake performance will be
maintained.
Caution
The steering assist can be
reduced during an Autostop.
Page 202 of 329

200Driving and operating
If the driver does not stop the vehicle
within 10 metres after a parking slot is
proposed, the system starts to search for another suitable parking slot.
Changing the parking side
The system is configured to detect parking slots on the passenger side.
To detect parking slots on the driver
side, switch turn indicator to the driver
side.
Display priorities
After activating the advanced parking assist, a message appears on the
Driver Information Centre. Indication
of messages with higher priority like
vehicle messages 3 126 will be
displayed. After approving the
message by pressing the SET/CLR
button, parking assist messages
appear again and parking can be
continued.
Deactivation
The system is deactivated by:
■ pushing button D for approx.
one second
■ parking manoeuvre successfully ended
■ driving faster than 18 mph
■ switching off the ignition
Deactivation by the driver or by the
system during manoeuvring will be indicated by Parking Deactivated in
the Driver Information Centre.
Fault A message appears in the Driver
Information Centre when:
■ there is a fault in the system
■ the driver did not successfully complete the parking manoeuvre
■ the system is not operationalIf an object is detected during parking instructions, Stop is indicated in the
Driver Information Centre. Removing
the object will resume the parking
manoeuvre. If the object is not
removed, the system will be
deactivated. Push button D for
approx. one second to activate the
system and search for a new parking
slot.
Important hints for using the
parking assist systems9 Warning
Under certain circumstances,
various reflective surfaces on
objects or clothing as well as
external noise sources may cause the system to fail to detect
obstacles.
Special attention has to be paid to
low obstacles which can damage
the lower part of the bumper.