open bonnet VAUXHALL ASTRA J 2015.75 Owner's Manual
[x] Cancel search | Manufacturer: VAUXHALL, Model Year: 2015.75, Model line: ASTRA J, Model: VAUXHALL ASTRA J 2015.75Pages: 337, PDF Size: 10.17 MB
Page 29 of 337

Keys, doors and windows27gases, which cannot be seen or
smelled, could enter the vehicle.
This can cause unconsciousness
and even death.Caution
Before opening the tailgate check
overhead obstructions, such as a
garage door, to avoid damage to
the tailgate. Always check the
moving area above and behind the tailgate.
Notice
The installation of certain heavy
accessories onto the tailgate may
affect its ability to remain open.
Vehicle security
Anti-theft locking system9 Warning
Do not use the system if there are
people in the vehicle! The doorscannot be unlocked from the
inside.
The system deadlocks all the doors.
All doors must be closed otherwise
the system cannot be activated.
If the ignition was on, the driver's door
must be opened and closed once so
that the vehicle can be secured.
Unlocking the vehicle disables the
mechanical anti-theft locking system.
This is not possible with the central
locking button.
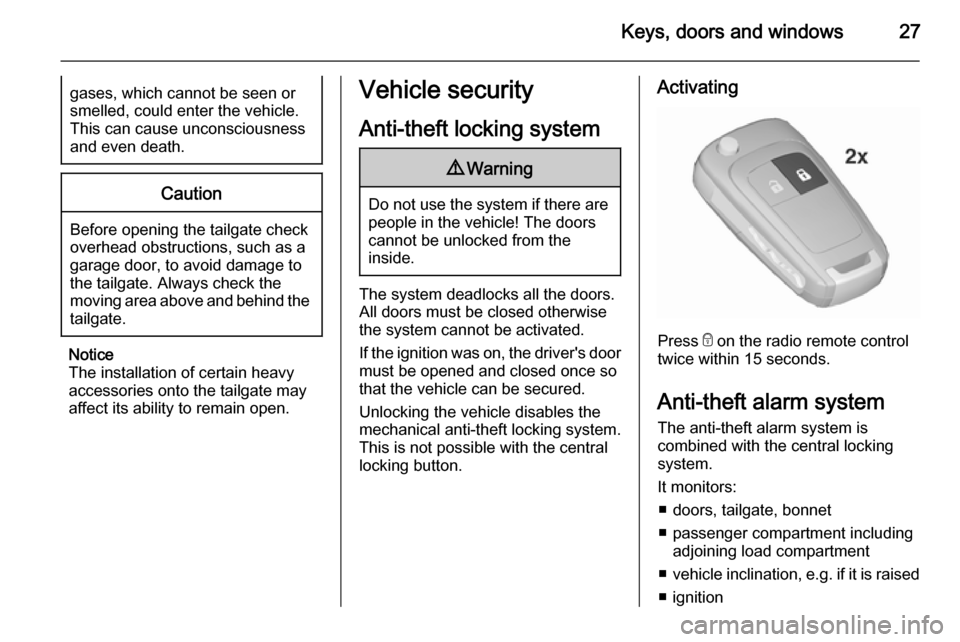
Activating
Press e on the radio remote control
twice within 15 seconds.
Anti-theft alarm system The anti-theft alarm system is
combined with the central locking
system.
It monitors: ■ doors, tailgate, bonnet
■ passenger compartment including adjoining load compartment
■ vehicle inclination, e.g. if it is raised
■ ignition
Page 30 of 337

28Keys, doors and windows
Activation■ Self-activated 30 seconds after locking the vehicle by pressing e
once.
■ Directly by pressing e twice briefly
within five seconds.
Notice
Changes to the vehicle interior such
as the use of seat covers, and open
windows or sunroof, could impair the
function of passenger compartment
monitoring.
Activation without monitoring of
passenger compartment and
vehicle inclinationSwitch off the monitoring of
passenger compartment and vehicle
inclination when animals are being
left in the vehicle, because of high
volume ultrasonic signals or
movements triggering the alarm. Also switch off when the vehicle is on a
ferry or train.
1. Close tailgate, bonnet, windows and sunroof.
2. Press o. LED in the button o
illuminates for a maximum of
10 minutes.
3. Close doors.
4. Activate the anti-theft alarm system.
Status message is displayed in the
Driver Information Centre (DIC).Status LED
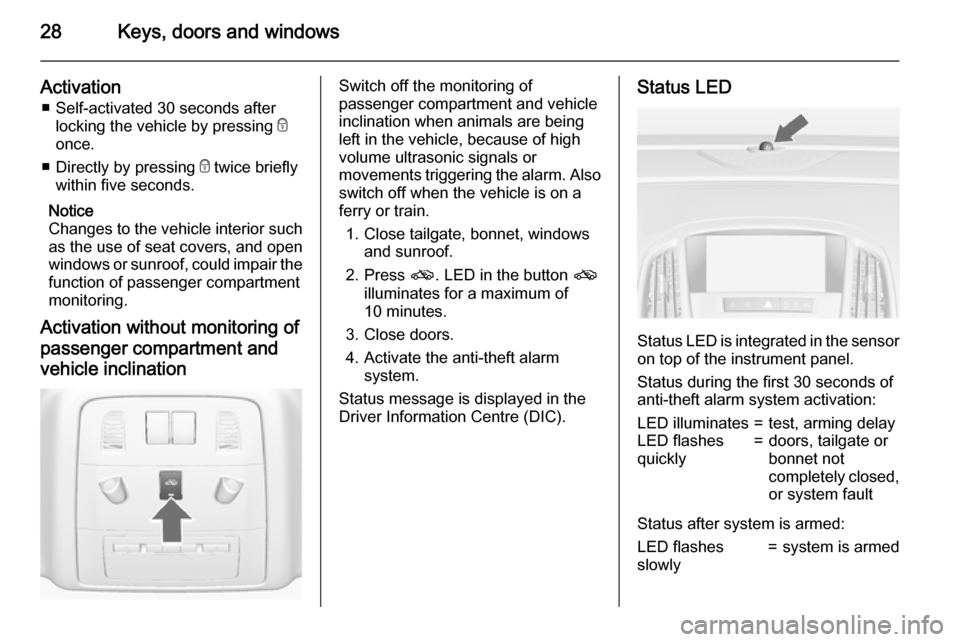
Status LED is integrated in the sensor
on top of the instrument panel.
Status during the first 30 seconds of
anti-theft alarm system activation:
LED illuminates=test, arming delayLED flashes
quickly=doors, tailgate or
bonnet not
completely closed,
or system fault
Status after system is armed:
LED flashes
slowly=system is armed
Page 128 of 337

126Instruments and controls
No.Vehicle message26Left rear turn signal failure27Right front turn signal failure28Right rear turn signal failure29Check trailer brake light30Check trailer reversing light31Check left trailer turn signal32Check right trailer turn signal33Check trailer rear fog light34Check trailer rear light35Replace battery in radio remote
control48Clean side blind zone alert
system49Lane departure warning
unavailable53Tighten gas cap54Water in diesel fuel filterNo.Vehicle message55Diesel particle filter is full
3 16556Tyre pressure imbalance on
front axle57Tyre pressure imbalance on
rear axle58Tyres without TPMS sensors
detected59Open and then close driver
window60Open and then close front
passenger window61Open and then close rear left
window62Open and then close rear right
window65Theft attempted66Service theft alarm system67Service steering wheel lock68Service power steeringNo.Vehicle message69Service suspension system70Service level control system71Service rear axle74Service AFL75Service air conditioning76Service side blind zone alert
system77Service lane departure warning79Top up engine oil81Service transmission82Change engine oil soon83Service adaptive cruise control84Engine power is reduced89Service vehicle soon94Shift to park before exiting95Service airbag128Bonnet open
Page 165 of 337

Driving and operating163
Conditions for an Autostop
The stop-start system checks if each
of the following conditions is fulfilled:
■ The stop-start system is not manually deactivated.
■ The bonnet is fully closed.
■ The driver's door is closed or the driver's seat belt is fastened.
■ The vehicle battery is sufficiently charged and in good condition.
■ The engine is warmed up.
■ The engine coolant temperature is not too high.
■ The engine exhaust temperature is
not too high, e.g. after driving with
high engine load.
■ The ambient temperature is above -5° C.
■ The climate control system allows an Autostop.
■ The brake vacuum is sufficient.
■ The self-cleaning function of the diesel particle filter is not active.
■ The vehicle was driven at least at walking speed since the last
Autostop.Otherwise an Autostop will be
inhibited.
Certain settings of the climate control
system may inhibit an Autostop. See
Climate control chapter for more
details 3 152.
Immediately after motorway driving
an Autostop may be inhibited.
New vehicle running-in 3 160.
Vehicle battery discharge protection
To ensure reliable engine restarts, several battery discharge protection
features are implemented as part of
the stop-start system.
Power saving measures
During an Autostop, several electric
features, e.g. auxiliary electric heater
or rear window heating are disabled
or switched into a power saving
mode. The fan speed of the climate
control system is reduced to save
power.Restart of the engine by the
driver
Depress the clutch pedal to restart the
engine.
The engine start is indicated by the
needle at the idle speed position in
the tachometer.
If the selector lever is shifted out of
neutral before depressing the clutch
first, control indicator - illuminates
or is shown as a symbol in the Driver
Information Centre (DIC).
Control indicator - 3 113.
Restart of the engine by the
stop-start system
The selector lever has to be in neutral to enable an automatic restart.
If one of the following conditions occurs during an Autostop, the
engine will be restarted automatically
by the stop-start system:
■ The stop-start system is manually deactivated.
■ The bonnet is opened.
■ The driver's seat belt is unfastened
and the driver's door is opened.
Page 226 of 337

224Vehicle care
■ Open the bonnet, close all doorsand lock the vehicle.
■ Disconnect the clamp from the negative terminal of the vehicle
battery. Beware that all systems are not functional, e.g. anti-theft alarm
system.
Putting back into operation When the vehicle is to be put back into
operation:
■ Connect the clamp to the negative terminal of the vehicle battery.
Activate the electronics of the
power windows.
■ Check tyre pressure.
■ Fill up the washer fluid reservoir.
■ Check the engine oil level.
■ Check the coolant level.
■ Fit the number plate if necessary.
End-of-life vehicle
recovery
Information on end-of-life vehicle
recovery centres and the recycling of
end-of-life vehicles is available on ourwebsite, where legally required. Only
entrust this work to an authorised
recycling centre.
Gas vehicles must be recycled by a
service centre authorised for gas
vehicles.Vehicle checks
Performing work9 Warning
Only perform engine compartment
checks when the ignition is off.
The cooling fan may start
operating even if the ignition is off.
Page 227 of 337

Vehicle care2259Danger
The ignition system and Xenon
headlights use extremely high
voltage. Do not touch.
Bonnet
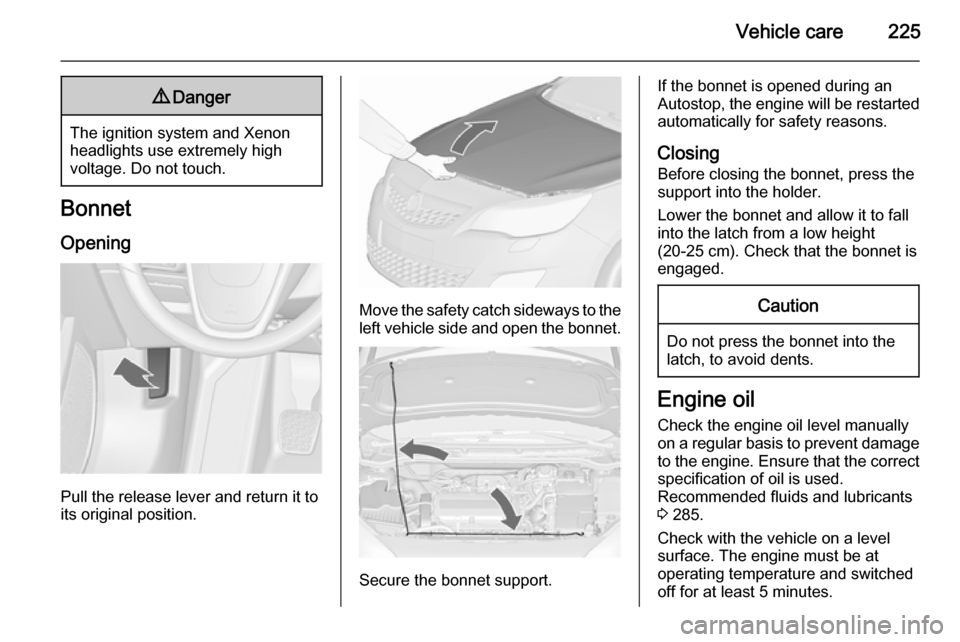
Opening
Pull the release lever and return it to
its original position.
Move the safety catch sideways to the left vehicle side and open the bonnet.
Secure the bonnet support.
If the bonnet is opened during an
Autostop, the engine will be restarted automatically for safety reasons.
Closing Before closing the bonnet, press the
support into the holder.
Lower the bonnet and allow it to fall
into the latch from a low height
(20-25 cm). Check that the bonnet is engaged.Caution
Do not press the bonnet into the
latch, to avoid dents.
Engine oil
Check the engine oil level manuallyon a regular basis to prevent damage
to the engine. Ensure that the correct specification of oil is used.
Recommended fluids and lubricants
3 285.
Check with the vehicle on a level
surface. The engine must be at
operating temperature and switched
off for at least 5 minutes.
Page 283 of 337

Vehicle care281
If using a vehicle wash, comply with
the vehicle wash manufacturer's
instructions. The windscreen wiper and rear window wiper must be
switched off. Remove antenna and
external accessories such as roof
racks etc.
If you wash your vehicle by hand,
make sure that the insides of the
wheel housings are also thoroughly
rinsed out.
Clean edges and folds on opened
doors and the bonnet as well as the
areas they cover.Caution
Always use a cleaning agent with
a pH value of 4 to 9.
Do not use cleaning agents on hot surfaces.
Have the door hinges of all doors
greased by a workshop.
Do not clean the engine compartment with a steam-jet or high-pressure jet
cleaner.
On vehicles with emblem touchpad:
when cleaning with a high-pressure
jet cleaner ensure a minimum
distance of 30 cm when working
around the tailgate to prevent
unintended unlocking.
Thoroughly rinse and leather-off the
vehicle. Rinse leather frequently. Use
separate leathers for painted and
glass surfaces: remnants of wax on
the windows will impair vision.
Exterior lights
Headlight and other light covers are
made of plastic. Do not use any
abrasive or caustic agents, do not use an ice scraper, and do not clean them
dry.
Polishing and waxing Wax the vehicle regularly (at the
latest when water no longer beads).
Otherwise, the paintwork will dry out.
Polishing is necessary only if the paint
has become dull or if solid deposits
have become attached to it.Paintwork polish with silicone forms a
protective film, making waxing
unnecessary.
Plastic body parts must not be treated with wax or polishing agents.
Windows and windscreen wiper blades
Use a soft lint-free cloth or chamois leather together with window cleanerand insect remover.
When cleaning the rear window from
inside, always wipe in parallel to the
heating element to prevent damage.
For mechanical removal of ice, use a
sharp-edged ice scraper. Press the
scraper firmly against the glass so
that no dirt can get under it and
scratch the glass.
Remove dirt residues from smearing
wiper blades by using a soft cloth and window cleaner. Also make sure to
remove any residues such as wax,
insect residues and similar from the
window.
Ice residues, pollution and continuous
wiping on dry windows will damage or
even destroy the wiper blades.