change wheel VAUXHALL ASTRA J 2016.25 Owner's Manual
[x] Cancel search | Manufacturer: VAUXHALL, Model Year: 2016.25, Model line: ASTRA J, Model: VAUXHALL ASTRA J 2016.25Pages: 267, PDF Size: 7.72 MB
Page 13 of 267

In brief111Power windows .....................36
2 Exterior mirrors .....................33
3 Central locking system ..........23
4 Side air vents ...................... 136
5 Cruise control .....................162
Speed limiter ....................... 164
Forward collision alert .........166
6 Turn and lane-change
signals, headlight flash,
low/high beam, high beam assist ................................... 123
Exit lighting ......................... 126
Parking lights ...................... 124
Buttons for Driver
Information Centre ................97
7 Instruments .......................... 87
Driver Information Centre ...... 97
8 Buttons for Driver
Information Centre ................97
9 Forward collision alert
indicator ............................. 166
10 Windscreen wiper and
washer, rear wiper and
washer ................................. 7611Centre air vents .................. 136
12 Info-Display ........................ 102
13 Anti-theft alarm system
status LED ........................... 30
14 Hazard warning flashers ....122
15 Glovebox .............................. 65
16 CD player
17 Controls for Info-Display
operation ............................. 102
18 Climate control system ........ 129
19 Fuse box ............................ 213
Power connector ..................82
20 Sport mode ........................ 162
Traction Control system .....159
Electronic Stability Control . 160
Parking assist/Advanced
parking aid ......................... 170
Lane keep assist ................185
Eco button for stop-start
system ................................. 14421 Manual transmission ..........153
Automatic transmission ......150
Manual transmission
automated ........................... 154
22 Power outlet .......................... 81
23 Parking brake ......................157
24 Power button ....................... 140
25 Ignition switch with
steering wheel lock ............139
26 Steering wheel adjustment ..75
27 Horn ..................................... 76
28 Bonnet release lever ..........196
29 Storage compartment ...........66
30 Light switch ........................ 117
Headlight range
adjustment ......................... 118
Front/rear fog lights ............123
Instrument illumination .......125
Page 67 of 267
Storage65StorageStorage compartments................65
Glovebox ................................... 65
Cupholders ................................ 65
Front storage ............................. 66
Armrest storage .........................66
Load compartment .......................67
Load compartment cover ...........69
Rear floor storage cover ............70
Lashing eyes ............................. 70
Warning triangle ........................71
First aid kit ................................. 71
Roof rack system .........................72
Roof rack ................................... 72
Loading information .....................72Storage compartments9Warning
Do not store heavy or sharp
objects in the storage
compartments. Otherwise, the
storage compartment lid could
open and vehicle occupants could be injured by objects being thrown
around in the event of hard
braking, a sudden change in
direction or an accident.
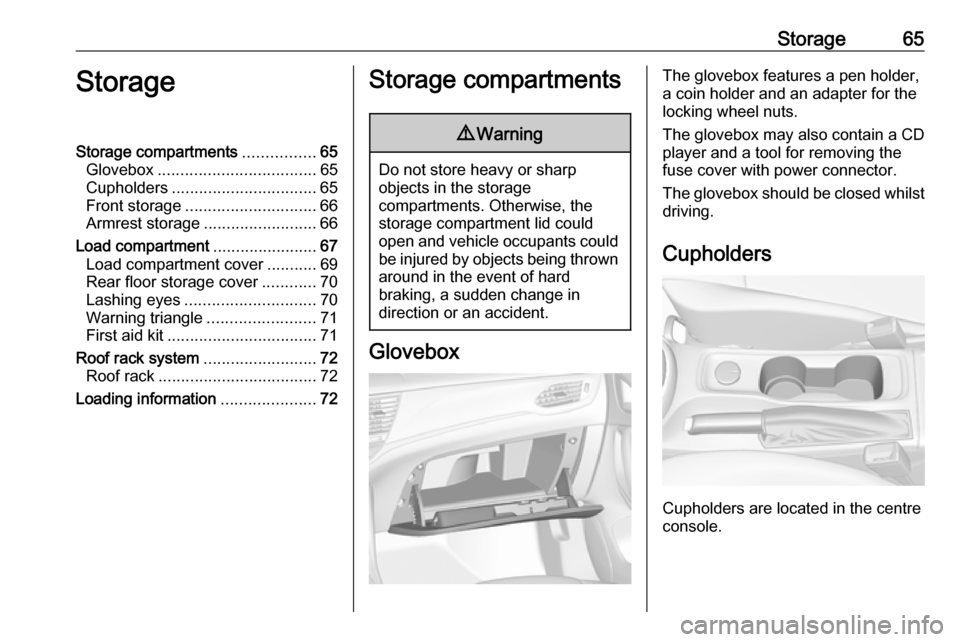
Glovebox
The glovebox features a pen holder,
a coin holder and an adapter for the
locking wheel nuts.
The glovebox may also contain a CD
player and a tool for removing the
fuse cover with power connector.
The glovebox should be closed whilst driving.
Cupholders
Cupholders are located in the centre
console.
Page 92 of 267

90Instruments and controlsCaution
If engine coolant temperature is
too high, stop vehicle, switch off
engine. Danger to engine. Check
coolant level.
Service display
The engine oil life system informs
when to change the engine oil and
filter. Based on driving conditions, the interval at which an engine oil and
filter change will be indicated can vary
considerably.
The remaining oil life duration menu
is displayed in the Driver Information
Centre 3 97.
On Midlevel display select the
Settings Menu by pressing MENU on
the turn signal lever. Turn the adjuster wheel to select the Remaining Oil
Life page.
On Uplevel display select Info Menu
by pressing p on steering wheel.
Press P to select Remaining Oil
Life page.
Remaining oil life duration is indicated
in percentage.
Reset
On Midlevel display press SET/CLR
on turn signal lever for several
seconds to reset. The ignition must be
switched on but engine not running.
On Uplevel display press > on
steering wheel to open the subfolder. Select Reset and confirm by pressing
Page 101 of 267

Instruments and controls99Confirm a main menu page with 9.
Once a main menu page is selected, press Q or P to select subpages.
Press q to open a next folder of the
selected subpage.
Press Q or P to select functions or
to set a numeric value, if required.
Press 9 to select and confirm a
function.
Once a main menu page is selected,
this selection remains stored until
another main menu page is selected.
Subpages are changed by pressing
P or Q.
Vehicle and service messages are
popped-up in the Driver Information
Centre if required. Confirm messages
by pressing 9. Vehicle messages
3 104.
Info Menu The following list contains all possible
Info Menu pages. Some may not be
available for your particular vehicle.
Depending on the display some
functions are symbolised.Turn the adjuster wheel or press Q
or P to select a page:
● trip odometer 1 or A average fuel consumption
average speed
● trip odometer 2 or B average fuel consumption
average vehicle speed
● digital speed
● fuel range
● instantaneous fuel consumption
● remaining oil life
● tyre pressure
● timer
● traffic sign assistant
● following distance
● top consumers
● economy trend
● Eco index
● blank page
On Midlevel display, the pages
Remaining Oil Life , Tyre Pressure ,
Traffic Sign Assistant and FollowingDistance are displayed in the Options
Menu ? . Select by pressing
MENU .
On Midlevel display, the pages Top
Consumers , Economy Trend and Eco
index are displayed in the ECO
Information Menu @. Select by
pressing MENU.
Trip odometer 1/A and 2/B
Trip odometer displays the current
distance since a certain reset.
Trip odometer counts up to a distance
of 9,999 miles then restarts at 0.
To reset on Midlevel display, press SET/CLR for a few seconds, on
Uplevel display, press > and confirm
with 9.
The information of trip odometer page
1/A and 2/B can be reset separately
for odometer, average consumption
and average speed while the
respective display is active.
Average Fuel Consumption
Display of average consumption. The measurement can be reset at any
time and starts with a default value.
Page 125 of 267
Lighting123
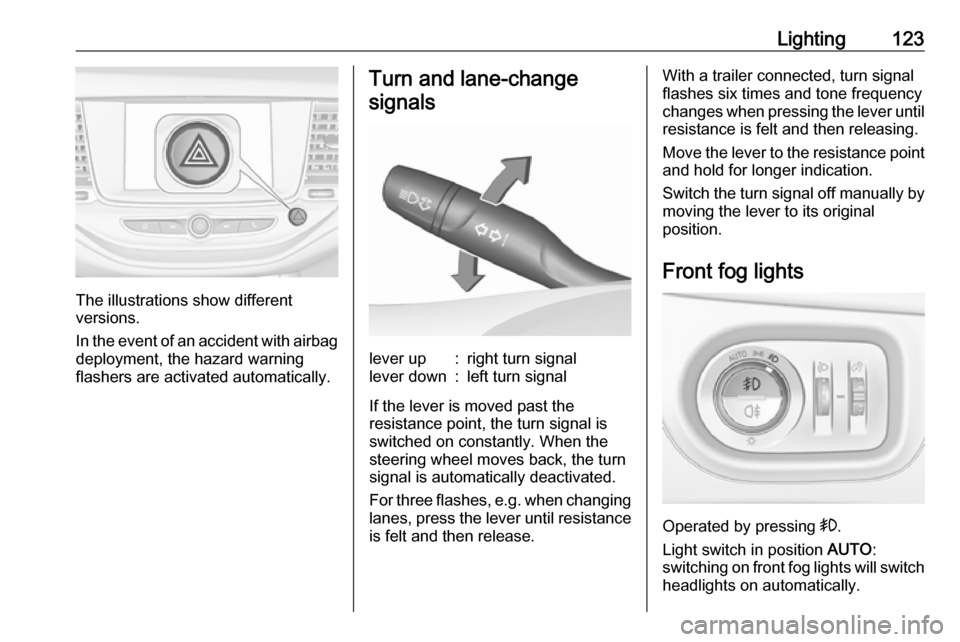
The illustrations show different
versions.
In the event of an accident with airbag
deployment, the hazard warning
flashers are activated automatically.
Turn and lane-change
signalslever up:right turn signallever down:left turn signal
If the lever is moved past the
resistance point, the turn signal is
switched on constantly. When the
steering wheel moves back, the turn
signal is automatically deactivated.
For three flashes, e.g. when changing
lanes, press the lever until resistance
is felt and then release.
With a trailer connected, turn signal
flashes six times and tone frequency
changes when pressing the lever until resistance is felt and then releasing.
Move the lever to the resistance point
and hold for longer indication.
Switch the turn signal off manually by
moving the lever to its original
position.
Front fog lights
Operated by pressing >.
Light switch in position AUTO:
switching on front fog lights will switch headlights on automatically.
Page 134 of 267
132Climate controlHeated rear window Ü 3 38, Heated
seats ß 3 47, Ventilated seats A
3 48, Heated steering wheel A 3 76.
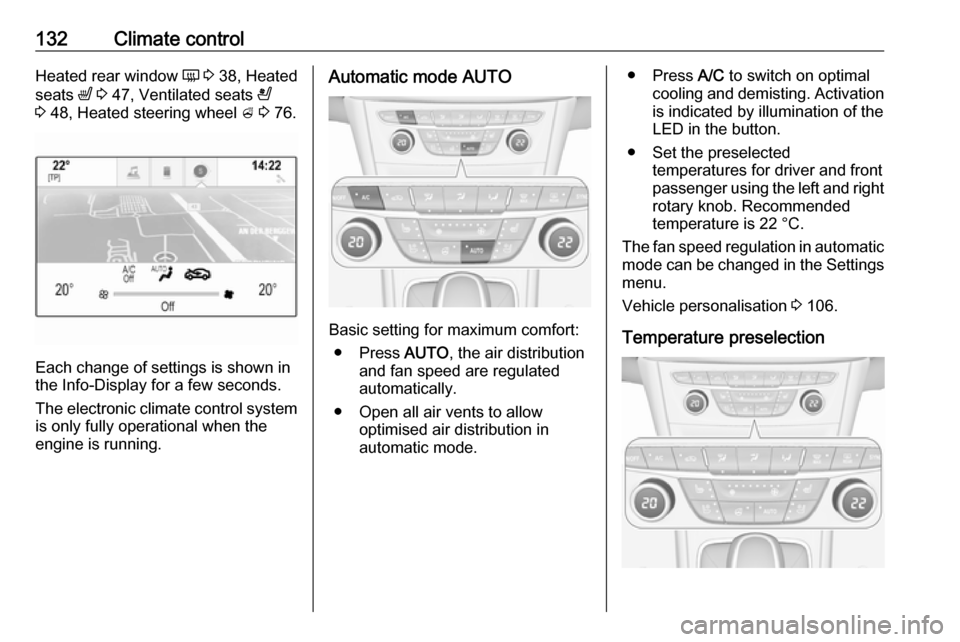
Each change of settings is shown in
the Info-Display for a few seconds.
The electronic climate control system
is only fully operational when the
engine is running.
Automatic mode AUTO
Basic setting for maximum comfort:
● Press AUTO, the air distribution
and fan speed are regulated
automatically.
● Open all air vents to allow optimised air distribution in
automatic mode.
● Press A/C to switch on optimal
cooling and demisting. Activation is indicated by illumination of the
LED in the button.
● Set the preselected temperatures for driver and front
passenger using the left and right
rotary knob. Recommended
temperature is 22 °C.
The fan speed regulation in automatic mode can be changed in the Settings menu.
Vehicle personalisation 3 106.
Temperature preselection
Page 138 of 267
136Climate controlAutomatic air recirculationAn air humidity sensor switches
automatically to external air if internal air humidity is too high.
Basic settings
Some settings can be changed in the Settings menu in the Info-Display.
Vehicle personalisation 3 106.
Auxiliary heater
Air heater Quickheat is an electric auxiliary air
heater which automatically warms up
the passenger compartment more
quickly.Air vents
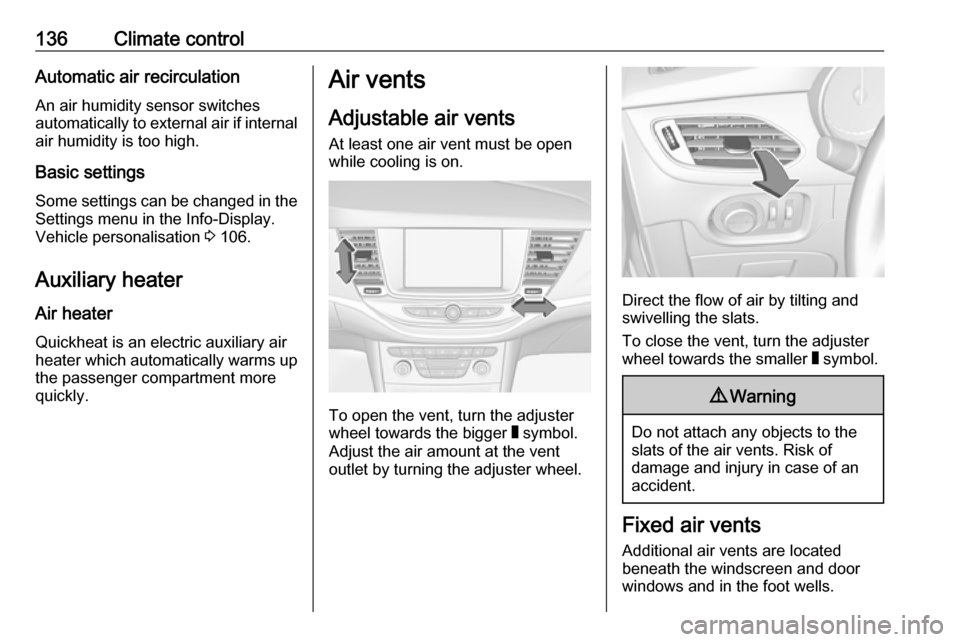
Adjustable air vents At least one air vent must be open
while cooling is on.
To open the vent, turn the adjuster
wheel towards the bigger W symbol.
Adjust the air amount at the vent
outlet by turning the adjuster wheel.
Direct the flow of air by tilting and
swivelling the slats.
To close the vent, turn the adjuster
wheel towards the smaller W symbol.
9 Warning
Do not attach any objects to the
slats of the air vents. Risk of
damage and injury in case of an
accident.
Fixed air vents
Additional air vents are located
beneath the windscreen and door windows and in the foot wells.
Page 167 of 267
Driving and operating165Activation
Illustrations show different versions.
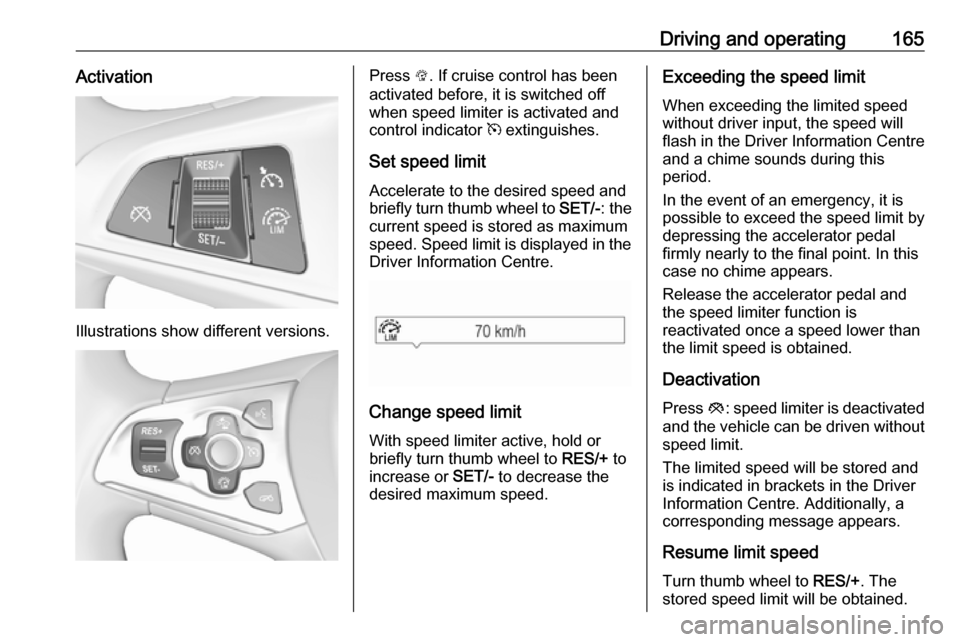
Press L. If cruise control has been
activated before, it is switched off when speed limiter is activated and
control indicator m extinguishes.
Set speed limit Accelerate to the desired speed and
briefly turn thumb wheel to SET/-: the
current speed is stored as maximum speed. Speed limit is displayed in the
Driver Information Centre.
Change speed limit
With speed limiter active, hold or
briefly turn thumb wheel to RES/+ to
increase or SET/- to decrease the
desired maximum speed.
Exceeding the speed limit
When exceeding the limited speed
without driver input, the speed will
flash in the Driver Information Centre
and a chime sounds during this
period.
In the event of an emergency, it is
possible to exceed the speed limit by
depressing the accelerator pedal
firmly nearly to the final point. In this
case no chime appears.
Release the accelerator pedal and the speed limiter function is
reactivated once a speed lower than
the limit speed is obtained.
Deactivation Press y: speed limiter is deactivated
and the vehicle can be driven without
speed limit.
The limited speed will be stored and
is indicated in brackets in the Driver
Information Centre. Additionally, a
corresponding message appears.
Resume limit speed Turn thumb wheel to RES/+. The
stored speed limit will be obtained.
Page 179 of 267
Driving and operating177Deactivation
The system is deactivated by:
● a short press of (
● parking manoeuvre successfully ended
● driving faster than 18 mph during
parking slot search
● driving faster than 5 mph during parking guidance
● driver interference on steering wheel detected
● exceeding number of maximum gear changes: eight cycles when
parallel parking or five cycles
when perpendicular parking
● switching off the ignition
Deactivation by the driver or by the
system during manoeuvring will be indicated by Parking Deactivated on
the display. Additionally, an acoustic
signal sounds.Fault
A message appears when:
● There is a fault in the system.● The driver did not successfully complete the parking
manoeuvre.
● The system is not operational.
● Any of the deactivation reasons described above apply.
If an object is detected during parking instructions, Stop is indicated on the
display. Removing the object will
resume the parking manoeuvre. If the
object is not removed, the system will
be deactivated. A long press of ( will
activate the system and search for a
new parking slot.
Basic notes on parking assist
systems9 Warning
Under certain circumstances,
various reflective surfaces on
objects or clothing as well as
external noise sources may cause the system to fail to detect
obstacles.
Special attention must be paid to
low obstacles which can damage
the lower part of the bumper.Caution
Performance of the system can be reduced when sensors are
covered, e.g. by ice or snow.
Performance of the parking assist
system can be reduced due to
heavy loading.
Special conditions apply if there
are taller vehicles in the vicinity
(e.g. off-road vehicles, mini vans,
vans). Object identification and correct distance indication in the
upper part of these vehicles
cannot be guaranteed.
Objects with a very small reflection
cross-section, e.g. objects of
narrow size or soft materials, may
not be detected by the system.
Page 186 of 267
184Driving and operating
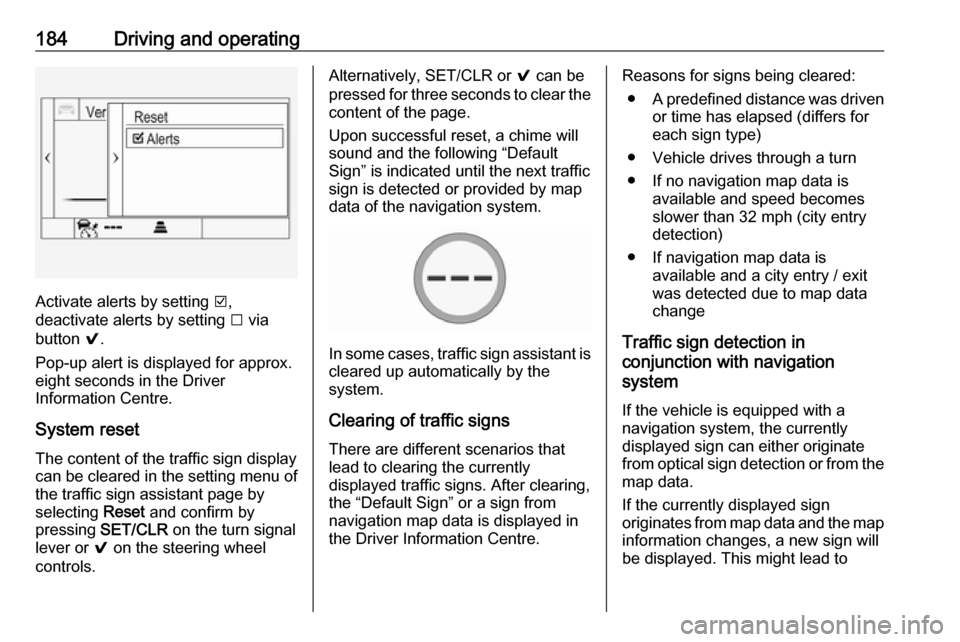
Activate alerts by setting J,
deactivate alerts by setting I via
button 9.
Pop-up alert is displayed for approx.
eight seconds in the Driver
Information Centre.
System reset The content of the traffic sign display
can be cleared in the setting menu of
the traffic sign assistant page by
selecting Reset and confirm by
pressing SET/CLR on the turn signal
lever or 9 on the steering wheel
controls.
Alternatively, SET/CLR or 9 can be
pressed for three seconds to clear the
content of the page.
Upon successful reset, a chime will
sound and the following “Default
Sign” is indicated until the next traffic
sign is detected or provided by map
data of the navigation system.
In some cases, traffic sign assistant is
cleared up automatically by the
system.
Clearing of traffic signs
There are different scenarios that
lead to clearing the currently
displayed traffic signs. After clearing,
the “Default Sign” or a sign from
navigation map data is displayed in
the Driver Information Centre.
Reasons for signs being cleared:
● A predefined distance was driven
or time has elapsed (differs for
each sign type)
● Vehicle drives through a turn
● If no navigation map data is available and speed becomes
slower than 32 mph (city entry
detection)
● If navigation map data is available and a city entry / exit
was detected due to map data
change
Traffic sign detection in
conjunction with navigation
system
If the vehicle is equipped with a
navigation system, the currently
displayed sign can either originate
from optical sign detection or from the
map data.
If the currently displayed sign
originates from map data and the map
information changes, a new sign will
be displayed. This might lead to