remove seats VAUXHALL ASTRA J 2016.75 Owner's Manual
[x] Cancel search | Manufacturer: VAUXHALL, Model Year: 2016.75, Model line: ASTRA J, Model: VAUXHALL ASTRA J 2016.75Pages: 291, PDF Size: 8.73 MB
Page 48 of 291
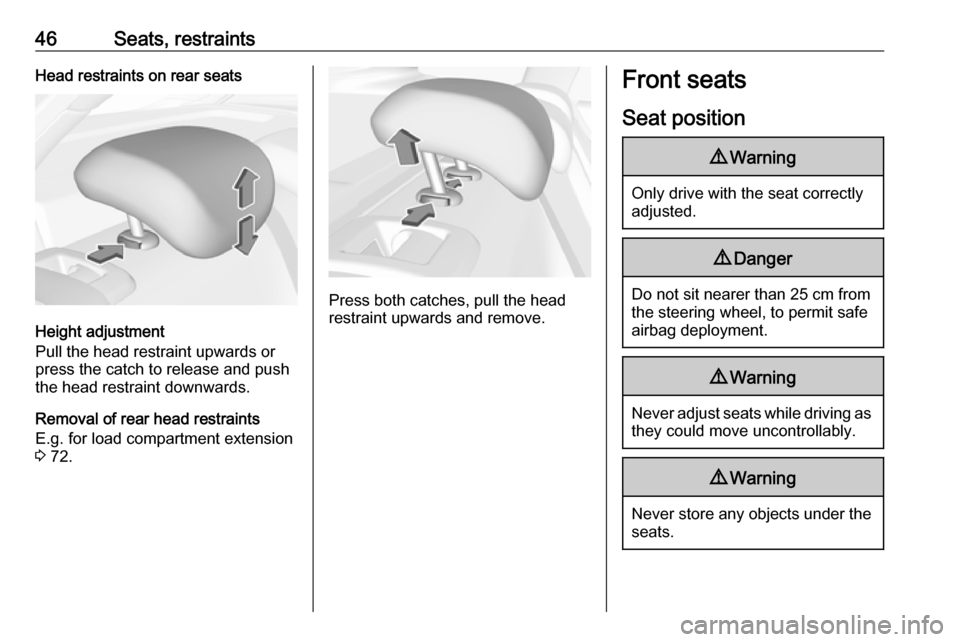
46Seats, restraintsHead restraints on rear seats
Height adjustment
Pull the head restraint upwards or
press the catch to release and push the head restraint downwards.
Removal of rear head restraints
E.g. for load compartment extension
3 72.
Press both catches, pull the head
restraint upwards and remove.
Front seats
Seat position9 Warning
Only drive with the seat correctly
adjusted.
9 Danger
Do not sit nearer than 25 cm from
the steering wheel, to permit safe
airbag deployment.
9 Warning
Never adjust seats while driving as
they could move uncontrollably.
9 Warning
Never store any objects under the
seats.
Page 54 of 291
52Seats, restraintsThe stored positions are
automatically recalled when the
ignition is switched on.
To stop recall movement, press one
of the memory or power seat controls.
Precondition is that Personalisation
by Driver and Auto Memory Recall is
activated in the personal settings of
the Info-Display.
This function can be activated or
deactivated in the vehicle
personalisation.
Select the relevant setting in the
Vehicle menu in the Info-Display.
Info-Display 3 118.
Vehicle personalisation 3 122.
Easy exit function
For a convenient exit out of the
vehicle, the power driver seat moves
rearwards when vehicle is stationary.
To activate the easy exit function: ● set selector lever to position P
(automatic transmission)
● apply parking brake (manual transmission)
● switch off ignition● remove key from the ignition switch
● open the driver's door
If the door is already open, switch off
ignition to activate easy exit.
To stop movement, press one of the
memory or power seat controls.
This function can be activated or
deactivated in the vehicle
personalisation.
Select the relevant setting in the
Vehicle menu in the Info-Display.
Info-Display 3 118.
Vehicle personalisation 3 122.
Safety function
If the driver's seat encounters
resistance during movement, the
recall may stop. After removing the
obstruction, press and hold the
appropriate memory position button for two seconds. Try recalling the
memory position again. If the recall
does not operate, consult a
workshop.Overload
If the seat setting is electrically overloaded, the power supply is
automatically cut-off for a short time.
Notice
After an accident in which airbags
have been deployed, the memory
function for each position button will
be deactivated.
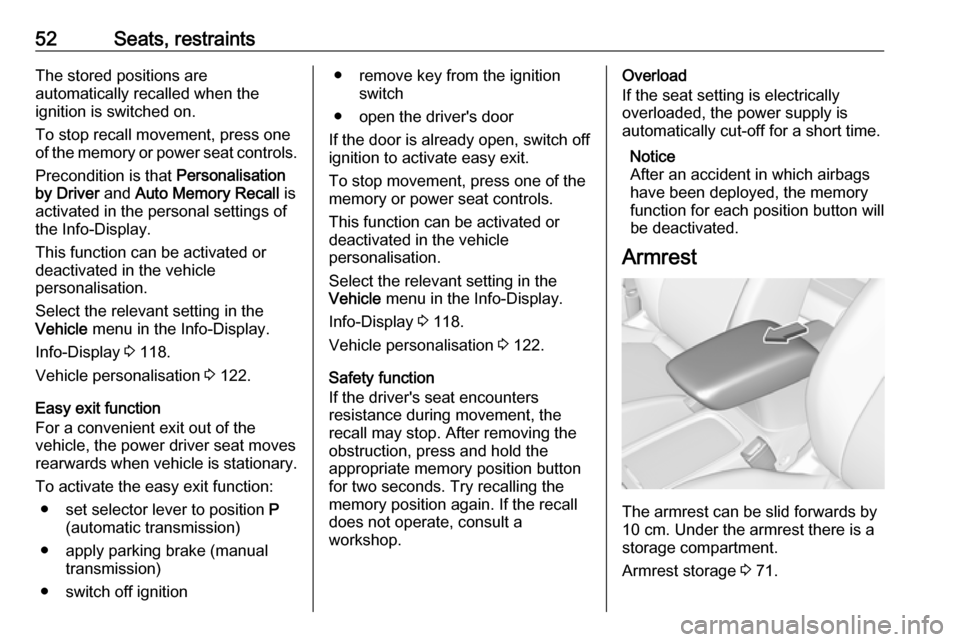
Armrest
The armrest can be slid forwards by
10 cm. Under the armrest there is a
storage compartment.
Armrest storage 3 71.
Page 67 of 291

Seats, restraints65child's backbone, which is still very
weak, is under less strain in the event
of an accident.
Suitable are restraint systems that
comply with valid UN ECE
regulations. Check local laws and
regulations for mandatory use of child restraint systems.
The following child restraints are
recommended for the following
weight classes:
Maxi Cosi Cabriofix for children up to 13 kg for group 0, group 0+ and Duo
Plus for children from 13 kg to 18 kg in group I.
Ensure that the child restraint system to be installed is compatible with the
vehicle type.
Ensure that the mounting location of
the child restraint system within the
vehicle is correct, see following
tables.
Allow children to enter and exit the
vehicle only on the side facing away
from the traffic.
When the child restraint system is not
in use, secure the seat with a seat belt or remove it from the vehicle.Notice
Do not affix anything on the child restraint systems and do not cover
them with any other materials.
A child restraint system which has
been subjected to stress in an
accident must be replaced.
Page 69 of 291

Seats, restraints672:move seat height adjustment upwards as far as necessary and adjust seat backrest inclination as far as necessaryto a vertical position to ensure that the belt is tight on the buckle side3:move the respective front seat ahead of the child restraint system forwards as far as necessary4:adjust the respective headrest as necessary or remove if required
Permissible options for fitting an ISOFIX child restraint system with ISOFIX brackets
Weight and age classSize classFixture
On front passenger seat
On rear
outboard seatsOn rear
centre seat
activated
airbagdeactivated
airbagGroup 0: up to 10 kg
or approx. 10 monthsGISO/L2XXXXFISO/L1XXXXEISO/R1XXIL 3XGroup 0+: up to 13 kg
or approx. 2 yearsEISO/R1XXIL 3XDISO/R2XXIL3XCISO/R3XXIL3XGroup I: 9 to 18 kg
or approx. 8 months to 4 yearsDISO/R2XXIL 3,4XCISO/R3XXIL 3,4XBISO/F2XXIL, IUF 3,4XB1ISO/F2XXXIL, IUF3,4XAISO/F3XXIL, IUF 3,4X
Page 70 of 291

68Seats, restraints
Weight and age classSize classFixture
On front passenger seat
On rear
outboard seatsOn rear
centre seat
activated
airbagdeactivated
airbagGroup II: 15 to 25 kg
or approx. 3 to 7 yearsXXIL 3,4XGroup III: 22 to 36 kg
or approx. 6 to 12 yearsXXIL 3,4XIL:suitable for particular ISOFIX restraint systems of the 'specific-vehicle', 'restricted' or 'semi-universal' categories.
The ISOFIX restraint system must be approved for the specific vehicle type (refer to the vehicle type list of the child restraint system)IUF:suitable for ISOFIX forward-facing child restraint systems of universal category approved for use in this weight classX:no ISOFIX child restraint system approved in this weight class1:move seat forwards as far as necessary and adjust seat backrest inclination as far as necessary to a vertical position
to ensure that the belt runs forwards from the upper anchorage point2:move seat height adjustment upwards as far as necessary and adjust seat backrest inclination as far as necessary
to a vertical position to ensure that the belt is tight on the buckle side3:move the respective front seat ahead of the child restraint system forwards as far as necessary4:adjust the respective headrest as necessary or remove if required
ISOFIX size class and seat device
A – ISO/F3:forward-facing child restraint system for children of maximum size in the weight class 9 to 18 kgB – ISO/F2:forward-facing child restraint system for smaller children in the weight class 9 to 18 kgB1 – ISO/F2X:forward-facing child restraint system for smaller children in the weight class 9 to 18 kgC – ISO/R3:rear-facing child restraint system for children of maximum size in the weight class up to 18 kgD – ISO/R2:rear-facing child restraint system for smaller children in the weight class up to 18 kgE – ISO/R1:rear-facing child restraint system for young children in the weight class up to 13 kg
Page 74 of 291
72StorageLoad compartmentDepending on the equipment, the
rear seat backrest is divided into two or three parts. All parts can be folded
down.
Before folding rear seat backrests,
execute the following if necessary:
● 5-door hatchback: remove the load compartment cover 3 78.
● Sports Tourer: remove roller blind 3 78.
● Press and hold the catch to push
the head restraints down 3 45.
● Remove the rear head restraints to have the backrests fully rest on
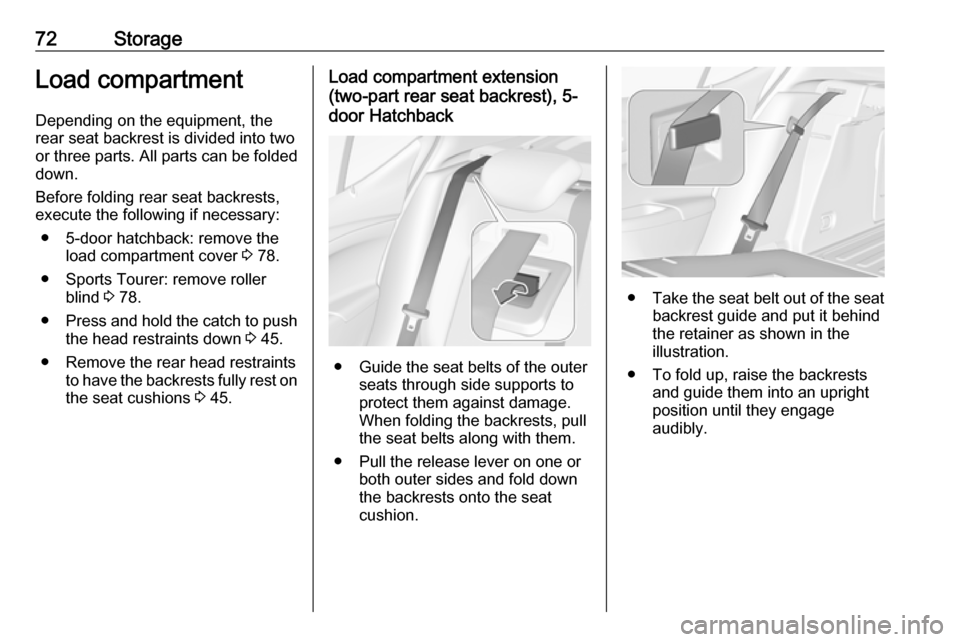
the seat cushions 3 45.Load compartment extension
(two-part rear seat backrest), 5-
door Hatchback
● Guide the seat belts of the outer seats through side supports to
protect them against damage.
When folding the backrests, pull
the seat belts along with them.
● Pull the release lever on one or both outer sides and fold down
the backrests onto the seat
cushion.
● Take the seat belt out of the seat
backrest guide and put it behind
the retainer as shown in the
illustration.
● To fold up, raise the backrests and guide them into an upright
position until they engage
audibly.
Page 82 of 291
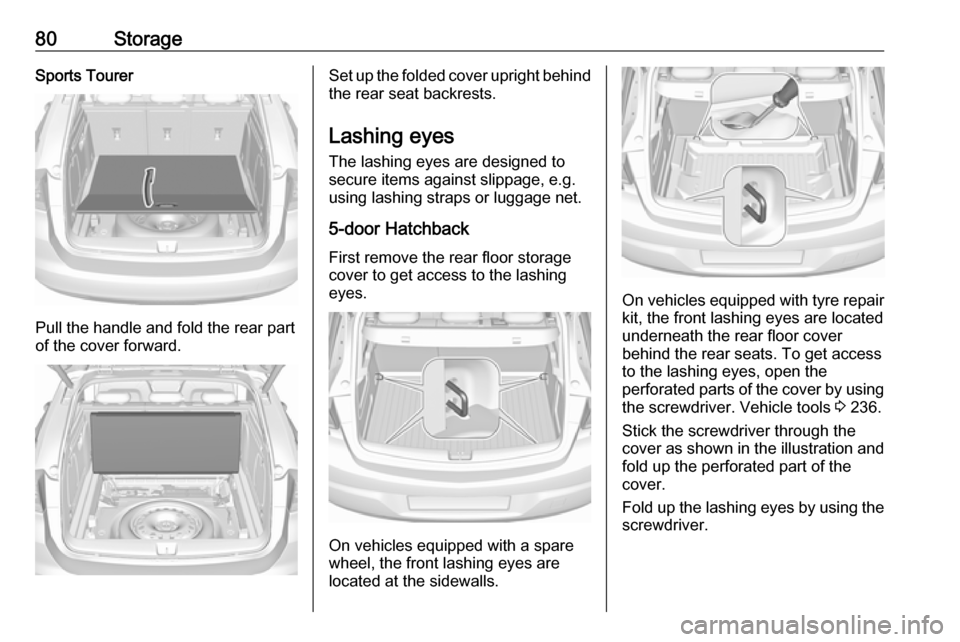
80StorageSports Tourer
Pull the handle and fold the rear part
of the cover forward.
Set up the folded cover upright behind the rear seat backrests.
Lashing eyes
The lashing eyes are designed to
secure items against slippage, e.g.
using lashing straps or luggage net.
5-door Hatchback
First remove the rear floor storage cover to get access to the lashing
eyes.
On vehicles equipped with a spare
wheel, the front lashing eyes are
located at the sidewalls.
On vehicles equipped with tyre repair
kit, the front lashing eyes are located
underneath the rear floor cover
behind the rear seats. To get access
to the lashing eyes, open the
perforated parts of the cover by using
the screwdriver. Vehicle tools 3 236.
Stick the screwdriver through the
cover as shown in the illustration and
fold up the perforated part of the
cover.
Fold up the lashing eyes by using the screwdriver.
Page 86 of 291
84StorageBehind the front seats
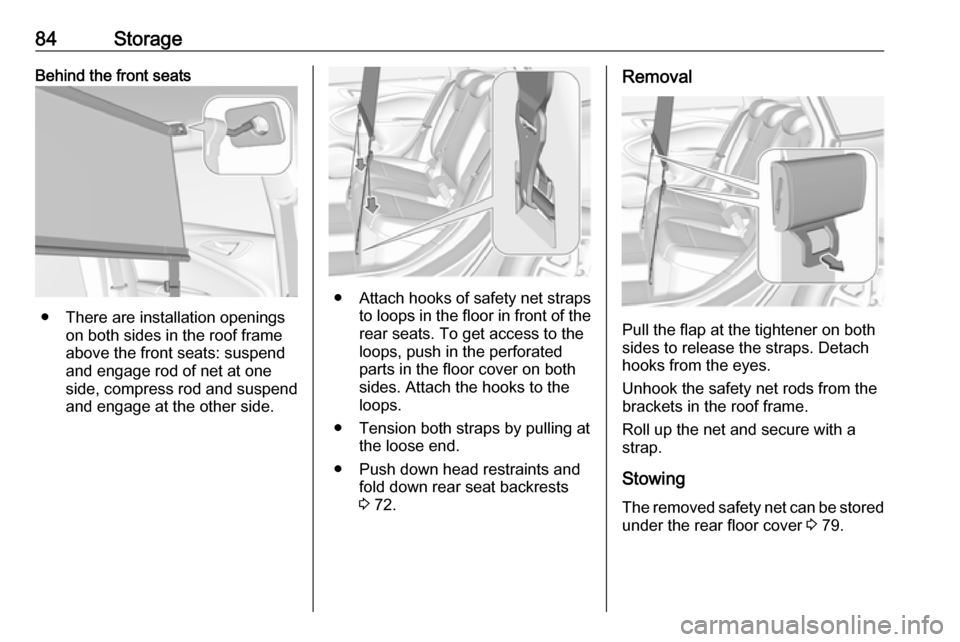
● There are installation openingson both sides in the roof frame
above the front seats: suspend
and engage rod of net at one
side, compress rod and suspend and engage at the other side.
● Attach hooks of safety net straps
to loops in the floor in front of the rear seats. To get access to the
loops, push in the perforated parts in the floor cover on both
sides. Attach the hooks to the
loops.
● Tension both straps by pulling at the loose end.
● Push down head restraints and fold down rear seat backrests
3 72.
Removal
Pull the flap at the tightener on both
sides to release the straps. Detach
hooks from the eyes.
Unhook the safety net rods from the
brackets in the roof frame.
Roll up the net and secure with a
strap.
Stowing The removed safety net can be storedunder the rear floor cover 3 79.
Page 126 of 291
124Instruments and controlsDelayed Door Lock: Activates or
deactivates the delayed door
locking function. This feature
delays the actual locking of the
doors until all doors are closed.
● Remote Lock, Unlock, and Start
Remote Unlock Feedback :
Activates or deactivates the
hazard warning flasher feedback
whilst unlocking.
Remote Lock Feedback :
Changes what kind of feedback
is given when locking the vehicle.
Remote Door Unlock : Changes
the configuration to unlock only
the driver's door or the whole
vehicle whilst unlocking.
Auto Relock Doors : Activates or
deactivates the automatic relock
function after unlocking without
opening the vehicle.
Remote Window Operation :
Activates or deactivates the
operation of power windows with
remote control.
Passive Door Unlock : Changes
the configuration to unlock onlythe driver's door or the whole
vehicle whilst unlocking.
Passive Door Lock : Activates or
deactivates the passive locking
function. This feature locks the
vehicle automatically after
several seconds if all doors have
been closed and an electronic
key has been removed from the
vehicle.
Remote Left in Vehicle Alarm :
Activates or deactivates the warning chime when the
electronic key remains in the
vehicle.
● Restore Factory Settings :
Resets all settings to the default settings.
● Valet Mode :
See Infotainment manual.
Personal settings 7" Colour-Info-Display
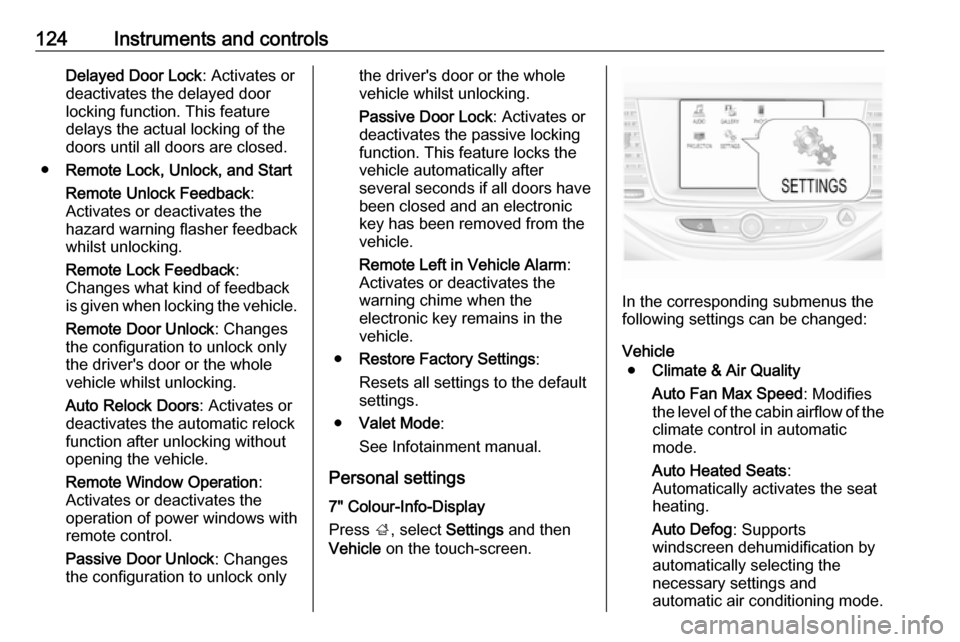
Press ;, select Settings and then
Vehicle on the touch-screen.
In the corresponding submenus the
following settings can be changed:
Vehicle ● Climate & Air Quality
Auto Fan Max Speed : Modifies
the level of the cabin airflow of the climate control in automatic
mode.
Auto Heated Seats :
Automatically activates the seat
heating.
Auto Defog : Supports
windscreen dehumidification by
automatically selecting the
necessary settings and
automatic air conditioning mode.
Page 128 of 291
126Instruments and controlsthe driver's door or the whole
vehicle whilst unlocking.
Passive Door Lock : Activates or
deactivates the passive locking function. This feature locks the
vehicle automatically after
several seconds if all doors have
been closed and an electronic
key has been removed from the
vehicle.
Remote Left in Vehicle Alert :
Activates or deactivates the
warning chime when the
electronic key remains in the
vehicle.
Personal settings 8" Colour-Info-Display
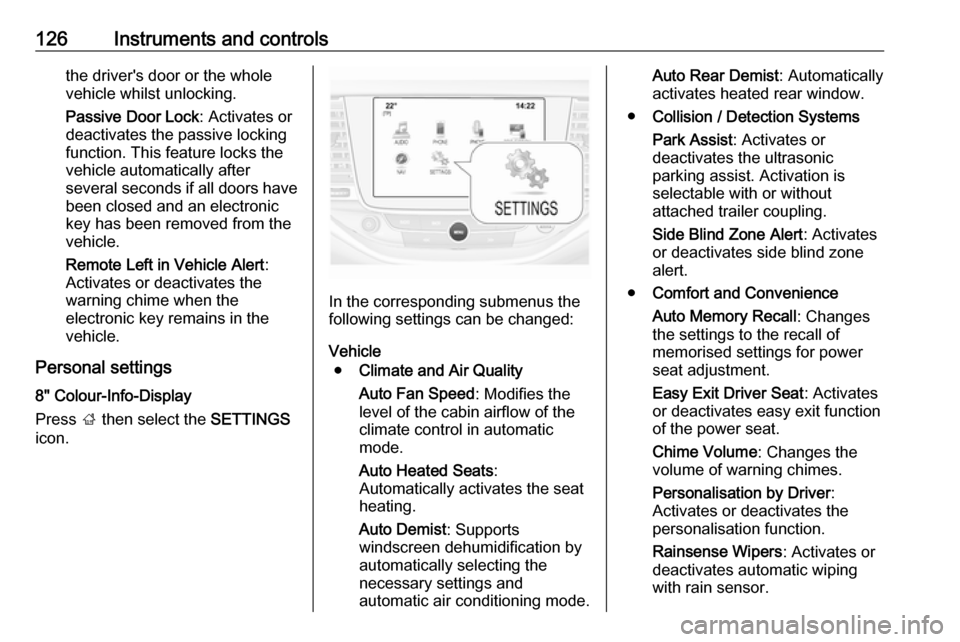
Press ; then select the SETTINGS
icon.
In the corresponding submenus the
following settings can be changed:
Vehicle ● Climate and Air Quality
Auto Fan Speed : Modifies the
level of the cabin airflow of the
climate control in automatic
mode.
Auto Heated Seats :
Automatically activates the seat
heating.
Auto Demist : Supports
windscreen dehumidification by
automatically selecting the
necessary settings and
automatic air conditioning mode.
Auto Rear Demist : Automatically
activates heated rear window.
● Collision / Detection Systems
Park Assist : Activates or
deactivates the ultrasonic
parking assist. Activation is
selectable with or without
attached trailer coupling.
Side Blind Zone Alert : Activates
or deactivates side blind zone alert.
● Comfort and Convenience
Auto Memory Recall : Changes
the settings to the recall of
memorised settings for power
seat adjustment.
Easy Exit Driver Seat : Activates
or deactivates easy exit function of the power seat.
Chime Volume : Changes the
volume of warning chimes.
Personalisation by Driver :
Activates or deactivates the
personalisation function.
Rainsense Wipers : Activates or
deactivates automatic wiping with rain sensor.