turn signal VAUXHALL ASTRA J 2016 Owner's Guide
[x] Cancel search | Manufacturer: VAUXHALL, Model Year: 2016, Model line: ASTRA J, Model: VAUXHALL ASTRA J 2016Pages: 341, PDF Size: 10.35 MB
Page 198 of 341
196Driving and operatingapproaching a vehicle ahead too
rapidly, it may not provide you
enough time to avoid a collision.
The driver accepts full
responsibility for the appropriate
following distance based on traffic, weather and visibility conditions.
The complete attention of the
driver is always required while
driving. The driver must always be
ready to take action and apply the
brakes.
System limitations
The system is designed to warn only for vehicles, but may react also to
other metallic objects.
In the following cases, forward
collision alert may not detect a vehicle ahead or sensor performance is
limited:
● on winding roads
● when weather limits visibility, e.g. fog, rain, or snow
● when the sensor is blocked by snow, ice, slush, mud, dirt, or
windscreen damage
Following distance
indication
The following distance indication
displays the distance to a preceding
moving vehicle. The system uses,
depending on the vehicle equipment,
either the radar behind the radiator
grille or the front camera in the
windscreen to detect the distance of
a vehicle directly ahead in your lane.
It is active at speeds above 25 mph.
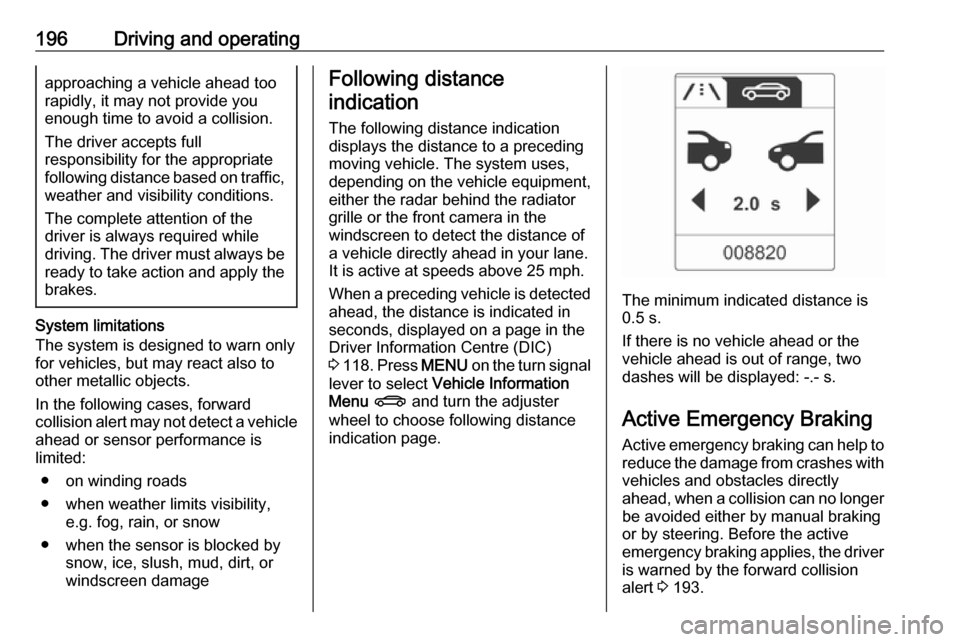
When a preceding vehicle is detected ahead, the distance is indicated inseconds, displayed on a page in the
Driver Information Centre (DIC)
3 118 . Press MENU on the turn signal
lever to select Vehicle Information
Menu X and turn the adjuster
wheel to choose following distance
indication page.
The minimum indicated distance is
0.5 s.
If there is no vehicle ahead or the vehicle ahead is out of range, two
dashes will be displayed: -.- s.
Active Emergency Braking Active emergency braking can help toreduce the damage from crashes with
vehicles and obstacles directly
ahead, when a collision can no longer be avoided either by manual braking
or by steering. Before the active
emergency braking applies, the driver is warned by the forward collision
alert 3 193.
Page 203 of 341

Driving and operating201
The distance to a front and rear
obstacle is indicated by changing
distance lines around the vehicle.
Rear obstacles are indicated
acoustically and visually at the same
time.
Front obstacles are indicated visually
first. At distances less than 80 cm an
acoustic signal also sounds.
The distance indication in the DIC can be inhibited by vehicle messages with
a higher priority. After approving the
message by pressing SET/CLR on
the turn signal lever, distance
indication appears again.
Deactivation
The rear parking assist automatically
switches off when reverse gear is
disengaged.
The front parking assist is deactivated automatically at a speed above
7 mph.
Manual deactivation is possible by
pressing r or D briefly.
When the system is deactivated, the
LED in the button extinguishes.
Additionally, Park Assist Off pops-up
in the DIC when the system is
deactivated manually.
After a manual deactivation, the front
parking assist is activated again if
r or D is pressed or if reverse
gear is engaged.
Fault
In the event of a fault in the system or if the system does not work due to
temporary conditions, e.g. ice
covered sensors, control indicator
r illuminates or a message is
displayed in the DIC.
Vehicle messages 3 124.
Control indicator r 3 115.
Advanced parking assist9 Warning
The driver bears full responsibility
for accepting the parking slot
suggested by the system and the
parking manoeuvre.
Always check the surrounding
area in all directions when using
advanced parking assist.
Page 206 of 341
204Driving and operating
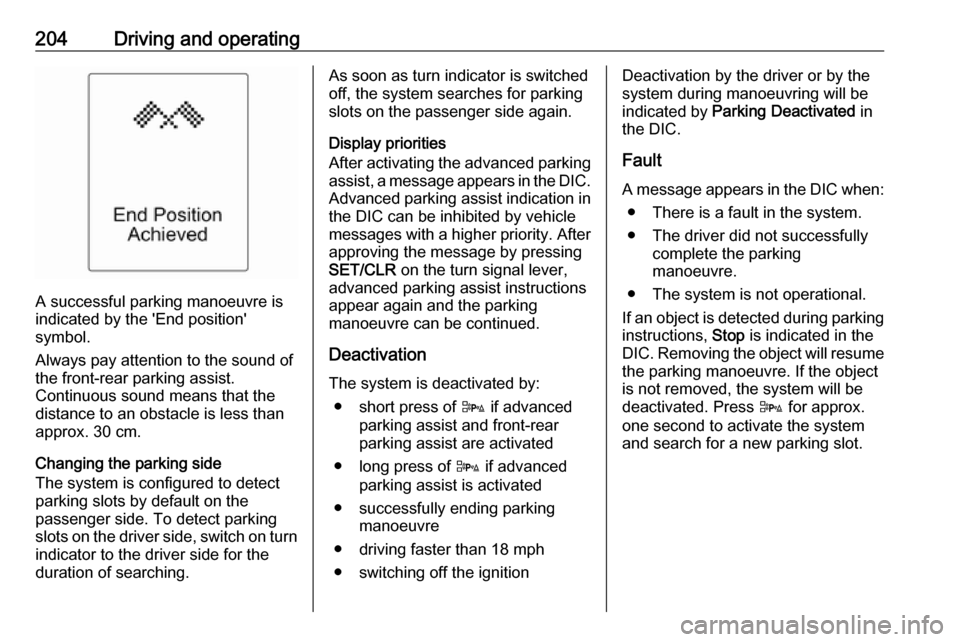
A successful parking manoeuvre is
indicated by the 'End position'
symbol.
Always pay attention to the sound of the front-rear parking assist.
Continuous sound means that the
distance to an obstacle is less than approx. 30 cm.
Changing the parking side
The system is configured to detect
parking slots by default on the
passenger side. To detect parking
slots on the driver side, switch on turn
indicator to the driver side for the
duration of searching.
As soon as turn indicator is switched
off, the system searches for parking
slots on the passenger side again.
Display priorities
After activating the advanced parking assist, a message appears in the DIC.
Advanced parking assist indication in
the DIC can be inhibited by vehicle
messages with a higher priority. After approving the message by pressing
SET/CLR on the turn signal lever,
advanced parking assist instructions
appear again and the parking
manoeuvre can be continued.
Deactivation The system is deactivated by: ● short press of D if advanced
parking assist and front-rear
parking assist are activated
● long press of D if advanced
parking assist is activated
● successfully ending parking manoeuvre
● driving faster than 18 mph
● switching off the ignitionDeactivation by the driver or by the system during manoeuvring will be
indicated by Parking Deactivated in
the DIC.
Fault A message appears in the DIC when: ● There is a fault in the system.● The driver did not successfully complete the parking
manoeuvre.
● The system is not operational.
If an object is detected during parking instructions, Stop is indicated in the
DIC. Removing the object will resume the parking manoeuvre. If the object
is not removed, the system will be
deactivated. Press D for approx.
one second to activate the system
and search for a new parking slot.
Page 208 of 341

206Driving and operatingSide blind spot alertThe Side blind spot alert system
detects and reports objects on either
side of the vehicle, within a specified
"blind spot" zone. The system alerts
visually in each exterior mirror, when
detecting objects that may not be
visible in the interior and exterior
mirrors.
The system's sensors are located in
the bumper on the left and right side
of the vehicle.9 Warning
Side blind spot alert does not
replace driver vision.
The system does not detect:
● vehicles outside the side blind zones which may be rapidly
approaching
● pedestrians, cyclists or animals
Before changing a lane, always
check all mirrors, look over the
shoulder and use the turn signal.
When the system detects a vehicle in the side blind zone while driving
forward, either while passing a
vehicle or being passed, an amber
warning symbol B will illuminate in
the relevant exterior mirror. If the
driver then activates the turn signal,
the warning symbol B starts flashing
amber as a warning not to change
lanes.
Notice
If the passing vehicle is at least
6 mph faster than the passed
vehicle, the warning symbol B in the
relevant exterior mirror will not
illuminate.Side blind spot alert is active from
speeds of 6 mph up to 87 mph.
Driving faster than 87 mph
deactivates the system, indicated by
low lighting warning symbols B in
both exterior mirrors. Reducing the speed again will extinguish the
warning symbols. If a vehicle is then
detected in the blind zone, the
warning symbols B will illuminate as
normal on the relevant side.
When the vehicle is started, both exterior mirror displays will briefly
come on to indicate that the system is operating.
The system can be activated or
deactivated in the menu Settings in
the Info-Display, vehicle
personalisation 3 130.
Deactivation is indicated by a
message in the Driver Information
Centre (DIC).
Detection zones
The system sensor covers a zone of
approx. 3 metres on both sides of the
vehicle. This zone starts at each
exterior mirror and extends rearwards
Page 212 of 341
210Driving and operatingAn exclamation mark in a frame
indicates that there is an add-on sign detected which cannot be recognised
by the system.
The system is active up to a speed of 124 mph depending on the lighting
conditions. At night the system is
active up to a speed of 99 mph.
As soon as vehicle speed becomes
slower than 34 mph the display will be
reset and the content of the traffic sign
page will be cleared. The next
recognized speed indication will be
displayed.
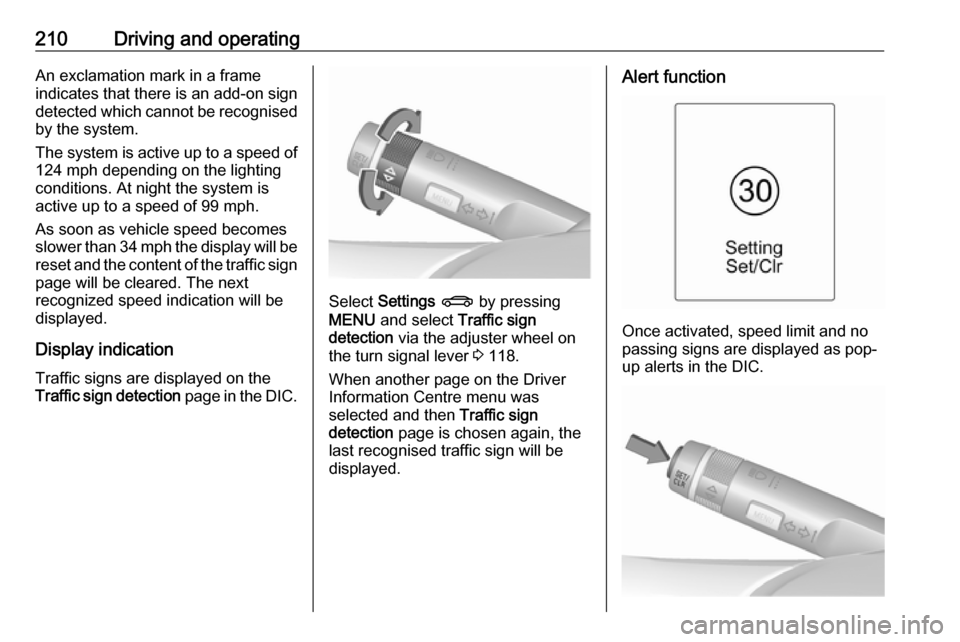
Display indication
Traffic signs are displayed on the Traffic sign detection page in the DIC.
Select Settings X by pressing
MENU and select Traffic sign
detection via the adjuster wheel on
the turn signal lever 3 118.
When another page on the Driver Information Centre menu was
selected and then Traffic sign
detection page is chosen again, the
last recognised traffic sign will be
displayed.
Alert function
Once activated, speed limit and no
passing signs are displayed as pop-
up alerts in the DIC.
Page 213 of 341
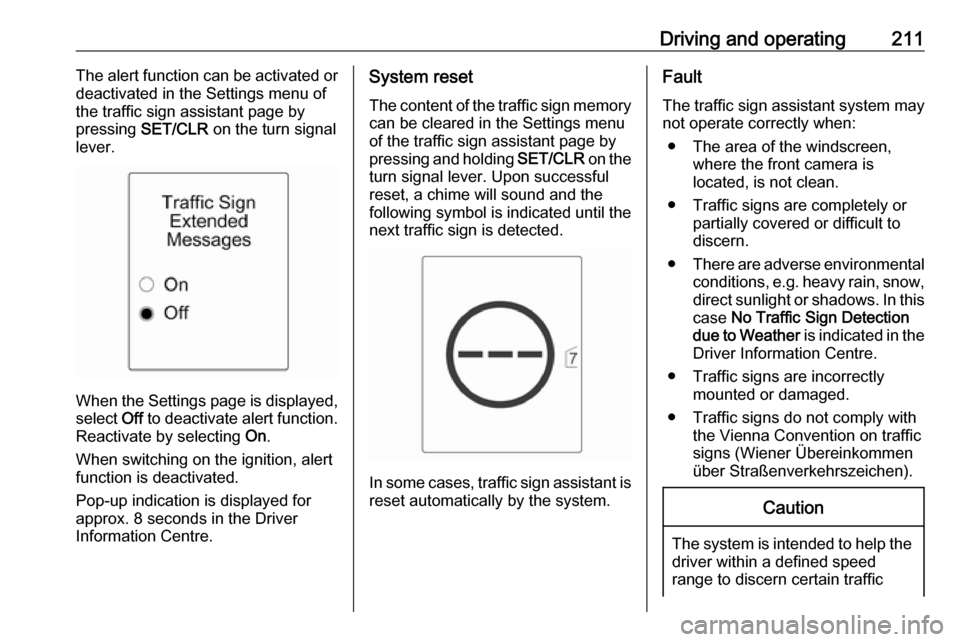
Driving and operating211The alert function can be activated or
deactivated in the Settings menu of
the traffic sign assistant page by pressing SET/CLR on the turn signal
lever.
When the Settings page is displayed, select Off to deactivate alert function.
Reactivate by selecting On.
When switching on the ignition, alert function is deactivated.
Pop-up indication is displayed for approx. 8 seconds in the Driver
Information Centre.
System reset
The content of the traffic sign memory
can be cleared in the Settings menu
of the traffic sign assistant page by
pressing and holding SET/CLR on the
turn signal lever. Upon successful
reset, a chime will sound and the
following symbol is indicated until the next traffic sign is detected.
In some cases, traffic sign assistant is
reset automatically by the system.
Fault
The traffic sign assistant system may
not operate correctly when:
● The area of the windscreen, where the front camera is
located, is not clean.
● Traffic signs are completely or partially covered or difficult to
discern.
● There are adverse environmental
conditions, e.g. heavy rain, snow,direct sunlight or shadows. In this
case No Traffic Sign Detection
due to Weather is indicated in the
Driver Information Centre.
● Traffic signs are incorrectly mounted or damaged.
● Traffic signs do not comply with the Vienna Convention on traffic
signs (Wiener Übereinkommen
über Straßenverkehrszeichen).Caution
The system is intended to help the driver within a defined speed
range to discern certain traffic
Page 214 of 341
212Driving and operatingsigns. Do not ignore traffic signs
which are not displayed by the
system.
The system does not discern any
other than the conventional traffic signs that might give or end a
speed limit.
Do not let this special feature
tempt you into taking risks when
driving.
Always adapt speed to the road
conditions.
The driver assistance systems do not relieve the driver from full
responsibility for vehicle
operation.
Lane departure warning
The lane departure warning system
observes the lane markings between
which the vehicle is driving via a front camera. The system detects lane
changes and warns the driver in the
event of an unintended lane change
via visual and acoustic signals.
Criteria for the detection of an
unintended lane change are:
● No operation of turn signals.
● No brake pedal operation.
● No active accelerator operation or speeding-up.
● No active steering.
If the driver is active, no warning will
be issued.
Activation
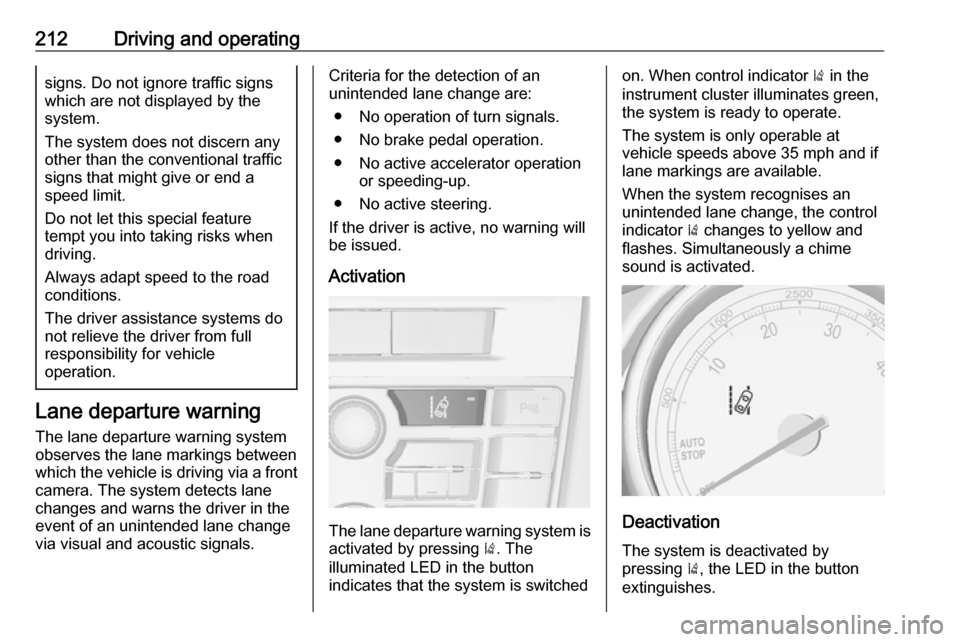
The lane departure warning system isactivated by pressing ). The
illuminated LED in the button
indicates that the system is switched
on. When control indicator ) in the
instrument cluster illuminates green, the system is ready to operate.
The system is only operable at
vehicle speeds above 35 mph and if lane markings are available.
When the system recognises an
unintended lane change, the control
indicator ) changes to yellow and
flashes. Simultaneously a chime
sound is activated.
Deactivation
The system is deactivated by
pressing ), the LED in the button
extinguishes.
Page 227 of 341

Vehicle care225Vehicle careGeneral Information...................226
Accessories and vehicle modifications .......................... 226
Vehicle storage ........................226
End-of-life vehicle recovery .....226
Vehicle checks ........................... 227
Performing work ......................227
Bonnet ..................................... 227
Engine oil ................................. 228
Engine coolant ......................... 229
Power steering fluid .................230
Washer fluid ............................ 230
Brakes ..................................... 231
Brake fluid ............................... 231
Vehicle battery ......................... 231
Diesel fuel system bleeding .....233
Wiper blade replacement ........233
Bulb replacement .......................234
Halogen headlights ..................234
Adaptive forward lighting .........237
Fog lights ................................. 238
Front turn signal lights .............240
Tail lights ................................. 242
Side turn signal lights ..............250
Number plate light ...................251Interior lights ............................ 252
Instrument panel illumination ...252
Electrical system ........................252
Fuses ....................................... 252
Engine compartment fuse box . 253
Instrument panel fuse box .......255
Load compartment fuse box ....256
Vehicle tools .............................. 259
Tools ........................................ 259
Wheels and tyres .......................261
Winter tyres ............................. 261
Tyre designations ....................261
Tyre pressure .......................... 261
Tyre pressure monitoring system .................................... 262
Tread depth ............................. 265
Changing tyre and wheel size . 266
Wheel covers ........................... 266
Tyre chains .............................. 266
Tyre repair kit .......................... 267
Wheel changing .......................270
Spare wheel ............................ 274
Jump starting ............................. 278
Towing ....................................... 280
Towing the vehicle ...................280
Towing another vehicle ...........281Appearance care .......................282
Exterior care ............................ 282
Interior care ............................. 284
Page 242 of 341
240Vehicle care
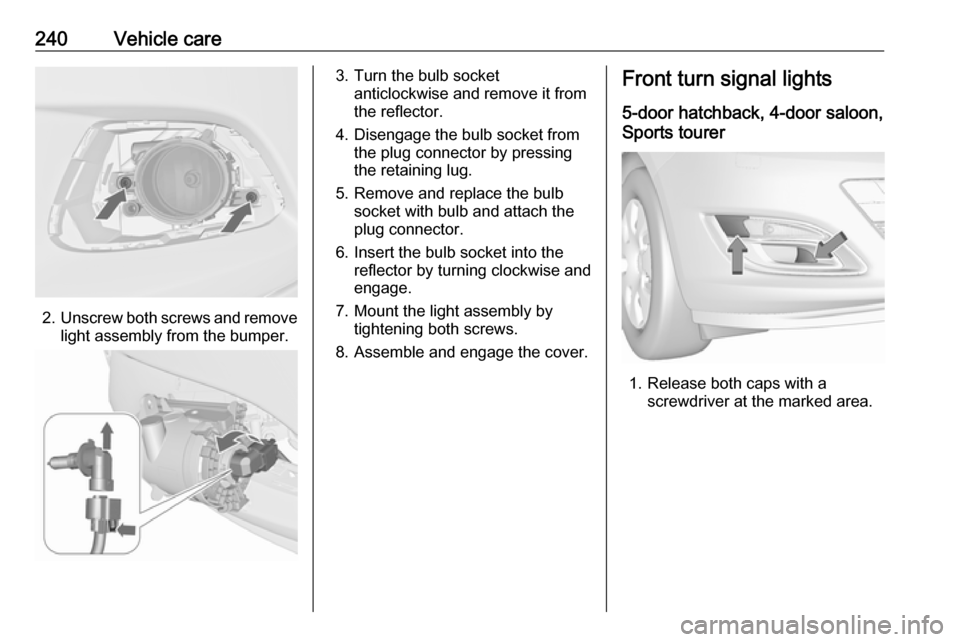
2.Unscrew both screws and remove
light assembly from the bumper.
3. Turn the bulb socket anticlockwise and remove it from
the reflector.
4. Disengage the bulb socket from the plug connector by pressing
the retaining lug.
5. Remove and replace the bulb socket with bulb and attach the
plug connector.
6. Insert the bulb socket into the reflector by turning clockwise and
engage.
7. Mount the light assembly by tightening both screws.
8. Assemble and engage the cover.Front turn signal lights
5-door hatchback, 4-door saloon,
Sports tourer
1. Release both caps with a screwdriver at the marked area.
Page 245 of 341
Vehicle care243
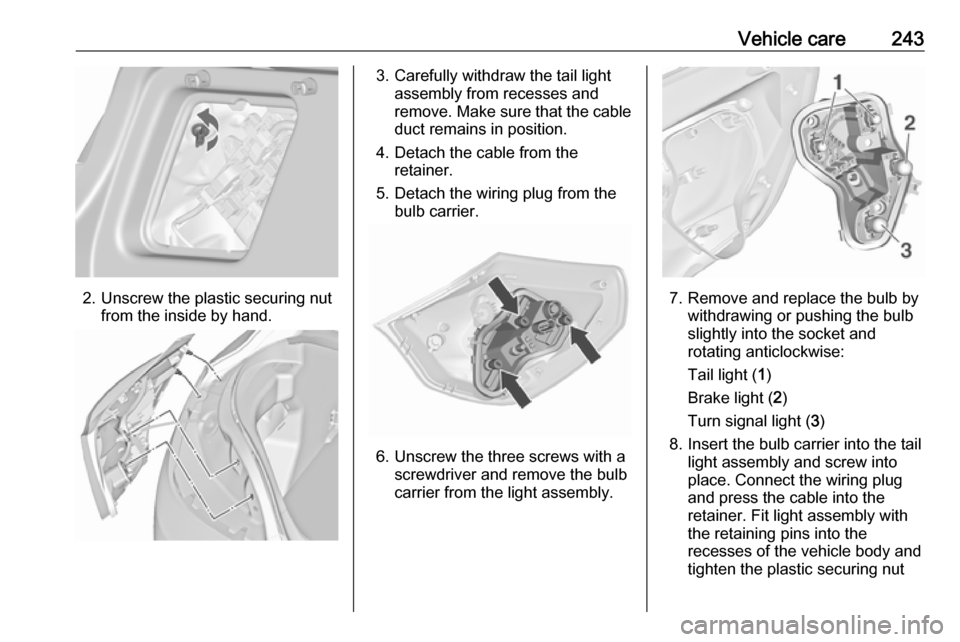
2. Unscrew the plastic securing nutfrom the inside by hand.
3. Carefully withdraw the tail lightassembly from recesses and
remove. Make sure that the cable duct remains in position.
4. Detach the cable from the retainer.
5. Detach the wiring plug from the bulb carrier.
6. Unscrew the three screws with a screwdriver and remove the bulb
carrier from the light assembly.
7. Remove and replace the bulb by withdrawing or pushing the bulb
slightly into the socket and
rotating anticlockwise:
Tail light ( 1)
Brake light ( 2)
Turn signal light ( 3)
8. Insert the bulb carrier into the tail light assembly and screw into
place. Connect the wiring plug
and press the cable into the
retainer. Fit light assembly with
the retaining pins into the
recesses of the vehicle body and
tighten the plastic securing nut