buttons VAUXHALL ASTRA J 2018 Infotainment system
[x] Cancel search | Manufacturer: VAUXHALL, Model Year: 2018, Model line: ASTRA J, Model: VAUXHALL ASTRA J 2018Pages: 167, PDF Size: 3.23 MB
Page 99 of 167
Basic operation99Notice
In subsequent chapters, the
operating steps for selecting and
activating a screen button or menu
item via the touch screen will be
described as "...select
Moving items on the home menu
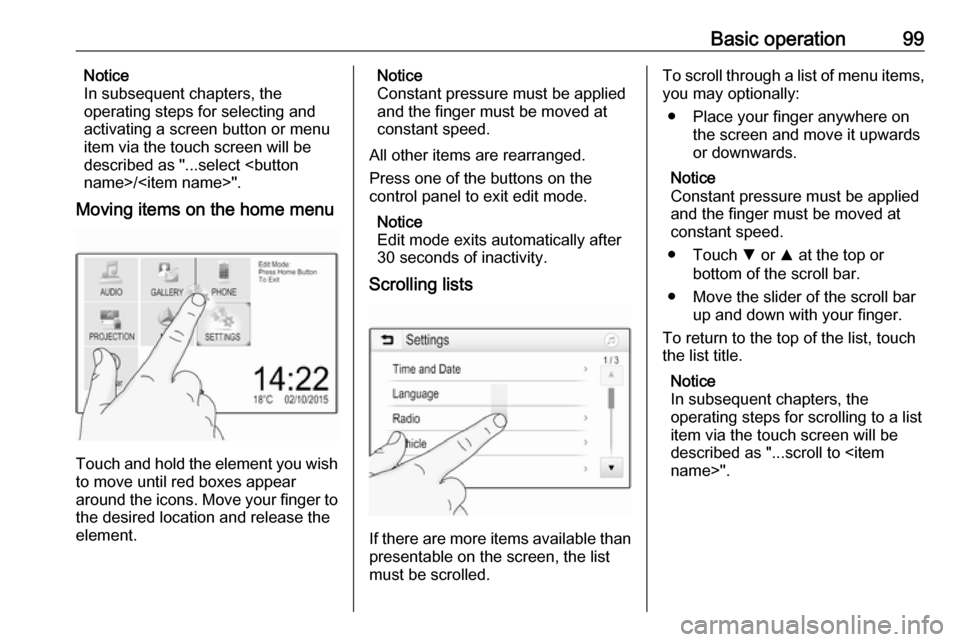
Touch and hold the element you wish
to move until red boxes appear
around the icons. Move your finger to
the desired location and release the
element.
Notice
Constant pressure must be applied and the finger must be moved at
constant speed.
All other items are rearranged.
Press one of the buttons on the
control panel to exit edit mode.
Notice
Edit mode exits automatically after
30 seconds of inactivity.
Scrolling lists
If there are more items available than
presentable on the screen, the list
must be scrolled.
To scroll through a list of menu items, you may optionally:
● Place your finger anywhere on the screen and move it upwards
or downwards.
Notice
Constant pressure must be applied and the finger must be moved at
constant speed.
● Touch S or R at the top or
bottom of the scroll bar.
● Move the slider of the scroll bar up and down with your finger.
To return to the top of the list, touch
the list title.
Notice
In subsequent chapters, the
operating steps for scrolling to a list item via the touch screen will be
described as "...scroll to
Page 102 of 167
102Basic operationVolume of traffic announcementsTo adjust the volume of traffic
announcements, set the desired
volume while a traffic announcement is given out by the system. The
respective setting is then stored by
the system.
System settings
The following settings concern the
whole system. All other settings are
described by theme in the respective chapters of this manual.
Time and date settings
Press ; and then select Settings.
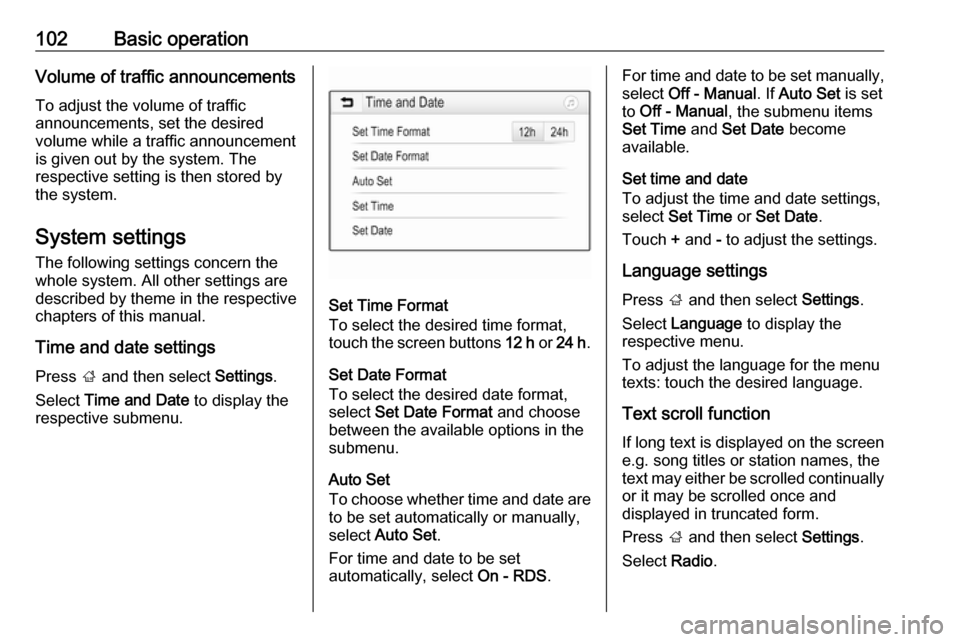
Select Time and Date to display the
respective submenu.
Set Time Format
To select the desired time format,
touch the screen buttons 12 h or 24 h .
Set Date Format To select the desired date format,
select Set Date Format and choose
between the available options in the
submenu.
Auto Set
To choose whether time and date are
to be set automatically or manually,
select Auto Set .
For time and date to be set
automatically, select On - RDS.
For time and date to be set manually,
select Off - Manual . If Auto Set is set
to Off - Manual , the submenu items
Set Time and Set Date become
available.
Set time and date
To adjust the time and date settings,
select Set Time or Set Date .
Touch + and - to adjust the settings.
Language settings
Press ; and then select Settings.
Select Language to display the
respective menu.
To adjust the language for the menu
texts: touch the desired language.
Text scroll function If long text is displayed on the screen
e.g. song titles or station names, the
text may either be scrolled continually or it may be scrolled once and
displayed in truncated form.
Press ; and then select Settings.
Select Radio.
Page 112 of 167
112External devicesJPG files must be 64 to 5000 pixels in
width and 64 to 5000 pixels in height.
BMP, PNG and GIF files must be 64
to 1024 pixels in width and 64 to
1024 pixels in height.
The pictures should not exceed a file size of 1MB.
Movie files
The playable movie file formats are
AVI and MP4.
The maximum resolution is 1280 x
720 pixels. The frame rate must be
less than 30 fps.
The usable codec is H.264/MPEG-4
AVC.
The playable audio formats are MP3,
AC3, AAC and WMA.
The displayable subtitle format is
SMI.
Playing audio Activating the music function
If the device is not yet connected to
the Infotainment system, connect the
device 3 110.Usually, the respective audio main
menu is displayed automatically.
If playback is not started
automatically, e.g. if USB Auto
Launch is deactivated 3 110 , take the
following steps:
Press ; and then select AUDIO to
open the audio main menu last
selected.
Select Source in the interaction
selector bar and then select the
desired audio source to open the respective audio main menu.
Playback of the audio tracks starts
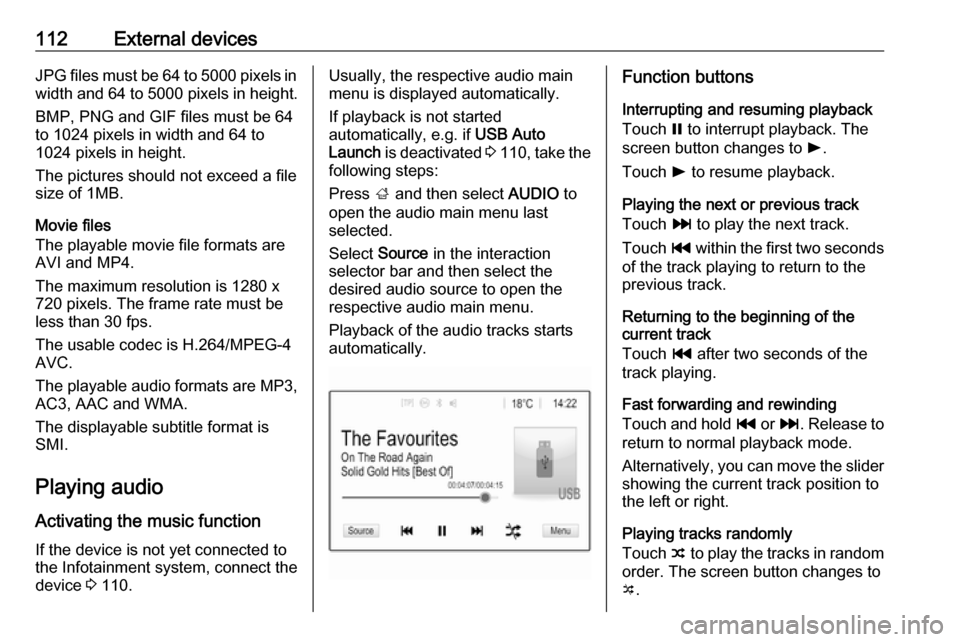
automatically.Function buttons
Interrupting and resuming playback
Touch = to interrupt playback. The
screen button changes to l.
Touch l to resume playback.
Playing the next or previous track
Touch v to play the next track.
Touch t within the first two seconds
of the track playing to return to the
previous track.
Returning to the beginning of the
current track
Touch t after two seconds of the
track playing.
Fast forwarding and rewinding
Touch and hold t or v. Release to
return to normal playback mode.
Alternatively, you can move the slider
showing the current track position to
the left or right.
Playing tracks randomly
Touch n to play the tracks in random
order. The screen button changes to
o .
Page 113 of 167
External devices113Touch o again to deactivate the
shuffle function and go back to the
normal playback mode.
Browse Music function
To display the browse screen, touch
the screen. Alternatively, select
Menu in the bottom line of the audio
main screen to display the respective
audio menu and then select Browse
Music .
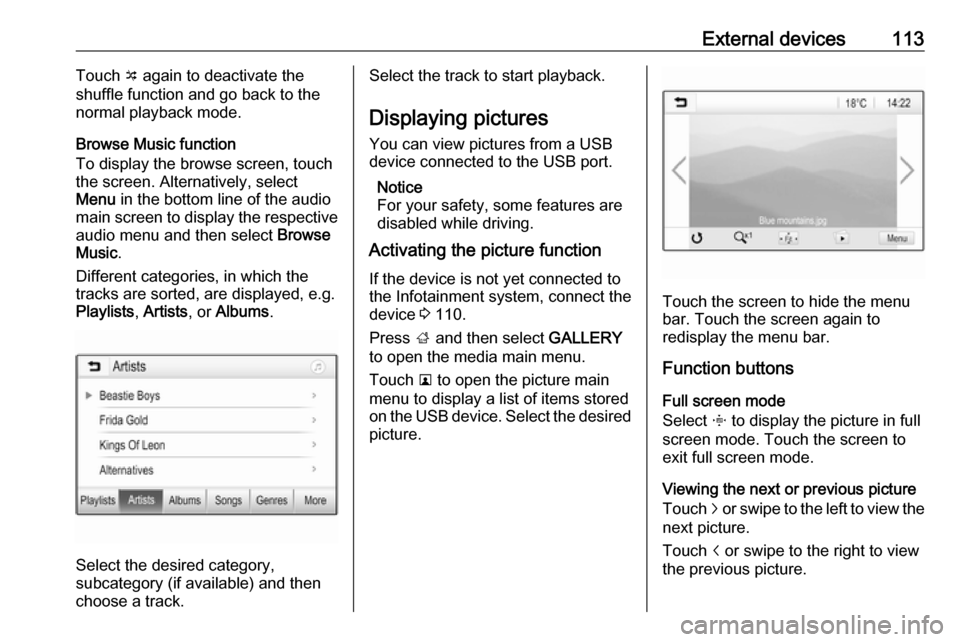
Different categories, in which the
tracks are sorted, are displayed, e.g.
Playlists , Artists , or Albums .
Select the desired category,
subcategory (if available) and then
choose a track.
Select the track to start playback.
Displaying pictures
You can view pictures from a USB
device connected to the USB port.
Notice
For your safety, some features are
disabled while driving.
Activating the picture function
If the device is not yet connected to
the Infotainment system, connect the
device 3 110.
Press ; and then select GALLERY
to open the media main menu.
Touch l to open the picture main
menu to display a list of items stored on the USB device. Select the desired
picture.
Touch the screen to hide the menu
bar. Touch the screen again to
redisplay the menu bar.
Function buttons
Full screen mode
Select x to display the picture in full
screen mode. Touch the screen to
exit full screen mode.
Viewing the next or previous picture
Touch j or swipe to the left to view the
next picture.
Touch i or swipe to the right to view
the previous picture.
Page 114 of 167
114External devicesRotating a picture
Select v to rotate the picture.
Zoom in on a picture
Touch w once or several times to
zoom in on a picture or to return to its
original size.
Viewing a slide show
Select t to view the pictures stored
on the USB device in a slide show.
Touch the screen to end the slide
show.
Picture menu
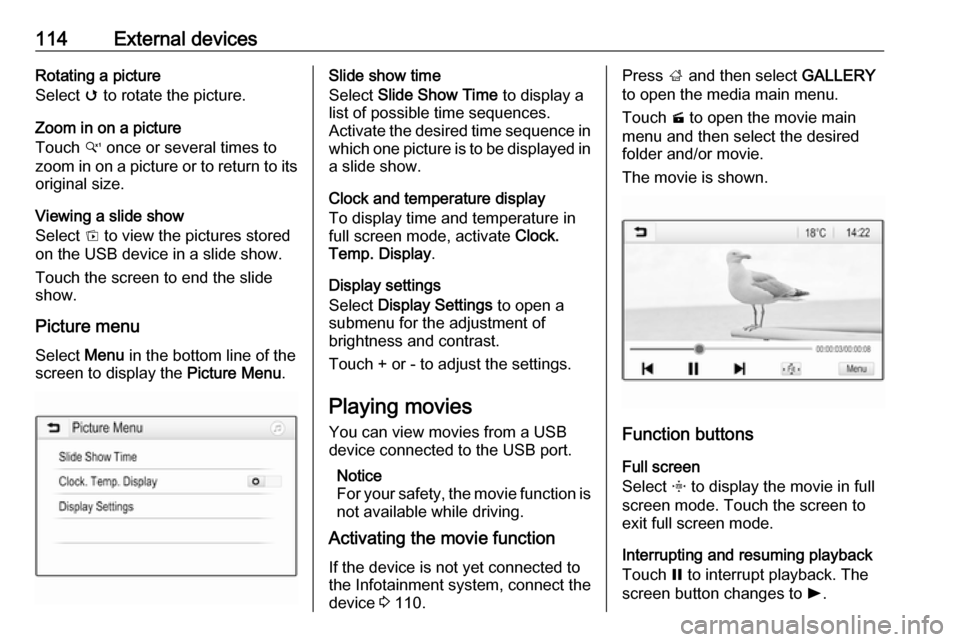
Select Menu in the bottom line of the
screen to display the Picture Menu.Slide show time
Select Slide Show Time to display a
list of possible time sequences.
Activate the desired time sequence in which one picture is to be displayed in
a slide show.
Clock and temperature display
To display time and temperature in
full screen mode, activate Clock.
Temp. Display .
Display settings
Select Display Settings to open a
submenu for the adjustment of
brightness and contrast.
Touch + or - to adjust the settings.
Playing movies
You can view movies from a USB
device connected to the USB port.
Notice
For your safety, the movie function is not available while driving.
Activating the movie function
If the device is not yet connected to
the Infotainment system, connect the
device 3 110.Press ; and then select GALLERY
to open the media main menu.
Touch m to open the movie main
menu and then select the desired folder and/or movie.
The movie is shown.
Function buttons
Full screen
Select x to display the movie in full
screen mode. Touch the screen to
exit full screen mode.
Interrupting and resuming playback
Touch = to interrupt playback. The
screen button changes to l.
Page 123 of 167
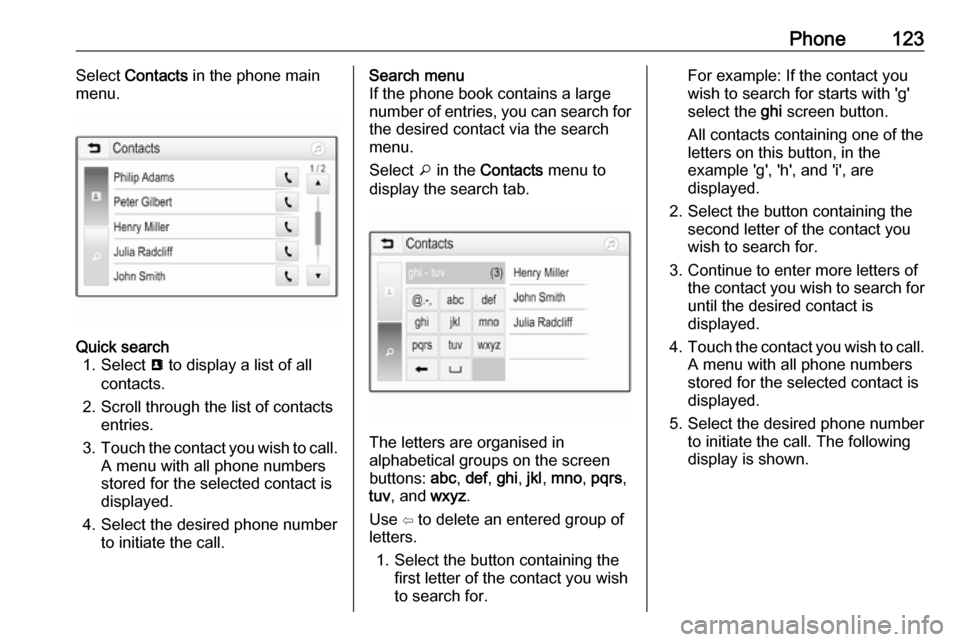
Phone123Select Contacts in the phone main
menu.Quick search 1. Select u to display a list of all
contacts.
2. Scroll through the list of contacts entries.
3. Touch the contact you wish to call.
A menu with all phone numbers
stored for the selected contact is
displayed.
4. Select the desired phone number to initiate the call.Search menu
If the phone book contains a large
number of entries, you can search for
the desired contact via the search
menu.
Select o in the Contacts menu to
display the search tab.
The letters are organised in
alphabetical groups on the screen
buttons: abc, def , ghi , jkl , mno , pqrs ,
tuv , and wxyz.
Use ⇦ to delete an entered group of
letters.
1. Select the button containing the first letter of the contact you wish
to search for.
For example: If the contact you
wish to search for starts with 'g'
select the ghi screen button.
All contacts containing one of the
letters on this button, in the example 'g', 'h', and 'i', are
displayed.
2. Select the button containing the second letter of the contact you
wish to search for.
3. Continue to enter more letters of the contact you wish to search for
until the desired contact is
displayed.
4. Touch the contact you wish to call.
A menu with all phone numbers
stored for the selected contact is
displayed.
5. Select the desired phone number to initiate the call. The following
display is shown.
Page 135 of 167

Introduction1351X......................................... 136
If switched off: short press:
switch power on
If switched on: short press: mute system; long press:
switch power off
Turn: adjust volume
2 RADIO
Activate radio or change
waveband ........................... 142
3 MEDIA
Activate media or change
media source ...................... 148
4 t v
Radio: short press: skip to
previous or next station;
press and hold: seek down or up .................................... 142
External devices: short
press: skip to previous or
next track; press and hold:
rewind or fast forward .........1485PHONE
Short press: open phone
menu ................................... 151
Long press: activate
speech recognition ..............150
6 BACK
Menu: one level back ..........138
Input: delete last character
or entire entry ......................138
7 MENU ................................. 138
Turn: mark screen buttons or menu items; set
numeric values
Press: select/activate a
marked screen button or
menu item; confirm set
value; switch to different
setting option; open
application-specific menu
(if available)8 Softkeys
Favourites: press: select
favourites; press and hold:
save radio stations as
favourites ............................ 143
Menu: press: select
corresponding screen
button .................................. 138
9 FAV
Press: display favourites
bar ....................................... 143
Page 136 of 167
136IntroductionSteering wheel audio controls
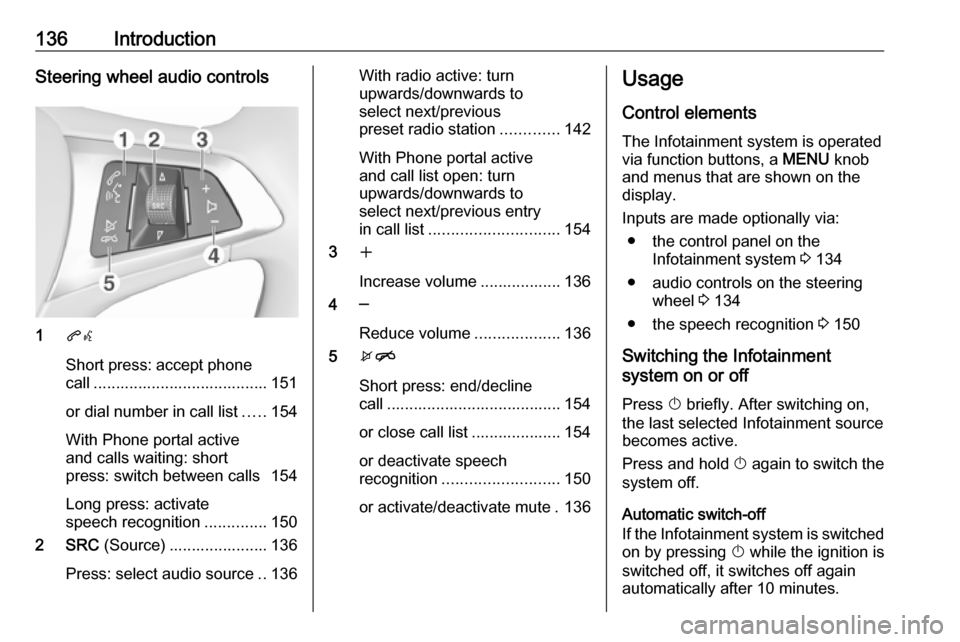
1qw
Short press: accept phone
call ....................................... 151
or dial number in call list .....154
With Phone portal active
and calls waiting: short
press: switch between calls 154
Long press: activate
speech recognition ..............150
2 SRC (Source) ...................... 136
Press: select audio source ..136
With radio active: turn
upwards/downwards to
select next/previous
preset radio station .............142
With Phone portal active
and call list open: turn
upwards/downwards to
select next/previous entry
in call list ............................. 154
3 w
Increase volume .................. 136
4 ─
Reduce volume ...................136
5 xn
Short press: end/decline
call ....................................... 154
or close call list .................... 154
or deactivate speech
recognition .......................... 150
or activate/deactivate mute . 136Usage
Control elements
The Infotainment system is operated
via function buttons, a MENU knob
and menus that are shown on the display.
Inputs are made optionally via: ● the control panel on the Infotainment system 3 134
● audio controls on the steering wheel 3 134
● the speech recognition 3 150
Switching the Infotainment
system on or off
Press X briefly. After switching on,
the last selected Infotainment source
becomes active.
Press and hold X again to switch the
system off.
Automatic switch-off
If the Infotainment system is switched
on by pressing X while the ignition is
switched off, it switches off again
automatically after 10 minutes.
Page 148 of 167
148External devicesIf you want the device to be only
charged on the USB port, activate
Charge Only . If you switch to the USB
audio source while this setting is
activated, you are prompted with a
charging message.
If you wish to play music files stored
on the device, activate Scan Music
Folder Only or Scan All Folder .
Bluetooth Bluetooth enabled audio sources
(e.g. music mobile phones, MP3
players featuring Bluetooth, etc.),
which support the Bluetooth music profiles A2DP and AVRCP can be
connected wirelessly to the
Infotainment system.
The Infotainment system can play
music files contained in Bluetooth
devices.
Connecting/disconnecting a device
For a detailed description of the
Bluetooth connection 3 152.Bluetooth device list
To access the Bluetooth device list,
activate the Bluetooth audio source,
press MENU and then select Manage
Bluetooth Devices .
For a detailed description of the Bluetooth device list 3 152.
File formats Only devices formatted in the FAT32,
NTFS and HFS+ file systems are
supported.
Notice
Some files may not be played
properly. This may be due to a
different recording format or the
condition of the file.
Files from online shops to which
Digital Rights Management (DRM)
has been applied cannot be played.
The playable audio file formats are
MP3, WMA, AAC and AIF.
When playing a file with ID3 tag
information, the Infotainment system
can display information, e.g. on the
track title and artist.Playing audio
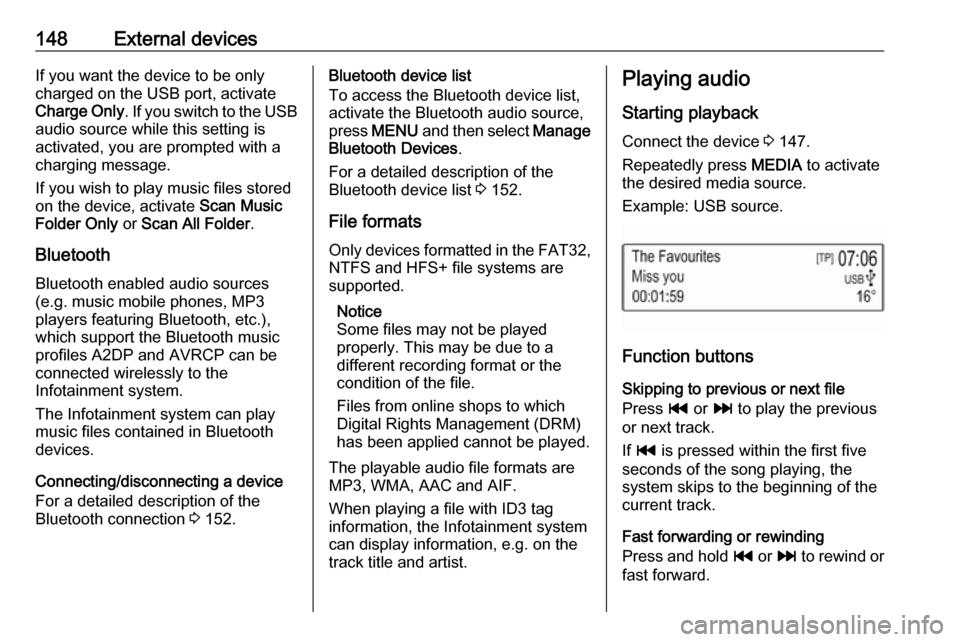
Starting playback Connect the device 3 147.
Repeatedly press MEDIA to activate
the desired media source.
Example: USB source.
Function buttons
Skipping to previous or next file
Press t or v to play the previous
or next track.
If t is pressed within the first five
seconds of the song playing, the
system skips to the beginning of the
current track.
Fast forwarding or rewinding
Press and hold t or v to rewind or
fast forward.
Page 164 of 167
164Phone holder
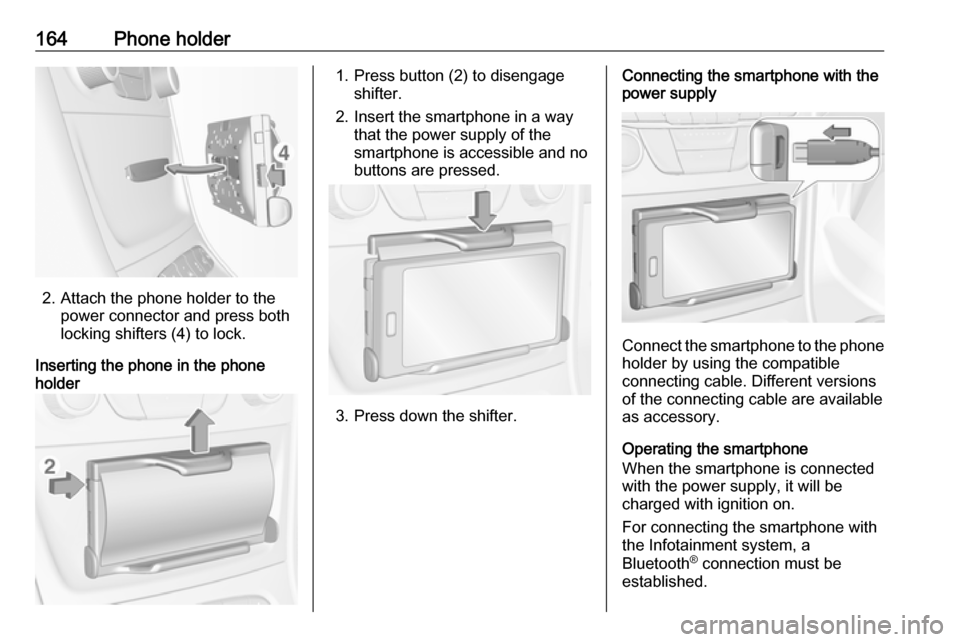
2. Attach the phone holder to thepower connector and press both
locking shifters (4) to lock.
Inserting the phone in the phone holder
1. Press button (2) to disengage
shifter.
2. Insert the smartphone in a way that the power supply of the
smartphone is accessible and no
buttons are pressed.
3. Press down the shifter.
Connecting the smartphone with the power supply
Connect the smartphone to the phone
holder by using the compatible
connecting cable. Different versions
of the connecting cable are available
as accessory.
Operating the smartphone
When the smartphone is connected with the power supply, it will be
charged with ignition on.
For connecting the smartphone with
the Infotainment system, a
Bluetooth ®
connection must be
established.