light VAUXHALL ASTRA J GTC 2018 User Guide
[x] Cancel search | Manufacturer: VAUXHALL, Model Year: 2018, Model line: ASTRA J GTC, Model: VAUXHALL ASTRA J GTC 2018Pages: 293, PDF Size: 8.29 MB
Page 31 of 293

Keys, doors and windows29A triggered alarm, which has not been
interrupted by the driver, will be
indicated by the hazard warning
lights. They will flash quickly three
times the next time the vehicle is
unlocked with the radio remote
control. Additionally, a warning
message or a warning code is
displayed in the Driver Information Centre after switching on the ignition.
Vehicle messages 3 97.
If the vehicle's battery is to be
disconnected (e.g. for maintenance
work), the alarm siren must be
deactivated as follows: Switch the
ignition on then off, then disconnect
the vehicle's battery within
15 seconds.
Immobiliser The system is part of the ignition
switch and checks whether the
vehicle is allowed to be started with
the key being used.
The immobiliser is activated
automatically after the key has been removed from the ignition switch.If the control indicator d flashes when
the ignition is on, there is a fault in the
system; the engine cannot be started. Switch off the ignition and repeat the
start attempt.
If the control indicator continues
flashing, attempt to start the engine
using the spare key and seek the
assistance of a workshop.
Notice
The immobiliser does not lock the
doors. You should always lock the
vehicle after leaving it and switch on the anti-theft alarm system 3 22,
3 27.
Control indicator d 3 90.Exterior mirrors
Convex shape The convex exterior mirror contains
an aspherical area and reduces blind spots. The shape of the mirror makes
objects appear smaller, which will affect the ability to estimate
distances.
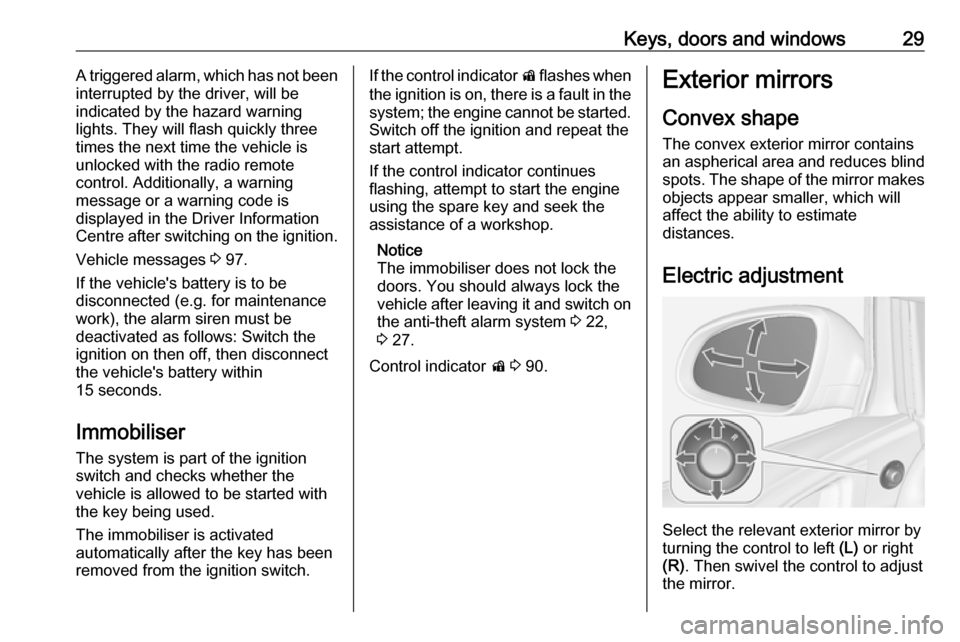
Electric adjustment
Select the relevant exterior mirror by
turning the control to left (L) or right
(R) . Then swivel the control to adjust
the mirror.
Page 32 of 293

30Keys, doors and windowsIn position 0 no mirror is selected.
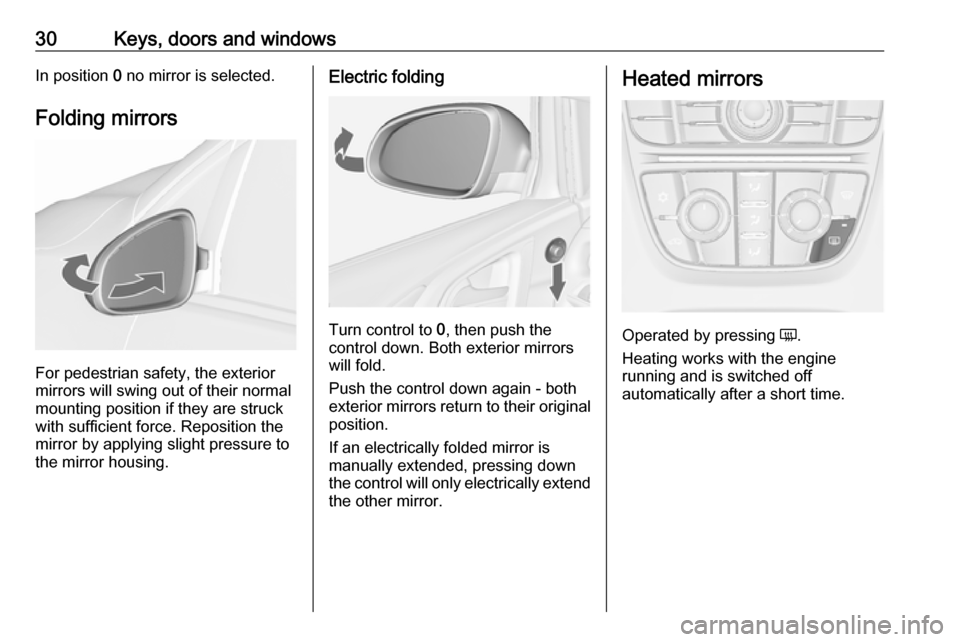
Folding mirrors
For pedestrian safety, the exterior
mirrors will swing out of their normal
mounting position if they are struck
with sufficient force. Reposition the mirror by applying slight pressure tothe mirror housing.
Electric folding
Turn control to 0, then push the
control down. Both exterior mirrors
will fold.
Push the control down again - both
exterior mirrors return to their original position.
If an electrically folded mirror is
manually extended, pressing down
the control will only electrically extend
the other mirror.
Heated mirrors
Operated by pressing Ü.
Heating works with the engine
running and is switched off
automatically after a short time.
Page 35 of 293

Keys, doors and windows33Safety function
If the window glass encounters
resistance above the middle of the
window during automatic closing, it is immediately stopped and opened
again.
Override safety function In the event of closing difficulties due
to frost or the like, switch on the
ignition, then pull the switch to the first
detent and hold. The window moves
up without safety function enabled.
To stop movement, release the
switch.Child safety system for rear
windows
Press z to deactivate rear door
power windows; the LED illuminates.
To activate, press z again.
Operating windows from outside
The windows can be operated
remotely from outside the vehicle.
Press and hold c to open windows.
Press and hold e to close windows.
Release button to stop window
movement.
If the windows are fully opened or
closed, the hazard warning lights will
flash twice.
Overload
If the windows are repeatedly
operated within short intervals, the
window operation is disabled for
some time.
Page 40 of 293

38Seats, restraintsHorizontal adjustment
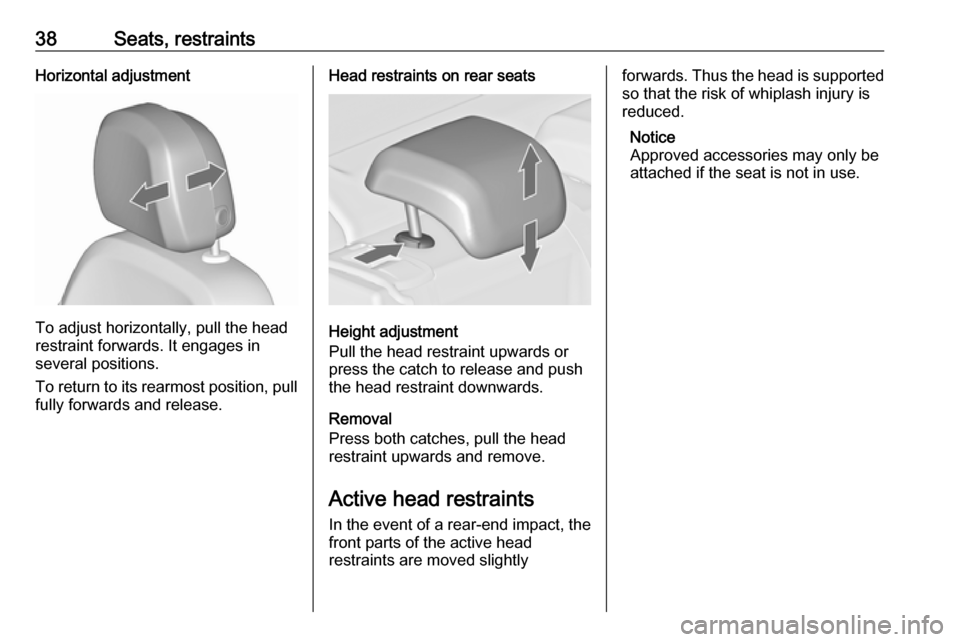
To adjust horizontally, pull the head
restraint forwards. It engages in
several positions.
To return to its rearmost position, pull fully forwards and release.
Head restraints on rear seats
Height adjustment
Pull the head restraint upwards or
press the catch to release and push the head restraint downwards.
Removal
Press both catches, pull the head restraint upwards and remove.
Active head restraints
In the event of a rear-end impact, the front parts of the active head
restraints are moved slightly
forwards. Thus the head is supported
so that the risk of whiplash injury is
reduced.
Notice
Approved accessories may only be attached if the seat is not in use.
Page 41 of 293

Seats, restraints39Front seats
Seat position9 Warning
Only drive with the seat correctly
adjusted.
9 Warning
Never adjust seats while driving as
they could move uncontrollably.
9 Danger
Do not sit closer than 25 cm to the
steering wheel, to permit safe
airbag deployment.
9 Warning
Never store any objects under the
seats.
● Sit with buttocks as far back against the backrest as possible.
Adjust the distance between the
seat and the pedals so that legs
are slightly angled when pressing the pedals. Slide the front
passenger seat as far back as
possible.
● Set seat height high enough to have a clear field of vision on allsides and of all display
instruments. There should be at
least one hand of clearance
between head and the roof
frame. Your thighs should rest
lightly on the seat without
pressing into it.
● Sit with shoulders as far back against the backrest as possible.
Set the backrest rake so that it is
possible to easily reach the
steering wheel with arms slightly
bent. Maintain contact between
shoulders and the backrest when turning the steering wheel. Do
not angle the backrest too far
back. We recommend a
maximum rake of approx. 25°.
● Adjust seat and steering wheel in
a way that the wrist rests on top
of the steering wheel while the
arm is fully extended and
shoulders on the backrest.
● Adjust the steering wheel 3 71.
● Adjust the head restraint 3 37.
● Adjust the height of the seat belt 3 47.
● Adjust the thigh support so that there is a space approx. two
fingers wide between the edge of
the seat and the hollow of the
knee.
● Adjust the lumbar support so that
it supports the natural shape of
the spine.
Page 45 of 293

Seats, restraints43
The illustration shows the release
lever on VXR seat.
9 Warning
To avoid injury, move the backrest
to an upright position before
folding.
Seat folding on power seats
Lift release lever and fold backrest
forwards. The seat slides
automatically forwards to the stop.
To restore, lift backrest to upright
position and engage. The seat slides
automatically backwards to the
original position.
In case the head restraint of the
folded backrest is blocked by the
upper windscreen frame, allow the
seat to move backwards slightly
before lifting up the backrest 3 43.
Safety function
If the power seat encounters
resistance while sliding forward or
rearward, it is immediately stopped
and moved back.
Overload
If the folding function is electrically overloaded, the power supply is
automatically cut-off for a short time.
Power seat adjustment9 Warning
Care must be taken when
operating the power seats. There
is a risk of injury, particularly for
children. Objects could become
trapped.
Keep a close watch on the seats
when adjusting them. Vehicle
passengers should be informed
accordingly.
Page 50 of 293

48Seats, restraints9Warning
The belt must not rest against hard
or fragile objects in the pockets of
your clothing.
Seat belt reminder X 3 85.
Height adjustment
1. Pull belt out slightly.
2. Shift the height adjuster upwards or press button to disengage and
push the height adjuster
downwards.
Adjust the height so that the belt lies
across the shoulder. It must not lie
across the throat or upper arm.
Do not adjust while driving.
Unfasten
To release belt, press red button on
belt buckle.
Seat belts on the rear seats
The seat belt for the rear centre seat
can only be withdrawn from the
retractor if the backrest is engaged in
upright position.
Page 53 of 293

Seats, restraints51The side airbag system consists of an
airbag in each front seat backrest.
This can be identified by the word
AIRBAG .
The side airbag system is triggered in
the event of a side impact of a certain severity. The ignition must be
switched on.
The inflated airbags cushion the
impact, thereby reducing the risk of
injury to the upper body and pelvis in
the event of a side-on collision
considerably.
9 Warning
Keep the area in which the airbag
inflates clear of obstructions.
Notice
Only use protective seat covers that have been approved for the vehicle.Be careful not to cover the airbags.
Curtain airbag system
The curtain airbag system consists of an airbag in the roof frame on each
side. This can be identified by the
word AIRBAG on the roof pillars.
The curtain airbag system is triggered
in the event of a side-on impact of a
certain severity. The ignition must be
switched on.
The inflated airbags cushion the
impact, thereby reducing the risk of
injury to the head in the event of a
side-on impact considerably.
9 Warning
Keep the area in which the airbag
inflates clear of obstructions.
The hooks on the handles in the
roof frame are only suitable for
hanging up light articles of
clothing, without coat hangers. Do not keep any items in these
clothes.
Page 68 of 293

66StorageLowering
To lower the cover, pull the strap
backwards and push down the front centre of the cover at the same time.
Caution
Do not lower the height adjustable
cover to position 1 in vehicles
equipped with subwoofer. The
subwoofer could be damaged.
Notice
● If mounted in position 2 or 3, the
space between the rear floor cover and the height adjustable
cover can be used as a stowage
compartment.
● The height adjustable cover can be lifted and hooked in with thestrap when it is mounted in
position 1 or 2.
● If mounted in position 2, an
almost completely flat load-bay is
created if the rear seat backrests are folded forwards.
● Opening the side covers (e.g. when exchanging the rear light
bulbs) is only possible with the
height adjustable cover mounted
in position 1 or 2.Caution
The height adjustable cover is
able to withstand a load of no more
than 100 kg.
Lashing eyes
The lashing eyes are designed to
secure items against slippage, e.g.
using lashing straps or luggage net.
The lashing eyes are only accessible
if the rear floor storage cover is in the lower position 3 65.
Page 72 of 293

70Instruments and controlsInstruments and
controlsControls ....................................... 71
Steering wheel adjustment ........71
Steering wheel controls .............71
Heated steering wheel ...............71
Horn ........................................... 72
Windscreen wiper/washer .........72
Rear window wiper/washer .......74
Outside temperature ..................74
Clock ......................................... 75
Power outlets ............................. 76
Cigarette lighter ......................... 77
Ashtrays .................................... 77
Warning lights, gauges and indi‐ cators ........................................... 78
Instrument cluster ......................78
Speedometer ............................. 78
Odometer .................................. 78
Trip odometer ............................ 78
Tachometer ............................... 78
Fuel gauge ................................ 79
Fuel selector .............................. 79
Engine coolant temperature gauge ....................................... 81
Service display .......................... 81Control indicators ......................82
Turn signal ................................. 85
Seat belt reminder .....................85
Airbag and belt tensioners .........85
Airbag deactivation ....................85
Charging system .......................86
Malfunction indicator light ..........86
Service vehicle soon .................86
Brake and clutch system ...........86
Operate pedal ............................ 86
Electric parking brake ................86
Electric parking brake fault ........87
Antilock brake system (ABS) .....87
Upshift ....................................... 87
Power steering .......................... 87
Lane departure warning ............87
Ultrasonic parking assist ...........88
Electronic Stability Control off ...88
Electronic Stability Control and Traction Control system ...........88
Traction Control system off .......88
Preheating ................................. 88
Diesel particle filter ....................88
Tyre pressure monitoring system ...................................... 89
Engine oil pressure ....................89
Low fuel ..................................... 89
Immobiliser ................................ 90
Reduced engine power .............90
Exterior light .............................. 90High beam................................. 90
High beam assist .......................90
Adaptive forward lighting ...........90
Fog light ..................................... 90
Rear fog light ............................. 90
Low washer fluid ........................90
Cruise control ............................ 90
Adaptive cruise control ..............90
Vehicle detected ahead .............91
Door open .................................. 91
Information displays .....................91
Driver Information Centre ..........91
Graphic-Info-Display, Colour- Info-Display .............................. 95
Smartphone controller ...............97
Vehicle messages ........................97
Warning chimes .......................100
Battery voltage ........................ 100
Trip computer ............................. 101
Vehicle personalisation ..............103
Telematics service .....................108
OnStar ..................................... 108
ERA GLONASS .......................111