tailgate VAUXHALL ASTRA K 2019.5 User Guide
[x] Cancel search | Manufacturer: VAUXHALL, Model Year: 2019.5, Model line: ASTRA K, Model: VAUXHALL ASTRA K 2019.5Pages: 311, PDF Size: 9.6 MB
Page 35 of 311
Keys, doors and windows33● press C on the open tailgate,
or
● press C on the inside of the
driver's door.
Pressing one of the switches again
will reverse the direction of
movement.
Operation modes
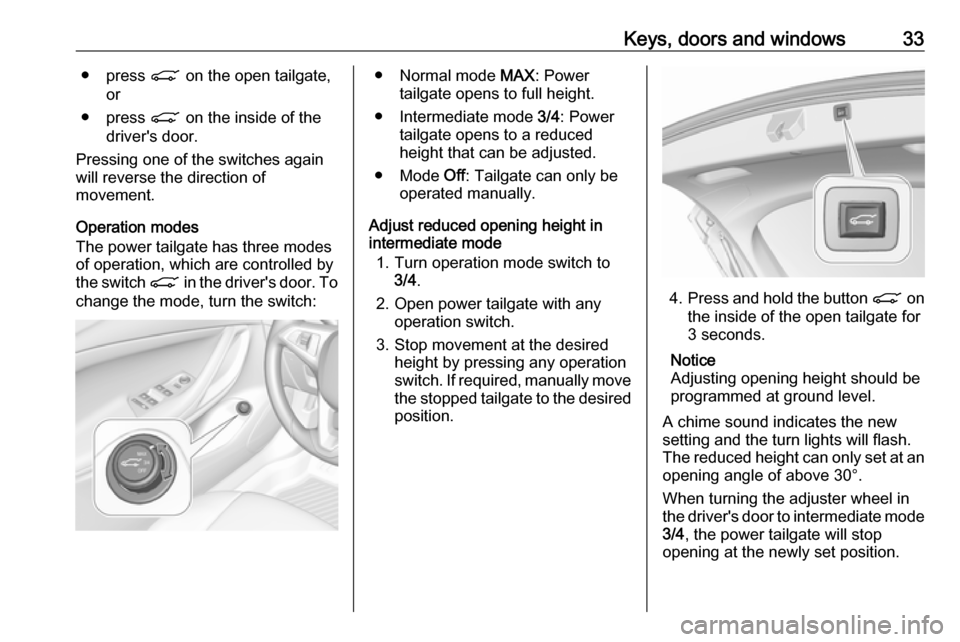
The power tailgate has three modes
of operation, which are controlled by
the switch C in the driver's door. To
change the mode, turn the switch:● Normal mode MAX: Power
tailgate opens to full height.
● Intermediate mode 3/4: Power
tailgate opens to a reduced
height that can be adjusted.
● Mode Off: Tailgate can only be
operated manually.
Adjust reduced opening height in
intermediate mode
1. Turn operation mode switch to 3/4 .
2. Open power tailgate with any operation switch.
3. Stop movement at the desired height by pressing any operation
switch. If required, manually move
the stopped tailgate to the desired
position.
4. Press and hold the button C on
the inside of the open tailgate for
3 seconds.
Notice
Adjusting opening height should be programmed at ground level.
A chime sound indicates the new
setting and the turn lights will flash.
The reduced height can only set at an
opening angle of above 30°.
When turning the adjuster wheel in
the driver's door to intermediate mode 3/4 , the power tailgate will stop
opening at the newly set position.
Page 36 of 311
34Keys, doors and windowsThe tailgate can only be held open if
a minimum height is exceeded
(minimum opening angle from 30°).
The opening height cannot be
programmed below that height.
Safety function
If the power tailgate encounters an
obstacle during opening or closing,
the direction of movement will
automatically be reversed slightly.
Multiple obstacles in one power cycle will deactivate the function. In this
case, close or open the tailgate
manually.
The power tailgate has pinch sensors
on the side edges. If the sensors
detect obstacles between tailgate and chassis, the tailgate will open, until it
is activated again or closed manually.
The safety function is indicated by a
warning chime.
Remove all obstacles before
resuming normal power operation.
If the vehicle is equipped with factory-
fitted towing equipment and a trailer
is electrically connected, the power
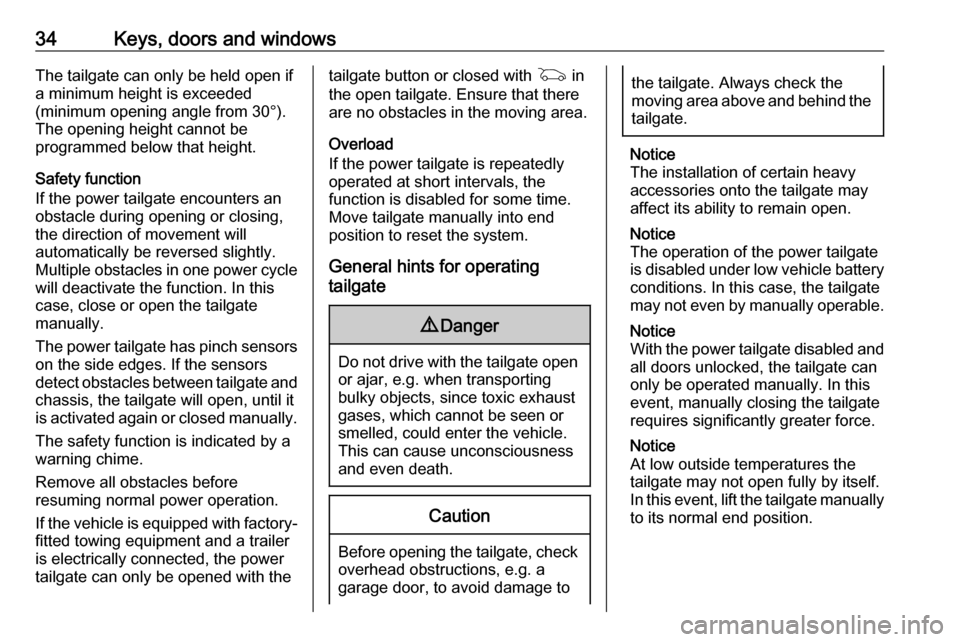
tailgate can only be opened with thetailgate button or closed with G in
the open tailgate. Ensure that there are no obstacles in the moving area.
Overload
If the power tailgate is repeatedly
operated at short intervals, the
function is disabled for some time.
Move tailgate manually into end
position to reset the system.
General hints for operating
tailgate9 Danger
Do not drive with the tailgate open
or ajar, e.g. when transporting
bulky objects, since toxic exhaust
gases, which cannot be seen or
smelled, could enter the vehicle.
This can cause unconsciousness
and even death.
Caution
Before opening the tailgate, check overhead obstructions, e.g. a
garage door, to avoid damage to
the tailgate. Always check the
moving area above and behind the
tailgate.
Notice
The installation of certain heavy
accessories onto the tailgate may
affect its ability to remain open.
Notice
The operation of the power tailgate
is disabled under low vehicle battery
conditions. In this case, the tailgate
may not even by manually operable.
Notice
With the power tailgate disabled and all doors unlocked, the tailgate can
only be operated manually. In this
event, manually closing the tailgate
requires significantly greater force.
Notice
At low outside temperatures the
tailgate may not open fully by itself.
In this event, lift the tailgate manually
to its normal end position.
Page 37 of 311

Keys, doors and windows35Vehicle security
Anti-theft locking system9 Warning
Do not use the system if there are
people in the vehicle! The doorscannot be unlocked from the
inside.
The system deadlocks all the doors. All doors must be closed otherwise
the system cannot be activated.
Unlocking the vehicle disables the
mechanical anti-theft locking system.
This is not possible with the central
locking button.
Activating
Press e on the radio remote control
twice within 5 seconds.
Anti-theft alarm system
The anti-theft alarm system is
combined with the central locking
system.
It monitors: ● doors, tailgate, bonnet
● passenger compartment including adjoining load
compartment
● vehicle inclination, e.g. if it is raised
● ignition
Activation
All doors must be closed and the electronic key of the electronic key
system must not remain in the
vehicle. Otherwise the system cannot be activated.
● Radio remote control: activated 30 seconds after locking the
vehicle by pressing e once.
● Electronic key system: activated 30 seconds after locking the
vehicle by pressing the button on any exterior door handle.
Page 38 of 311
36Keys, doors and windows● Radio remote control orelectronic key: directly by
pressing e twice within
5 seconds.
● Electronic key system with passive locking enabled: briefly
activated after passive locking
occurs.
Notice
Changes to the vehicle interior such
as the use of seat covers, and open
windows or sunroof, could impair the function of passenger compartment
monitoring.Activation without monitoring of
passenger compartment and
vehicle inclination
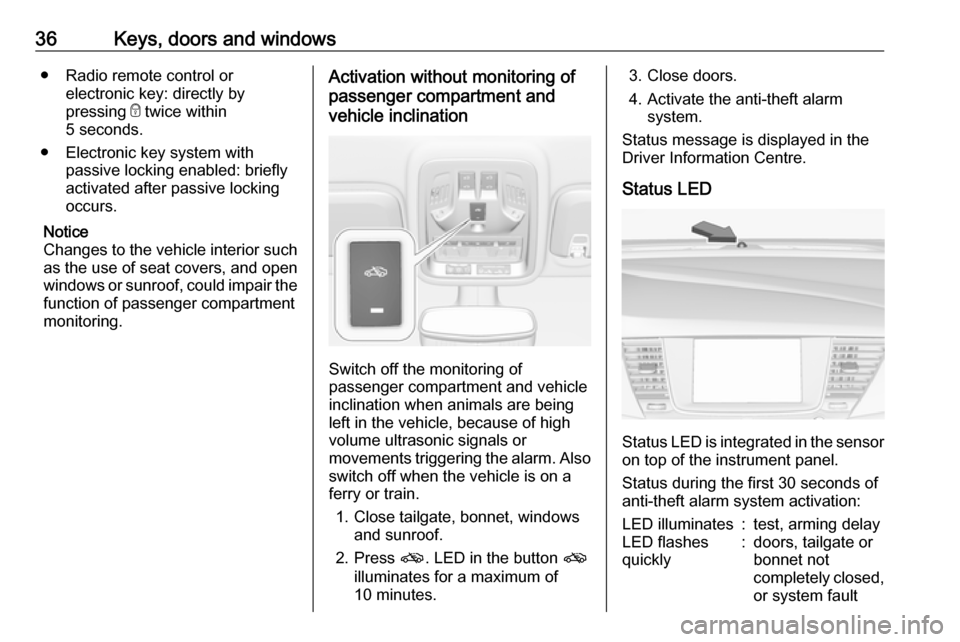
Switch off the monitoring of
passenger compartment and vehicle
inclination when animals are being
left in the vehicle, because of high
volume ultrasonic signals or
movements triggering the alarm. Also switch off when the vehicle is on a
ferry or train.
1. Close tailgate, bonnet, windows and sunroof.
2. Press o. LED in the button o
illuminates for a maximum of
10 minutes.
3. Close doors.
4. Activate the anti-theft alarm system.
Status message is displayed in the
Driver Information Centre.
Status LED
Status LED is integrated in the sensor
on top of the instrument panel.
Status during the first 30 seconds of
anti-theft alarm system activation:
LED illuminates:test, arming delayLED flashes
quickly:doors, tailgate or
bonnet not
completely closed,
or system fault
Page 80 of 311

78StorageRear storage
Storage box
A storage box is located in the load
compartment. Remove the cover to
gain access to the storage box.
Rear floor storage cover 3 79.
Load compartment cover Do not place any objects on the cover.
5-door hatchback
Removing cover
Unhook retaining straps from tailgate.
Lift cover at the rear.
Remove the cover.
Fitting cover
Engage cover in side guides and fold
downwards. Attach retaining straps to tailgate.
Sports Tourer
Closing roller blind
Pull the roller blind using the handle
towards the rear and upwards until it
engages in the sideward retainers.
Opening roller blind
Page 114 of 311

112Instruments and controlsIlluminates green
Cruise control is active. Set speed is
indicated in the Driver Information
Centre.
Cruise control 3 180.
Adaptive cruise control
m illuminates white or green.
C illuminates in the Driver
Information Centre.
m illuminates white
The system is on.
m illuminates green
Adaptive cruise control is active.
When Adaptive cruise control is on or
active, C with the set speed is
indicated in the Driver Information Centre.
Adaptive cruise control 3 184.
Vehicle detected ahead A illuminates green or yellow.Illuminates green
A vehicle ahead is detected in the
same lane.
Illuminates yellow
The distance to a preceding moving
vehicle gets too small or when
approaching another vehicle too
rapidly.
Adaptive cruise control 3 184.
Forward collision alert 3 191.
Speed limiter L illuminates white or green.
Illuminates white The system is on.
Illuminates green
Speed limiter is active. Set speed is
indicated near L symbol.
Speed limiter 3 182.
Traffic sign assistant
L displays detected traffic signs as
control indicator.Traffic sign assistant 3 209.
Door open h illuminates red.
A door or the tailgate is open.
Page 123 of 311
Instruments and controls121Vehicle messages
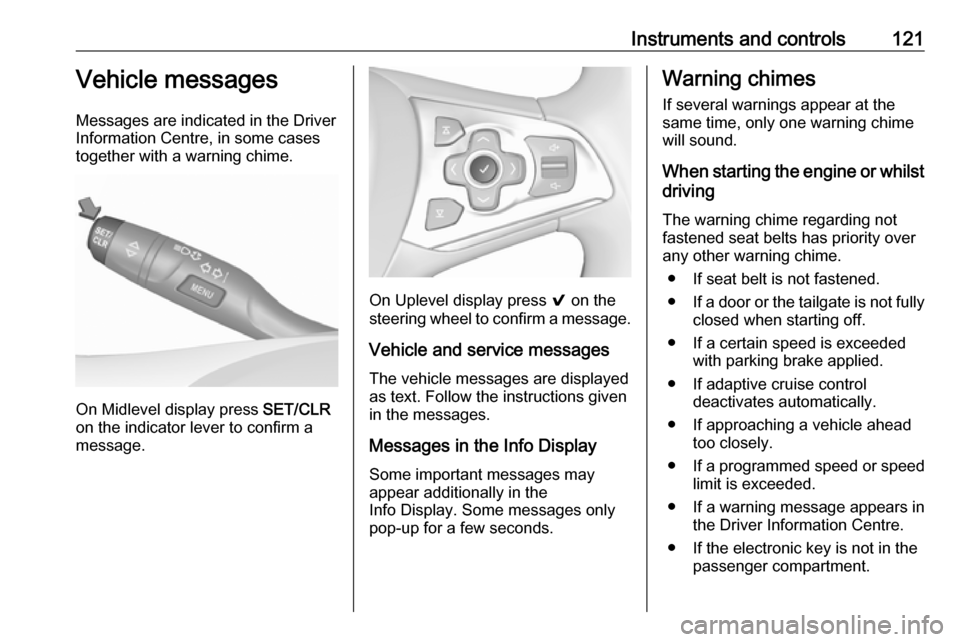
Messages are indicated in the Driver
Information Centre, in some cases
together with a warning chime.
On Midlevel display press SET/CLR
on the indicator lever to confirm a
message.
On Uplevel display press 9 on the
steering wheel to confirm a message.
Vehicle and service messages
The vehicle messages are displayed
as text. Follow the instructions given
in the messages.
Messages in the Info Display
Some important messages may
appear additionally in the
Info Display. Some messages only
pop-up for a few seconds.
Warning chimes
If several warnings appear at the
same time, only one warning chime
will sound.
When starting the engine or whilst driving
The warning chime regarding not
fastened seat belts has priority over
any other warning chime.
● If seat belt is not fastened.
● If a door or the tailgate is not fully
closed when starting off.
● If a certain speed is exceeded with parking brake applied.
● If adaptive cruise control deactivates automatically.
● If approaching a vehicle ahead too closely.
● If a programmed speed or speed
limit is exceeded.
● If a warning message appears in the Driver Information Centre.
● If the electronic key is not in the passenger compartment.
Page 124 of 311

122Instruments and controls● If the parking assist detects anobject.
● If an unintended lane change occurs.
● If the exhaust filter has reached the maximum filling level.
● If safety function of the power tailgate detects obstacles in the
moving area.
When the vehicle is parked and / or the driver's door is opened
● With exterior lights on.
During an Autostop ● If the driver's door is opened.
● If any condition for an Autostop is
not fulfilled.
Battery voltage When the vehicle battery voltage is
running low, a warning message will
appear in the Driver Information
Centre.1. Switch off any electrical consumers which are not requiredfor a safe drive, e.g. seat heating,
heated rear window or other main consumers.
2. Charge the vehicle battery by driving continuously for a while or
by using a charging device.
The warning message will disappear
after the engine has been started
twice without a voltage drop.
If the vehicle battery cannot be
recharged, have the cause of the fault remedied by a workshop.Vehicle personalisation
The vehicle's behaviour can be
personalised by changing the settings in the Info Display.
Some of the personal settings for
different drivers can be memorised
individually for each vehicle key.
Memorised settings 3 23.
Depending on vehicle equipment and
country-specific regulations some of
the functions described below may
not be available.
Some functions are only displayed or
active when the engine is running.
Personal settings Graphic Info Display
Press MENU to open the respective
menu.
Select Settings , scroll through the list
and select Vehicle Settings .
Page 209 of 311

Driving and operating207Fault
Occasional missed alerts can occur
under normal circumstances and will
increase in wet conditions.
Side blind spot alert does not operate when the left or right corners of the
rear bumper are covered with mud,
dirt, snow, ice, slush, or in heavy
rainstorms.
Cleaning instructions 3 272.
In the event of a fault in the system or if the system does not work due to
temporary conditions, the symbols in
the mirrors will be permanently
illuminated and a message is
displayed in the Driver Information
Centre. Seek the assistance of a
workshop.
Rear view camera The rear view camera assists the
driver when reversing by displaying a view of the area behind the vehicle.
The view of the camera is displayed
in the Info Display.9 Warning
The rear view camera does not
replace driver vision. Note that
objects that are outside the
camera's field of view and the
parking assist sensors, e.g. below
the bumper or underneath the
vehicle, are not displayed.
Do not reverse or park the vehicle
using only the rear view camera.
Always check the surrounding of
the vehicle before driving.
Activation
Rear view camera is automatically
activated when reverse gear is
engaged.
Functionality
On 5-door hatchback the camera is
mounted between the number plate
lights.
On Sports Tourer the camera is
mounted under the tailgate moulding.
Page 240 of 311
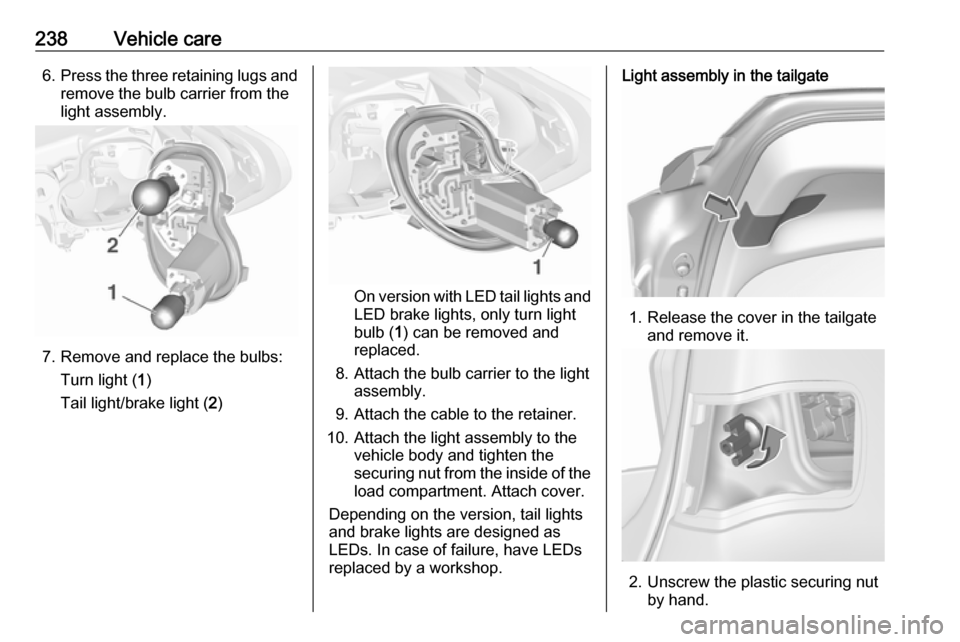
238Vehicle care6.Press the three retaining lugs and
remove the bulb carrier from the
light assembly.
7. Remove and replace the bulbs:
Turn light ( 1)
Tail light/brake light ( 2)
On version with LED tail lights and
LED brake lights, only turn light
bulb ( 1) can be removed and
replaced.
8. Attach the bulb carrier to the light assembly.
9. Attach the cable to the retainer.
10. Attach the light assembly to the vehicle body and tighten the
securing nut from the inside of the load compartment. Attach cover.
Depending on the version, tail lights
and brake lights are designed as
LEDs. In case of failure, have LEDs
replaced by a workshop.
Light assembly in the tailgate
1. Release the cover in the tailgate and remove it.
2. Unscrew the plastic securing nutby hand.