warning light VAUXHALL ASTRA K 2019.5 Owner's Guide
[x] Cancel search | Manufacturer: VAUXHALL, Model Year: 2019.5, Model line: ASTRA K, Model: VAUXHALL ASTRA K 2019.5Pages: 311, PDF Size: 9.6 MB
Page 217 of 311
Driving and operating215Switch off the system if the system is
disturbed by tar marks, shadows,
road cracks, temporary or
construction lane markings, or other
road imperfections.9 Warning
Always keep your attention on the
road and maintain proper vehicle
position within the lane, otherwise
vehicle damage, injury or death
could occur.
Lane keep assist does not
continuously steer the vehicle.
The system may not keep the
vehicle in the lane or give an alert,
even if a lane marking is detected.
The steering of the lane keep
assist may not be sufficient to
avoid a lane departure.
The system may not detect hands-
off driving due to external
influences (road condition and
surface, weather etc). The driver
has full responsibility to control the
vehicle and is always required to keep the hands on the steeringwheel while driving.
Using the system while towing a
trailer or on slippery roads could
cause loss of control of the vehicle
and a crash. Switch the system off.Fuel
Fuel for petrol engines
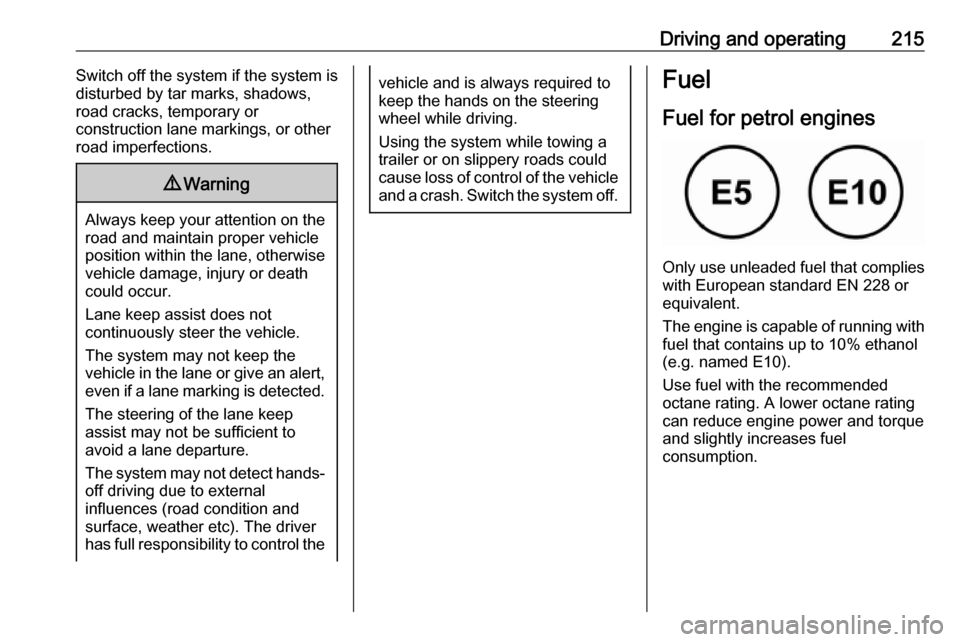
Only use unleaded fuel that complies
with European standard EN 228 or
equivalent.
The engine is capable of running with
fuel that contains up to 10% ethanol
(e.g. named E10).
Use fuel with the recommended
octane rating. A lower octane rating can reduce engine power and torque
and slightly increases fuel
consumption.
Page 221 of 311
Driving and operating219
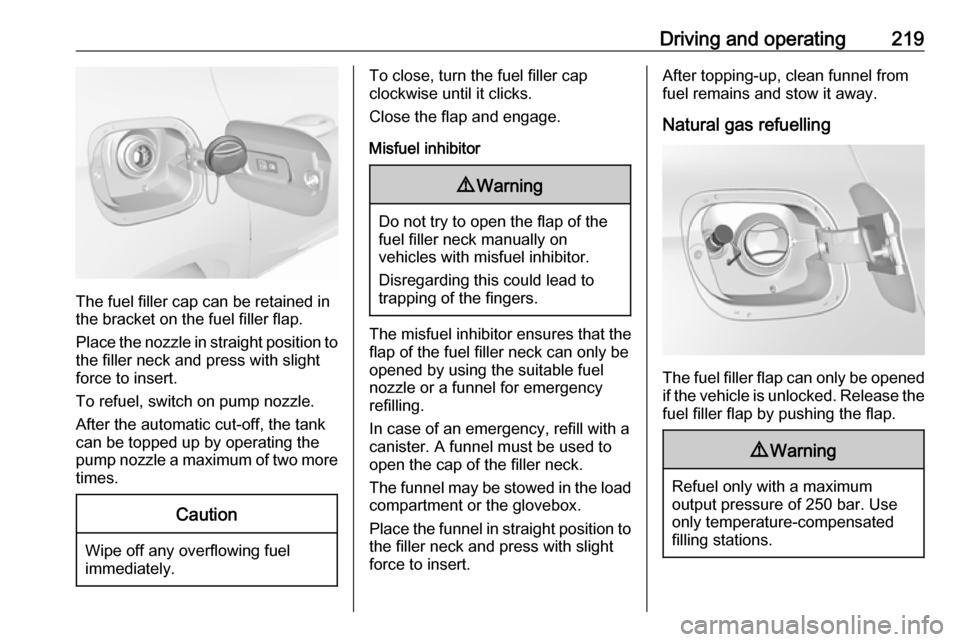
The fuel filler cap can be retained in
the bracket on the fuel filler flap.
Place the nozzle in straight position to the filler neck and press with slight
force to insert.
To refuel, switch on pump nozzle.
After the automatic cut-off, the tank can be topped up by operating the
pump nozzle a maximum of two more
times.
Caution
Wipe off any overflowing fuel
immediately.
To close, turn the fuel filler cap
clockwise until it clicks.
Close the flap and engage.
Misfuel inhibitor9 Warning
Do not try to open the flap of the
fuel filler neck manually on
vehicles with misfuel inhibitor.
Disregarding this could lead to
trapping of the fingers.
The misfuel inhibitor ensures that the flap of the fuel filler neck can only be
opened by using the suitable fuel
nozzle or a funnel for emergency
refilling.
In case of an emergency, refill with a
canister. A funnel must be used to
open the cap of the filler neck.
The funnel may be stowed in the load
compartment or the glovebox.
Place the funnel in straight position to the filler neck and press with slight
force to insert.
After topping-up, clean funnel from
fuel remains and stow it away.
Natural gas refuelling
The fuel filler flap can only be opened
if the vehicle is unlocked. Release the
fuel filler flap by pushing the flap.
9 Warning
Refuel only with a maximum
output pressure of 250 bar. Use
only temperature-compensated
filling stations.
Page 235 of 311
Vehicle care233Charging the vehicle battery9Warning
On vehicles with stop-start
system, ensure that the charging potential does not exceed 14.6 V
when using a battery charger.
Otherwise the vehicle battery may be damaged.
Jump starting 3 269.
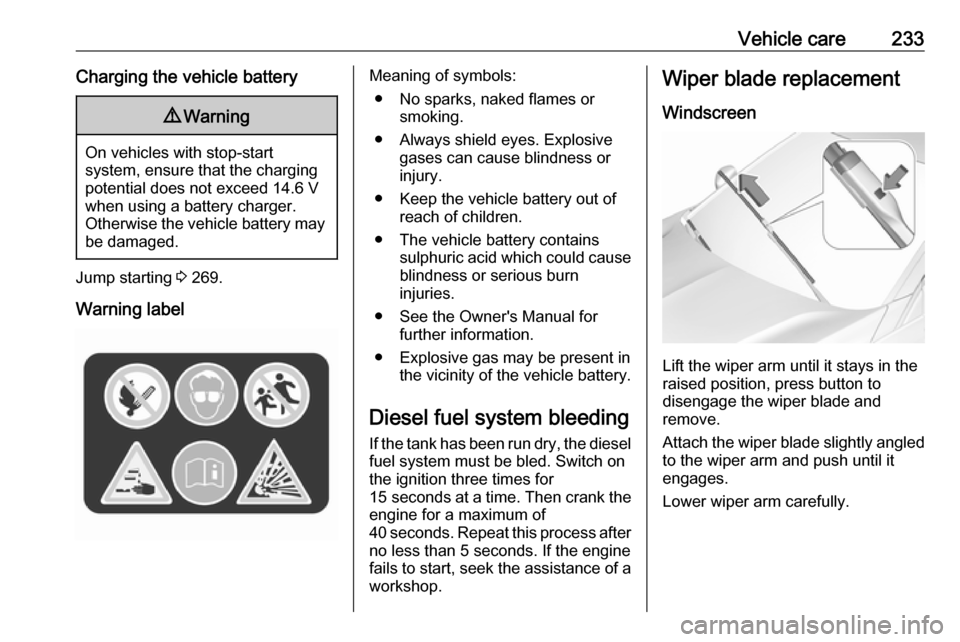
Warning label
Meaning of symbols: ● No sparks, naked flames or smoking.
● Always shield eyes. Explosive gases can cause blindness or
injury.
● Keep the vehicle battery out of reach of children.
● The vehicle battery contains sulphuric acid which could cause
blindness or serious burn
injuries.
● See the Owner's Manual for further information.
● Explosive gas may be present in the vicinity of the vehicle battery.
Diesel fuel system bleeding If the tank has been run dry, the diesel
fuel system must be bled. Switch on
the ignition three times for
15 seconds at a time. Then crank the
engine for a maximum of 40 seconds. Repeat this process after
no less than 5 seconds. If the engine fails to start, seek the assistance of a
workshop.Wiper blade replacement
Windscreen
Lift the wiper arm until it stays in the
raised position, press button to
disengage the wiper blade and
remove.
Attach the wiper blade slightly angled
to the wiper arm and push until it
engages.
Lower wiper arm carefully.
Page 249 of 311
Vehicle care247No.Circuit32DC transformer / LED display /
Electrical heater / Climate
control / Glow plug controller33Anti theft warning horn34Horn35Power outlet load compartment36Right high beam (Halogen) /
Right low beam (LED)37Left high beam (Halogen)38LED headlight / Automatic
headlight range adjustment39Front fog light40Central Gateway Module41Water in fuel sensor / Water
pump42Manual headlight range adjust‐
ment43Fuel pump44Rear view camera / Inside rear
view mirror / Trailer moduleNo.Circuit45LED headlight left / Automatic
headlight range adjustment left46Instrument cluster47Steering column lock48Rear wiper49Outside rearview mirror50LED headlight right / Automatic
headlight range adjustment
right51Left low beam (LED)52Engine control module / Trans‐
mission control module53Diesel exhaust system54Windscreen wiper55Electrical rear seat folding56–57–
After having changed defective fuses,
close the fuse box cover and press
until it engages.
If the fuse box cover is not closed
correctly, malfunction may occur.
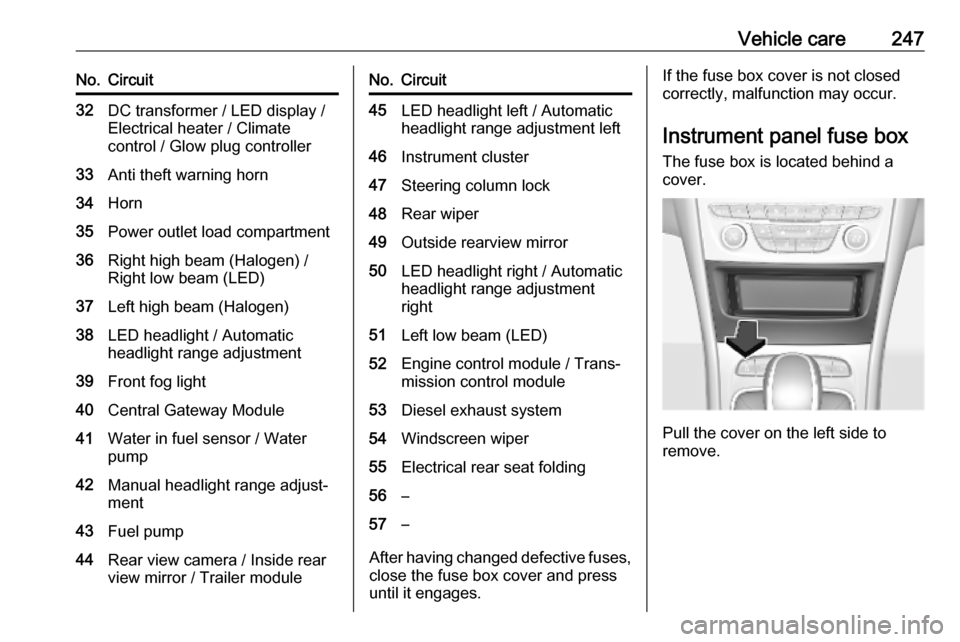
Instrument panel fuse boxThe fuse box is located behind a
cover.
Pull the cover on the left side to
remove.
Page 258 of 311

256Vehicle careThe use of commercially-availableliquid tyre repair kits can impair the
function of the system. Factory-
approved repair kits can be used.
Operating electronic devices or being close to facilities using similar wave
frequencies could disrupt the tyre
pressure monitoring system.
Each time the tyres are replaced, tyre
pressure monitoring system sensors
must be dismounted and serviced. For the screwed sensor, replace
valve core and sealing ring. For the
clipped sensor, replace complete
valve stem.
Use only original plastic valve caps to protect valve on any damage.Caution
Do not use metal valve caps as
they lead to valve oxidation and
damage.
Vehicle loading status
Adjust tyre pressure to load condition
according to the tyre information label or tyre pressure chart 3 289, and
select the appropriate setting in Tyre
Load within the Vehicle Information
Menu 3 113. This setting determines
the reference pressures for the tyre
pressure warnings.
The Tyre Load menu only appears
when the vehicle is at a standstill and the parking brake is applied. On
vehicles with automatic transmission
the selector lever must be in P.
Midlevel display:
Select the Tyre load page under the
Vehicle Information Menu ? in the
Driver Information Centre 3 113.
Select
● Light for comfort pressure up to
three people.
● Eco for Eco pressure up to three
people.
● Max for full loading.
Uplevel display:
Select the Tyre load page under the
Options Menu in the Driver
Information Centre 3 113.
Page 259 of 311
Vehicle care257Select● Light for comfort pressure up to
three people.
● Eco for Eco pressure up to
three people.
● Max for full loading.
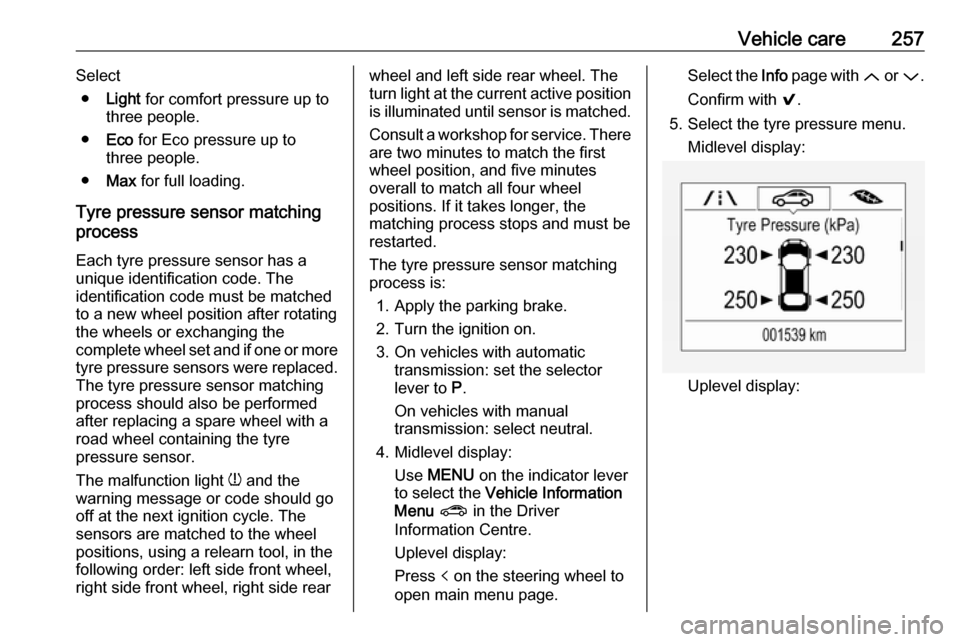
Tyre pressure sensor matching
process
Each tyre pressure sensor has a
unique identification code. The
identification code must be matched
to a new wheel position after rotating
the wheels or exchanging the
complete wheel set and if one or more
tyre pressure sensors were replaced. The tyre pressure sensor matching
process should also be performed
after replacing a spare wheel with a
road wheel containing the tyre
pressure sensor.
The malfunction light w and the
warning message or code should go
off at the next ignition cycle. The
sensors are matched to the wheel
positions, using a relearn tool, in the
following order: left side front wheel,
right side front wheel, right side rearwheel and left side rear wheel. The
turn light at the current active position
is illuminated until sensor is matched.
Consult a workshop for service. There are two minutes to match the first
wheel position, and five minutes
overall to match all four wheel
positions. If it takes longer, the
matching process stops and must be restarted.
The tyre pressure sensor matching
process is:
1. Apply the parking brake.
2. Turn the ignition on.
3. On vehicles with automatic transmission: set the selector
lever to P.
On vehicles with manual
transmission: select neutral.
4. Midlevel display: Use MENU on the indicator lever
to select the Vehicle Information
Menu ? in the Driver
Information Centre.
Uplevel display:
Press p on the steering wheel to
open main menu page.Select the Info page with Q or P.
Confirm with 9.
5. Select the tyre pressure menu. Midlevel display:
Uplevel display:
Page 307 of 311

305CNG.................................... 103, 217
Control indicators........................ 106
Control of the vehicle .................157
Controls ........................................ 90
Convex shape .............................. 38
Coolant and antifreeze ...............277
Cruise control ....................111, 180
Cupholders .................................. 70
Curtain airbag system .................. 62
Curve lighting.............................. 138
D
Danger, Warnings and Cautions ...4
Daytime running lights ...............138
Declaration of conformity ............292
DEF ............................................ 168
Diesel exhaust fluid ....................168
Diesel fuel system bleeding .......233
Door open .................................. 112
Doors ............................................ 29
Driver assistance systems ..........180
Driver Information Centre ...........113
Driving characteristics and towing tips .............................. 221
Driving hints ................................ 157
E Electric adjustment ......................38
Electrical system......................... 244
Electric parking brake .........108, 175
Electric parking brake fault .........108Electronic climate control system 149
Electronic driving programmes ..172
Electronic key system ...................21
Electronic Stability Control.......... 178
Electronic Stability Control and Traction Control system ..........109
Electronic Stability Control off..... 109
End-of-life vehicle recovery .......227
Engine compartment fuse box ...245
Engine coolant ........................... 230
Engine coolant temperature gauge ..................................... 104
Engine data ............................... 283
Engine exhaust .......................... 166
Engine identification ...................280
Engine oil ................... 229, 277, 281
Engine oil pressure ....................110
Entry lighting .............................. 143
Event data recorders ..................299
Exhaust filter ............................... 166
Exit lighting ................................ 144
Exterior care .............................. 272
Exterior light ............................... 111
Exterior lighting ....................12, 134
Exterior mirrors ............................. 38
F
Fault ........................................... 173
First aid kit ................................... 85
Fixed air vents ........................... 154Folding mirrors ............................. 38
Following distance ......................109
Following distance indication ......194
Forward collision alert................. 191
Front airbag system .....................61
Front fog lights ...........111, 141, 236
Front seats.................................... 46
Front storage ................................ 71
Fuel............................................. 215
Fuel for diesel engines ..............217
Fuel for natural gas operation ...217
Fuel for petrol engines ...............215
Fuel gauge ................................. 103
Fuel selector .............................. 103
Fuses ......................................... 244
G Gauges ....................................... 101
Gear selection ........................... 171
Gear shifting ............................... 109
General information ...................220
Glovebox ..................................... 70
H Halogen headlights ....................234
Hand brake ......................... 174, 175
Hazard warning flashers ............140
Headlight flash ........................... 137
Headlight range adjustment ......137
Headlights................................... 134
Headlights when driving abroad 138
Page 310 of 311

308Tyre pressure monitoringsystem ............................. 110, 254
Tyre pressures ........................... 289
Tyre repair kit ............................. 260
U Ultrasonic parking assist............. 198
Upholstery .................................. 274
Uplevel display ........................... 113
USB port ....................................... 96
Using this manual ..........................3
V Valet mode ................................. 118
Vehicle battery ........................... 232
Vehicle checks............................ 228
Vehicle data ................................ 281
Vehicle data recording and privacy ..................................... 299
Vehicle detected ahead ..............112
Vehicle dimensions .................... 287
Vehicle identification number ....279
Vehicle jack ................................ 251
Vehicle messages .....................121
Vehicle personalisation .............122
Vehicle security ............................ 35
Vehicle specific data ......................3
Vehicle storage ........................... 227
Vehicle tools ............................... 251
Vehicle unlocking ........................... 6Ventilating ..................................... 53
Ventilation ................................... 146
W
Warning chimes .........................121
Warning lights ............................. 101
Warning triangle .......................... 85
Washer and wiper systems .........13
Washer fluid ............................... 231
Wheel changing .........................263
Wheel covers ............................. 259
Wheels and tyres .......................252
Windows ....................................... 40
Windscreen................................... 40
Windscreen wiper and washer ....91
Winter tyres ............................... 252
Wiper blade replacement ..........233