clock VAUXHALL ASTRA K 2019.5 Owner's Manual
[x] Cancel search | Manufacturer: VAUXHALL, Model Year: 2019.5, Model line: ASTRA K, Model: VAUXHALL ASTRA K 2019.5Pages: 311, PDF Size: 9.6 MB
Page 91 of 311

Instruments and controls89Instruments and
controlsControls ....................................... 90
Steering wheel adjustment ........90
Steering wheel controls .............90
Heated steering wheel ...............91
Horn ........................................... 91
Windscreen wiper and washer ..91
Rear window wiper and washer ...................................... 93
Outside temperature ..................94
Clock ......................................... 94
Power outlets ............................. 96
Ashtrays .................................... 97
Warning lights, gauges and indi‐ cators ........................................... 98
Instrument cluster ......................98
Speedometer ........................... 101
Odometer ................................ 102
Trip odometer .......................... 102
Tachometer ............................. 103
Fuel gauge .............................. 103
Fuel selector ............................ 103
Engine coolant temperature gauge ..................................... 104
Service display ........................ 105Control indicators ....................106
Turn lights ................................ 106
Seat belt reminder ...................106
Airbag and belt tensioners .......107
Airbag deactivation ..................107
Charging system .....................108
Malfunction indicator light ........108
Brake and clutch system .........108
Electric parking brake ..............108
Electric parking brake fault ......108
Antilock brake system (ABS) ...109
Gear shifting ............................ 109
Following distance ...................109
Lane keep assist .....................109
Electronic Stability Control off . 109
Electronic Stability Control and Traction Control system .........109
Traction Control system off .....110
Preheating ............................... 110
AdBlue ..................................... 110
Tyre pressure monitoring system .................................... 110
Engine oil pressure ..................110
Low fuel ................................... 111
Immobiliser .............................. 111
Exterior light ............................ 111
High beam ............................... 111
High beam assist .....................111
LED headlights ........................ 111
Front fog lights ......................... 111Rear fog light........................... 111
Cruise control .......................... 111
Adaptive cruise control ............112
Vehicle detected ahead ...........112
Speed limiter ........................... 112
Traffic sign assistant ................112
Door open ................................ 112
Displays ..................................... 113
Driver Information Centre ........113
Info Display .............................. 118
Vehicle messages ......................121
Warning chimes .......................121
Battery voltage ........................ 122
Vehicle personalisation ..............122
Telematics service .....................129
OnStar ..................................... 129
Page 96 of 311
94Instruments and controlsActivation or deactivation of this
function can be changed in the menu Settings in the Info Display.
Vehicle personalisation 3 122.
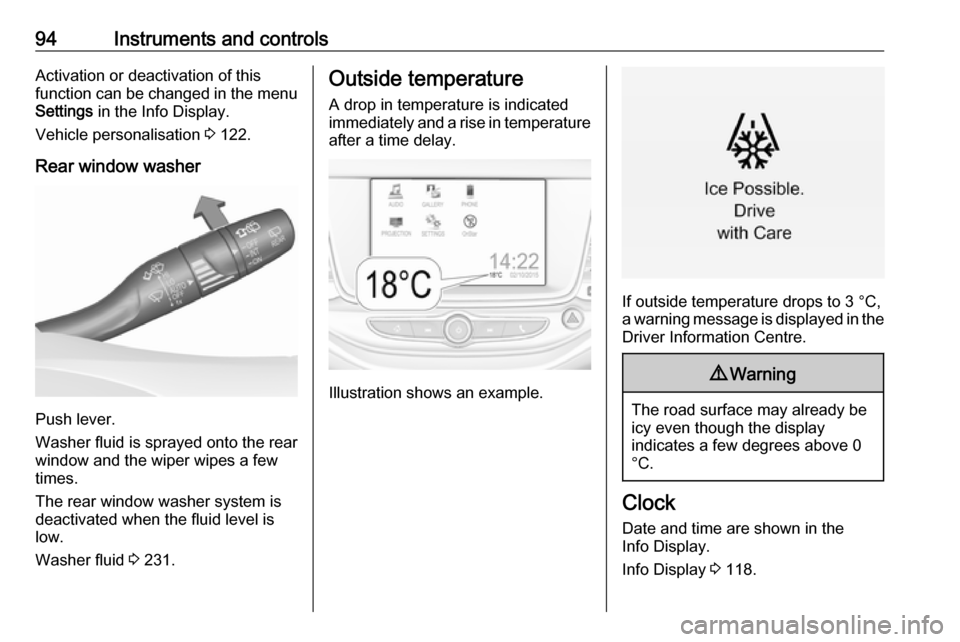
Rear window washer
Push lever.
Washer fluid is sprayed onto the rear
window and the wiper wipes a few
times.
The rear window washer system is
deactivated when the fluid level is
low.
Washer fluid 3 231.
Outside temperature
A drop in temperature is indicated
immediately and a rise in temperature
after a time delay.
Illustration shows an example.
If outside temperature drops to 3 °C,
a warning message is displayed in the Driver Information Centre.
9 Warning
The road surface may already be
icy even though the display
indicates a few degrees above 0
°C.
Clock
Date and time are shown in the
Info Display.
Info Display 3 118.
Page 98 of 311
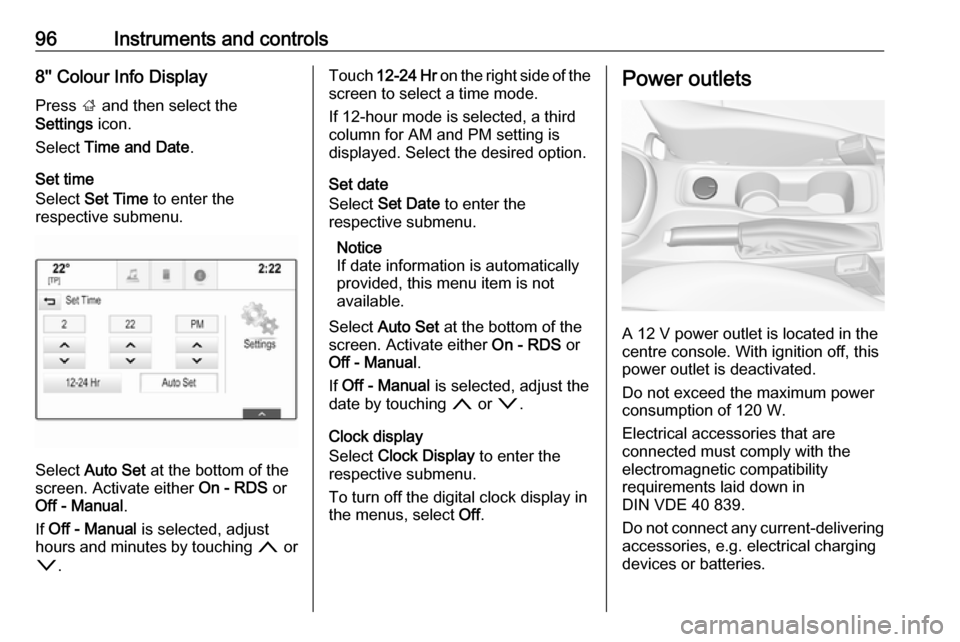
96Instruments and controls8'' Colour Info Display
Press ; and then select the
Settings icon.
Select Time and Date .
Set time
Select Set Time to enter the
respective submenu.
Select Auto Set at the bottom of the
screen. Activate either On - RDS or
Off - Manual .
If Off - Manual is selected, adjust
hours and minutes by touching n or
o .
Touch 12-24 Hr on the right side of the
screen to select a time mode.
If 12-hour mode is selected, a third
column for AM and PM setting is
displayed. Select the desired option.
Set date
Select Set Date to enter the
respective submenu.
Notice
If date information is automatically
provided, this menu item is not
available.
Select Auto Set at the bottom of the
screen. Activate either On - RDS or
Off - Manual .
If Off - Manual is selected, adjust the
date by touching n or o.
Clock display
Select Clock Display to enter the
respective submenu.
To turn off the digital clock display in
the menus, select Off.Power outlets
A 12 V power outlet is located in the
centre console. With ignition off, this
power outlet is deactivated.
Do not exceed the maximum power
consumption of 120 W.
Electrical accessories that are
connected must comply with the
electromagnetic compatibility
requirements laid down in
DIN VDE 40 839.
Do not connect any current-delivering
accessories, e.g. electrical charging
devices or batteries.
Page 172 of 311
170Driving and operatingNotice
Whenever a filling pump with a
nozzle for passenger cars is not
available at a filling station, use only
AdBlue bottles or canisters with a
sealed refill adapter for refilling, to
prevent splashback and overspill,
and in order to ensure that the fumes
from the tank are captured and do
not emerge. AdBlue in bottles or
canisters is available in many filling
stations and can be purchased e.g. at Vauxhall dealers and other retail
outlets.
Since AdBlue has a limited
durability, check the date of expiry
before refilling.
Notice
When unscrewing the protective cap from the filler neck, ammonia fumesmay emerge. Do not inhale as the
fumes have a pungent smell. The
fumes are not harmful by inhalation.
The AdBlue tank should be filled
completely. This must be done if the
warning message regarding
prevention of an engine restart is
already displayed.The vehicle must be parked on a level surface.
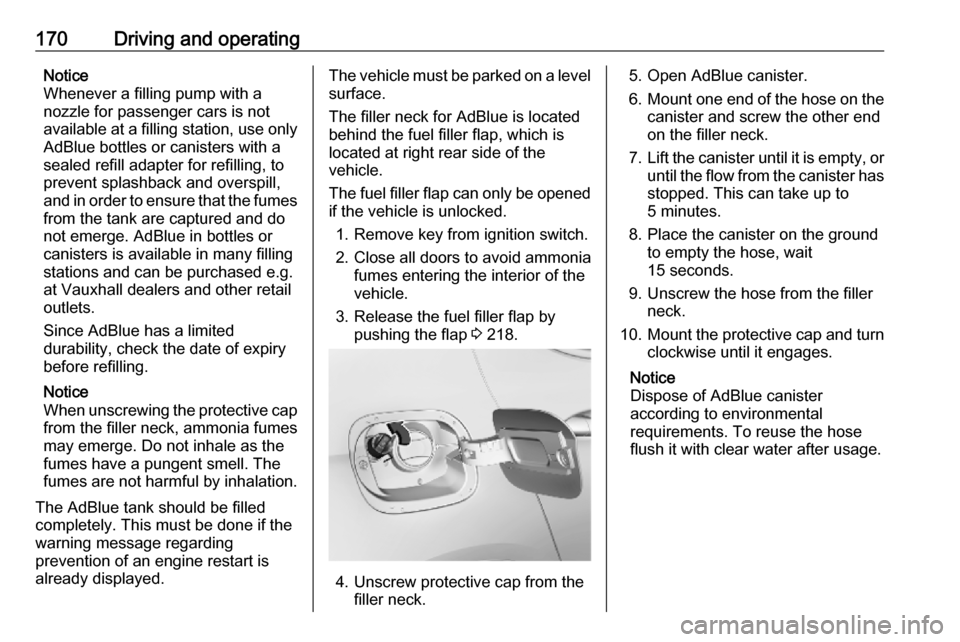
The filler neck for AdBlue is located
behind the fuel filler flap, which is
located at right rear side of the
vehicle.
The fuel filler flap can only be opened
if the vehicle is unlocked.
1. Remove key from ignition switch.
2. Close all doors to avoid ammonia fumes entering the interior of the
vehicle.
3. Release the fuel filler flap by pushing the flap 3 218.
4. Unscrew protective cap from the
filler neck.
5. Open AdBlue canister.
6. Mount one end of the hose on the
canister and screw the other end
on the filler neck.
7. Lift the canister until it is empty, or
until the flow from the canister has stopped. This can take up to
5 minutes.
8. Place the canister on the ground to empty the hose, wait
15 seconds.
9. Unscrew the hose from the filler neck.
10. Mount the protective cap and turn
clockwise until it engages.
Notice
Dispose of AdBlue canister
according to environmental
requirements. To reuse the hose
flush it with clear water after usage.
Page 220 of 311
218Driving and operatingRefuelling9Danger
Before refuelling, switch off
ignition and any external heaters
with combustion chambers.
Follow the operating and safety
instructions of the filling station
when refuelling.
9 Danger
Fuel is flammable and explosive.
No smoking. No naked flames or
sparks.
If you can smell fuel in your
vehicle, have the cause of this
remedied immediately by a
workshop.
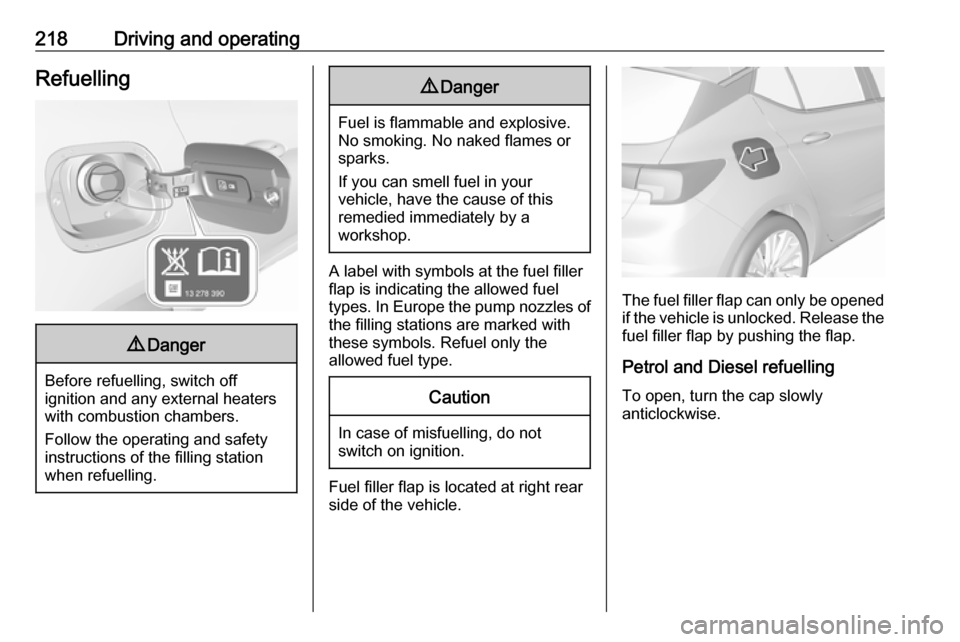
A label with symbols at the fuel filler
flap is indicating the allowed fuel
types. In Europe the pump nozzles of the filling stations are marked with
these symbols. Refuel only the
allowed fuel type.
Caution
In case of misfuelling, do not
switch on ignition.
Fuel filler flap is located at right rear
side of the vehicle.
The fuel filler flap can only be opened
if the vehicle is unlocked. Release the
fuel filler flap by pushing the flap.
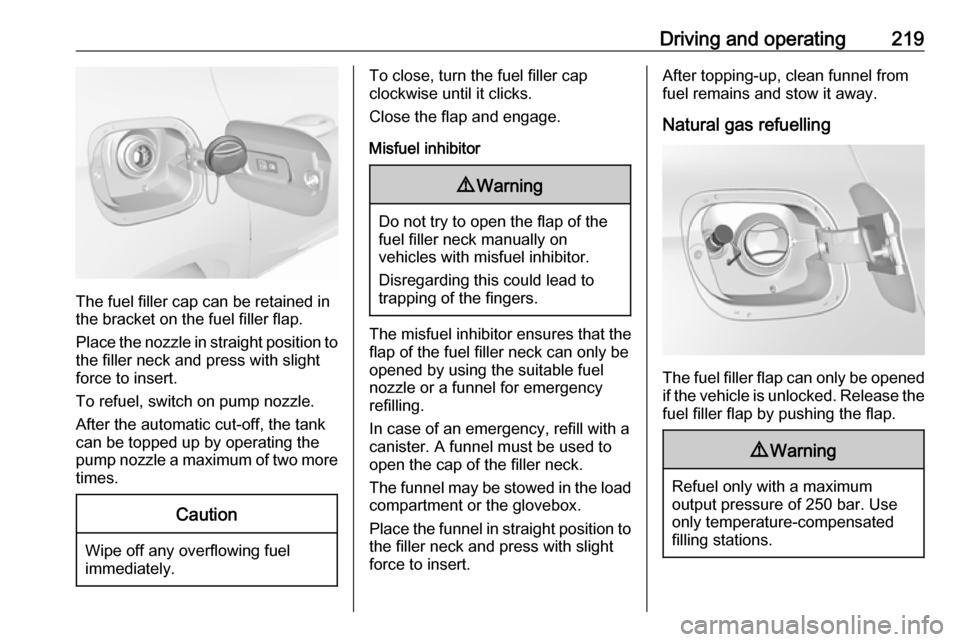
Petrol and Diesel refuelling To open, turn the cap slowly
anticlockwise.
Page 221 of 311
Driving and operating219
The fuel filler cap can be retained in
the bracket on the fuel filler flap.
Place the nozzle in straight position to the filler neck and press with slight
force to insert.
To refuel, switch on pump nozzle.
After the automatic cut-off, the tank can be topped up by operating the
pump nozzle a maximum of two more
times.
Caution
Wipe off any overflowing fuel
immediately.
To close, turn the fuel filler cap
clockwise until it clicks.
Close the flap and engage.
Misfuel inhibitor9 Warning
Do not try to open the flap of the
fuel filler neck manually on
vehicles with misfuel inhibitor.
Disregarding this could lead to
trapping of the fingers.
The misfuel inhibitor ensures that the flap of the fuel filler neck can only be
opened by using the suitable fuel
nozzle or a funnel for emergency
refilling.
In case of an emergency, refill with a
canister. A funnel must be used to
open the cap of the filler neck.
The funnel may be stowed in the load
compartment or the glovebox.
Place the funnel in straight position to the filler neck and press with slight
force to insert.
After topping-up, clean funnel from
fuel remains and stow it away.
Natural gas refuelling
The fuel filler flap can only be opened
if the vehicle is unlocked. Release the
fuel filler flap by pushing the flap.
9 Warning
Refuel only with a maximum
output pressure of 250 bar. Use
only temperature-compensated
filling stations.
Page 225 of 311

Driving and operating223Checking the tensioning of the
coupling ball bar
● Red marking on rotary knob must
point towards green marking on
coupling ball bar.
● The gap between the rotary knob
and the coupling ball bar must be approx. 6 mm.
● The key must be in position c.
Otherwise, the coupling ball bar must be tensioned before being inserted:
● Unlock coupling ball bar by turning key to position c.
● Pull out rotary knob and turn
clockwise as far as it will go.
Inserting the coupling ball bar
Insert the tensioned coupling ball bar
in the opening and push firmly
upwards until it audibly engages.
The rotary handle snaps back into its
original position resting against the
coupling ball bar without a gap.9 Warning
Do not touch rotary handle during
insertion.
Lock the coupling ball bar by turning
the key to position e. Remove the key
and close the protective flap.
Eye for break-away stopping cable
Page 226 of 311

224Driving and operatingIllustration shows 5-door hatchback.
Illustration shows Sports Tourer.
Attach breakaway stopping cable to eye.
Check that the coupling ball bar is
correctly installed
● Green marking on rotary knob must point towards green
marking on coupling ball bar.
● There must be no gap between the rotary handle and the
coupling ball bar.
● The coupling ball bar must be firmly engaged in the opening.
● The coupling ball bar must be locked and the key removed.9Warning
Towing a trailer is permitted only
when a coupling ball bar is fitted correctly. If the coupling ball bardoes not engage correctly, seekthe assistance of a workshop.
Dismounting the coupling ball bar
Open the protective flap and turn the
key to position c to unlock the
coupling ball bar.
Pull out rotary handle and turn
clockwise as far as it will go. Pull out coupling ball bar downwards.
Insert sealing plug in opening.
Fold away connecting socket.
On Sports Tourer insert cover into
rear bumper as shown in the
illustration.
Page 237 of 311

Vehicle care2351. Rotate the cap anticlockwise andremove it.
2. Disengage spring clip from retainer by pulling. Withdraw the
bulb holder from the reflector
housing.
3. Detach the bulb from the bulb holder and replace the bulb.
4. Insert the bulb holder, engaging the two lugs into the reflector
housing and rotate clockwise to
secure.
5. Push spring clip back in place. 6. Fit the cap and rotate clockwise.
High beam (2)
1. Rotate the cap anticlockwise and remove it.
Page 238 of 311

236Vehicle care2. Disengage spring clip fromretainer by moving it forward and
to the side. Swivel spring clip
downwards.
3. Withdraw the bulb holder from the
reflector housing.
4. Detach the bulb from the bulb holder and replace the bulb.
5. Insert the bulb holder and install spring clip.
Fit the cap and rotate clockwise.
Front turn lights
In case of defective LEDs, have them replaced by a workshop.
Side light
In case of defective LEDs, have them replaced by a workshop.
Daytime running light
In case of defective LEDs, have them replaced by a workshop.
Front fog lights The bulbs are accessible from the
underside of the vehicle.
1. Turn the bulb holder anti- clockwise and remove it from the
reflector housing.
2. Disengage the bulb socket from the plug connector by pressing
the retaining lug.
3. Remove and replace the bulb socket with bulb and attach the
plug connector.
4. Insert the bulb socket into the reflector housing by turning
clockwise and engage.