key VAUXHALL ASTRA K 2020 Infotainment system
[x] Cancel search | Manufacturer: VAUXHALL, Model Year: 2020, Model line: ASTRA K, Model: VAUXHALL ASTRA K 2020Pages: 85, PDF Size: 5.78 MB
Page 13 of 85

Profiles13ProfilesThis application is only applicable toMultimedia Navi Pro.
Touch Users on the homescreen to
display a list of all available profiles.
Due to the option of creating profiles,
the Infotainment system can be fitted
to several drivers. Different settings
as well as favourite radio stations and destinations will be connected to aspecific profile. Thereby, the settings
and favourites don't need to be
adjusted every time another person is driving the vehicle.
A profile can be connected to a
specific vehicle key. While starting the
vehicle, the corresponding profile will
be activated.
Creating a profile 1. Select Users on the homescreen.
2. If applicable, select Add User
Profile .
3. Select Create Profile .
4. Enter a profile name and select Next .5.If desired, choose a profile picture
and select Next. Otherwise, select
Skip .
6. If desired, choose a vehicle key which is intended to be connectedto the profile and select Next.
Otherwise, select Skip.
7. Select Done.
A new profile is created. The profile settings can be changed at any time.
Notice
Whenever a new profile is created or the active profile is switched, the
audio application is paused and
restarted.
Creating a PIN for a profile
Every created profile can be secured
with a PIN. After switching on the vehicle, the PIN has to be entered.
To create a PIN, go to the
homescreen and select Settings I
Personal I Security .
The Guest profile cannot be secured
with a PIN.Switching the profile
There are two ways to switch the
profile:
● Select Users on the homescreen
and select the desired profile.
● If the Guest profile is not active:
Go the the homescreen and
select Settings I Personal I
Switch User . Select the desired
profile.
Editing a profile Only the currently active profile can
be edited. There are two ways to edit
a profile:
● Go to the homescreen and select
Users I / .
● Go to the homescreen and select
Settings I Personal .
All profile settings, e.g. name, profile
picture, connected vehicle key, can
be changed.
Deleting a profile
To delete a profile, select f next to
the corresponding profile. The Guest
profile cannot be deleted.
Page 17 of 85
Navigation17NavigationNavigation system.......................17
Connected navigation ..................18Navigation system
This application is only applicable to
Multimedia Navi Pro.
For each profile, the terms and
conditions and a privacy statement of
the navigation function need to be
accepted when starting the
navigation application for the first
time. After a short introduction about
the connected navigation feature,
also a privacy statement of the
predictive navigation function needs
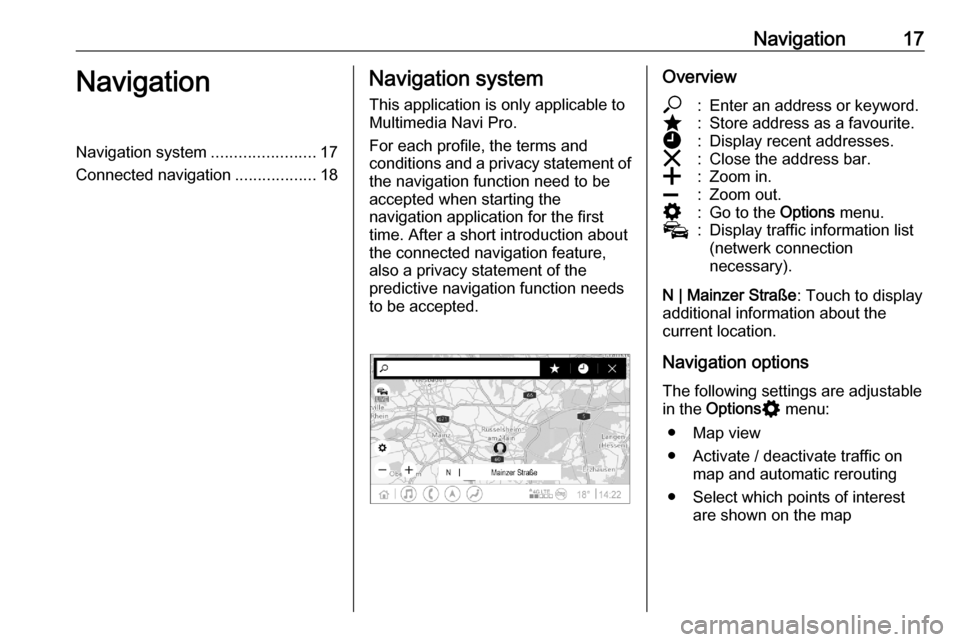
to be accepted.Overview*:Enter an address or keyword.;:Store address as a favourite.':Display recent addresses.&:Close the address bar.g:Zoom in.h:Zoom out.%:Go to the Options menu.v:Display traffic information list
(netwerk connection
necessary).
N | Mainzer Straße : Touch to display
additional information about the
current location.
Navigation options
The following settings are adjustable
in the Options % menu:
● Map view
● Activate / deactivate traffic on map and automatic rerouting
● Select which points of interest are shown on the map
Page 18 of 85
18Navigation●Select the routing options and the
map colours, look for map
updates, change the volume of
the voice prompts, change home
and work address, etc.
● Indicate routes that should be avoided
● Edit destinations
Starting a route guidance 1. Touch * to display the keyboard.
2. Enter an address, choose a favourite or choose a point of
interest.
Points of interest are sorted by
different categories (fuel, parking,
food, etc.).
3. Touch Go and the route guidance
is started.
Different routes can also be
displayed before touching Go.
It is possible to enter a second
destination which will be added
before the first destination. The order
of the destinations can be changed in the Options % menu.Active route guidance
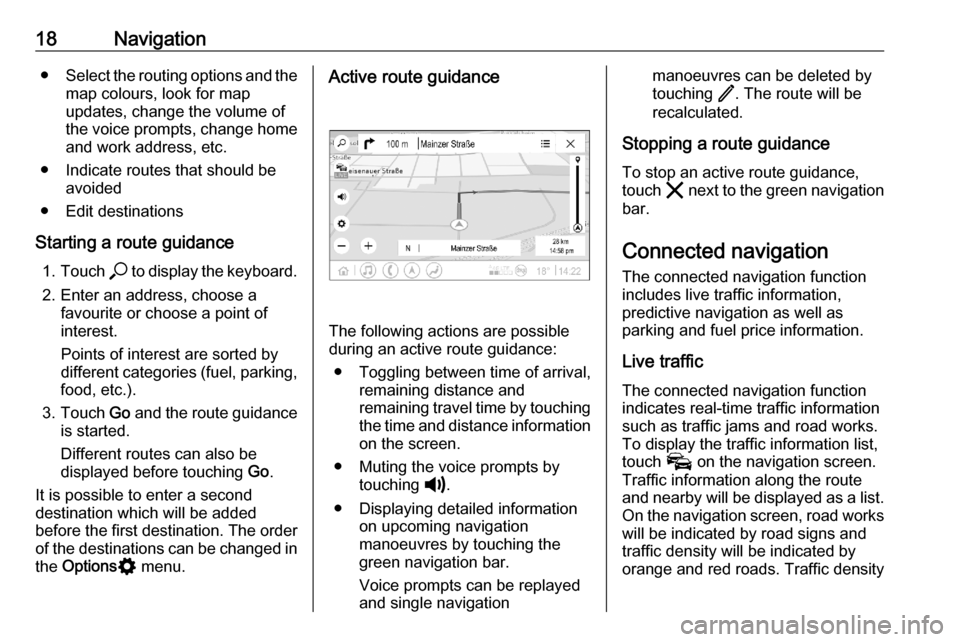
The following actions are possible
during an active route guidance:
● Toggling between time of arrival, remaining distance and
remaining travel time by touching
the time and distance information on the screen.
● Muting the voice prompts by touching ?.
● Displaying detailed information on upcoming navigation
manoeuvres by touching the
green navigation bar.
Voice prompts can be replayed
and single navigation
manoeuvres can be deleted by
touching /. The route will be
recalculated.
Stopping a route guidance To stop an active route guidance,
touch & next to the green navigation
bar.
Connected navigationThe connected navigation function
includes live traffic information,
predictive navigation as well as
parking and fuel price information.
Live traffic The connected navigation function
indicates real-time traffic information
such as traffic jams and road works.
To display the traffic information list,
touch v on the navigation screen.
Traffic information along the route and nearby will be displayed as a list.
On the navigation screen, road works
will be indicated by road signs and
traffic density will be indicated by
orange and red roads. Traffic density
Page 25 of 85
Phone25PhoneGeneral information.....................25
Bluetooth connection ...................25
Using smartphone applications ...27General information
Not every mobile phone fully supports
the phone function. Therefore,
deviations from the range of functions
described below are possible.
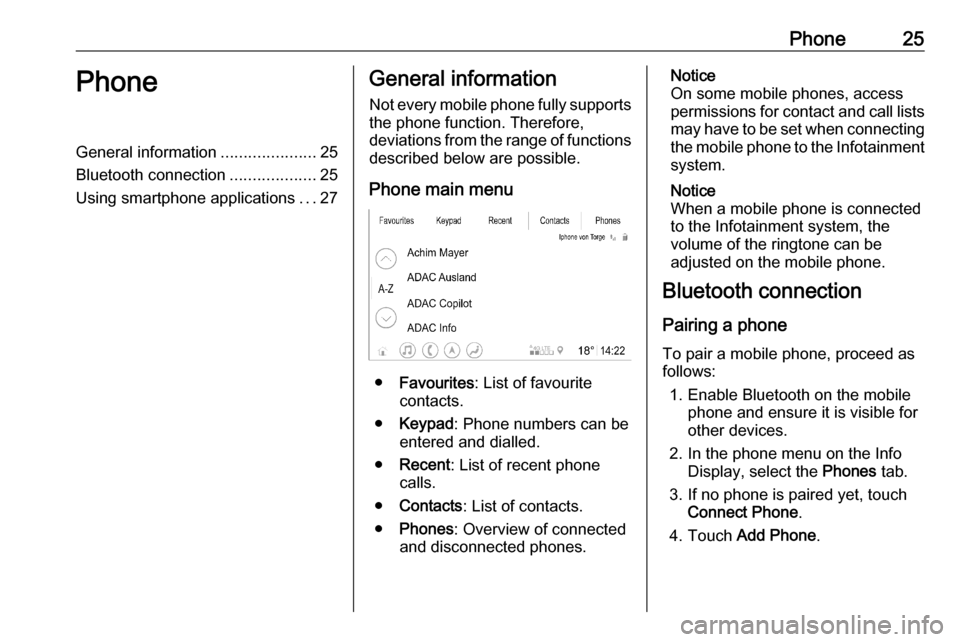
Phone main menu
● Favourites : List of favourite
contacts.
● Keypad : Phone numbers can be
entered and dialled.
● Recent : List of recent phone
calls.
● Contacts : List of contacts.
● Phones : Overview of connected
and disconnected phones.
Notice
On some mobile phones, access
permissions for contact and call lists
may have to be set when connecting the mobile phone to the Infotainment
system.
Notice
When a mobile phone is connected
to the Infotainment system, the
volume of the ringtone can be
adjusted on the mobile phone.
Bluetooth connection
Pairing a phone
To pair a mobile phone, proceed as follows:
1. Enable Bluetooth on the mobile phone and ensure it is visible for
other devices.
2. In the phone menu on the Info Display, select the Phones tab.
3. If no phone is paired yet, touch Connect Phone .
4. Touch Add Phone .
Page 64 of 85
64NavigationDestination input
The navigation application provides
different options to set a destination
for route guidance.
Destination input via map
It is possible to directly enter
destinations from the map screen.
Personal addresses on the map
Two address shortcuts (e.g. Home
and Work) to easily start route
guidance to these two places can be
predefined. The addresses can be
defined in the settings menu and be
labelled individually. Then, they can
be directly selected from the map.
To save the addresses, select % on
the map, Navigation Settings and
then Set up My Places .
Select one of the menu items ( Home
and Work by default). Use the
keyboard to enter the required data in the address field. For a detailed
description of the keyboard, see
below.To change the name of the personal
address, select c to hide the
keyboard and select one of the items in the list. Alternatively, enter a newname in the first entry field.
If necessary, tap within one of the
entry fields to redisplay the keyboard
and select Done. The location is
saved as shortcut.
To start route guidance to one of
these locations, select the ═ screen
button on the map. The two
destinations are displayed.
Select one of the screen buttons. The Routes menu is displayed.
Activate the desired route and then
select Go to start route guidance.
Destination selection via map
Scroll to the desired map section.
Touch and hold the desired location
on the screen. The map centres
around this location.
A red K is displayed at the respective
location and the corresponding
address is shown on a label.
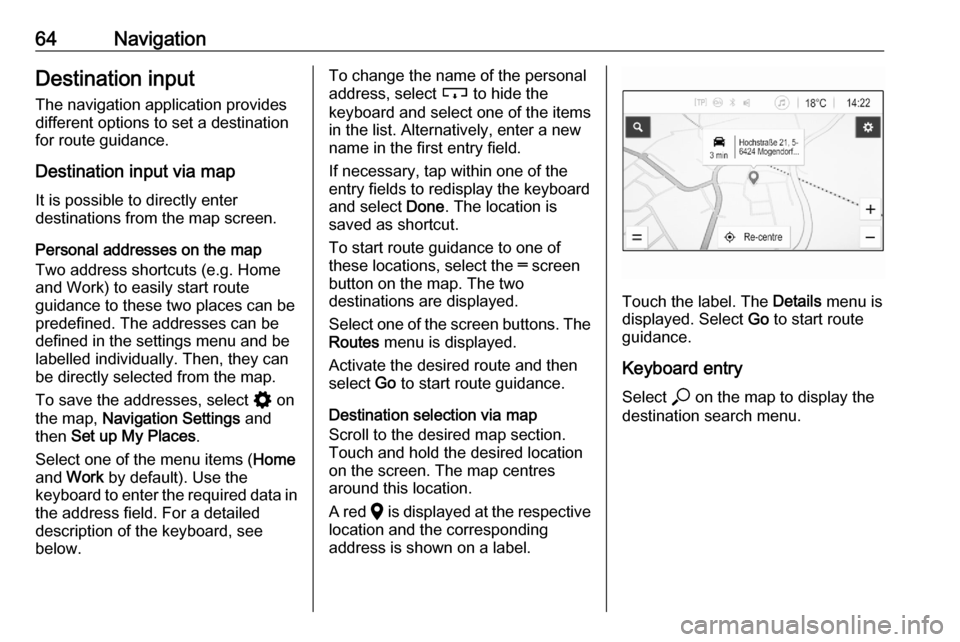
Touch the label. The Details menu is
displayed. Select Go to start route
guidance.
Keyboard entry
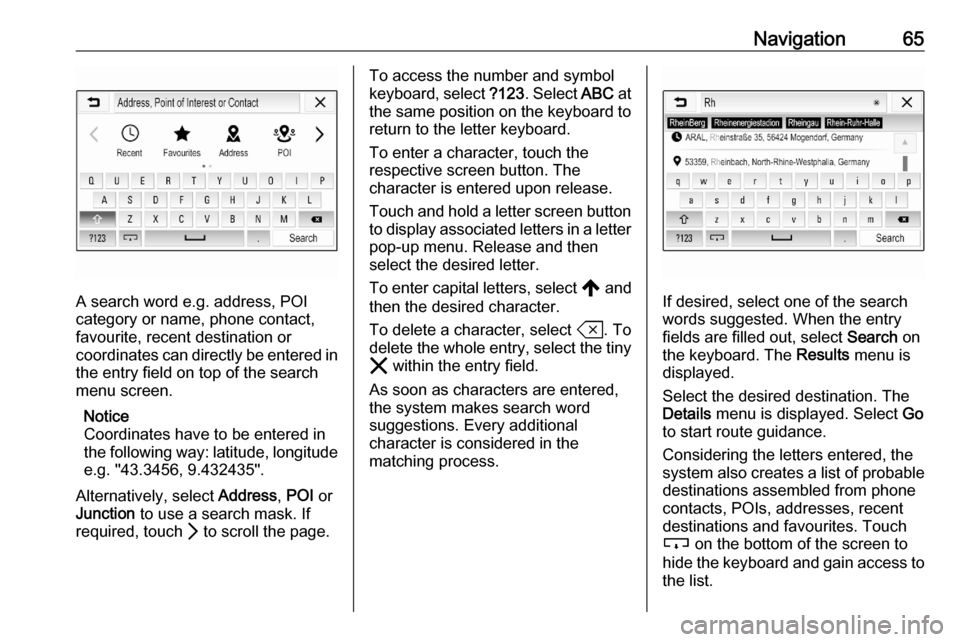
Select * on the map to display the
destination search menu.
Page 65 of 85
Navigation65
A search word e.g. address, POI
category or name, phone contact,
favourite, recent destination or
coordinates can directly be entered in
the entry field on top of the search
menu screen.
Notice
Coordinates have to be entered in the following way: latitude, longitude e.g. "43.3456, 9.432435".
Alternatively, select Address, POI or
Junction to use a search mask. If
required, touch Q to scroll the page.
To access the number and symbol
keyboard, select ?123. Select ABC at
the same position on the keyboard to
return to the letter keyboard.
To enter a character, touch the
respective screen button. The
character is entered upon release.
Touch and hold a letter screen button to display associated letters in a letter
pop-up menu. Release and then
select the desired letter.
To enter capital letters, select , and
then the desired character.
To delete a character, select T. To
delete the whole entry, select the tiny
& within the entry field.
As soon as characters are entered,
the system makes search word
suggestions. Every additional
character is considered in the
matching process.
If desired, select one of the search words suggested. When the entry
fields are filled out, select Search on
the keyboard. The Results menu is
displayed.
Select the desired destination. The
Details menu is displayed. Select Go
to start route guidance.
Considering the letters entered, the
system also creates a list of probable
destinations assembled from phone
contacts, POIs, addresses, recent
destinations and favourites. Touch
c on the bottom of the screen to
hide the keyboard and gain access to the list.
Page 66 of 85

66NavigationTo redisplay the keyboard, tap within
the entry field.
If desired, select a destination from
the list. The Details menu is
displayed. Select Go to start route
guidance.
Lists with selectable destinations
To access the lists, select * on the
map and, if required, touch Q to scroll
the page.
Select one of the options:
● Recent : list of destinations
recently used
● Favourites : list of destinations
stored as favourites
● Contacts : list of addresses stored
in the phone book of the mobile
phone currently connected via
Bluetooth
To choose a destination from one of
the lists, scroll through the respective
list and select the desired destination. The Details menu is displayed. Select
Go to start route guidance.Recent destinations
The recent destinations list is
automatically filled with destinations
used in route guidance.
The addresses in the recent
destinations list can be stored as
favourites. Enter the recent
destinations list, select n next to the
desired address to display additional
function buttons and then select ;. If
the icon is filled, the address is saved
in the favourites list.
Addresses can be deleted from the
recent destinations list. Enter the
recent destinations list, select n next
to the desired address and then
select f to delete the respective
address.
Favourites
Favourites can be added when a ;
icon is displayed next to an address.
When the star icon is filled, the
respective address is stored as a
favourite.The position of a favourite in the list can be changed. Enter the favouriteslist, select n next to the desired
favourite to display additional function buttons and then select S or R.
The name of a favourite can be
changed. Enter the favourites list,
select n next to the desired favourite
to display additional function buttons
and then select >. A keyboard is
displayed. Enter the desired name
and then select Done.
Favourites can be deleted. Enter the
favourites list, select n next to the
desired favourite to display additional
function buttons and then select ;.
The favourite is deactivated (unfilled
star). If the icon is selected again, the favourite is reactivated (filled star).
When leaving the favourites list while
favourites are deactivated, they are
deleted from the list.
Contacts
The keyboard can be used to search
for addresses within the list. Enter the first letters of the desired word (name
Page 67 of 85
Navigation67or address) and all entries containing
a word starting with these letters are
displayed.
For a detailed description of the
keyboard, see above.
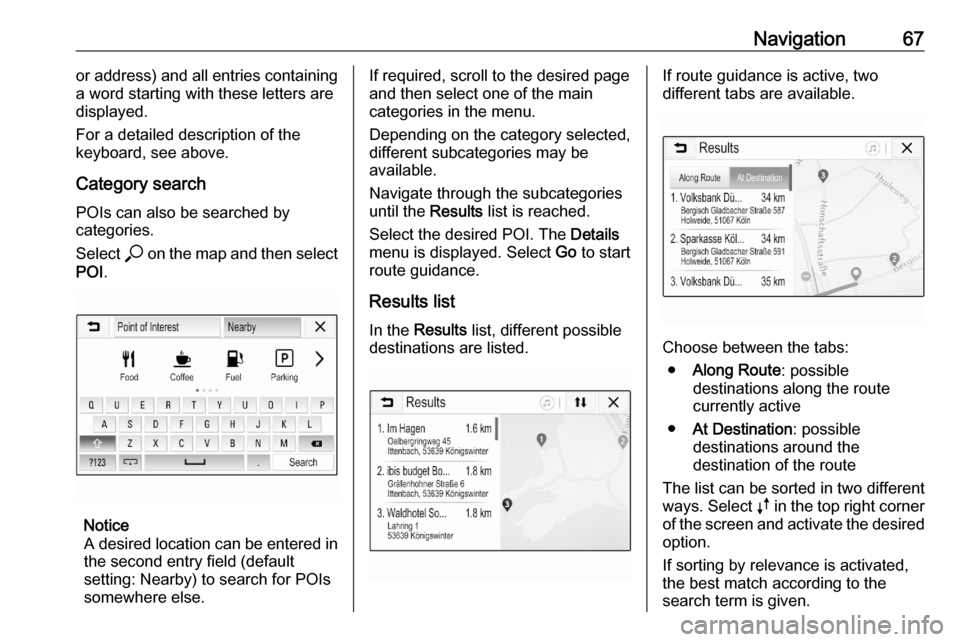
Category search POIs can also be searched by
categories.
Select * on the map and then select
POI .
Notice
A desired location can be entered in
the second entry field (default
setting: Nearby) to search for POIs
somewhere else.
If required, scroll to the desired page
and then select one of the main
categories in the menu.
Depending on the category selected,
different subcategories may be
available.
Navigate through the subcategories until the Results list is reached.
Select the desired POI. The Details
menu is displayed. Select Go to start
route guidance.
Results list In the Results list, different possible
destinations are listed.If route guidance is active, two
different tabs are available.
Choose between the tabs:
● Along Route : possible
destinations along the route
currently active
● At Destination : possible
destinations around the
destination of the route
The list can be sorted in two different
ways. Select k in the top right corner
of the screen and activate the desired
option.
If sorting by relevance is activated,
the best match according to the
search term is given.
Page 75 of 85
Phone75
Notice
If no phone is connected, the Device
Management menu can also be
accessed via the phone menu:
Press ! and then select Phone.
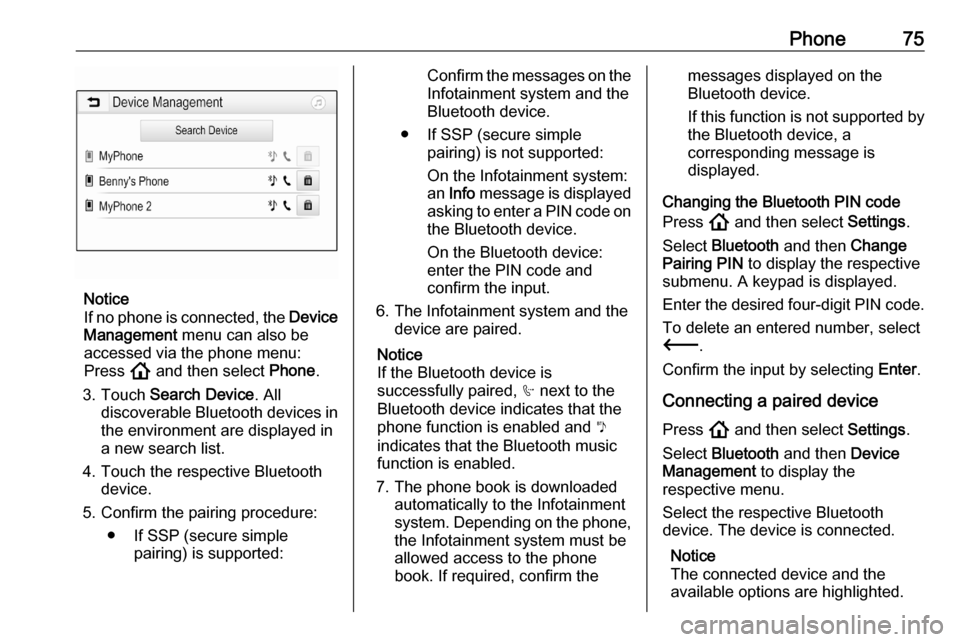
3. Touch Search Device . All
discoverable Bluetooth devices in
the environment are displayed in a new search list.
4. Touch the respective Bluetooth device.
5. Confirm the pairing procedure: ● If SSP (secure simple pairing) is supported:
Confirm the messages on the
Infotainment system and the
Bluetooth device.
● If SSP (secure simple pairing) is not supported:
On the Infotainment system: an Info message is displayed
asking to enter a PIN code on the Bluetooth device.
On the Bluetooth device:
enter the PIN code and
confirm the input.
6. The Infotainment system and the device are paired.
Notice
If the Bluetooth device is
successfully paired, h next to the
Bluetooth device indicates that the
phone function is enabled and y
indicates that the Bluetooth music
function is enabled.
7. The phone book is downloaded automatically to the Infotainment
system. Depending on the phone,
the Infotainment system must be allowed access to the phone
book. If required, confirm themessages displayed on the
Bluetooth device.
If this function is not supported by the Bluetooth device, a
corresponding message is
displayed.
Changing the Bluetooth PIN code
Press ! and then select Settings.
Select Bluetooth and then Change
Pairing PIN to display the respective
submenu. A keypad is displayed.
Enter the desired four-digit PIN code.
To delete an entered number, select
3 .
Confirm the input by selecting Enter.
Connecting a paired device Press ! and then select Settings.
Select Bluetooth and then Device
Management to display the
respective menu.
Select the respective Bluetooth
device. The device is connected.
Notice
The connected device and the
available options are highlighted.
Page 77 of 85
Phone77Many functions of the mobile phone
can now be controlled via the phone
main menu (and associated
submenus), and via the phone-
specific controls on the steering
wheel.
Initiating a phone call
Entering a phone number
Press ! and then select Phone.
Enter a telephone number using the
keypad in the phone main menu.
To delete one or more entered
characters, touch or touch and hold
⇦.
Touch w on the screen or press Y on
the steering wheel to start dialling.
Using the phone book Notice
When pairing a mobile phone with
the Infotainment system via
Bluetooth, the phone book of the
mobile phone is downloaded
automatically 3 74.
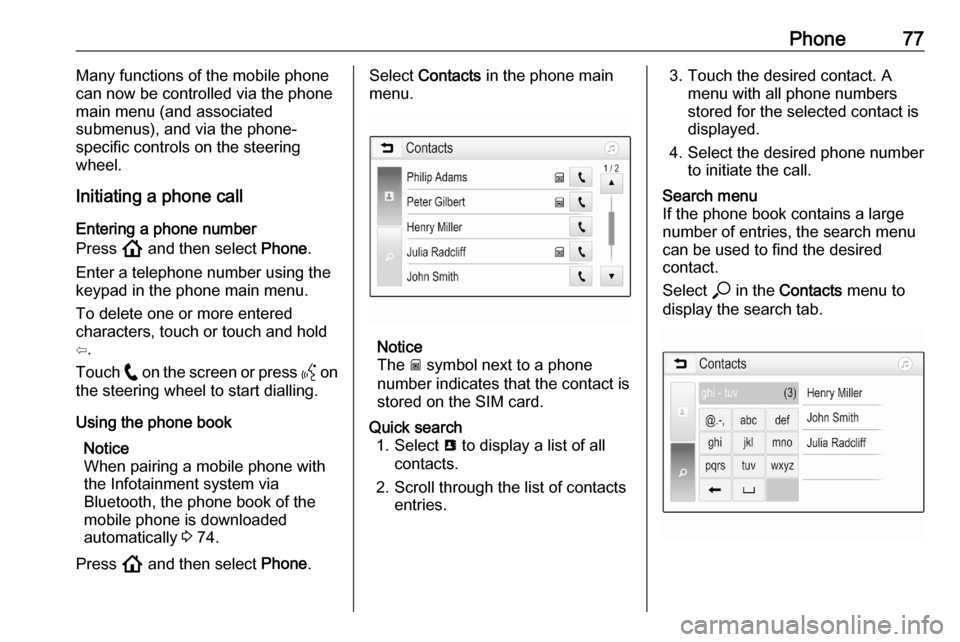
Press ! and then select Phone.Select Contacts in the phone main
menu.
Notice
The g symbol next to a phone
number indicates that the contact is stored on the SIM card.
Quick search 1. Select u to display a list of all
contacts.
2. Scroll through the list of contacts entries.3. Touch the desired contact. Amenu with all phone numbers
stored for the selected contact is
displayed.
4. Select the desired phone number to initiate the call.Search menu
If the phone book contains a large
number of entries, the search menu
can be used to find the desired
contact.
Select * in the Contacts menu to
display the search tab.