Screen VAUXHALL ASTRA K 2020 User Guide
[x] Cancel search | Manufacturer: VAUXHALL, Model Year: 2020, Model line: ASTRA K, Model: VAUXHALL ASTRA K 2020Pages: 303, PDF Size: 27.35 MB
Page 97 of 303

Instruments and controls95Windscreen washer
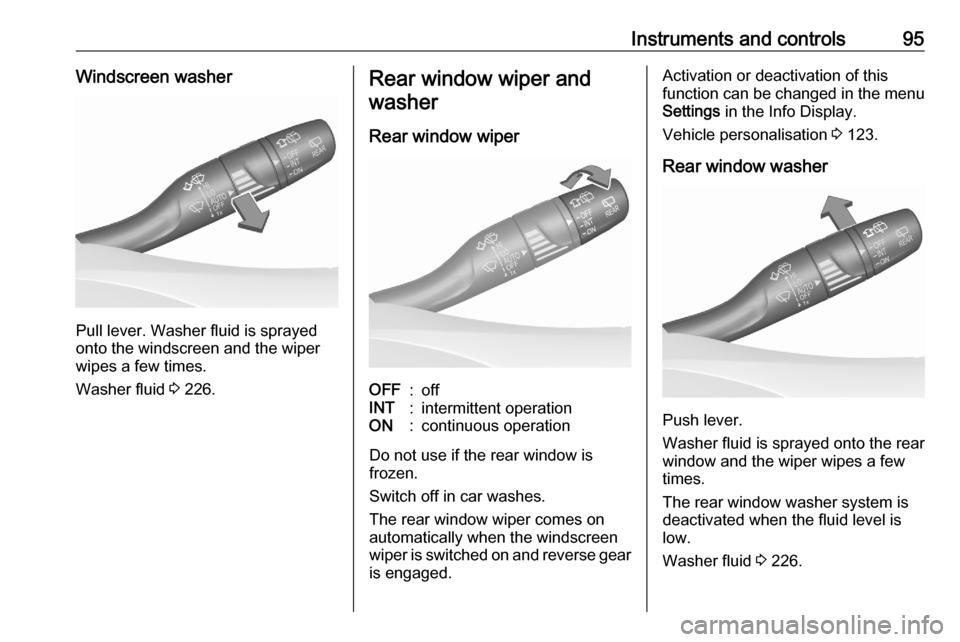
Pull lever. Washer fluid is sprayed
onto the windscreen and the wiper
wipes a few times.
Washer fluid 3 226.
Rear window wiper and
washer
Rear window wiperOFF:offINT:intermittent operationON:continuous operation
Do not use if the rear window is
frozen.
Switch off in car washes.
The rear window wiper comes on
automatically when the windscreen
wiper is switched on and reverse gear
is engaged.
Activation or deactivation of this
function can be changed in the menu Settings in the Info Display.
Vehicle personalisation 3 123.
Rear window washer
Push lever.
Washer fluid is sprayed onto the rear
window and the wiper wipes a few
times.
The rear window washer system is
deactivated when the fluid level is
low.
Washer fluid 3 226.
Page 98 of 303

96Instruments and controlsOutside temperatureA drop in temperature is indicated
immediately and a rise in temperature
after a time delay.
Illustration shows an example.
If outside temperature drops to 3 °C,
a warning message is displayed in the Driver Information Centre.
9 Warning
The road surface may already be
icy even though the display
indicates a few degrees above 0
°C.
Clock
Date and time are shown in the
Info Display.
Info Display 3 120.
Graphic Info Display
Press MENU to open the respective
audio menu.
Select Time and Date .
Set Time
Select Set Time to enter the
respective submenu.
Select Auto Set at the bottom of the
screen. Activate either On - RDS or
Off (Manual) .
If Off (Manual) is selected, adjust
hours and minutes.
Repeatedly select 12-24 HR at the
bottom of the screen to choose a time mode.
If the 12-hour mode is selected, a
third column for AM and PM selection
is displayed. Select the desired
option.
Page 99 of 303

Instruments and controls97Set Date
Select Set Date to enter the
respective submenu.
Select Auto Set at the bottom of the
screen. Activate either On - RDS or
Off (Manual) .
If Off (Manual) is selected, adjust the
date settings.
7'' Colour Info Display Press ; and then select Settings.
Select Time and Date to display the
respective submenu.Set Time Format
To select the desired time format,
touch the screen buttons 12 h or 24 h .
Set Date Format
To select the desired date format,
select Set Date Format and choose
between the available options in the
submenu.
Auto Set
To choose whether time and date are
to be set automatically or manually,
select Auto Set .
For time and date to be set
automatically, select On - RDS.
For time and date to be set manually, select Off - Manual . If Auto Set is set
to Off - Manual , the submenu items
Set Time and Set Date become
available.
Set time and date
To adjust the time and date settings, select Set Time or Set Date .
Touch + and - to adjust the settings.8'' Colour Info Display
Press ; and then select the
Settings icon.
Select Time and Date .
Set time
Select Set Time to enter the
respective submenu.
Select Auto Set at the bottom of the
screen. Activate either On - RDS or
Off - Manual .
If Off - Manual is selected, adjust
hours and minutes by touching n or
o .
Page 100 of 303

98Instruments and controlsTouch 12-24 Hr on the right side of the
screen to select a time mode.
If 12-hour mode is selected, a third
column for AM and PM setting is
displayed. Select the desired option.
Set date
Select Set Date to enter the
respective submenu.
Notice
If date information is automatically
provided, this menu item is not
available.
Select Auto Set at the bottom of the
screen. Activate either On - RDS or
Off - Manual .
If Off - Manual is selected, adjust the
date by touching n or o.
Clock display
Select Clock Display to enter the
respective submenu.
To turn off the digital clock display in
the menus, select Off.Power outlets
A 12 V power outlet is located in the
centre console. With ignition off, this
power outlet is deactivated.
Do not exceed the maximum power
consumption of 120 W.
Electrical accessories that are
connected must comply with the
electromagnetic compatibility
requirements laid down in
DIN VDE 40 839.
Do not connect any current-delivering
accessories, e.g. electrical charging
devices or batteries.
Do not damage the outlets by using
unsuitable plugs.
Stop-start system 3 156.
USB port
Depending on the infotainment
system, one or two USB ports for
charging devices are located in
between the front seats. These ports
have also a data connection to the
Infotainment system. For further
information, see Infotainment
manual.
Page 122 of 303

120Instruments and controlsInfo DisplayThe Info Display is located in the
instrument panel near the instrument
cluster.
Depending on the vehicle
configuration, the vehicle has one of
the following Infotainment systems:
● Multimedia
or
● Multimedia Navi
or
● Multimedia Navi Pro
The Info Display can indicate: ● time 3 96
● outside temperature 3 96
● date 3 96
● Infotainment system, see description in the Infotainment
manual
● climate control settings 3 142
● rear view camera 3 203
● parking assist instructions 3 194
● navigation, see description in the
Infotainment manual● system messages
● settings for vehicle personalisation 3 123
Multimedia Navi Selecting menus and settings
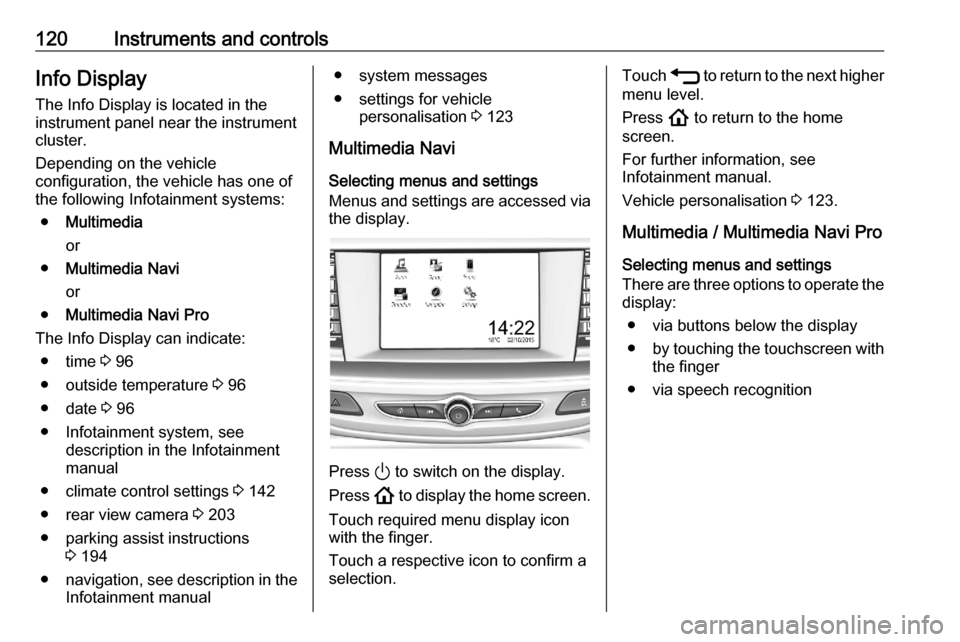
Menus and settings are accessed via
the display.
Press ) to switch on the display.
Press ! to display the home screen.
Touch required menu display icon
with the finger.
Touch a respective icon to confirm a
selection.
Touch 1 to return to the next higher
menu level.
Press ! to return to the home
screen.
For further information, see
Infotainment manual.
Vehicle personalisation 3 123.
Multimedia / Multimedia Navi Pro
Selecting menus and settings
There are three options to operate the display:
● via buttons below the display
● by touching the touchscreen with
the finger
● via speech recognition
Page 123 of 303

Instruments and controls121Button operation
Press ) to switch on the display.
Press ! to display the home screen.
Press BACK to exit a menu without
changing a setting.
For further information, see
Infotainment manual.
Touchscreen operation
Display must be switched on by
pressing ). Touch ! to select the
home screen.
Touch required menu display icon or
select a function with the finger.
Scroll a longer submenu list with the
finger up or down.Confirm a required function or
selection by touching.
Touch O to exit a menu with saving of
the changed setting.
Touch icon & to leave a menu
without saving.
Touch ! to return to the home
screen.
For further information, see
Infotainment manual.Speech recognition
Description see Infotainment manual.
Vehicle personalisation 3 123.
Vehicle messages
Messages are indicated in the Driver
Information Centre, in some cases
together with a warning chime.
On Midlevel display press SET/CLR
on the indicator lever to confirm a
message.
Page 125 of 303

Instruments and controls1231. Switch off any electricalconsumers which are not requiredfor a safe drive, e.g. seat heating,
heated rear window or other main consumers.
2. Charge the vehicle battery by driving continuously for a while or
by using a charging device.
The warning message will disappear after the engine has been started
twice without a voltage drop.
If the vehicle battery cannot be
recharged, have the cause of the fault remedied by a workshop.Vehicle personalisation
The vehicle's behaviour can be
personalised by changing the settings in the Info Display.
Some of the personal settings for
different drivers can be memorised
individually for each vehicle key.
Memorised settings 3 24.
Depending on vehicle equipment and
country-specific regulations some of
the functions described below may
not be available.
Some functions are only displayed or
active when the engine is running.
Personal settings Multimedia Navi
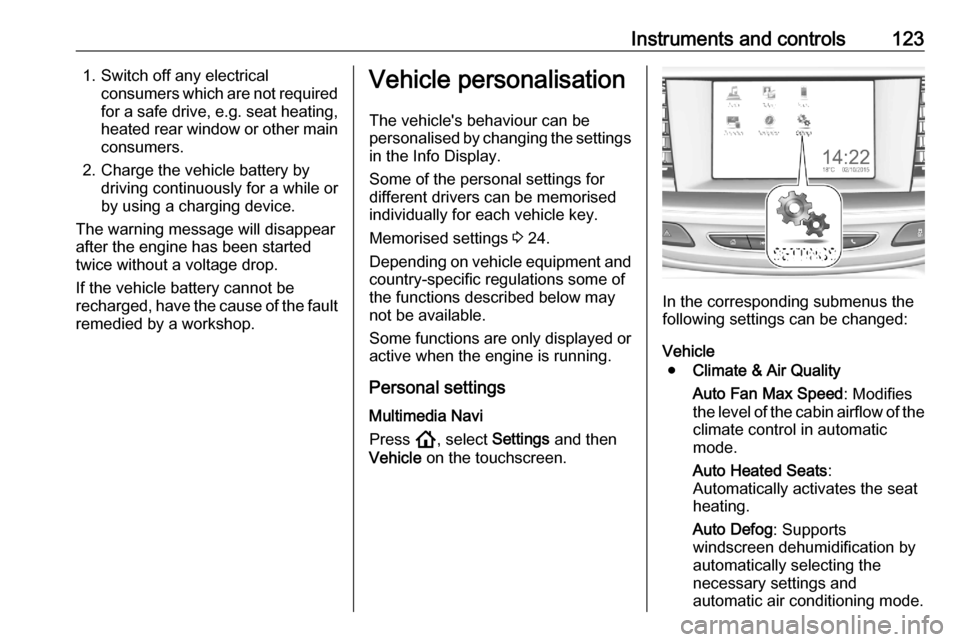
Press !, select Settings and then
Vehicle on the touchscreen.
In the corresponding submenus the
following settings can be changed:
Vehicle ● Climate & Air Quality
Auto Fan Max Speed : Modifies
the level of the cabin airflow of the climate control in automatic
mode.
Auto Heated Seats :
Automatically activates the seat
heating.
Auto Defog : Supports
windscreen dehumidification by
automatically selecting the
necessary settings and
automatic air conditioning mode.
Page 128 of 303

126Instruments and controlsSystem
To change Time/Date, see Clock
3 96.
Select Language to open a list of
available languages for the Info
Display and Driver Information
Center. Select desired language.
Apps
See Infotainment manual.
Vehicle ● Climate and Air Quality
Auto Fan Speed : Modifies the
level of the cabin airflow of the
climate control in automatic
mode.
Auto heated seats : Automatically
activates the seat heating.
Auto Demist : Supports
windscreen dehumidification by
automatically selecting the
necessary settings and
automatic air conditioning mode.
Auto Rear Demist : Automatically
activates heated rear window.● Collision/Detection Systems
Forward Collision System :
Deactivates the system
completely, activates warning
chimes only or warning chimes in combination with automatic
brake functionality.
Front Pedestrian Detection :
Activates warning chimes only or warning chimes in combination
with automatic brake functionality
or deactivates the system
completely.
Adaptive Cruise Go Notifier :
Activates or deactivates the
reminder message to drive off
when the adaptive cruise control
holds the vehicle at standstill.
Lane Change Alert : Activates or
deactivates side blind zone alert.
Park Assist : Activates or
deactivates the parking assist.
Activation is selectable with or
without attached trailer coupling.
Rear Cross Traffic Alert :
Activates or deactivates rear cross traffic alert.● Comfort and Convenience
Auto Memory Recall : Changes
the settings to the recall of
memorised settings for power
seat adjustment.
Easy Exit Driver's Seat : Activates
or deactivates easy exit function
of the power seat.
Chime Volume : Changes the
volume of warning chimes.
Handsfree Liftgate/Boot Lid
Control : Changes the hands-free
function settings of the power
tailgate.
Reverse Tilt Mirror : Changes the
parking assist function of the exterior mirrors.
Auto Mirror Folding : Activates or
deactivates folding of the exterior
mirrors with the remote control.
Personalisation by Driver :
Activates or deactivates the
personalisation function,
depending on which key is being
used.
Rain Sense Wipers : Activates or
deactivates automatic wiping with rain sensor.
Page 132 of 303

130LightingTail lightsTail lights are illuminated together
with low/high beam and sidelights.
Automatic light control
When the automatic light control
function is switched on and the
engine is running, the system
switches between daytime running
lights and headlights automatically
depending on the external lighting
conditions and information given by
the rain sensor system.
Daytime running light 3 133.
Automatic headlight activation
During poor lighting conditions
headlights are switched on.
Additionally, headlights are switched
on if the windscreen wipers have
been activated for several wipes.
LED headlights 3 133.
Tunnel detection
When a tunnel is entered headlights
are switched on immediately.
High beam assist
The camera in the windscreen
detects the lights of oncoming or
preceding vehicles. Once activated,
high beam assist remains active and switches high beam on and off
automatically. The latest setting of the high beam assist will remain after theignition is switched on again.
It switches automatically to low beam
when:
● Driving in urban areas.
● It is foggy or snowy.
● Fog lights are switched on.If there are no restrictions detected, the system switches back to high
beam.
This feature allows the high beam to
function as main driving light at night.
Each LED on right or left side is
triggered or faded out particularly according to the traffic situation. This
gives the best light distribution
without dazzling other road users.
High beam is switched on
automatically at a speed above
31 mph . High beam is switched off at
a speed below 22 mph, but high beam
assist remains active.
Page 143 of 303

Climate control141Press A/C again to switch off cooling.
The air conditioning system cools and
dehumidifies (dries) as soon as the
outside temperature is slightly above
the freezing point. Therefore
condensation may form and drip from
under the vehicle.
If no cooling or drying is required,
switch off the cooling system for fuel
saving reasons.
Activated cooling may inhibit
Autostops.
Stop-start system 3 156.
Air recirculation system nPress n to activate air recirculation
mode, LED is indicated.
Press n again to deactivate air
recirculation mode.9 Warning
The exchange of fresh air is
reduced in air recirculation mode.
In operation without cooling the air humidity increases, so the
windows may mist up from inside.
The quality of the passenger
compartment air deteriorates,
which may cause the vehicle
occupants to feel drowsy.
In warm and very humid ambient air conditions, the windscreen may mist
up from outside when cold air is
directed towards it. If windscreen
mists up from outside, activate
windscreen wiper and deactivate l.
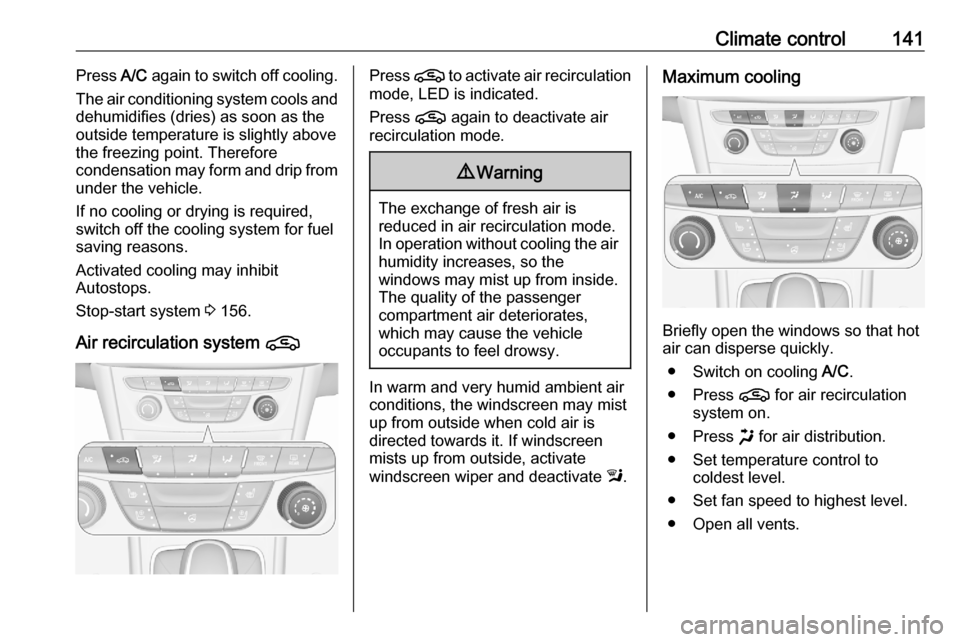
Maximum cooling
Briefly open the windows so that hot
air can disperse quickly.
● Switch on cooling A/C.
● Press n for air recirculation
system on.
● Press x for air distribution.
● Set temperature control to coldest level.
● Set fan speed to highest level.
● Open all vents.