VAUXHALL ASTRA K 2020 Manual Online
Manufacturer: VAUXHALL, Model Year: 2020, Model line: ASTRA K, Model: VAUXHALL ASTRA K 2020Pages: 303, PDF Size: 27.35 MB
Page 81 of 303
Storage79
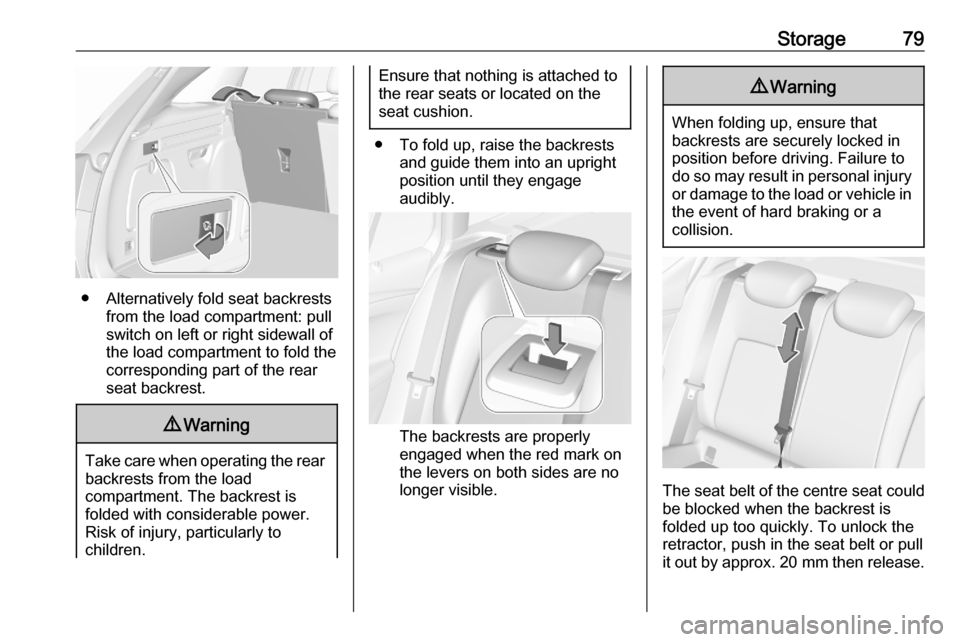
● Alternatively fold seat backrestsfrom the load compartment: pullswitch on left or right sidewall of
the load compartment to fold the
corresponding part of the rear
seat backrest.
9 Warning
Take care when operating the rear
backrests from the load
compartment. The backrest is
folded with considerable power.
Risk of injury, particularly to
children.
Ensure that nothing is attached to
the rear seats or located on the
seat cushion.
● To fold up, raise the backrests and guide them into an upright
position until they engage
audibly.
The backrests are properly
engaged when the red mark on
the levers on both sides are no longer visible.
9 Warning
When folding up, ensure that
backrests are securely locked in
position before driving. Failure to
do so may result in personal injury or damage to the load or vehicle in the event of hard braking or a
collision.
The seat belt of the centre seat could
be blocked when the backrest is
folded up too quickly. To unlock the
retractor, push in the seat belt or pull
it out by approx. 20 mm then release.
Page 82 of 303

80StorageLoad compartment cover
Do not place any objects on the cover.
5-door hatchback
Removing cover
Unhook retaining straps from tailgate.
Lift cover at the rear.
Remove the cover.
Fitting cover
Engage cover in side guides and fold
downwards. Attach retaining straps to tailgate.
Sports Tourer
Closing roller blind
Pull the roller blind using the handle
towards the rear and upwards until it
engages in the sideward retainers.
Opening roller blind
Pull the roller blind handle to the rear
and downwards. It rolls up
automatically.
Page 83 of 303
Storage81Removing roller blind
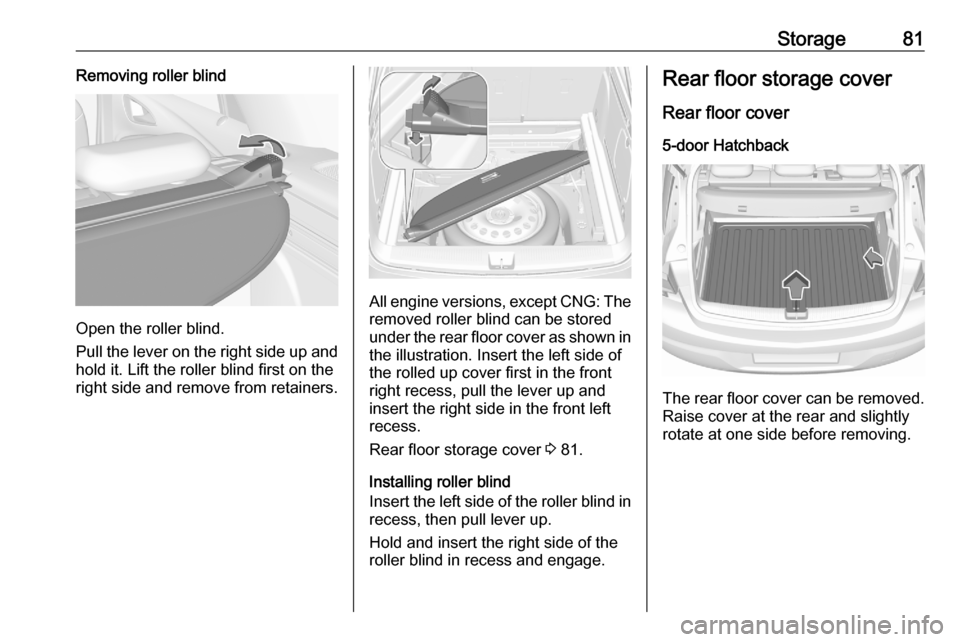
Open the roller blind.
Pull the lever on the right side up and hold it. Lift the roller blind first on the
right side and remove from retainers.
All engine versions, except CNG: The
removed roller blind can be stored
under the rear floor cover as shown in the illustration. Insert the left side ofthe rolled up cover first in the front
right recess, pull the lever up and
insert the right side in the front left
recess.
Rear floor storage cover 3 81.
Installing roller blind
Insert the left side of the roller blind in
recess, then pull lever up.
Hold and insert the right side of the
roller blind in recess and engage.
Rear floor storage cover
Rear floor cover 5-door Hatchback
The rear floor cover can be removed.
Raise cover at the rear and slightly
rotate at one side before removing.
Page 84 of 303
82StorageSports Tourer
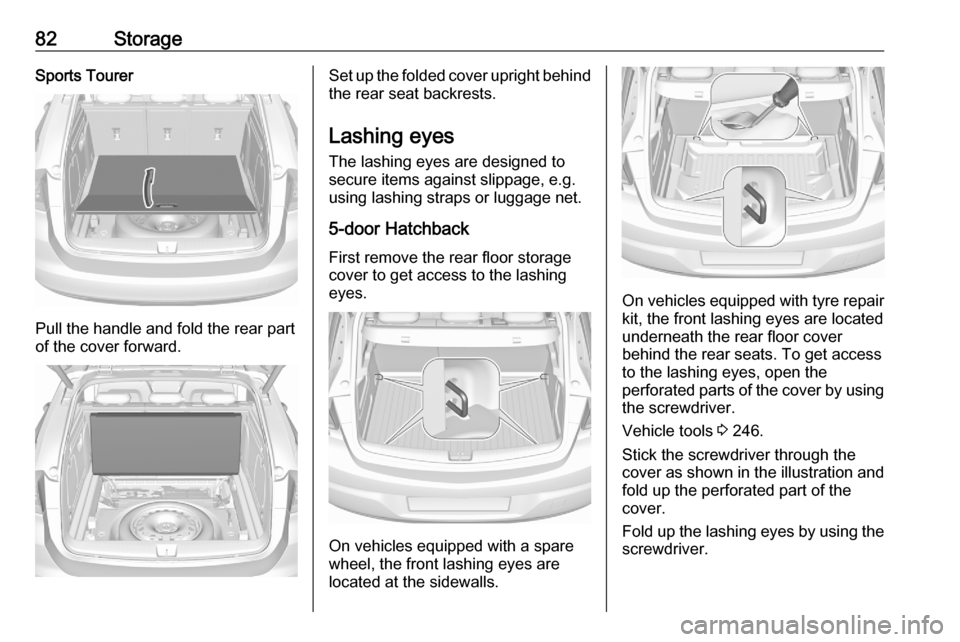
Pull the handle and fold the rear part
of the cover forward.
Set up the folded cover upright behind the rear seat backrests.
Lashing eyes
The lashing eyes are designed to
secure items against slippage, e.g.
using lashing straps or luggage net.
5-door Hatchback
First remove the rear floor storage cover to get access to the lashing
eyes.
On vehicles equipped with a spare
wheel, the front lashing eyes are
located at the sidewalls.
On vehicles equipped with tyre repair
kit, the front lashing eyes are located
underneath the rear floor cover
behind the rear seats. To get access
to the lashing eyes, open the
perforated parts of the cover by using
the screwdriver.
Vehicle tools 3 246.
Stick the screwdriver through the
cover as shown in the illustration and
fold up the perforated part of the
cover.
Fold up the lashing eyes by using the screwdriver.
Page 85 of 303

Storage83Sports Tourer
Front and rear lashing eyes are
located at the sidewalls. Fold up the
lashing eyes to use and fold down
when not required.
Cargo management system The FlexOrganizer is a flexible
system for dividing up the load
compartment.
The system consists of: ● adapters
● mesh pockets
● hooks
● service box
● strap set
The components are fitted in rails on
both side panels using adapters and hooks.
Installation of adapters in the rails
Fold open the handle plate, insert the adapter into the upper and lower
groove of the rail and move to the
required position. Turn the handle
plate upwards to lock the adapter. To
remove, turn the handle plate down
and move out of the rail.
Variable partition net
Insert adapters into the required
position in the rails. Stick together the
halves of the net rods.
To install, push rods together a little
and insert into the relevant openings
in the adapters.
To remove, press the net rods
together and remove from the
adapters.
Page 86 of 303

84StorageNet pocket
Insert adapters into the required
position in the rails. The net pocket
can be suspended from the adapters.
Installation of hooks in the rails
Insert the hook in the desired position first in the upper groove of the rail and
then press in the lower groove. To
remove, first pull out of the upper
groove.
Service box
Install two hooks in the upper rail.
Insert the upper brackets of the box
from above into the hooks.
Page 87 of 303
Storage85Alternatively install both hooks in the
lower rail. Plug in the lower brackets
of the box from above into the lower
hooks.
Strap set
Insert the adapters of the strap set in
a rail. Make sure that the belt is not
twisted.
The strap set has two locks to open. The belt can be tightened.
Safety net
The safety net is available on the
Sports Tourer and can be installed
behind the rear seats or, if the rear
seat backrests are folded, behind the
front seats.
Passengers must not be transported
behind the safety net.
Installation
Behind the rear seats
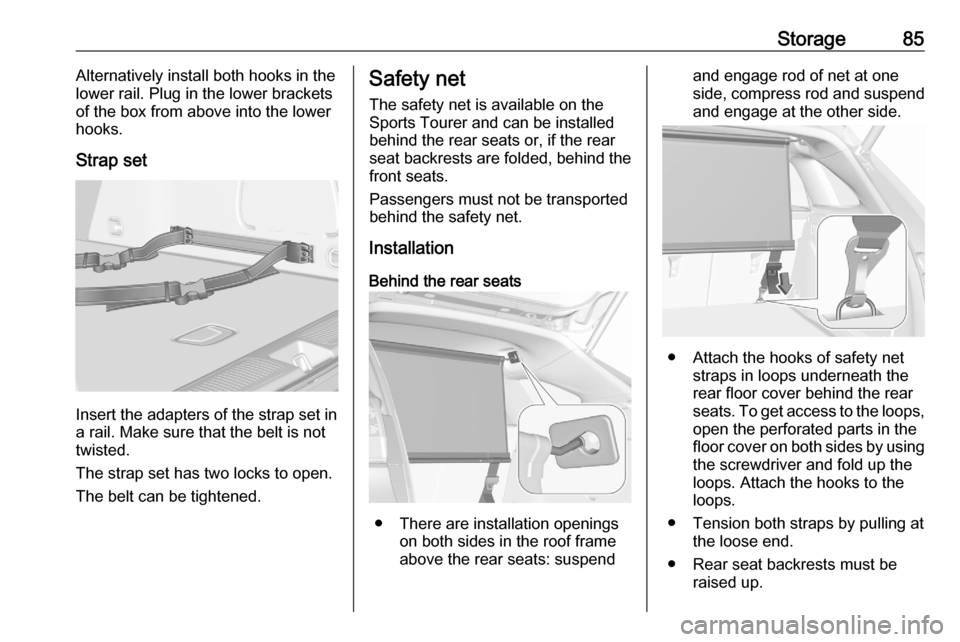
● There are installation openings on both sides in the roof frame
above the rear seats: suspend
and engage rod of net at one side, compress rod and suspendand engage at the other side.
● Attach the hooks of safety net straps in loops underneath the
rear floor cover behind the rear
seats. To get access to the loops, open the perforated parts in the
floor cover on both sides by using
the screwdriver and fold up the
loops. Attach the hooks to the
loops.
● Tension both straps by pulling at the loose end.
● Rear seat backrests must be raised up.
Page 88 of 303
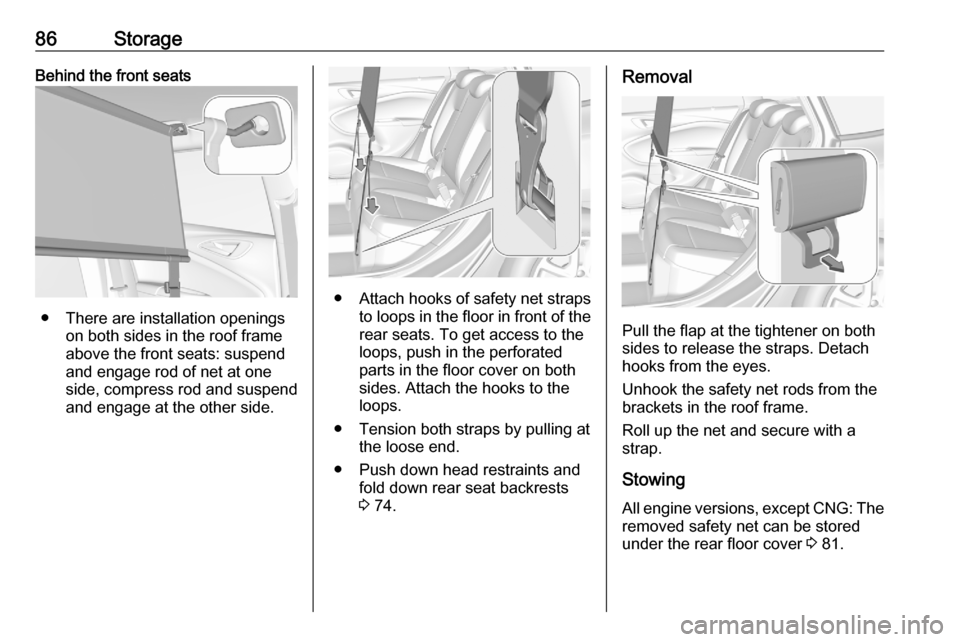
86StorageBehind the front seats
● There are installation openingson both sides in the roof frame
above the front seats: suspend
and engage rod of net at one
side, compress rod and suspend and engage at the other side.
● Attach hooks of safety net straps
to loops in the floor in front of the rear seats. To get access to the
loops, push in the perforated parts in the floor cover on both
sides. Attach the hooks to the
loops.
● Tension both straps by pulling at the loose end.
● Push down head restraints and fold down rear seat backrests
3 74.
Removal
Pull the flap at the tightener on both
sides to release the straps. Detach
hooks from the eyes.
Unhook the safety net rods from the
brackets in the roof frame.
Roll up the net and secure with a
strap.
Stowing All engine versions, except CNG: The
removed safety net can be stored
under the rear floor cover 3 81.
Page 89 of 303

Storage87Warning triangle
5-door hatchback
Stow the warning triangle in the
recess at the rear of the load
compartment.
Sports Tourer
Stow the warning triangle in the
recess under the rear floor cover on
the right or left side.
First aid kit Stow the first aid kit in the
compartment in the left side wall.
Illustration shows 5-door Hatchback.
To open the compartment, disengage cover and open.
Illustration shows Sports Tourer.
Page 90 of 303

88StorageTo open the cover turn knob.Roof rack systemRoof rack
For safety reasons and to avoid
damage to the roof, the vehicle
approved roof rack system is
recommended. For further
information contact your workshop.
Mounting roof rack
5-door Hatchback, Sports Tourer
Open all doors.
Mounting points are located in each
door frame of the vehicle body.
Fasten the roof rack according to the installation instructions delivered with the roof rack.
Remove the roof rack when not in use.9 Warning
Sports Tourer
Roof railings are a styling element only and not designed to carry any load. Installation of roof racks or
other accessory is not permitted.
Use the designated mounting
points in the door frames
exclusively.