buttons VAUXHALL ASTRA K 2020 Owner's Manual
[x] Cancel search | Manufacturer: VAUXHALL, Model Year: 2020, Model line: ASTRA K, Model: VAUXHALL ASTRA K 2020Pages: 303, PDF Size: 27.35 MB
Page 13 of 303

In brief111Power windows .....................42
2 Exterior mirrors .....................39
3 Central locking system ..........24
4 Side air vents ...................... 148
5 Cruise control .....................175
Speed limiter ....................... 177
Adaptive cruise control .......178
Forward collision alert .........186
6 Turn lights, headlight
flash, low / high beam,
high beam assist .................135
Exit lighting ......................... 138
Parking lights ...................... 136
Buttons for Driver
Information Centre ..............114
7 Instruments ........................ 103
Driver Information Centre .... 114
8 Buttons for Driver
Information Centre ..............114
9 Windscreen wiper and
washer, rear wiper and
washer ................................. 93
10 Centre air vents ................... 14811Info Display ......................... 120
12 Anti-theft alarm system
status LED ........................... 36
13 Hazard warning flashers ....134
14 Glovebox .............................. 72
15 Controls for Info Display
operation ............................. 120
16 Climate control system ........ 140
17 Fuse box ............................ 243
18 Traction Control system .....172
Electronic Stability Control . 173
Parking assist / Advanced
parking assist .....................194
Lane keep assist ................209
Eco button for stop-start
system ................................. 156
19 Manual transmission ..........169
Automatic transmission ......165
20 Power outlet .......................... 98
21 Parking brake ......................170
22 Power button ....................... 152
23 Ignition switch .....................151
24 Steering wheel adjustment ..92
25 Horn ..................................... 9326Bonnet release lever ..........223
27 Storage compartment ...........73
28 Light switch ........................ 129
Headlight range
adjustment ......................... 132
Front / rear fog lights ..........135
Instrument illumination .......136
Page 23 of 303
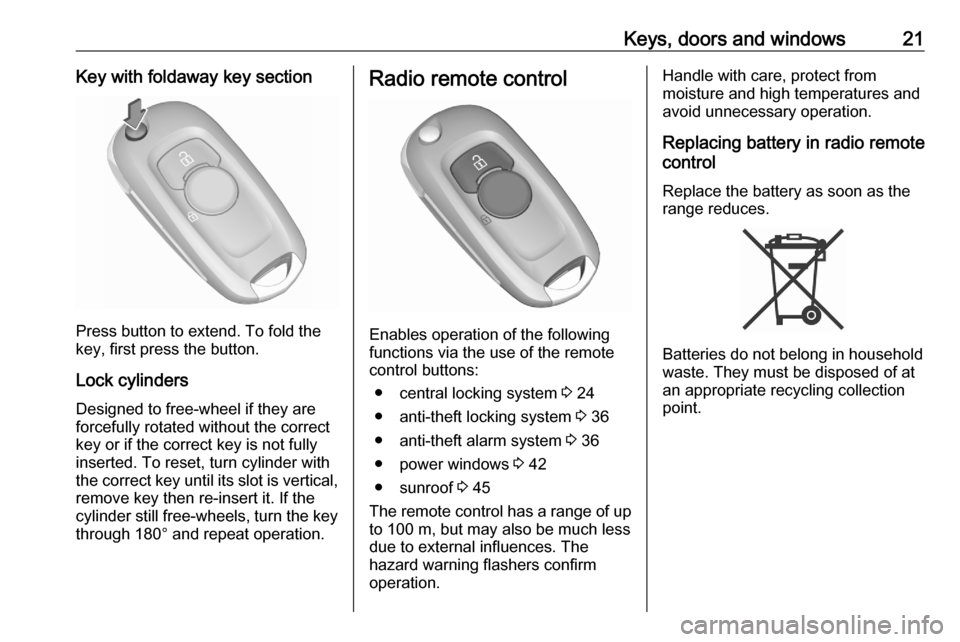
Keys, doors and windows21Key with foldaway key section
Press button to extend. To fold the
key, first press the button.
Lock cylinders
Designed to free-wheel if they are forcefully rotated without the correct
key or if the correct key is not fully
inserted. To reset, turn cylinder with
the correct key until its slot is vertical, remove key then re-insert it. If the
cylinder still free-wheels, turn the key
through 180° and repeat operation.
Radio remote control
Enables operation of the following
functions via the use of the remote control buttons:
● central locking system 3 24
● anti-theft locking system 3 36
● anti-theft alarm system 3 36
● power windows 3 42
● sunroof 3 45
The remote control has a range of up
to 100 m, but may also be much less
due to external influences. The
hazard warning flashers confirm
operation.
Handle with care, protect from
moisture and high temperatures and
avoid unnecessary operation.
Replacing battery in radio remote
control
Replace the battery as soon as the
range reduces.
Batteries do not belong in household
waste. They must be disposed of at
an appropriate recycling collection
point.
Page 29 of 303
Keys, doors and windows27The system locks if any of the
following occurs:
● It has been more than 5 seconds since unlocking.
● The button on an exterior handle has been pressed twice within
3 seconds to unlock the vehicle.
● Any door has been opened and all doors are now closed.
If the driver's door is not closed
properly, the electronic key remains in
the vehicle or the ignition is not off,
locking will not be permitted.
If there have been two or more
electronic keys in the vehicle and the
ignition was on once, the doors will be locked even if just one electronic key
is taken out of the vehicle.
Unlocking and opening the tailgate
The tailgate can be unlocked and
opened hands-free via moving the
foot below the rear bumper or by
pushing the tailgate button under the
brand emblem when the electronic
key is in range. The doors remain
locked.
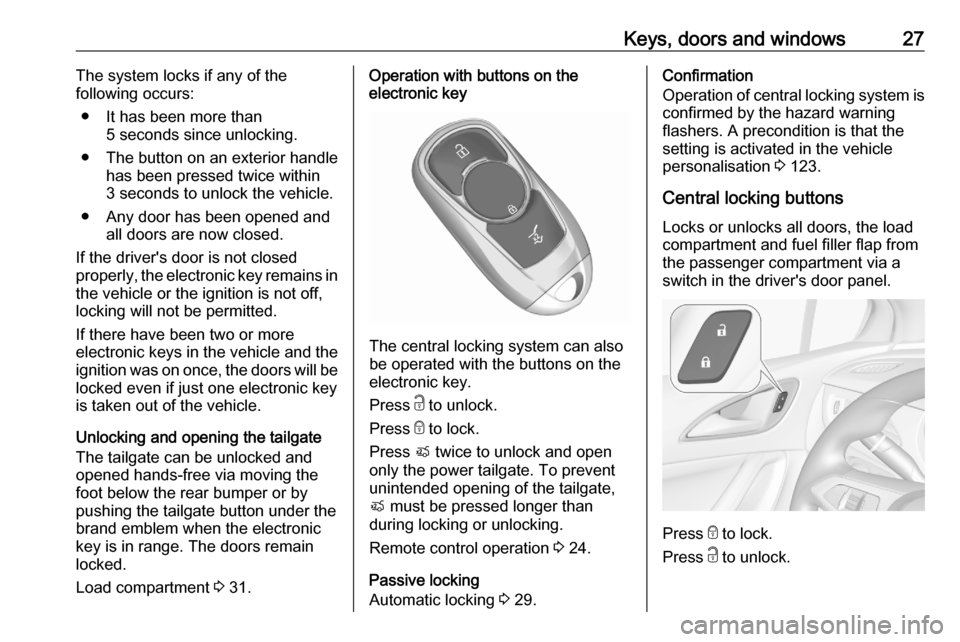
Load compartment 3 31.Operation with buttons on the
electronic key
The central locking system can also
be operated with the buttons on the
electronic key.
Press c to unlock.
Press e to lock.
Press X twice to unlock and open
only the power tailgate. To prevent
unintended opening of the tailgate,
X must be pressed longer than
during locking or unlocking.
Remote control operation 3 24.
Passive locking
Automatic locking 3 29.
Confirmation
Operation of central locking system is
confirmed by the hazard warning
flashers. A precondition is that the
setting is activated in the vehicle
personalisation 3 123.
Central locking buttons Locks or unlocks all doors, the load
compartment and fuel filler flap from
the passenger compartment via a
switch in the driver's door panel.
Press e to lock.
Press c to unlock.
Page 57 of 303
Seats, restraints55The armrest can be slid forwards by
10 cm. Under the armrest there is a
storage compartment.
Armrest storage 3 73.
Heating
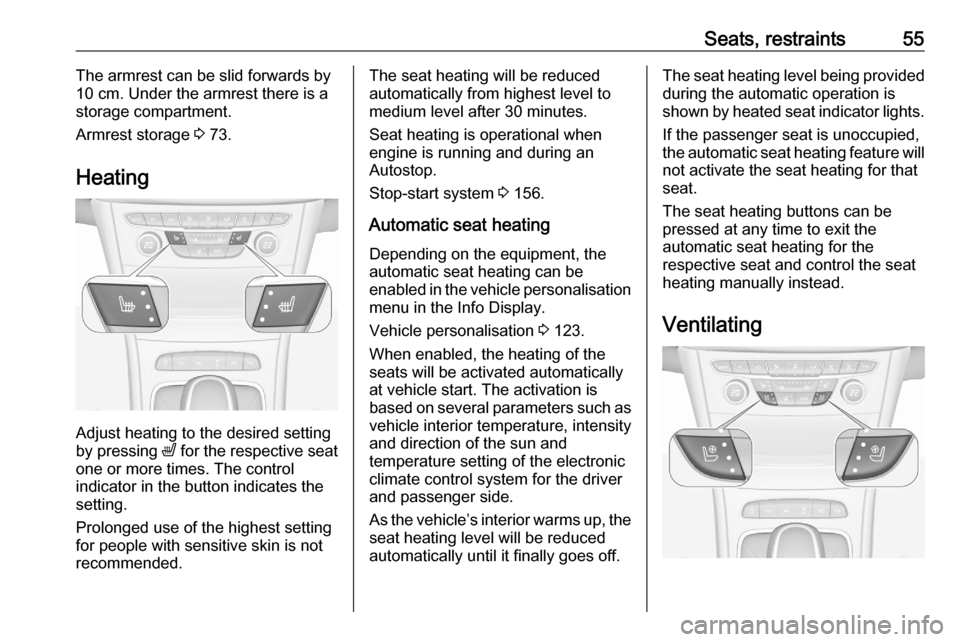
Adjust heating to the desired setting
by pressing ß for the respective seat
one or more times. The control
indicator in the button indicates the
setting.
Prolonged use of the highest setting
for people with sensitive skin is not
recommended.
The seat heating will be reduced
automatically from highest level to
medium level after 30 minutes.
Seat heating is operational when
engine is running and during an
Autostop.
Stop-start system 3 156.
Automatic seat heating Depending on the equipment, the
automatic seat heating can be
enabled in the vehicle personalisation
menu in the Info Display.
Vehicle personalisation 3 123.
When enabled, the heating of the
seats will be activated automatically
at vehicle start. The activation is
based on several parameters such as vehicle interior temperature, intensity
and direction of the sun and
temperature setting of the electronic
climate control system for the driver
and passenger side.
As the vehicle’s interior warms up, the seat heating level will be reduced
automatically until it finally goes off.The seat heating level being provided
during the automatic operation is
shown by heated seat indicator lights.
If the passenger seat is unoccupied,
the automatic seat heating feature will not activate the seat heating for that
seat.
The seat heating buttons can be
pressed at any time to exit the
automatic seat heating for the
respective seat and control the seat
heating manually instead.
Ventilating
Page 99 of 303

Instruments and controls97Set Date
Select Set Date to enter the
respective submenu.
Select Auto Set at the bottom of the
screen. Activate either On - RDS or
Off (Manual) .
If Off (Manual) is selected, adjust the
date settings.
7'' Colour Info Display Press ; and then select Settings.
Select Time and Date to display the
respective submenu.Set Time Format
To select the desired time format,
touch the screen buttons 12 h or 24 h .
Set Date Format
To select the desired date format,
select Set Date Format and choose
between the available options in the
submenu.
Auto Set
To choose whether time and date are
to be set automatically or manually,
select Auto Set .
For time and date to be set
automatically, select On - RDS.
For time and date to be set manually, select Off - Manual . If Auto Set is set
to Off - Manual , the submenu items
Set Time and Set Date become
available.
Set time and date
To adjust the time and date settings, select Set Time or Set Date .
Touch + and - to adjust the settings.8'' Colour Info Display
Press ; and then select the
Settings icon.
Select Time and Date .
Set time
Select Set Time to enter the
respective submenu.
Select Auto Set at the bottom of the
screen. Activate either On - RDS or
Off - Manual .
If Off - Manual is selected, adjust
hours and minutes by touching n or
o .
Page 116 of 303
114Instruments and controlsSpeed limiter 3 177.
Traffic sign assistant
L displays detected traffic signs as
control indicator.
Traffic sign assistant 3 205.
Door open h illuminates red.
A door or the tailgate is open.Displays
Driver Information Centre The Driver Information Centre is
located in the instrument cluster.
Depending on the version and the
instrument cluster, the Driver
Information Centre is available as
Baselevel display or Uplevel display.
Driver Information Centre indicates
depending on the equipment:
● overall and trip odometer
● vehicle information
● trip / fuel information
● driving economy information ● vehicle and warning messages● audio and infotainment information
● phone information
● navigation information
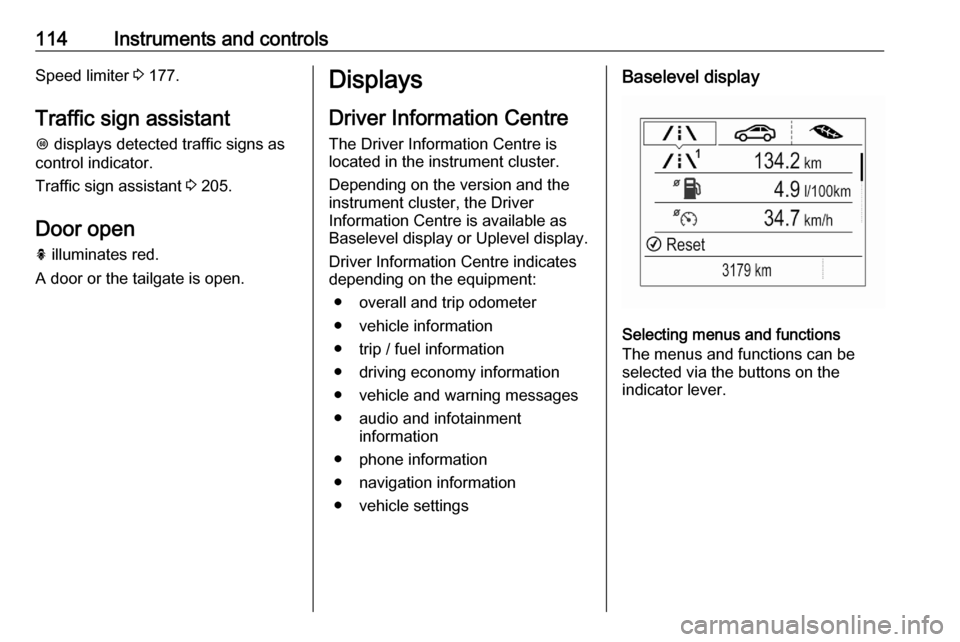
● vehicle settingsBaselevel display
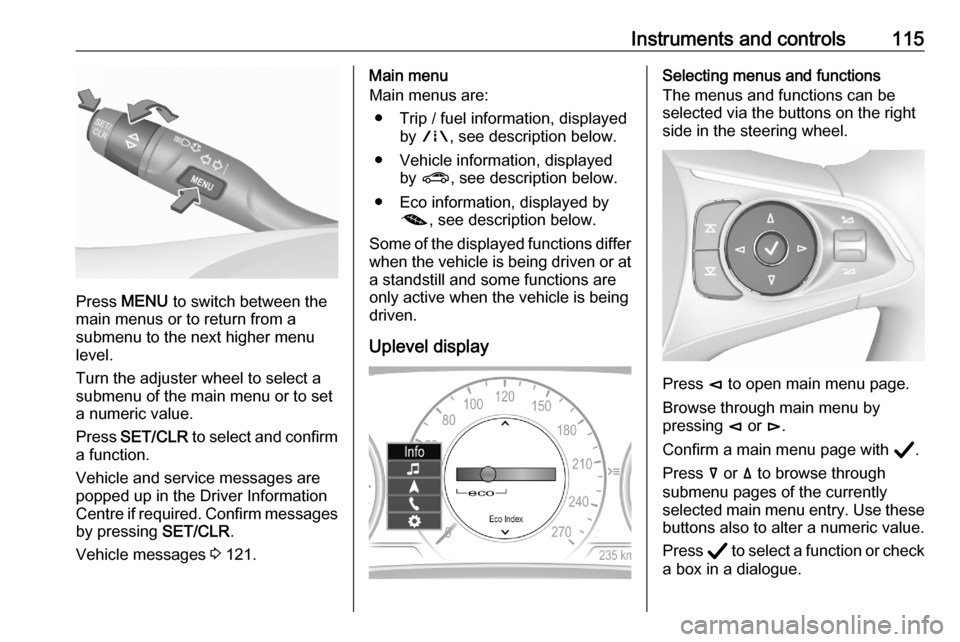
Selecting menus and functions
The menus and functions can be
selected via the buttons on the
indicator lever.
Page 117 of 303
Instruments and controls115
Press MENU to switch between the
main menus or to return from a
submenu to the next higher menu
level.
Turn the adjuster wheel to select a
submenu of the main menu or to set
a numeric value.
Press SET/CLR to select and confirm
a function.
Vehicle and service messages are
popped up in the Driver Information
Centre if required. Confirm messages
by pressing SET/CLR.
Vehicle messages 3 121.
Main menu
Main menus are:
● Trip / fuel information, displayed by ; , see description below.
● Vehicle information, displayed by ? , see description below.
● Eco information, displayed by @ , see description below.
Some of the displayed functions differ when the vehicle is being driven or at
a standstill and some functions are
only active when the vehicle is being
driven.
Uplevel displaySelecting menus and functions
The menus and functions can be
selected via the buttons on the right
side in the steering wheel.
Press è to open main menu page.
Browse through main menu by
pressing è or é.
Confirm a main menu page with Å.
Press å or ä to browse through
submenu pages of the currently
selected main menu entry. Use these
buttons also to alter a numeric value.
Press Å to select a function or check
a box in a dialogue.
Page 122 of 303
120Instruments and controlsInfo DisplayThe Info Display is located in the
instrument panel near the instrument
cluster.
Depending on the vehicle
configuration, the vehicle has one of
the following Infotainment systems:
● Multimedia
or
● Multimedia Navi
or
● Multimedia Navi Pro
The Info Display can indicate: ● time 3 96
● outside temperature 3 96
● date 3 96
● Infotainment system, see description in the Infotainment
manual
● climate control settings 3 142
● rear view camera 3 203
● parking assist instructions 3 194
● navigation, see description in the
Infotainment manual● system messages
● settings for vehicle personalisation 3 123
Multimedia Navi Selecting menus and settings
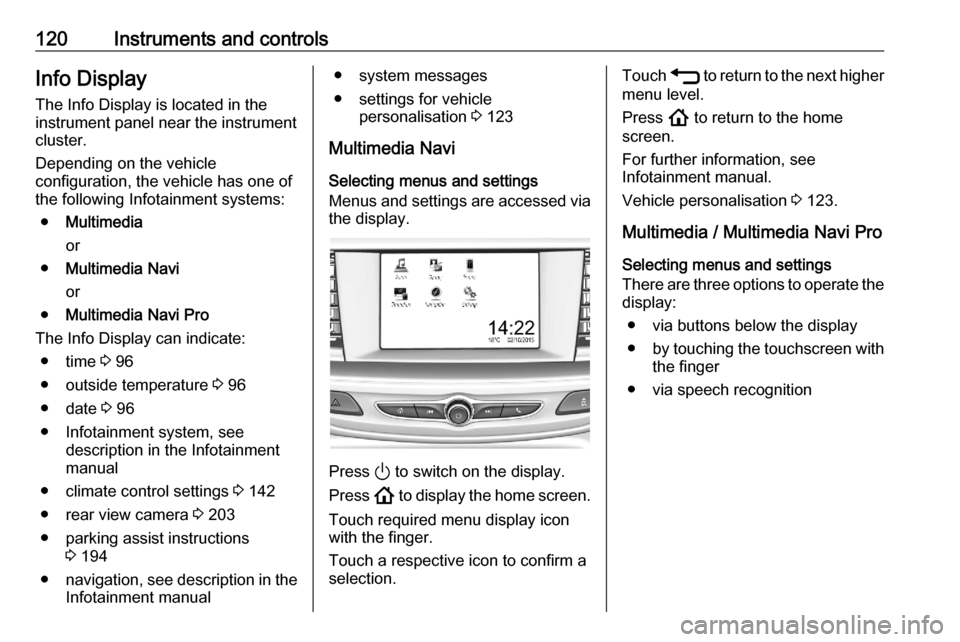
Menus and settings are accessed via
the display.
Press ) to switch on the display.
Press ! to display the home screen.
Touch required menu display icon
with the finger.
Touch a respective icon to confirm a
selection.
Touch 1 to return to the next higher
menu level.
Press ! to return to the home
screen.
For further information, see
Infotainment manual.
Vehicle personalisation 3 123.
Multimedia / Multimedia Navi Pro
Selecting menus and settings
There are three options to operate the display:
● via buttons below the display
● by touching the touchscreen with
the finger
● via speech recognition
Page 148 of 303
146Climate controlVersion with heated
windscreen 9
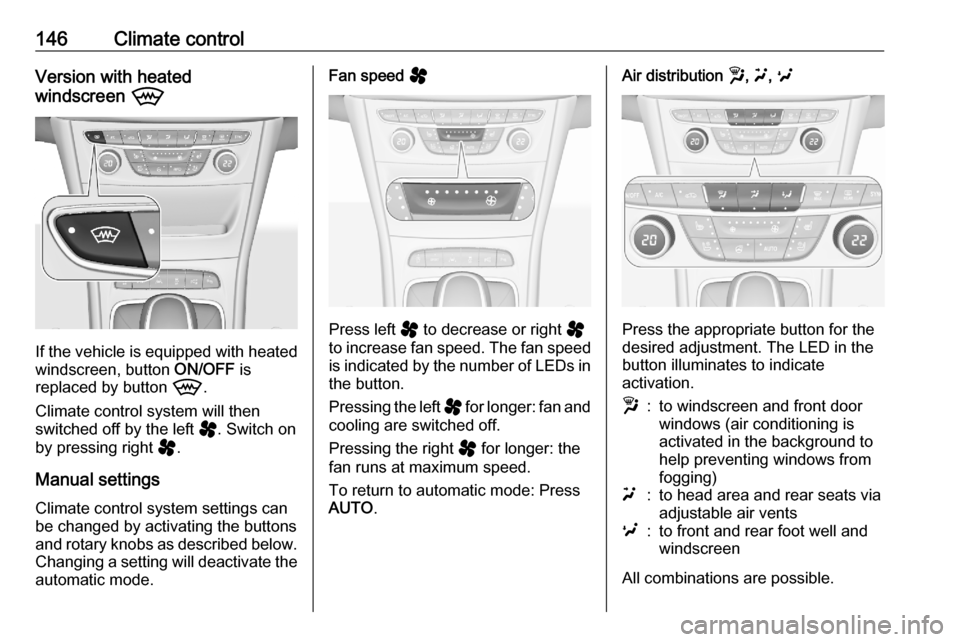
If the vehicle is equipped with heated
windscreen, button ON/OFF is
replaced by button 9.
Climate control system will then
switched off by the left y. Switch on
by pressing right y.
Manual settings Climate control system settings can
be changed by activating the buttons
and rotary knobs as described below.
Changing a setting will deactivate the
automatic mode.
Fan speed y
Press left
y to decrease or right y
to increase fan speed. The fan speed
is indicated by the number of LEDs in the button.
Pressing the left y for longer: fan and
cooling are switched off.
Pressing the right y for longer: the
fan runs at maximum speed.
To return to automatic mode: Press AUTO .
Air distribution w, u , v
Press the appropriate button for the
desired adjustment. The LED in the
button illuminates to indicate
activation.
w:to windscreen and front door
windows (air conditioning is
activated in the background to
help preventing windows from
fogging)u:to head area and rear seats via
adjustable air ventsv:to front and rear foot well and
windscreen
All combinations are possible.
Page 155 of 303
Driving and operating153preheating. Control indicators
illuminate and most electrical
functions are operable.Engine start
Press Engine Start/Stop briefly while:
● manual transmission: operating clutch pedal,
● automatic transmission: operating brake pedal with
selector lever in P or N.
Starting the engine 3 154.Ignition off
Press Engine Start/Stop briefly when
Autostop is activated or when engine is running and vehicle is stationary.
Automatic transmission: apply the
parking brake and engage P.
Press Engine Start/Stop briefly
without operating clutch or brake pedal when in ignition on power
mode.
Some functions remain active until
driver's door is opened, provided the
ignition was on previously.Emergency shut off during driving
Press Engine Start/Stop for longer
than 2 seconds or press twice briefly
within 5 seconds 3 154.
Steering wheel lock The steering wheel lock activates
automatically when:
● The vehicle is stationary.
● The ignition has been switched off.
● The driver's door is opened.
To release steering wheel lock, open
and close driver's door and switch on accessory mode or start the engine
directly.9 Warning
If the vehicle battery is discharged,
the vehicle must not be towed,
tow-started or jump-started as the
steering wheel lock cannot be
disengaged.
Operation on vehicles with
electronic key system in case of
failure
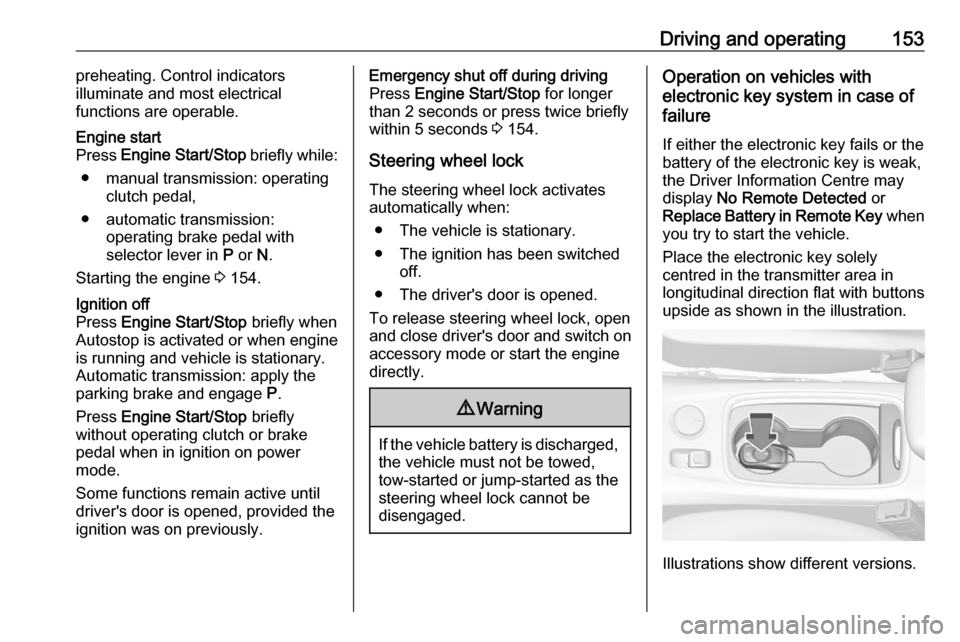
If either the electronic key fails or the
battery of the electronic key is weak,
the Driver Information Centre may
display No Remote Detected or
Replace Battery in Remote Key when
you try to start the vehicle.
Place the electronic key solely
centred in the transmitter area in
longitudinal direction flat with buttons
upside as shown in the illustration.
Illustrations show different versions.