infotainment VAUXHALL CASCADA 2014.5 Owner's Manual
[x] Cancel search | Manufacturer: VAUXHALL, Model Year: 2014.5, Model line: CASCADA, Model: VAUXHALL CASCADA 2014.5Pages: 247, PDF Size: 7.42 MB
Page 22 of 247
20Keys, doors and windows
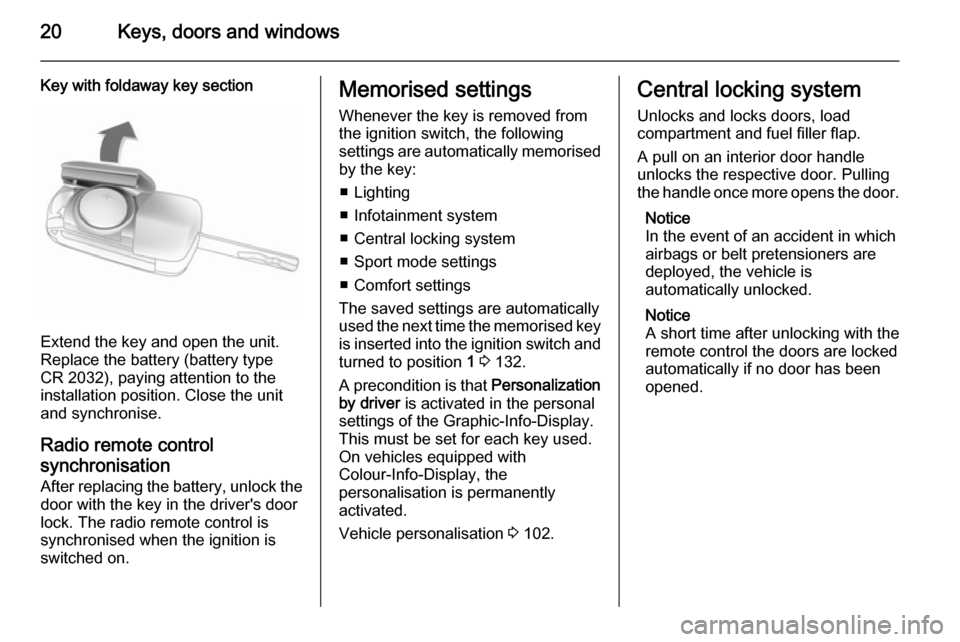
Key with foldaway key section
Extend the key and open the unit.
Replace the battery (battery type CR 2032), paying attention to the
installation position. Close the unit
and synchronise.
Radio remote controlsynchronisation
After replacing the battery, unlock the
door with the key in the driver's door
lock. The radio remote control is
synchronised when the ignition is
switched on.
Memorised settings
Whenever the key is removed from
the ignition switch, the following
settings are automatically memorised by the key:
■ Lighting
■ Infotainment system
■ Central locking system
■ Sport mode settings
■ Comfort settings
The saved settings are automatically
used the next time the memorised key
is inserted into the ignition switch and
turned to position 1 3 132.
A precondition is that Personalization
by driver is activated in the personal
settings of the Graphic-Info-Display.
This must be set for each key used.
On vehicles equipped with
Colour-Info-Display, the
personalisation is permanently
activated.
Vehicle personalisation 3 102.Central locking system
Unlocks and locks doors, load
compartment and fuel filler flap.
A pull on an interior door handle
unlocks the respective door. Pulling
the handle once more opens the door.
Notice
In the event of an accident in which
airbags or belt pretensioners are
deployed, the vehicle is
automatically unlocked.
Notice
A short time after unlocking with the
remote control the doors are locked
automatically if no door has been
opened.
Page 78 of 247

76Instruments and controlsInstruments and
controlsControls ....................................... 76
Warning lights, gauges and indi‐
cators ........................................... 83
Information displays .....................94
Vehicle messages ...................... 100
Vehicle personalisation ..............102Controls
Steering wheel adjustment
Unlock lever, adjust steering wheel,
then engage lever and ensure it is fully locked.
Do not adjust steering wheel unless
vehicle is stationary and steering
wheel lock has been released.
Steering wheel controls
The Infotainment system, some driver assistance systems and a connected
mobile phone can be operated via the
controls on the steering wheel.
Further information is available in the
Infotainment system manual.
Driver assistance systems 3 149.
Page 83 of 247
Instruments and controls81
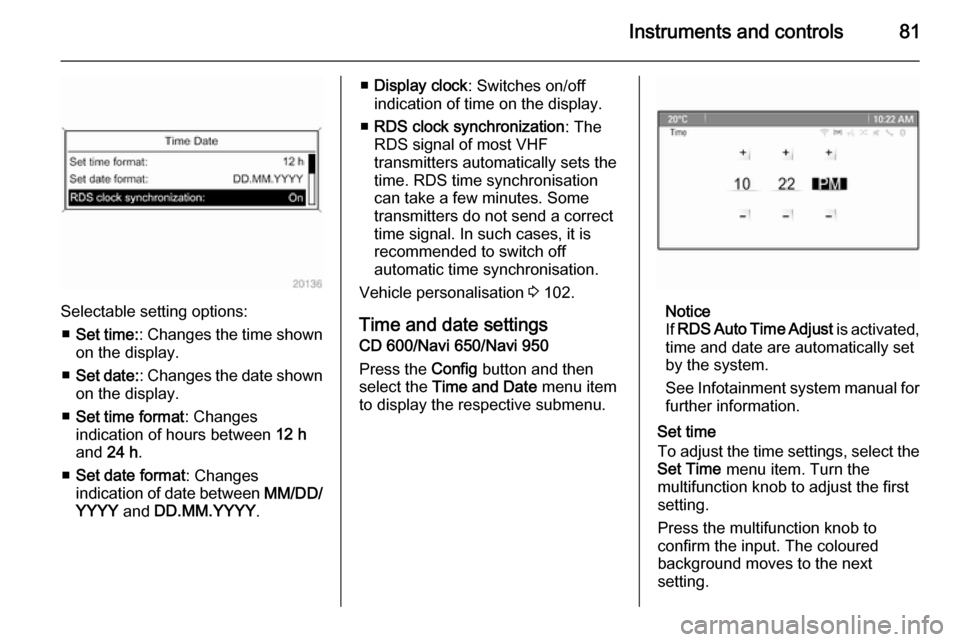
Selectable setting options:■ Set time: : Changes the time shown
on the display.
■ Set date: : Changes the date shown
on the display.
■ Set time format : Changes
indication of hours between 12 h
and 24 h.
■ Set date format : Changes
indication of date between MM/DD/
YYYY and DD.MM.YYYY .
■Display clock : Switches on/off
indication of time on the display.
■ RDS clock synchronization : The
RDS signal of most VHF
transmitters automatically sets the
time. RDS time synchronisation
can take a few minutes. Some
transmitters do not send a correct
time signal. In such cases, it is
recommended to switch off
automatic time synchronisation.
Vehicle personalisation 3 102.
Time and date settings
CD 600/Navi 650/Navi 950
Press the Config button and then
select the Time and Date menu item
to display the respective submenu.
Notice
If RDS Auto Time Adjust is activated,
time and date are automatically set
by the system.
See Infotainment system manual for further information.
Set time
To adjust the time settings, select the
Set Time menu item. Turn the
multifunction knob to adjust the first
setting.
Press the multifunction knob to
confirm the input. The coloured
background moves to the next
setting.
Page 100 of 247

98Instruments and controls
above recommends upshifting for
fuel saving reasons.
Eco index display : The current fuel
consumption is indicated on a
segment display. For economical driving adapt your driving style to
keep the filled segments within the
Eco area. The more segments are
filled, the higher the fuel
consumption. Simultaneously the
current consumption value is
indicated.
■ Top Consumers : List of top comfort
consumers currently switched on is displayed in descending order. Fuel
saving potential is indicated. A
switched off consumer disappears
from the list and the consumption
value will be updated.
During sporadic driving conditions,
the heated rear window is activated automatically to increase engine
load. In this event, the heated rear
window is indicated as one of the
top consumers, without activation
by the driver.
■ Economy Trend : Displays the
average consumption development
over a distance of 50 miles. Filled
segments display the consumption
in 5 mile steps and shows the effect of topography or driving behaviour
on fuel consumption.
Graphic-Info-Display,
Colour-Info-Display Depending on the vehicle
configuration the vehicle has a
Graphic-Info-Display or a Colour-
Info-Display.
The Info-Displays is located in the
instrument panel above the
Infotainment system.
Graphic-Info-Display
Page 101 of 247

Instruments and controls99
Depending on the Infotainment
system, the Graphic-Info-Display is
available in two versions.
Graphic-Info-Display indicates:
■ time 3 80
■ outside temperature 3 80
■ date 3 80
■ electronic climate control settings 3 124
■ Infotainment system, see description in the Infotainment
system manual
■ settings for vehicle personalisation 3 102
Colour-Info-Display
The Colour-Info-Display indicates in
colour:
■ time 3 80
■ outside temperature 3 80
■ date 3 80
■ electronic climate control settings 3 124
■ rear view camera 3 163
■ Infotainment system, see description in the Infotainment
system manual
■ navigation, see description in the Infotainment system manual
■ system settings
■ vehicle messages 3 100
■ settings for vehicle personalisation 3 102
The type of information and how it is
displayed depends on the equipment
of the vehicle and the settings made.
Selecting menus and settingsMenus and settings are accessed via
the display.
Push button CONFIG: Menu page
Settings is displayed.
Page 105 of 247
Instruments and controls103
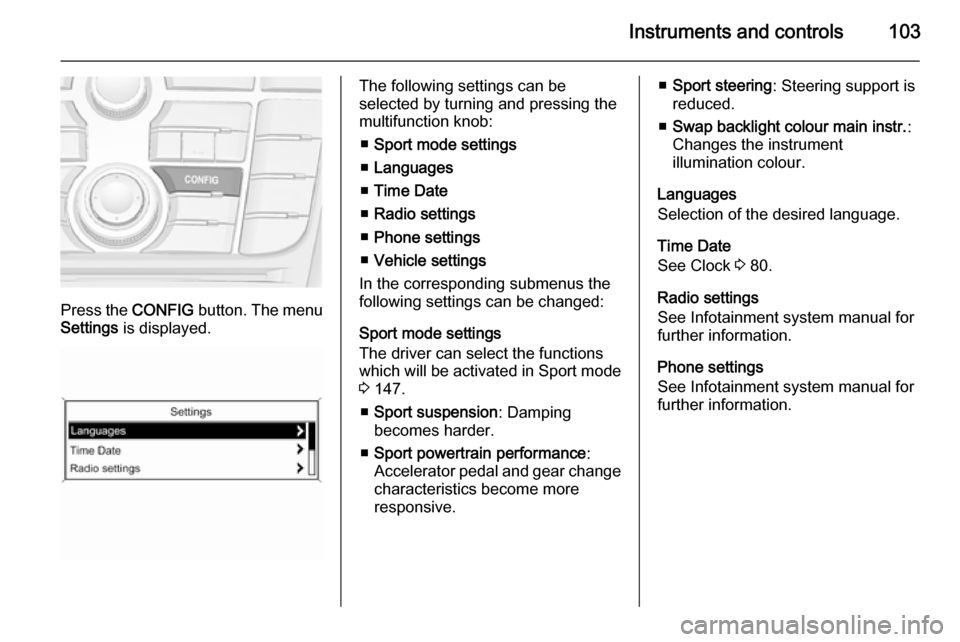
Press the CONFIG button. The menu
Settings is displayed.
The following settings can be
selected by turning and pressing the
multifunction knob:
■ Sport mode settings
■ Languages
■ Time Date
■ Radio settings
■ Phone settings
■ Vehicle settings
In the corresponding submenus the
following settings can be changed:
Sport mode settings
The driver can select the functions
which will be activated in Sport mode
3 147.
■ Sport suspension : Damping
becomes harder.
■ Sport powertrain performance :
Accelerator pedal and gear change
characteristics become more
responsive.■ Sport steering : Steering support is
reduced.
■ Swap backlight colour main instr. :
Changes the instrument
illumination colour.
Languages
Selection of the desired language.
Time Date
See Clock 3 80.
Radio settings
See Infotainment system manual for further information.
Phone settings
See Infotainment system manual for
further information.
Page 107 of 247
Instruments and controls105
Auto relock doors: Activates or
deactivates the automatic relock
function after unlocking without
opening the vehicle.
■ Restore factory settings
Restore factory settings : Resets all
settings to the default settings.
Settings in the Colour-Info-
Display
CD 600/Navi 650/Navi 950
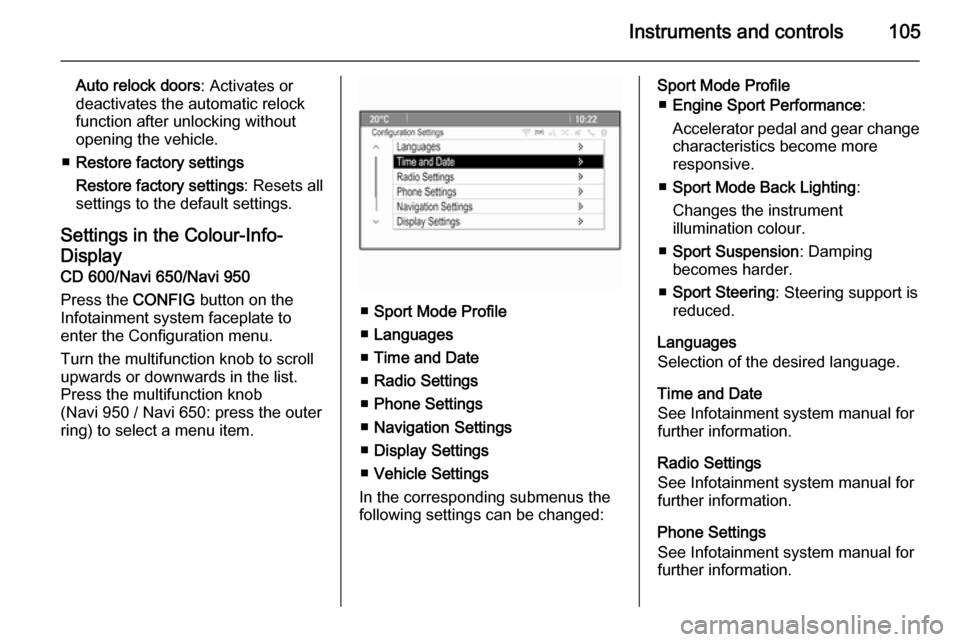
Press the CONFIG button on the
Infotainment system faceplate to enter the Configuration menu.
Turn the multifunction knob to scroll
upwards or downwards in the list.
Press the multifunction knob
(Navi 950 / Navi 650: press the outer
ring) to select a menu item.
■ Sport Mode Profile
■ Languages
■ Time and Date
■ Radio Settings
■ Phone Settings
■ Navigation Settings
■ Display Settings
■ Vehicle Settings
In the corresponding submenus the
following settings can be changed:
Sport Mode Profile
■ Engine Sport Performance :
Accelerator pedal and gear change characteristics become more
responsive.
■ Sport Mode Back Lighting :
Changes the instrument
illumination colour.
■ Sport Suspension : Damping
becomes harder.
■ Sport Steering : Steering support is
reduced.
Languages
Selection of the desired language.
Time and Date
See Infotainment system manual for
further information.
Radio Settings
See Infotainment system manual for further information.
Phone Settings
See Infotainment system manual for further information.
Page 108 of 247

106Instruments and controls
Navigation Settings
See Infotainment system manual for
further information.
Display Settings ■ Home Page Menu :
See Infotainment system manual
for further information.
■ Rear Camera Options :
Press to adjust the rear camera options 3 163.
■ Display Off :
See Infotainment system manual
for further information.
■ Map Settings :
See Infotainment system manual
for further information.
Vehicle Settings ■ Climate and Air Quality
Auto Fan Speed : Modifies the level
of the cabin airflow of the climate
control in automatic mode.
Air Conditioning Mode : Controls the
state of the cooling compressor
when the vehicle is started. Last
setting (recommended) or atvehicle start is either always ON or
always OFF.
Auto Rear Demist : Activates
heated rear window automatically.
■ Comfort and Convenience
Chime Volume : Changes the
volume of warning chimes.
Personalisation by Driver :
Activates or deactivates the
personalisation function.
■ Collision Detection Systems
Park Assist : Activates or
deactivates the ultrasonic sensors.
Side Blind Zone Alert : Activates or
deactivates the side blind spot alert system.
■ Lighting
Vehicle Locator Lights : Activates or
deactivates the entry lighting.
Exit Lighting : Activates or
deactivates and changes the
duration of exit lighting.
■ Power Door Locks
Open Door Anti Lock Out : Activates
or deactivates the automatic doorlocking function while a door is open.
Auto Door Lock : Activates or
deactivates the automatic door
unlocking function after switching
off ignition. Activates or deactivates the automatic door locking function
after driving-off.
Delay Door Lock : Activates or
deactivates the delayed door
locking function.
■ Remote Lock/Unlock/Start
Remote Lock Feedback : Activates
or deactivates the hazard warning
flasher feedback whilst locking.
Remote Unlock Feedback :
Activates or deactivates the hazard warning flasher feedback whilst
unlocking.
Remote Door Unlock : Changes the
configuration to unlock only the
driver's door or the whole vehicle
whilst unlocking.
Relock Remotely Unlocked Doors :
Activates or deactivates the
automatic relock function after
Page 135 of 247
Driving and operating133
■ Power windows
■ Power outlets
Power to the Infotainment system will continue to operate for 30 minutes oruntil the key is removed from theignition switch, regardless of whether
any door will be opened.
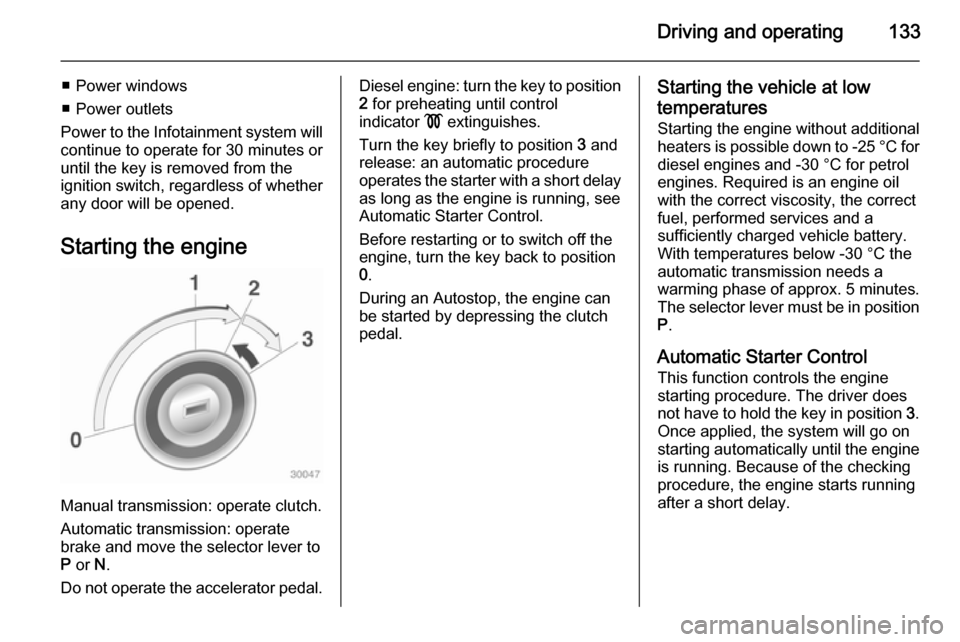
Starting the engine
Manual transmission: operate clutch.
Automatic transmission: operate
brake and move the selector lever to
P or N.
Do not operate the accelerator pedal.
Diesel engine: turn the key to position 2 for preheating until control
indicator ! extinguishes.
Turn the key briefly to position 3 and
release: an automatic procedure
operates the starter with a short delay
as long as the engine is running, see
Automatic Starter Control.
Before restarting or to switch off the
engine, turn the key back to position
0 .
During an Autostop, the engine can
be started by depressing the clutch
pedal.Starting the vehicle at low
temperatures
Starting the engine without additional heaters is possible down to -25 °С for
diesel engines and -30 °C for petrol
engines. Required is an engine oil
with the correct viscosity, the correct
fuel, performed services and a
sufficiently charged vehicle battery.
With temperatures below -30 °C the
automatic transmission needs a
warming phase of approx. 5 minutes.
The selector lever must be in position P .
Automatic Starter Control
This function controls the engine
starting procedure. The driver does
not have to hold the key in position 3.
Once applied, the system will go on starting automatically until the engine
is running. Because of the checking
procedure, the engine starts running after a short delay.
Page 199 of 247

Vehicle care197
No.Circuit1Displays2Body control unit, exterior lights3Body control unit, exterior lights4Infotainment system5Infotainment system, instru‐
ment6Power outlet, cigarette lighter7Power outlet8Body control module, left low
beam9Body control module, right low
beam10Body control module, door locks11Interior fan12Driver power seat13Passenger power seat14Diagnostic connector15AirbagNo.Circuit16Boot lid relay17Air conditioning system18Service diagnose19Body control module, brake
lights, tail lights, interior lights20-21Instrument panel22Ignition system23Body control module24Body control module25–26Trunk power outlet accessory
Load compartment fuse
box
The fuse box is on the left side of the
load compartment behind a cover.
Remove the cover.
Fuse assignments