display VAUXHALL COMBO 2014 Owner's Guide
[x] Cancel search | Manufacturer: VAUXHALL, Model Year: 2014, Model line: COMBO, Model: VAUXHALL COMBO 2014Pages: 187, PDF Size: 4.15 MB
Page 85 of 187

Instruments and controls83
Press the SETq button when
activated ( On) to access the current
set speed. Adjust as required and
confirm.
Warning chimes 3 85.
TRIP B DATA
Activate or deactivate the second trip
computer (set to On or Off).
Trip B records average consumption, distance travelled, average speed
and travel time (driving time). The
measurement can be restarted at any
time. Trip computer 3 86.
SET TIME (Setting the clock and
clock mode)
After accessing this menu option, it is possible to either set the time or
change the clock mode between 12
hour and 24 hour clock.
Select Time and confirm. Adjust the
hours setting (flashing value) and
confirm. Adjust minutes setting
(flashing value) and confirm.
Select Mode and confirm. Select
12h or 24h and confirm.
Clock 3 63.SET DATE
Adjust the year setting (flashing
value) and confirm. Adjust month
setting (flashing value) and confirm.
Adjust the day setting (flashing value)
and confirm.
RADIO INFO (Display audio and
radio information)
Activate radio info (set to On) to
display audio and radio information (e.g. station frequency, RDS
messages, track number). Deactivate
when not required (set to Off).
AUTOCLOSE (Automatic central
locking when driving)
Activate the autoclose feature (set to
On ) to automatically lock the doors
when vehicle speed exceeds
12 mph. Deactivate when not
required (set to Off).
UNIT OF MEASUREMENT (for
Distance, Fuel consumption and
Temperature)
After accessing this menu option, it is possible to set the unit of
measurement for distance, fuel
consumption and temperature.Select Distance and confirm. Set the
unit of measurement to km or mi
(miles) and confirm.
Select Consumption and confirm.
When the Distance unit is set to km, it
is possible to set the unit of
measurement for fuel consumption to either l/100km or km/l . When the
Distance unit is set to mi (miles), fuel
consumption is shown in mpg.
Select Temperature and confirm. Set
the unit of measurement to °C or °F
and confirm.
LANGUAGE (for Display messages) Display messages can be shown in
different languages, including:
English, German, French, Italian,
Portuguese, Spanish, Dutch, Polish and Turkish. Select desired language
and confirm.
WARNING VOLUME (Warning chime volume)
Adjust the volume of warning chimes and confirm. 8 volume levels are
available.
Warning chimes 3 85.
Page 86 of 187

84Instruments and controls
BUTTON VOLUME
A chime is sounded every time the
SET q, R or S button is pressed.
Adjust the volume of these chimes
and confirm. 8 volume levels are
available.
Warning chimes 3 85.
SEAT BELT BUZZER (Reactivate
warning chime for driver and/or front
passenger seat belt reminder)
This menu option is available only
when the seat belt reminder has
already been deactivated by a
workshop.
When reactivated, the driver and/or
front passenger are alerted with a
warning chime when the
corresponding seat belt is not
fastened.
Seat belt reminder 3 73.
SERVICE (Distance to next service)
Access this menu option to view the
remaining distance to the next
service.The distance to next service is also
displayed automatically when the
distance reaches 1,250 miles and is
repeated after every additional
125 miles.
Service display 3 70.
PASSENGER AIRBAG (Passenger
front and side airbags activation/
deactivation)
Activate the front passenger airbags
if an adult is occupying the front
passenger seat. Deactivate airbags
when a child restraint system is
installed on this seat.9 Danger
Risk of fatal injury for a child using
a child restraint system on a seat
with activated front passenger
airbag.
Risk of fatal injury for an adult
person on a seat with deactivated
front passenger airbag.
After accessing this menu option,
activate or deactivate the airbags
( Bag Pass On or Bag Pass Off ) and
confirm; a confirmation message
appears in the display. Select YES (to
confirm changes) or No (to cancel
changes).
Airbag deactivation 3 45.
DAYTIME RUNNING LIGHTS
Activate the daytime running lights to
increase visibility of the vehicle during
daylight (set to On). Deactivate when
not required (set to Off).
Daytime running lights 3 89.
EXIT MENU
Select this menu option to exit the
settings menu.
Page 88 of 187

86Instruments and controlsTrip computerThe trip computer provides
information on driving data, which is
continually recorded and evaluated electronically.
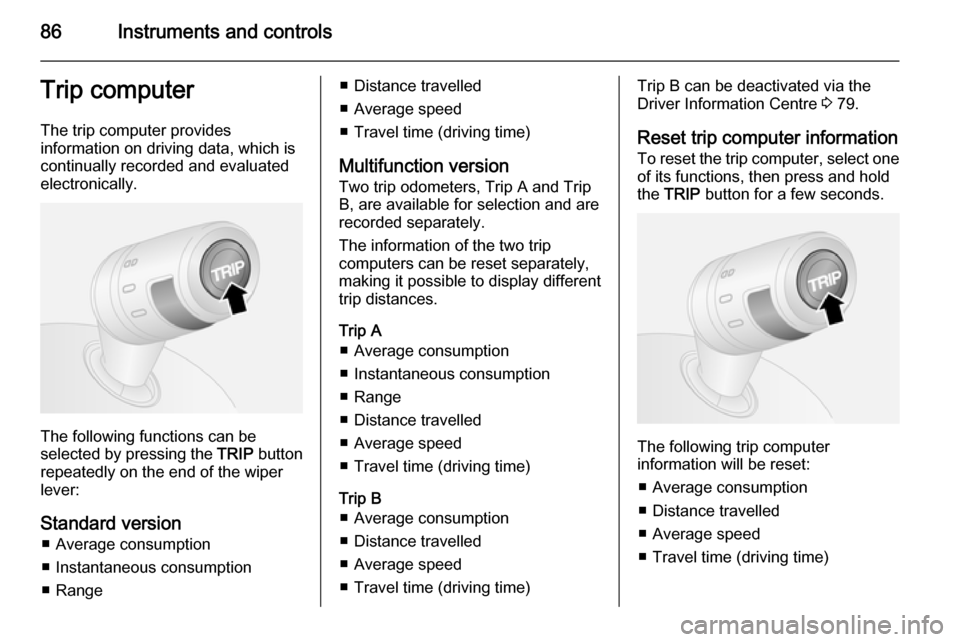
The following functions can be
selected by pressing the TRIP button
repeatedly on the end of the wiper
lever:
Standard version ■ Average consumption
■ Instantaneous consumption
■ Range
■ Distance travelled
■ Average speed
■ Travel time (driving time)
Multifunction version
Two trip odometers, Trip A and Trip
B, are available for selection and are
recorded separately.
The information of the two trip
computers can be reset separately,
making it possible to display different
trip distances.
Trip A ■ Average consumption
■ Instantaneous consumption
■ Range
■ Distance travelled
■ Average speed
■ Travel time (driving time)
Trip B ■ Average consumption
■ Distance travelled
■ Average speed
■ Travel time (driving time)Trip B can be deactivated via the
Driver Information Centre 3 79.
Reset trip computer information
To reset the trip computer, select one of its functions, then press and hold
the TRIP button for a few seconds.
The following trip computer
information will be reset:
■ Average consumption
■ Distance travelled
■ Average speed
■ Travel time (driving time)
Page 89 of 187

Instruments and controls87
The trip computer will reset
automatically when the maximum
value of any of the parameters is
exceeded.
Average consumption
Average consumption is displayed,
taking into consideration the distance
travelled and the fuel used since the
last reset.
The measurement can be restarted at any time.
Instantaneous consumption Display of the instantaneous fuel
consumption.
_ _ _ _ will appear in the display if the
vehicle is left parked with the engine
running for a long time.
Range
The range is calculated from the
current contents of the fuel tank and
the average consumption since the
last reset.
When the range is less than 30 miles ,
_ _ _ _ will appear in the display.After refuelling, the range is updated
automatically after a brief delay.
The measurement can be restarted at
any time.
Notice
The range will not be displayed if the
vehicle is left parked with the engine
running for a long time.
Distance travelled Displays the distance driven since the
last reset.
The measurement can be restarted at
any time.
Average speed
The average speed since the last
reset is displayed.
The measurement can be restarted at
any time.
Interruptions in the journey with the ignition off are not included in the
calculations.
Travel time (driving time) The time elapsed since the since thelast reset is displayed.The measurement can be restarted at
any time.
Exit trip computer
To exit the trip computer, press and
hold the SETq button for more than
2 seconds.
Driver Information Centre 3 79.
Interruption of power supply If the power supply has been
interrupted or if the battery voltage
has dropped too low, the values
stored in the trip computer will be lost.
Page 91 of 187

Lighting89Headlight range
adjustment
Manual headlight range
adjustment
To adapt headlight range to the
vehicle load to prevent dazzling of
other road users: Press À or Á
buttons until the required setting is displayed in the Driver Information
Centre 3 79.
0=Front seats occupied1=All seats occupied2=All seats occupied and load
compartment laden3=Driver's seat occupied and load
compartment laden
Headlights when driving
abroad
The asymmetrical headlight beam
extends visibility at the edge of the
road at the passenger side.
However, when driving in countries
where traffic drives on the opposite
side of the road, adjust the headlights
to prevent dazzling of oncoming
traffic.
Have the headlights adjusted by a
workshop.
Daytime running lights
Daytime running lights increase
visibility of the vehicle during daylight.
When the function is activated and
the ignition is switched on, the
headlights come on automatically and
instrument illumination is subdued.
The light switch must be in position
§ . The daytime running lights switch
off when the ignition is switched off.
Notice
The driver remains responsible for
switching on the low beam when
required, e.g. when driving through
a tunnel or at night.
When the function is deactivated, the
headlights do not come on
automatically when the ignition is
switched on and the light switch is in
position §.
The daytime running lights function is activated/deactivated via a menu in
the Driver Information Centre 3 79.
Page 93 of 187

Lighting91Rear fog lights
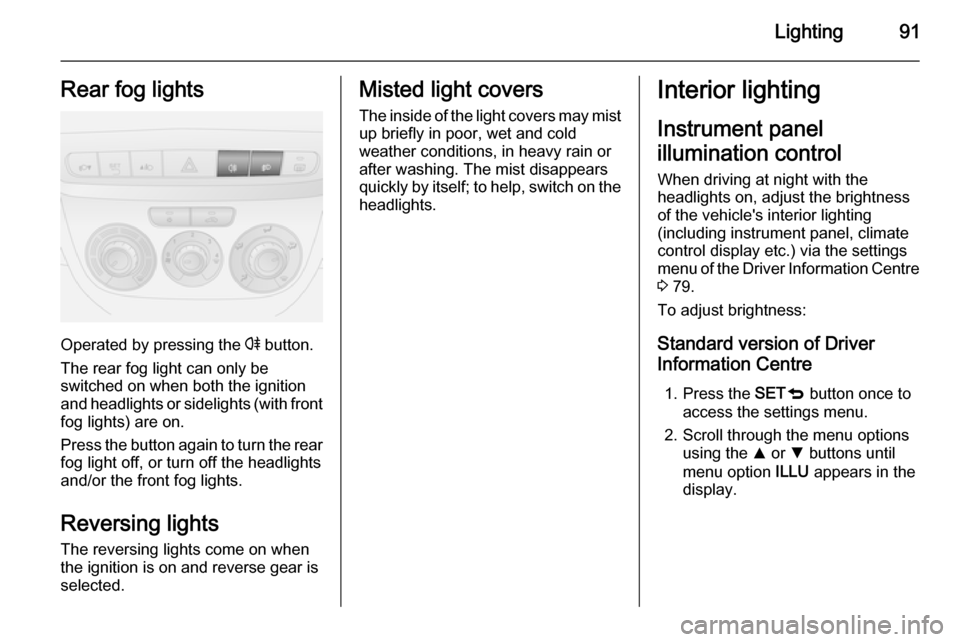
Operated by pressing the r button.
The rear fog light can only be
switched on when both the ignition
and headlights or sidelights (with front
fog lights) are on.
Press the button again to turn the rear fog light off, or turn off the headlights
and/or the front fog lights.
Reversing lights The reversing lights come on when
the ignition is on and reverse gear is
selected.
Misted light covers
The inside of the light covers may mist
up briefly in poor, wet and cold
weather conditions, in heavy rain or
after washing. The mist disappears
quickly by itself; to help, switch on the headlights.Interior lighting
Instrument panel
illumination control When driving at night with the
headlights on, adjust the brightness
of the vehicle's interior lighting
(including instrument panel, climate
control display etc.) via the settings
menu of the Driver Information Centre
3 79.
To adjust brightness:
Standard version of Driver
Information Centre
1. Press the SETq button once to
access the settings menu.
2. Scroll through the menu options using the R or S buttons until
menu option ILLU appears in the
display.
Page 94 of 187

92Lighting
3. Press the R or S button to
increase or decrease the
displayed value.
4. Press SETq briefly to confirm
changes and automatically return
to the previous display screen.
Multifunction version of Driver
Information Centre
1. Press the SETq button to access
the settings menu.
2. Scroll through the menu options using the R or S buttons until
menu option LIGHTING appears
in the display.
3. Press the R or S button to
increase or decrease the displayed value.
4. Press SETq briefly to confirm
changes and automatically return to the previous display screen.
It is also possible to adjust the
brightness using the R or S buttons
without accessing the settings menu.
Driver Information Centre 3 79.Interior lights
Depending on model variant, during
entry and exit of the vehicle the front
and rear courtesy lights come on
automatically and then switch off after
a delay.
Notice
In the event of an accident of a
certain severity, the interior lights
come on automatically. Fuel cut-off
system 3 85.
Front courtesy light
Centre switch position: automatic
interior light.
To operate manually when the doors are closed, press the lens on either
side.
Front courtesy light with readinglights
Centre switch position: automatic
interior light.
Can be operated individually or
together with the 7 switch when the
doors are closed.
Press rocker switch 7 left or right to
operate respective reading light.
Page 100 of 187

98Climate control
clockwise=warmanticlockwise=cold
Heating will not be fully effective until
the engine has reached normal
operating temperature.
When the minimum temperature is
set below 16 ℃, the electronic climate
control system runs at maximum
cooling. LO appears in the display.
If the maximum temperature is set
above 32 ℃, the electronic climate
control system runs at maximum
heating. HI appears in the display.
Fan speed
The selected fan speed is indicated
with bars in the display.
Press ] or < to increase or decrease
the fan speed.
maximum fan
speed=all bars displayedminimum fan
speed=one bar displayed
Press n button to deactivate fan.
To return to automatic fan speed:
Press AUTO button.
Demisting and defrosting the
windows
Press the Ê button.
Temperature and air distribution are
set automatically and the fan runs at a high speed.
When the vehicle reaches normal
operating temperature the function
remains active for approx. 3 minutes.
To return to automatic mode: press
button n or AUTO .
Air distribution
Press R, S and 6 buttons.
LED in buttons illuminate.
Arrows shown in the display indicate
the distribution settings.
Cooling
Press button n to switch on cooling.
Activation is indicated by the LED in
the button. Cooling is only functional
when the engine is running and
climate control fan is switched on.
Press button n again to switch off
cooling.The air conditioning system cools and
dehumidifies (dries) when outside
temperature is above a specific level. Therefore condensation may form
and drip from under the vehicle.
If no cooling or drying is required
press n again to switch the cooling
system off, thus saving fuel.
Manual air recirculation mode
Operated with the 4 button.recir‐
cula‐
tion on=LED in button illuminated;
D appears in the displayrecir‐
cula‐
tion off=LED in button
extinguishes; E
appears in the display9 Warning
The exchange of fresh air is
reduced in air recirculation mode.
In operation without cooling the air humidity increases, so the
windows may mist up. The quality
of the passenger compartment air
deteriorates, which may cause the vehicle occupants to feel drowsy.
Page 110 of 187

108Driving and operatingCaution
It is not advisable to drive with thehand resting on the selector lever.
When gearshifting is recommended
to improve fuel economy, control
indicator [ or Ò illuminates in the
Driver Information Centre 3 75.
Manual transmission
automated
The manual transmission automated
(MTA) permits manual (manual
mode) or automatic gear shifting
(automatic mode), both with
automatic clutch control.
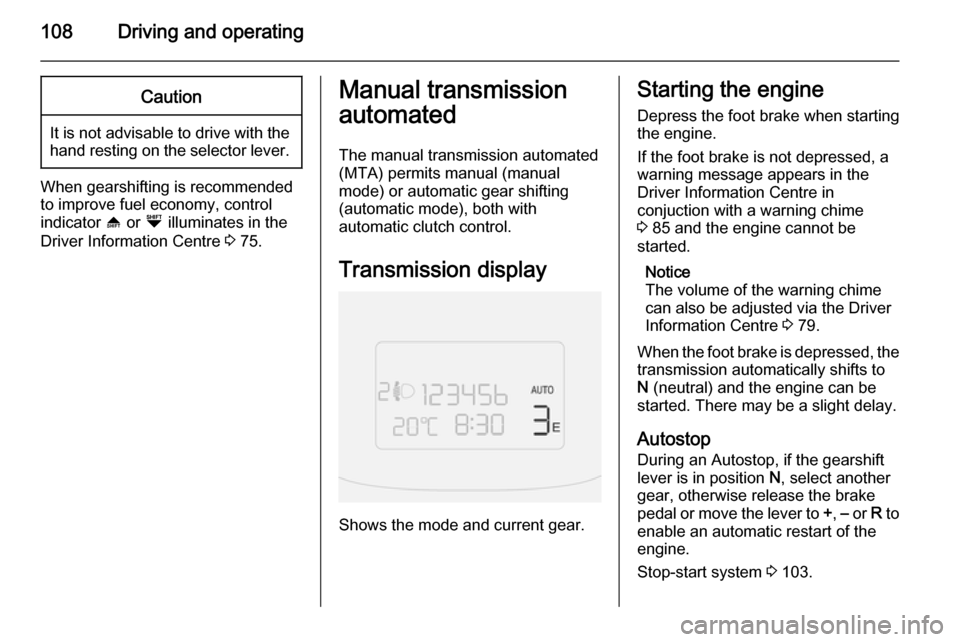
Transmission display
Shows the mode and current gear.
Starting the engine Depress the foot brake when starting
the engine.
If the foot brake is not depressed, a
warning message appears in the
Driver Information Centre in
conjuction with a warning chime
3 85 and the engine cannot be
started.
Notice
The volume of the warning chime
can also be adjusted via the Driver
Information Centre 3 79.
When the foot brake is depressed, the
transmission automatically shifts to
N (neutral) and the engine can be
started. There may be a slight delay.
Autostop During an Autostop, if the gearshift
lever is in position N, select another
gear, otherwise release the brake pedal or move the lever to +, – or R to
enable an automatic restart of the
engine.
Stop-start system 3 103.
Page 111 of 187

Driving and operating109Selector lever
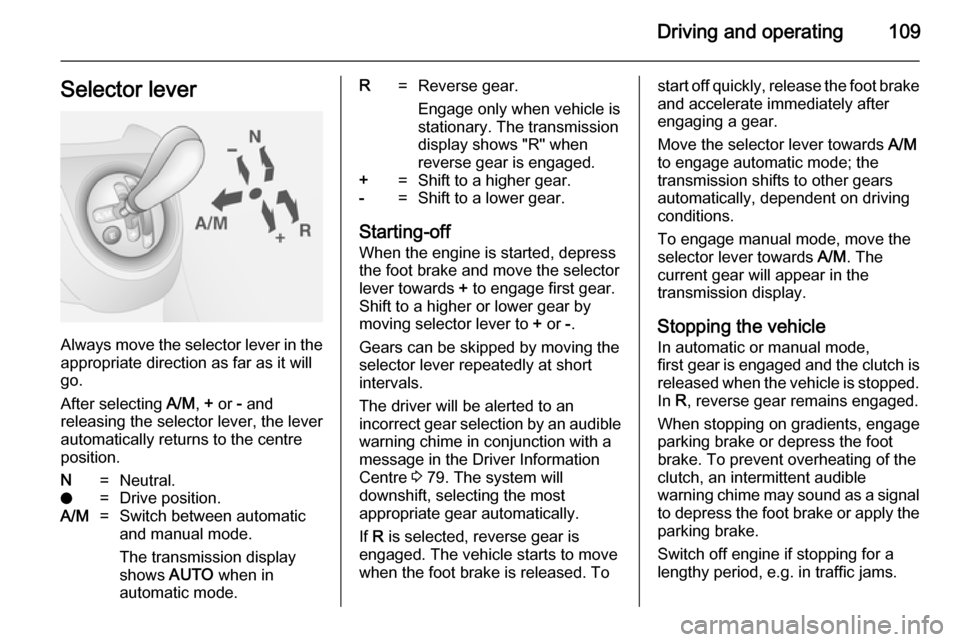
Always move the selector lever in the
appropriate direction as far as it will
go.
After selecting A/M, + or - and
releasing the selector lever, the lever
automatically returns to the centre
position.
N=Neutral.o=Drive position.A/M=Switch between automatic
and manual mode.
The transmission display
shows AUTO when in
automatic mode.R=Reverse gear.
Engage only when vehicle is
stationary. The transmission
display shows "R" when
reverse gear is engaged.+=Shift to a higher gear.-=Shift to a lower gear.
Starting-off
When the engine is started, depress
the foot brake and move the selector
lever towards + to engage first gear.
Shift to a higher or lower gear by
moving selector lever to + or -.
Gears can be skipped by moving the selector lever repeatedly at short
intervals.
The driver will be alerted to an
incorrect gear selection by an audible warning chime in conjunction with a
message in the Driver Information
Centre 3 79. The system will
downshift, selecting the most
appropriate gear automatically.
If R is selected, reverse gear is
engaged. The vehicle starts to move
when the foot brake is released. To
start off quickly, release the foot brake
and accelerate immediately after
engaging a gear.
Move the selector lever towards A/M
to engage automatic mode; the
transmission shifts to other gears
automatically, dependent on driving
conditions.
To engage manual mode, move the
selector lever towards A/M. The
current gear will appear in the
transmission display.
Stopping the vehicle
In automatic or manual mode,
first gear is engaged and the clutch is
released when the vehicle is stopped. In R, reverse gear remains engaged.
When stopping on gradients, engage parking brake or depress the foot
brake. To prevent overheating of the
clutch, an intermittent audible
warning chime may sound as a signal
to depress the foot brake or apply the
parking brake.
Switch off engine if stopping for a
lengthy period, e.g. in traffic jams.