belt VAUXHALL COMBO 2016 Owner's Guide
[x] Cancel search | Manufacturer: VAUXHALL, Model Year: 2016, Model line: COMBO, Model: VAUXHALL COMBO 2016Pages: 189, PDF Size: 4.47 MB
Page 79 of 189

Instruments and controls77If 9 illuminates together with I
3 82; stop engine immediately and
seek the assistance of a workshop.
In the event of the failure of control
indicator v for airbags and belt
tensioners 3 77, 9 will illuminate.
9 also illuminates if the fuel cut-off
switch is triggered. Consult a
workshop.
Fuel cut-off system 3 91, Vehicle
shutdown 3 109.
Depending on version, corresponding
warning messages may also be
displayed in the Driver Information
Centre (DIC) 3 85.
Turn signal 2 or 3 flashes green.
Flashes
A turn signal or the hazard warning flashers are activated.
Rapid flashing: failure of a turn signal
light or associated fuse, failure of turn
signal light on trailer.
Bulb replacement 3 140, Fuses
3 146.Turn signals 3 96.
Seat belt reminder
Seat belt reminder for front seats
X for driver's seat and/or front
passenger seat illuminates or flashes
red.
Illuminates
When the ignition has been switched
on, control indicator X illuminates
briefly if driver's seat belt and/or front
passenger seat belt is not engaged. A
warning chime also sounds for a few
seconds.
Flashes
During driving X will flash and a
warning chime will sound for
90 seconds until the front seat belts
are fastened.
Three-point seat belts 3 42.9 Warning
Fasten seat belt before each trip.
In the event of an accident, people
not wearing seat belts endanger their fellow occupants and
themselves.
To deactivate the seat belt reminder,
consult a workshop. Reactivation of the warning chime for seat belt
reminder can be done via the Driver
Information Centre (DIC) 3 85.
Notice
The volume of the warning chime
can also be adjusted via the Driver
Information Centre (DIC) 3 85.
Airbag and belt tensioners
v illuminates red.
When the ignition is switched on, the control indicator illuminates for
approx. 4 seconds.
If it does not illuminate, does not go
out after 4 seconds or illuminates
whilst driving, there is a fault in the
airbag system. Seek the assistance
Page 80 of 189

78Instruments and controlsof a workshop. The airbags and belt
pretensioners may fail to trigger in the
event of an accident.
Deployment of the belt pretensioners
or airbags is indicated by continuous
illumination of v.
Depending on version, 9 will
illuminate in the event of the failure of
control indicator v.
Generic warning 9 3 76.
Depending on version, a warning
message may also be displayed in
the Driver Information Centre (DIC)
3 85.9 Warning
Have the cause of the fault
remedied immediately by a
workshop.
Belt pretensioners, airbag system
3 41, 3 44.
Airbag deactivation
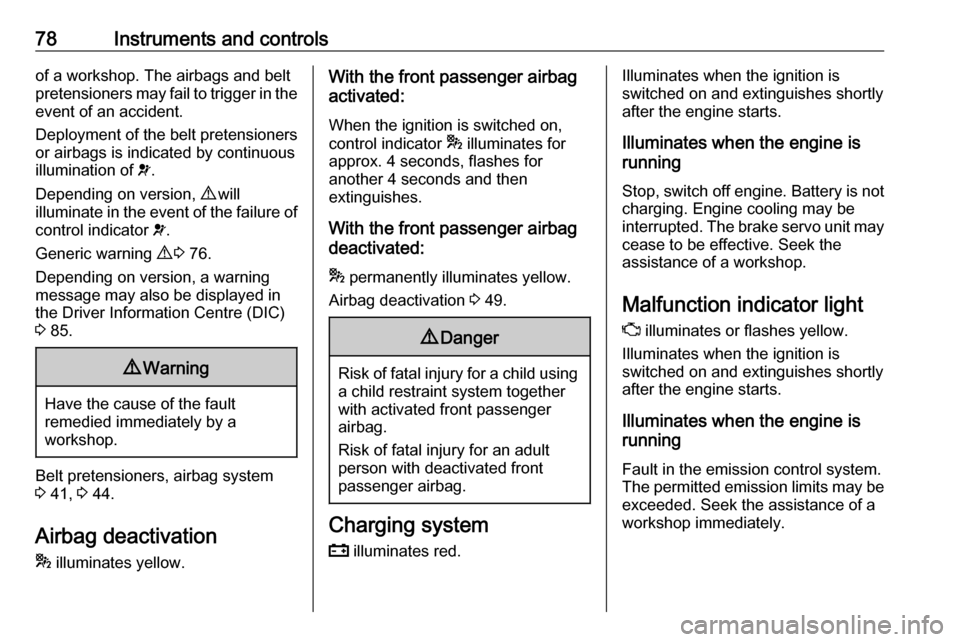
* illuminates yellow.
With the front passenger airbag
activated:
When the ignition is switched on, control indicator * illuminates for
approx. 4 seconds, flashes for
another 4 seconds and then
extinguishes.
With the front passenger airbag
deactivated:
* permanently illuminates yellow.
Airbag deactivation 3 49.9 Danger
Risk of fatal injury for a child using
a child restraint system together
with activated front passenger
airbag.
Risk of fatal injury for an adult
person with deactivated front
passenger airbag.
Charging system
p illuminates red.
Illuminates when the ignition is
switched on and extinguishes shortly
after the engine starts.
Illuminates when the engine is
running
Stop, switch off engine. Battery is not
charging. Engine cooling may be
interrupted. The brake servo unit may cease to be effective. Seek the
assistance of a workshop.
Malfunction indicator light
Z illuminates or flashes yellow.
Illuminates when the ignition is
switched on and extinguishes shortly
after the engine starts.
Illuminates when the engine is
running
Fault in the emission control system.The permitted emission limits may be
exceeded. Seek the assistance of a
workshop immediately.
Page 89 of 189

Instruments and controls87After accessing this menu option,
activate or deactivate the function
(set to On or Off) and confirm.
Press SETq when activated ( On) to
access the current set speed. Adjust
as required and confirm.
Warning chimes 3 90.
HOUR (Setting the clock)
Adjust the hours setting (flashing
value) and confirm. Adjust minutes
setting (flashing value) and confirm.
Clock 3 67.
UNIT (Unit of measurement)
Set the unit of measurement to km or
miles .
bUZZ (Warning chime volume)
Adjust the volume of warning chimes
and confirm. 8 volume levels are
available.
A chime is also sounded every time
SET q, R or S is pressed.
Warning chimes 3 90.BAG P (Passenger front and side
airbags activation/deactivation)
Activate the front passenger airbags
if an adult is occupying the front
passenger seat. Deactivate airbags
when a child restraint system is
installed on this seat.9 Danger
Risk of fatal injury for a child using
a child restraint system on a seat
with activated front passenger
airbag.
Risk of fatal injury for an adult
person on a seat with deactivated
front passenger airbag.
After accessing this menu option,
activate or deactivate the airbags
( BAG P On or BAG P Off ) and
confirm; a confirmation message
appears in the display. Select YES (to
confirm changes) or No (to cancel
changes).
Airbag deactivation 3 49.
DRL (Daytime running lights)
Activate the daytime running lights to
increase visibility of the vehicle during
daylight (set to On). Deactivate when
not required (set to Off).
Daytime running lights 3 95.
Settings menu options -
Multifunction version
The settings menu contains the
following options:
● Lighting
● Speed beep
● Trip B data
● Set time
● Set date
● Radio info
● Autoclose
● Unit of measurement
● Language
● Warning volume
● Button volume
● Seat belt buzzer
● Service
● Passenger airbag
Page 91 of 189

Instruments and controls89Select Distance and confirm. Set the
unit of measurement to km or mi
(miles) and confirm.
Select Consumption and confirm.
When the Distance unit is set to km, it
is possible to set the unit of
measurement for fuel consumption to
either l/100km or km/l . When the
Distance unit is set to mi (miles), fuel
consumption is shown in mpg.
Select Temperature and confirm. Set
the unit of measurement to °C or °F
and confirm.
LANGUAGE
Languages selectable include:
English, German, French, Italian,
Portuguese, Spanish, Dutch, Polish and Turkish. Select desired language
and confirm.
WARNING VOLUME (Warning chime volume)
Adjust the volume of warning chimes
and confirm. 8 volume levels are
available.
Warning chimes 3 90.BUTTON VOLUME
A chime is sounded every time
SET q, R or S is pressed.
Adjust the volume of these chimes
and confirm. 8 volume levels are
available.
Warning chimes 3 90.
SEAT BELT BUZZER (Reactivate
warning chime for driver and/or front
passenger seat belt reminder)
This menu option is available only
when the seat belt reminder has
already been deactivated by a
workshop.
When reactivated, the driver and/or
front passenger are alerted with a
warning chime when the
corresponding seat belt is not
fastened.
Seat belt reminder 3 77.
SERVICE (Distance to next service)
Access this menu option to view the
remaining distance to the next
service.The distance to next service is also
displayed automatically when the
distance reaches 1,250 miles and is
repeated after every additional
125 miles.
Service display 3 73.
PASSENGER AIRBAG (Passenger
front and side airbags activation/
deactivation)
Activate the front passenger airbags if an adult is occupying the front
passenger seat. Deactivate airbags
when a child restraint system is
installed on this seat.9 Danger
Risk of fatal injury for a child using
a child restraint system on a seat
with activated front passenger
airbag.
Risk of fatal injury for an adult
person on a seat with deactivated
front passenger airbag.
After accessing this menu option,
activate or deactivate the airbags
( Bag Pass On or Bag Pass Off ) and
confirm; a confirmation message
Page 92 of 189

90Instruments and controlsappears in the display. Select YES (to
confirm changes) or No (to cancel
changes).
Airbag deactivation 3 49.
DAYTIME RUNNING LIGHTS
Activate the daytime running lights to
increase visibility of the vehicle during daylight (set to On). Deactivate when
not required (set to Off).
Daytime running lights 3 95.
EXIT MENU
Select this menu option to exit the
settings menu.Vehicle messages
Warning chimes Only one warning chime will sound at
a time.
The warning chime regarding
unfastened seat belts has priority
over any other warning chime.
When starting the engine or whilst
driving
● If seat belt is not fastened.
● If a certain speed is exceeded with the parking brake applied.
● If the parking assist detects an object.
● If a fault is detected in the parking
assist.
● If a door, the bonnet or the tailgate is not fully closed when
starting-off.
● If the vehicle speed briefly exceeds a set limit.
● If the stop-start system cannot restart the engine automatically.● Vehicles with manual transmission automated; brake
pedal has not been depressed
when starting the engine.
● Vehicles with manual transmission automated; an
incorrect gear has been selected when starting-off or during
driving.
● Vehicles with manual transmission automated; whenthe vehicle is at a standstill, if
engine is running and a gear is
engaged; transmission
automatically shifts to N in certain
situations.
● If the clutch temperature is too high in vehicles with manual
transmission automated.
● If a transmission fault is detected
in vehicles with manual
transmission automated.
● If a warning message, e.g. low tyre pressure, appears in the
Driver Information Centre (DIC).
Page 108 of 189

106Climate controlMaintenanceAir intake
The air intake in front of the
windscreen in the engine
compartment must be kept clear to
allow air intake. Remove any leaves,
dirt or snow.
Pollen filter The pollen filter cleans dust, soot,
pollen and spores from the air
entering the vehicle through the air
intake.
Air conditioning regular
operation
In order to ensure continuously
efficient performance, cooling must
be operated for a few minutes once a
month, irrespective of the weather
and time of year. Operation with
cooling is not possible when outside
temperature is too low.
ServiceFor optimal cooling performance, it is
recommended that the climate control system be checked annually, starting
three years after initial vehicle
registration, including:
● functionality and pressure test
● heating functionality
● leakage check
● check of drive belts
● cleaning of condenser and evaporator drainage
● performance check
Page 113 of 189

Driving and operating111AutostopIf the vehicle is at a low speed or at a
standstill, activate an Autostop as
follows:
● depress the clutch pedal
● set the lever to neutral
● release the clutch pedal
The engine will be switched off while
the ignition stays on.
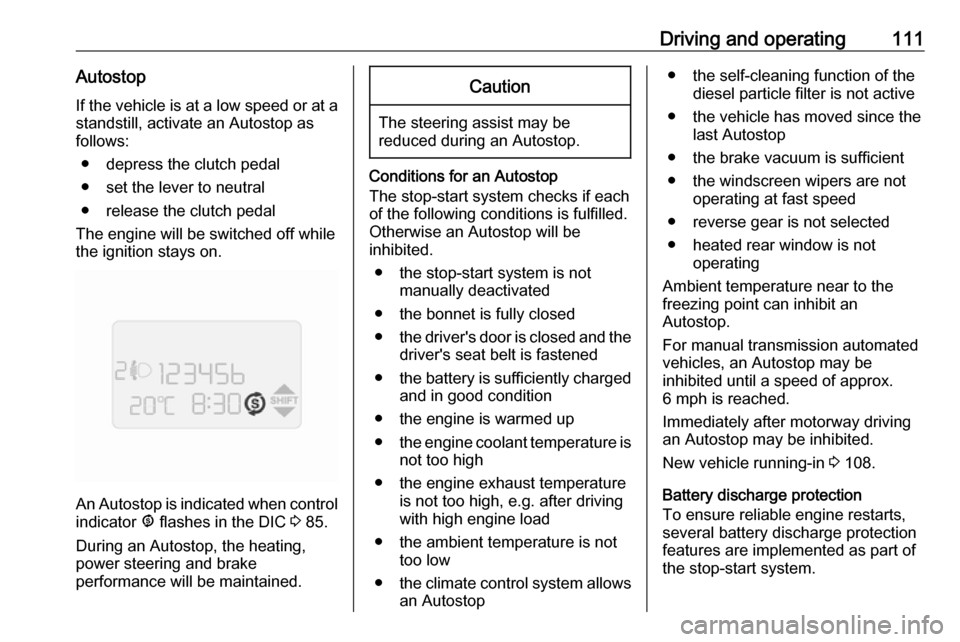
An Autostop is indicated when control
indicator ^ flashes in the DIC 3 85.
During an Autostop, the heating,
power steering and brake
performance will be maintained.
Caution
The steering assist may be
reduced during an Autostop.
Conditions for an Autostop
The stop-start system checks if each
of the following conditions is fulfilled.
Otherwise an Autostop will be
inhibited.
● the stop-start system is not manually deactivated
● the bonnet is fully closed
● the driver's door is closed and the
driver's seat belt is fastened
● the battery is sufficiently charged
and in good condition
● the engine is warmed up
● the engine coolant temperature is
not too high
● the engine exhaust temperature is not too high, e.g. after driving
with high engine load
● the ambient temperature is not too low
● the climate control system allows
an Autostop
● the self-cleaning function of the diesel particle filter is not active
● the vehicle has moved since the last Autostop
● the brake vacuum is sufficient ● the windscreen wipers are not operating at fast speed
● reverse gear is not selected
● heated rear window is not operating
Ambient temperature near to the
freezing point can inhibit an
Autostop.
For manual transmission automated vehicles, an Autostop may be
inhibited until a speed of approx.
6 mph is reached.
Immediately after motorway driving
an Autostop may be inhibited.
New vehicle running-in 3 108.
Battery discharge protection
To ensure reliable engine restarts,
several battery discharge protection
features are implemented as part of
the stop-start system.
Page 114 of 189

112Driving and operatingRestarting the engine
Manual transmission
The selector lever must be in neutral
to enable an automatic restart.
Depress the clutch pedal to restart the
engine.
Manual transmission automated
If the lever is in position N, select
another gear, otherwise release the
brake pedal or move the lever to +, –
or R to enable an automatic restart.
If an electrical accessory, e.g. a
portable CD player, is connected to
the power outlet, a brief power drop
during the restart may be noticeable.
Restarting the engine with the key When one of the following conditions
occurs during an Autostop, the
engine will need to be restarted
manually using the key.
● the driver's seat belt is unfastened and the driver's door
is opened
● three minutes have elapsed since the engine was switched offIn this event, control indicator ^
flashes in the DIC in conjunction with
a warning chime. Depending on
version, a corresponding message
may also appear in the DIC 3 85.
Fault
If control indicator Æ illuminates in the
instrument cluster, there is a fault in
the stop-start system 3 84.
Depending on version, 9 will
illuminate as an alternative if control
indicator Æ is not present. A warning
message may also be displayed in
the DIC 3 85.
Generic warning 9 3 76.
Seek the assistance of a workshop.
Parking9 Warning
● Do not park the vehicle on an
easily ignitable surface. The
high temperature of the
exhaust system could ignite the
surface.
● Always apply parking brake without pressing release
button. Apply as firmly as
possible on a downhill slope or
uphill slope. Depress brake
pedal at the same time to
reduce operating force.
● Switch off the engine. Turn the ignition key to position 0 and
remove it. Turn the steering
wheel until the steering wheel
lock is felt to engage.
● If the vehicle is on a level surface or uphill slope, engage
first gear before switching off
the ignition. On an uphill slope,
turn the front wheels away from
the kerb.
If the vehicle is on a downhill
slope, engage reverse gear
before switching off the ignition. Turn the front wheels towardsthe kerb.
Lock the vehicle 3 21 and activate the
anti-theft locking system 3 26 .
Page 152 of 189

150Vehicle careCombi, Combo Tour
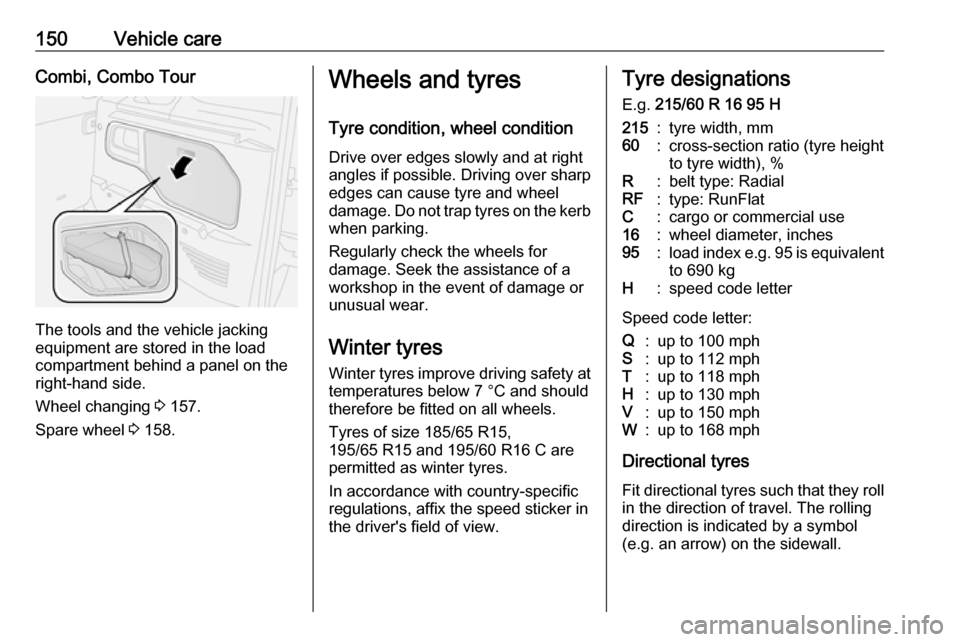
The tools and the vehicle jacking
equipment are stored in the load
compartment behind a panel on the
right-hand side.
Wheel changing 3 157.
Spare wheel 3 158.
Wheels and tyres
Tyre condition, wheel condition
Drive over edges slowly and at right
angles if possible. Driving over sharp
edges can cause tyre and wheel
damage. Do not trap tyres on the kerb when parking.
Regularly check the wheels for
damage. Seek the assistance of a
workshop in the event of damage or
unusual wear.
Winter tyres Winter tyres improve driving safety at
temperatures below 7 °C and should
therefore be fitted on all wheels.
Tyres of size 185/65 R15,
195/65 R15 and 195/60 R16 C are
permitted as winter tyres.
In accordance with country-specific
regulations, affix the speed sticker in
the driver's field of view.Tyre designations
E.g. 215/60 R 16 95 H215:tyre width, mm60:cross-section ratio (tyre height
to tyre width), %R:belt type: RadialRF:type: RunFlatC:cargo or commercial use16:wheel diameter, inches95:load index e.g. 95 is equivalent to 690 kgH:speed code letter
Speed code letter:
Q:up to 100 mphS:up to 112 mphT:up to 118 mphH:up to 130 mphV:up to 150 mphW:up to 168 mph
Directional tyres
Fit directional tyres such that they rollin the direction of travel. The rolling
direction is indicated by a symbol
(e.g. an arrow) on the sidewall.
Page 168 of 189

166Vehicle careTowing equipment
Do not clean the coupling ball bar with
a steam-jet or high-pressure jet
cleaner.
Interior care
Interior and upholstery
Only clean the vehicle interior,
including the instrument panel fascia
and panelling, with a dry cloth or
interior cleaner.
Clean the leather upholstery with
clear water and a soft cloth. In case of
heavy soiling, use leather care.
The instrument cluster and the
displays should only be cleaned using a soft damp cloth. If necessary, use a
weak soap solution.
Clean fabric upholstery with a
vacuum cleaner and brush. Remove
stains with an upholstery cleaner.
Clothing fabrics may not be
colourfast. This could cause visible
discolourations, especially on light-coloured upholstery. Removable
stains and discolourations should be
cleaned as soon as possible.
Clean seat belts with lukewarm water or interior cleaner.Caution
Close Velcro fasteners as open
Velcro fasteners on clothing could
damage seat upholstery.
The same applies to clothing with
sharp-edged objects, like zips or
belts or studded jeans.
Plastic and rubber parts
Plastic and rubber parts can be
cleaned with the same cleaner as
used to clean the body. Use interior cleaner if necessary. Do not use any
other agent. Avoid solvents and petrol in particular. Do not use high-
pressure jet cleaners.