warning VAUXHALL COMBO 2016 Owner's Guide
[x] Cancel search | Manufacturer: VAUXHALL, Model Year: 2016, Model line: COMBO, Model: VAUXHALL COMBO 2016Pages: 189, PDF Size: 4.47 MB
Page 45 of 189

Seats, restraints43
Loose or bulky clothing prevents the
belt from fitting snugly. Do not place
objects such as handbags or mobile
phones between the belt and your body.
9 Warning
The belt must not rest against hard
or fragile objects in the pockets of
your clothing.
Height adjustment
1. Pull belt out slightly.
2. Shift the height adjustment upwards or press button down to
disengage and push the height
adjustment downwards.
Adjust the height so that the belt lies across the shoulder. It must not lie
across the throat or upper arm.
Do not adjust while driving.
Page 46 of 189

44Seats, restraintsRemoving
To release belt, press red button on
belt buckle.
Seat belts on the rear seats
The seat belt for the rear centre seat
can only be withdrawn from the
retractor if the backrest is in the rear
position.
Using the seat belt while pregnant9 Warning
The lap belt must be positioned as
low as possible across the pelvis
to prevent pressure on the
abdomen.
Airbag system
The airbag system consists of a
number of individual systems
depending on the scope of
equipment.
When triggered, the airbags inflate
within milliseconds. They also deflate
so quickly that it is often unnoticeable
during the collision.
Notice
Depending on the severity of a
collision, the fuel system may also be cut-off and the engine switched
off automatically, for safety reasons. Resetting the fuel cut-off system;
refer to "Fuel system messages"
3 91.
Notice
Expiry dates for replacing the airbag system components may be found
on the label inside the glovebox. Contact a workshop to have the
airbag system components
replaced.
Page 47 of 189

Seats, restraints459Warning
If handled improperly the airbag
systems can be triggered in an
explosive manner.
Notice
The airbag systems and belt
pretensioner control electronics are
located in the centre console area.
Do not put any magnetic objects in
this area.
Do not fix any objects onto the airbag
covers and do not cover them with
other materials.
Each airbag is triggered only once.
Have deployed airbags replaced by
a workshop. Furthermore, it might be necessary to have the steering
wheel, the instrument panel, parts of
the panelling, the door seals,
handles and the seats replaced.
Do not make any modifications to
the airbag system as this will
invalidate the vehicle type approval.
9 Warning
When the airbags inflate, escaping
hot gases may cause burns.
Control indicator v for airbag systems
3 77.
Fault
If there is a fault in the airbag and belt tensioner system, the control
indicator v illuminates in the
instrument cluster. The system is not
operational.
Have the cause of the fault remedied
by a workshop.
Control indicator v 3 77.
Child restraint systems on front
passenger seat with airbag
systems
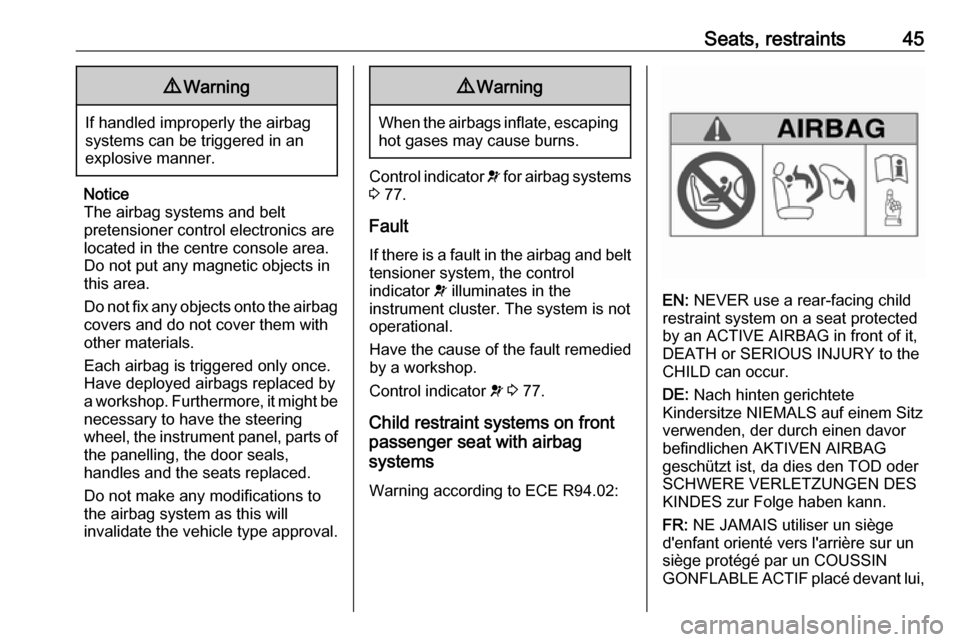
Warning according to ECE R94.02:
EN: NEVER use a rear-facing child
restraint system on a seat protected
by an ACTIVE AIRBAG in front of it,
DEATH or SERIOUS INJURY to the
CHILD can occur.
DE: Nach hinten gerichtete
Kindersitze NIEMALS auf einem Sitz
verwenden, der durch einen davor
befindlichen AKTIVEN AIRBAG
geschützt ist, da dies den TOD oder
SCHWERE VERLETZUNGEN DES
KINDES zur Folge haben kann.
FR: NE JAMAIS utiliser un siège
d'enfant orienté vers l'arrière sur un
siège protégé par un COUSSIN
GONFLABLE ACTIF placé devant lui,
Page 50 of 189

48Seats, restraintsMT: QATT tuża trażżin għat-tfal li
jħares lejn in-naħa ta’ wara fuq sit
protett b’AIRBAG ATTIV quddiemu;
dan jista’ jikkawża l-MEWT jew
ĠRIEĦI SERJI lit-TFAL.
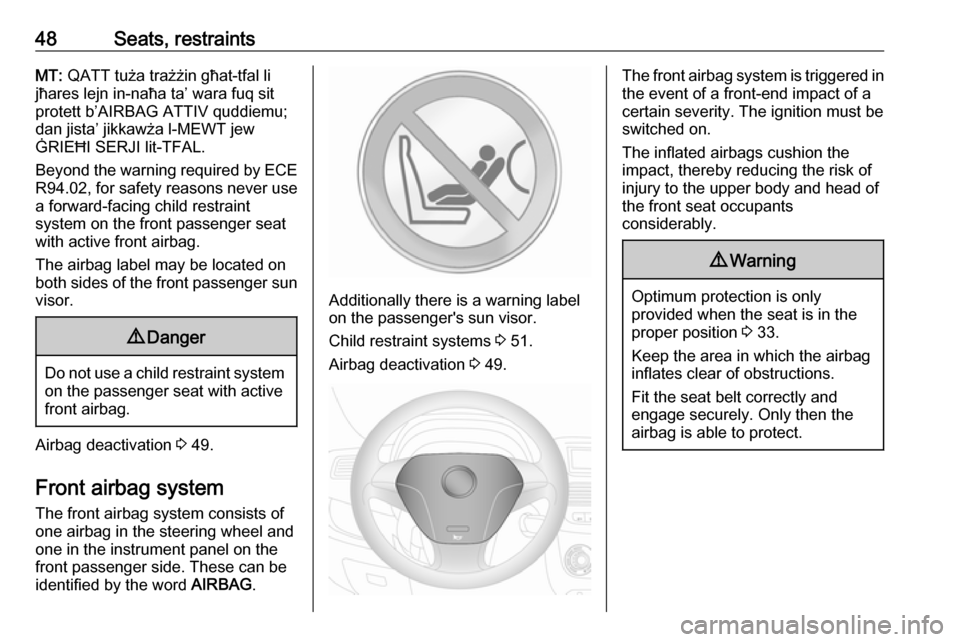
Beyond the warning required by ECE R94.02, for safety reasons never use
a forward-facing child restraint
system on the front passenger seat
with active front airbag.
The airbag label may be located on
both sides of the front passenger sun
visor.9 Danger
Do not use a child restraint system
on the passenger seat with active
front airbag.
Airbag deactivation 3 49.
Front airbag system
The front airbag system consists of
one airbag in the steering wheel and
one in the instrument panel on the
front passenger side. These can be
identified by the word AIRBAG.
Additionally there is a warning label
on the passenger's sun visor.
Child restraint systems 3 51.
Airbag deactivation 3 49.
The front airbag system is triggered in
the event of a front-end impact of a
certain severity. The ignition must be
switched on.
The inflated airbags cushion the
impact, thereby reducing the risk of
injury to the upper body and head of
the front seat occupants
considerably.9 Warning
Optimum protection is only
provided when the seat is in the
proper position 3 33.
Keep the area in which the airbag
inflates clear of obstructions.
Fit the seat belt correctly and
engage securely. Only then the
airbag is able to protect.
Page 51 of 189

Seats, restraints49Side airbag system
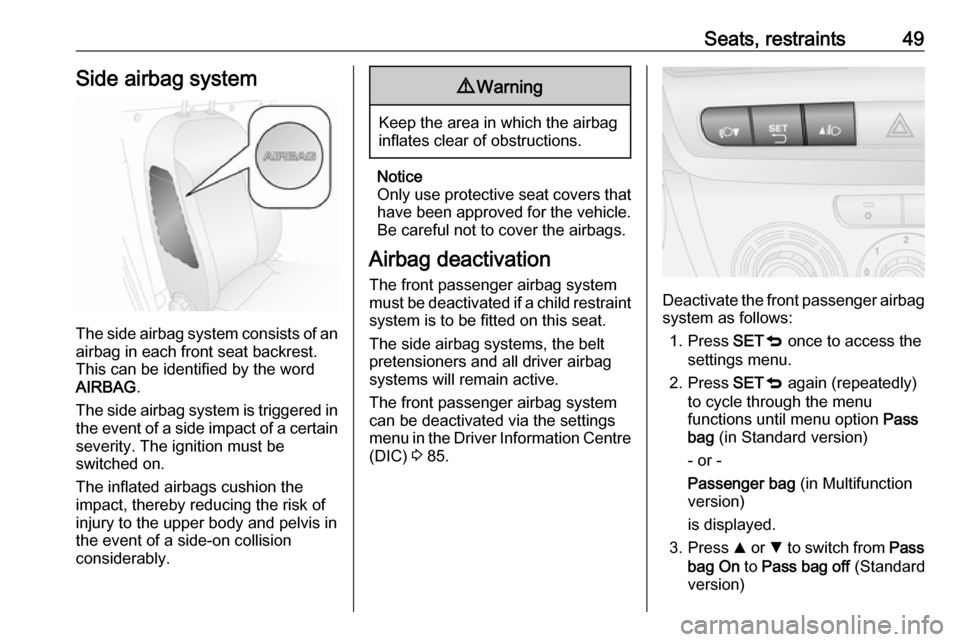
The side airbag system consists of an
airbag in each front seat backrest.
This can be identified by the word
AIRBAG .
The side airbag system is triggered in the event of a side impact of a certain
severity. The ignition must be
switched on.
The inflated airbags cushion the
impact, thereby reducing the risk of
injury to the upper body and pelvis in
the event of a side-on collision
considerably.
9 Warning
Keep the area in which the airbag
inflates clear of obstructions.
Notice
Only use protective seat covers that have been approved for the vehicle.Be careful not to cover the airbags.
Airbag deactivation
The front passenger airbag system
must be deactivated if a child restraint
system is to be fitted on this seat.
The side airbag systems, the belt pretensioners and all driver airbag
systems will remain active.
The front passenger airbag system
can be deactivated via the settings
menu in the Driver Information Centre (DIC) 3 85.
Deactivate the front passenger airbag
system as follows:
1. Press SETq once to access the
settings menu.
2. Press SETq again (repeatedly)
to cycle through the menu
functions until menu option Pass
bag (in Standard version)
- or -
Passenger bag (in Multifunction
version)
is displayed.
3. Press R or S to switch from Pass
bag On to Pass bag off (Standard
version)
Page 53 of 189

Seats, restraints51Child restraints
Child restraint systems
We recommend the Vauxhall child
restraint system which is tailored
specifically to the vehicle.
When a child restraint system is being used, pay attention to the following
usage and installation instructions
and also those supplied with the child
restraint system.
Always comply with local or national
regulations. In some countries, the
use of child restraint systems is
forbidden on certain seats.9 Warning
When using a child restraint
system on the front passenger
seat, the airbag systems for the
front passenger seat must be
deactivated; if not, the triggering of the airbags poses a risk of fatal
injury to the child.
This is especially the case if rear-
facing child restraint systems are
used on the front passenger seat.
Airbag deactivation 3 49.
Airbag label 3 44.
Selecting the right system The rear seats are the most
convenient location to fasten a child
restraint system.
Children should travel facing
rearwards in the vehicle as long as
possible. This makes sure that the
child's backbone, which is still very
weak, is under less strain in the event of an accident.
Suitable are restraint systems that
comply with valid UN ECE
regulations. Check local laws and
regulations for mandatory use of child restraint systems.
Ensure that the child restraint system
to be installed is compatible with the
vehicle type.
Ensure that the mounting location of
the child restraint system within the
vehicle is correct.
Allow children to enter and exit the
vehicle only on the side facing away
from the traffic.When the child restraint system is not in use, secure the seat with a seat beltor remove it from the vehicle.
Notice
Do not affix anything on the child
restraint systems and do not cover
them with any other materials.
A child restraint system which has
been subjected to stress in an
accident must be replaced.
Page 58 of 189

56StorageStorageStorage compartments................56
Instrument panel storage ...........56
Glovebox ................................... 57
Cupholders ................................ 57
Overhead console .....................57
Underseat storage .....................57
Load compartment .......................58
Rear storage .............................. 58
Load compartment cover ...........58
Lashing eyes ............................. 61
Load compartment grille ............61
Roof rack system .........................62
Roof rack ................................... 62
Loading information .....................62Storage compartments9Warning
Do not store heavy or sharp
objects in the storage
compartments. Otherwise vehicle
occupants could be injured by
objects being thrown around in the
event of hard braking, a sudden
change in direction or an accident.
Instrument panel storage
Storage compartments are located in the instrument panel.
Document holder
Pull the rear of the document holder
upwards from the instrument panel
and rest in tilted position.
To fold away, lower the document holder back into the instrument panel, pressing down until it engages
audibly.
Page 60 of 189

58StorageLoad compartmentRear storage
Roof bars
Do not exceed the maximum load
(which includes the weight of the bars) of 25 kg. Always distribute the
load evenly on the roof bars. The load must not obstruct complete closure ofthe doors.
Retighten the fastening screws on the
four brackets periodically.Caution
Do not use elastic lashings, e.g.
bungee cord. We recommend the
use of webbing straps.
Roof bars are designed to be fitted in
a specific position. Proper fastening
of the roof bars cannot be guaranteed if refitted in another position.
No materials (e.g. rubber, plastic)
should be placed between the feet of
the bars and the vehicle body, to
ensure proper fastening.
9 Warning
The use of roof bars may affect
steering and vehicle handling.
Removal
To remove the roof bars when not in use:
1. On one side of the vehicle, rotate handle below first roof bar
(located beneath the bracket) to
loosen, then slide handle inwards
towards centre of vehicle.
2. Repeat above step for the other side of the vehicle.
3. Push up roof bar to release from bracket on both sides and remove
roof bar completely.
4. Repeat above steps for the second roof bar.
5. Unfasten screws on the four brackets to remove the brackets
from the vehicle body.
Load compartment cover
Extendable load compartment
cover
Do not place any heavy or sharp-
edged objects on the extendable load
compartment cover.
Page 62 of 189

60StorageRear parcel shelf
The rear parcel shelf consists of two
parts - a front part and rear part. The front part can be opened or closed,
allowing for greater flexibility in the
load compartment.
Do not place any excessively heavy
or sharp-edged objects on the rear
parcel shelf.9 Warning
Always make sure that the load in
the vehicle is securely stowed.
Otherwise objects can be thrown
around inside the vehicle and
cause personal injury or damage
to the load or car.The rear parcel shelf can be installed
in 2 positions, i.e. the upper position
or the lower position. In the lower
position, the maximum load
permissible is 70 kg.
Removing
If the rear seats are in the folded
position, remove the parcel shelf and
store it horizontally between the back of the front seats and the folded rearseats.Caution
For safety reasons, do not place
loads on the folded rear seats.
Page 63 of 189

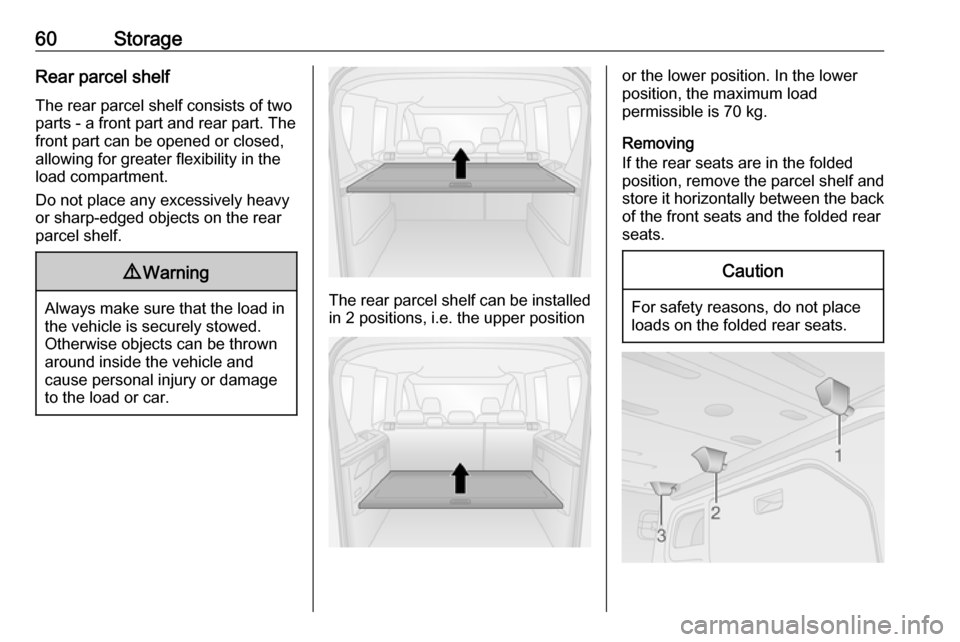
Storage61To remove, lift the front part of the
parcel shelf by releasing it from the
front retainers ( 1) on both sides.
Lift the rear part of the parcel shelf by
releasing it from the rear retainers ( 2
and 3) on both sides.
Installing
Refit the parcel shelf by engaging in
front and rear retainers on both sides.
Lashing eyes VanThe lashing eyes are designed to
secure items against slippage, e.g.
using lashing straps or a luggage net.
Combo Tour
Load compartment grille Depending on version, the load
compartment area can be increased
by opening the load compartment
partition on the front passenger side
(where fitted).
● Fold down the front passenger seat. Refer to "Seat folding"
3 35.
● From inside the load
compartment, release the pin (1)
on the rear of the partition to
unlock, then swing open the
partition door over the folded
front passenger seat.
● Insert the pin in the slot (2) on the
backrest of the folded front
passenger seat to lock in
position.
9 Warning
The load compartment partition
must always be locked in either
position during driving. Otherwise