ECO mode VAUXHALL COMBO 2016 Owner's Manual
[x] Cancel search | Manufacturer: VAUXHALL, Model Year: 2016, Model line: COMBO, Model: VAUXHALL COMBO 2016Pages: 189, PDF Size: 4.47 MB
Page 5 of 189

Introduction3Vehicle specific dataPlease enter your vehicle's data on
the previous page to keep it easily
accessible. This information is
available in the sections "Service and
maintenance" and "Technical data"
as well as on the identification plate.
Introduction
Your vehicle is a designed
combination of advanced technology, safety, environmental friendliness
and economy.
This Owner's Manual provides you
with all the necessary information to
enable you to drive your vehicle
safely and efficiently.
Make sure your passengers are
aware of the possible risk of accident
and injury which may result from
improper use of the vehicle.
You must always comply with the
specific laws and regulations of the
country that you are in. These laws
may differ from the information in this Owner's Manual.When this Owner's Manual refers to aworkshop visit, we recommend your
Vauxhall Authorised Repairer. For
gas vehicles, we recommend a
Vauxhall Authorised Repairer
licensed to service gas vehicles.
All Vauxhall Authorised Repairers
provide first-class service at
reasonable prices. Experienced
mechanics trained by Vauxhall work
according to specific Vauxhall
instructions.
The customer literature pack should
always be kept ready to hand in the
vehicle.
Using this manual ● This manual describes all options
and features available for this
model. Certain descriptions,
including those for display and
menu functions, may not apply to your vehicle due to model
variant, country specifications,
special equipment or
accessories.
● The "In brief" section will give you
an initial overview.● The table of contents at the beginning of this manual and
within each section shows where the information is located.
● The index will enable you to search for specific information.
● This Owner's Manual depicts left-
hand drive vehicles. Operation is
similar for right-hand drive
vehicles.
● The Owner's Manual uses the factory engine designations. The
corresponding sales
designations can be found in the
section "Technical data".
● Directional data, e.g. left or right, or front or back, always relate to
the direction of travel.
● The vehicle display screens may not support your specific
language.
● Display messages and interior labelling are written in bold
letters.
Page 17 of 189
In brief15Demisting and defrosting the
windows
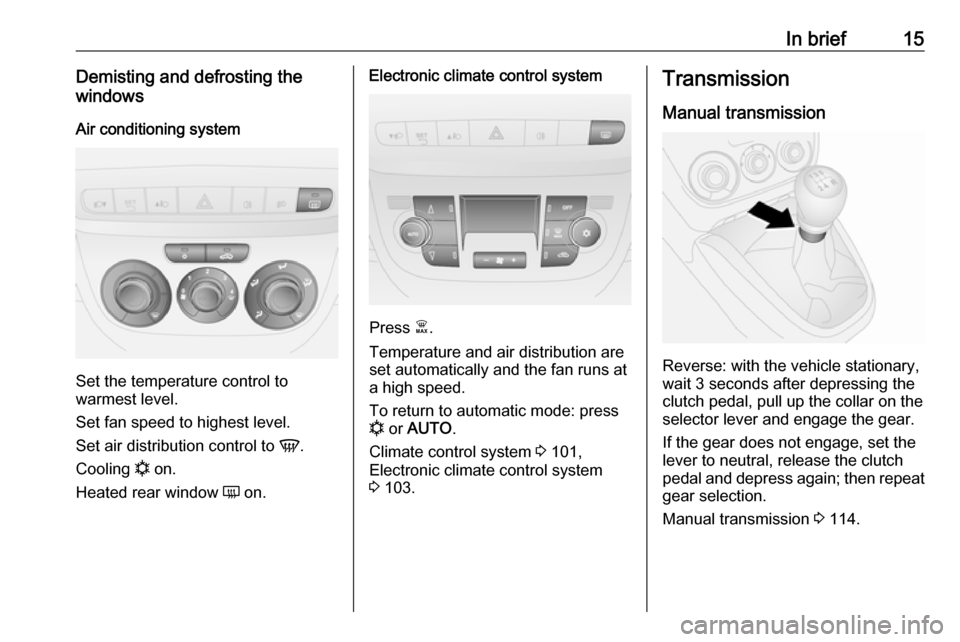
Air conditioning system
Set the temperature control to
warmest level.
Set fan speed to highest level.
Set air distribution control to V.
Cooling n on.
Heated rear window Ü on.
Electronic climate control system
Press Ê.
Temperature and air distribution are
set automatically and the fan runs at
a high speed.
To return to automatic mode: press
n or AUTO .
Climate control system 3 101,
Electronic climate control system 3 103.
Transmission
Manual transmission
Reverse: with the vehicle stationary,
wait 3 seconds after depressing the
clutch pedal, pull up the collar on the
selector lever and engage the gear.
If the gear does not engage, set the
lever to neutral, release the clutch
pedal and depress again; then repeat
gear selection.
Manual transmission 3 114.
Page 73 of 189
Instruments and controls71To reset the trip odometer, press and
hold TRIP on the end of the wiper
lever for a few seconds while the
relevant trip odometer is displayed.
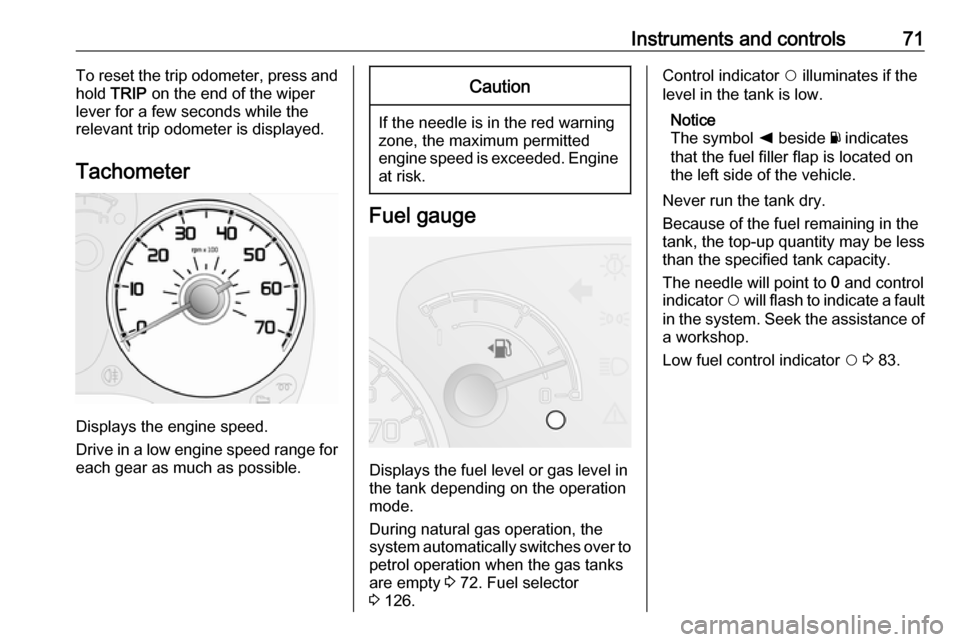
Tachometer
Displays the engine speed.
Drive in a low engine speed range for each gear as much as possible.
Caution
If the needle is in the red warning
zone, the maximum permitted
engine speed is exceeded. Engine at risk.
Fuel gauge
Displays the fuel level or gas level in
the tank depending on the operation
mode.
During natural gas operation, the
system automatically switches over to
petrol operation when the gas tanks
are empty 3 72. Fuel selector
3 126.
Control indicator $ illuminates if the
level in the tank is low.
Notice
The symbol k beside Y indicates
that the fuel filler flap is located on
the left side of the vehicle.
Never run the tank dry.
Because of the fuel remaining in the
tank, the top-up quantity may be less
than the specified tank capacity.
The needle will point to 0 and control
indicator $ will flash to indicate a fault
in the system. Seek the assistance of a workshop.
Low fuel control indicator $ 3 83.
Page 75 of 189
Instruments and controls73Caution
If engine coolant temperature is
too high, stop vehicle, switch off
engine. Danger to engine. Check
coolant level.
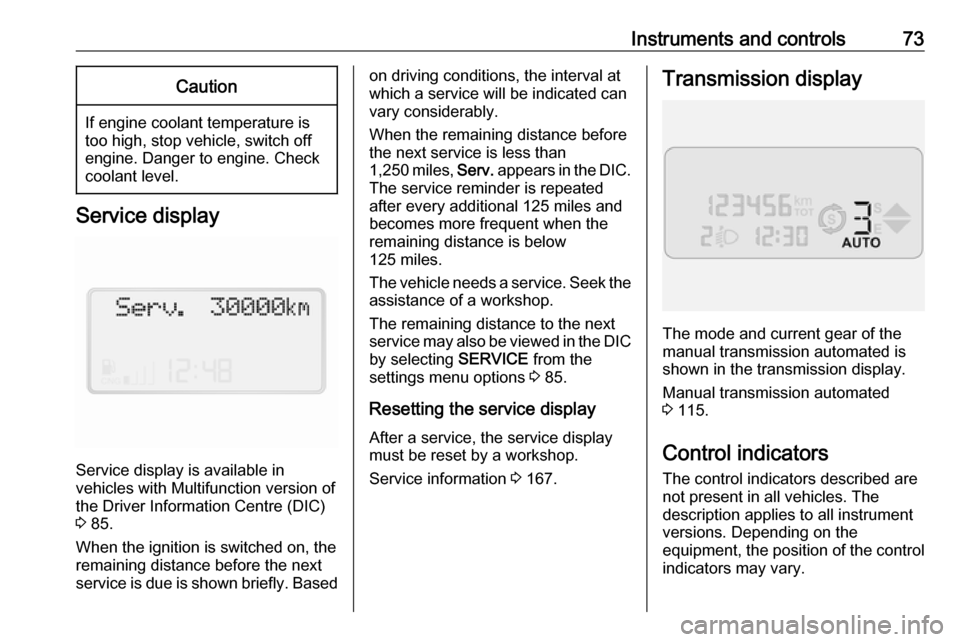
Service display
Service display is available in
vehicles with Multifunction version of the Driver Information Centre (DIC)3 85.
When the ignition is switched on, the remaining distance before the next
service is due is shown briefly. Based
on driving conditions, the interval at
which a service will be indicated can
vary considerably.
When the remaining distance before
the next service is less than
1,250 miles, Serv. appears in the DIC.
The service reminder is repeated
after every additional 125 miles and becomes more frequent when the
remaining distance is below
125 miles.
The vehicle needs a service. Seek the
assistance of a workshop.
The remaining distance to the next
service may also be viewed in the DIC by selecting SERVICE from the
settings menu options 3 85.
Resetting the service display After a service, the service display
must be reset by a workshop.
Service information 3 167.Transmission display
The mode and current gear of the
manual transmission automated is
shown in the transmission display.
Manual transmission automated
3 115.
Control indicators The control indicators described are
not present in all vehicles. The
description applies to all instrument
versions. Depending on the
equipment, the position of the control
indicators may vary.
Page 85 of 189

Instruments and controls83Illuminates when the ignition is
switched on and extinguishes shortly after the engine starts.
The engine oil life monitor lets you know when to change the oil. Control
indicator I will flash to indicate that
engine oil life has been diminished
and the oil needs changing.
Depending on version, a warning
message may also be displayed in
the Driver Information Centre (DIC) 3 85.
Based on driving conditions, the
interval at which an oil change will be
indicated can vary considerably.
Depending on model variant, I may
flash in the following ways:
● for 1 minute every 2 hours, or
● for 3 minute cycles with I off for
intervals of 5 seconds
The warning will be repeated every
time the engine is started, until the
engine oil is changed and the service
display is reset. Seek the assistance
of a workshop.
Service display 3 73.Low engine oil level
S illuminates red.
Illuminates for a few seconds after the
ignition is switched on.
If the control indicator does not
extinguish after a few seconds, or if it illuminates while driving, the engine
oil level is insufficient.
Depending on version, a warning
message may also be displayed in
the Driver Information Centre (DIC)
3 85.
Check oil level before seeking the assistance of a workshop 3 135.
Low fuel $ illuminates or flashes yellow.
Illuminates for a few seconds after the
ignition is switched on.
Illuminates
Level in fuel tank is too low. Refuel
immediately 3 127.
Never run the tank dry.
Catalytic converter 3 114.Flashes
Fault in fuel system. Have the cause
of the fault remedied by a workshop.
The needle in the fuel gauge will point to 0. Fuel gauge 3 71.
Drain fuel filter U illuminates yellow.
Illuminates for a few seconds after the
ignition is switched on.
Illuminates when the engine is
running
Indicates the presence of water in the
diesel. Depending on version, a
warning message may also be
displayed in the Driver Information
Centre (DIC) 3 85. Seek the
assistance of a workshop
immediately.
Immobiliser d illuminates yellow.
Fault in the immobiliser system. The
engine cannot be started.
Page 90 of 189

88Instruments and controls●Daytime running lights
● Exit menu
LIGHTING (Brightness of interior
lighting)
When driving at night with the low
beam on, adjust the brightness of the
vehicle's interior lighting (e.g.
instrument panel, climate control
display).
It is also possible to adjust the
brightness by pressing R or S
without accessing the settings menu.
SPEED BEEP (Speed limit warning
chime)
Activate or deactivate the speed limit
warning chime or change the speed
limit. Speeds between 20 and
125 mph can be stored.
When activated, the driver is alerted
with a warning chime when the set
speed limit is exceeded.
After accessing this menu option,
activate or deactivate the function
(set to On or Off) and confirm.
Press SETq when activated ( On) to
access the current set speed. Adjust
as required and confirm.Warning chimes 3 90.
TRIP B DATA
Activate or deactivate the second trip
computer (set to On or Off).
Trip B records average consumption, distance travelled, average speed
and travel time (driving time). The
measurement can be restarted at any
time. Trip computer 3 91.
SET TIME (Setting the clock and clock mode)
After accessing this menu option, it is possible to either set the time or
change the clock mode between 12
hour and 24 hour clock.
Select Time and confirm. Adjust the
hours setting (flashing value) and
confirm. Adjust minutes setting
(flashing value) and confirm.
Select Mode and confirm. Select
12h or 24h and confirm.
Clock 3 67.SET DATE
Adjust the year setting (flashing
value) and confirm. Adjust month
setting (flashing value) and confirm.
Adjust the day setting (flashing value)
and confirm.
RADIO INFO (Display audio and
radio information)
Activate radio info (set to On) to
display audio and radio information (e.g. station frequency, RDS
messages, track number). Deactivate
when not required (set to Off).
AUTOCLOSE (Automatic central
locking when driving)
Activate the autoclose feature (set to
On ) to automatically lock the doors
when vehicle speed exceeds
12 mph. Deactivate when not
required (set to Off).
UNIT OF MEASUREMENT (for
Distance, Fuel consumption and
Temperature)
After accessing this menu option, it is
possible to set the unit of
measurement for distance, fuel
consumption and temperature.
Page 101 of 189
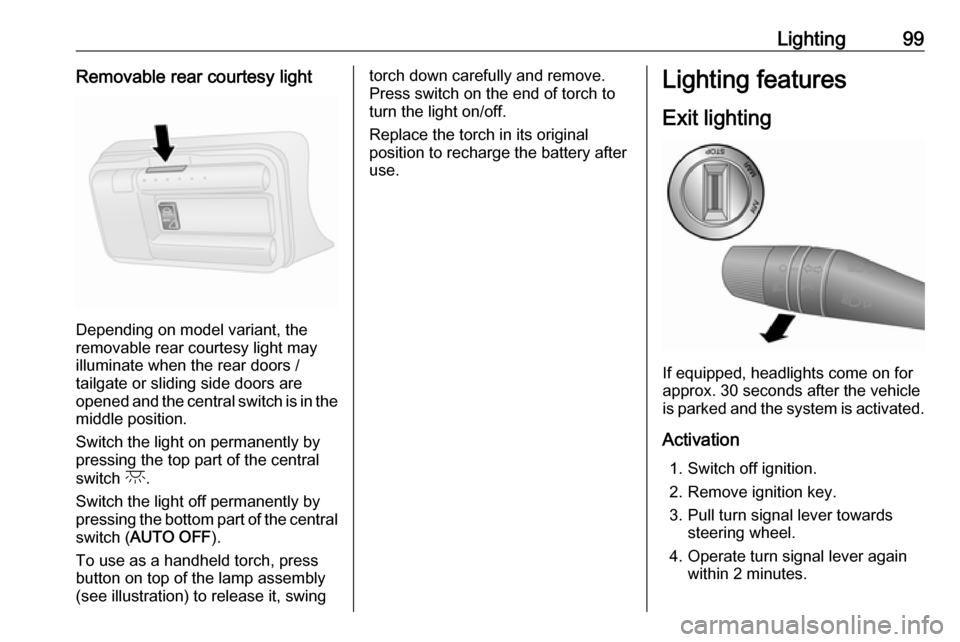
Lighting99Removable rear courtesy light
Depending on model variant, the
removable rear courtesy light may
illuminate when the rear doors /
tailgate or sliding side doors are
opened and the central switch is in the middle position.
Switch the light on permanently by pressing the top part of the central
switch c.
Switch the light off permanently by pressing the bottom part of the central
switch ( AUTO OFF ).
To use as a handheld torch, press
button on top of the lamp assembly
(see illustration) to release it, swing
torch down carefully and remove.
Press switch on the end of torch to
turn the light on/off.
Replace the torch in its original
position to recharge the battery after
use.Lighting features
Exit lighting
If equipped, headlights come on for
approx. 30 seconds after the vehicle
is parked and the system is activated.
Activation 1. Switch off ignition.
2. Remove ignition key.
3. Pull turn signal lever towards steering wheel.
4. Operate turn signal lever again within 2 minutes.
Page 117 of 189
Driving and operating115Caution
It is not advisable to drive with thehand resting on the selector lever.
When gearshifting is recommended
to improve fuel economy, control
indicator [ or Ò illuminates in the
Driver Information Centre (DIC) 3 80.
Manual transmission
automated
The manual transmission automated (MTA) permits manual (manual
mode) or automatic gear shifting
(automatic mode), both with
automatic clutch control.
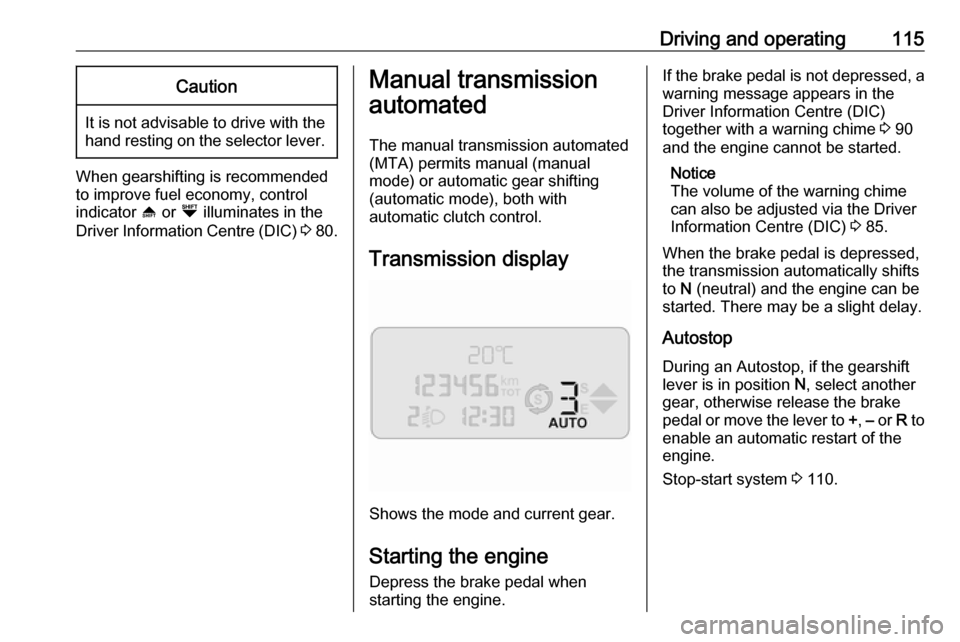
Transmission display
Shows the mode and current gear.
Starting the engine
Depress the brake pedal when
starting the engine.
If the brake pedal is not depressed, a
warning message appears in the
Driver Information Centre (DIC)
together with a warning chime 3 90
and the engine cannot be started.
Notice
The volume of the warning chime
can also be adjusted via the Driver
Information Centre (DIC) 3 85.
When the brake pedal is depressed,
the transmission automatically shifts
to N (neutral) and the engine can be
started. There may be a slight delay.
Autostop
During an Autostop, if the gearshift
lever is in position N, select another
gear, otherwise release the brake
pedal or move the lever to +, – or R to
enable an automatic restart of the
engine.
Stop-start system 3 110.
Page 119 of 189
Driving and operating117chime will sound and the
transmission automatically shifts to
N in certain situations.
When stopping on gradients, engage
parking brake or depress the brake pedal. To prevent overheating of theclutch, an intermittent audible
warning chime may sound as a signal
to depress the brake pedal or apply
the parking brake.
Switch off engine if stopping for a
lengthy period, e.g. in traffic jams.
Engine braking
Automatic mode
When driving downhill, the manual
transmission automated does not
shift into higher gears until a fairly
high engine speed has been reached. It shifts down in good time when
braking.
Manual mode
To utilise the engine braking effect,
select a lower gear in good time when
driving downhill.Rocking the vehicle
Rocking the vehicle is only
permissible if the vehicle is stuck in
sand, mud, snow or a hole. Move the
selector lever between R and A/M (or
between + and -) in a repeat pattern,
while applying light pressure to the
accelerator pedal. Do not race the
engine and avoid sudden
acceleration.
Parking
Apply the parking brake. The most
recently engaged gear (see
transmission display) remains
engaged.Caution
Do not leave the vehicle with the
transmission in position N.
When the ignition is switched on, a
warning chime will sound when the
vehicle is parked if the transmission is
still in N.
When the ignition is switched off, the transmission no longer responds to
movement of the selector lever.
Manual mode
If engine speed is too low, the
transmission automatically shifts to a
lower gear.
In manual mode, no automatic
shifting to a higher gear takes place
at high engine revolutions. If engine
speed is too high, the transmission
only switches to a higher gear via
kickdown 3 118.
When gearshifting is recommended
to improve fuel economy, control
indicator [ or Ò illuminates in the
Driver Information Centre (DIC) 3 80.
Page 120 of 189

118Driving and operatingElectronic drivingprogrammes
Eco mode E
When automatic mode is engaged,
the Eco mode can be selected to
reduce fuel consumption.
Eco mode selects the most suitable gear depending on the speed of the
vehicle, the engine speed and the
intensity with which the accelerator is pressed.
Activation
Press E on the selector lever housing.
Control indicator E is shown in the
transmission display to indicate
activation.
Deactivation
Eco mode is switched off by:
● pressing E again
● switching to manual mode
In order to protect the transmission at extremely high clutch temperatures,
an intermittent audible warning chime
may sound. In such cases, depress
the brake pedal, select N and apply
the parking brake to allow the clutch
to cool down.
Kickdown If the accelerator pedal is pressed
past the pressure point, the
transmission shifts to a lower gear
depending on engine speed. Full
engine power is available for
acceleration.If engine speed is too high the
transmission switches to a higher
gear, even in manual mode. Without
kickdown this automatic shift is not
effected in manual mode.
Fault
In the event of a fault, control indicator s is shown in the transmission
display.
Continued driving is possible,
provided the vehicle is driven with
care and anticipation. A warning
message may appear in the Driver
Information Centre (DIC) in
conjunction with a warning chime
3 90.
Notice
The volume of the warning chime can also be adjusted via the Driver
Information Centre (DIC) 3 85.
Have the cause of the fault remedied by a workshop.