rear view mirror VAUXHALL COMBO E 2019.75 Owner's Manual
[x] Cancel search | Manufacturer: VAUXHALL, Model Year: 2019.75, Model line: COMBO E, Model: VAUXHALL COMBO E 2019.75Pages: 281, PDF Size: 10.44 MB
Page 22 of 281

20Keys, doors and windowsKeys, doors and
windowsKeys, locks ................................... 20
Keys .......................................... 20
Radio remote control .................21
Electronic key system ................22
Central locking system ..............24
Automatic locking ......................27
Child locks ................................. 27
Doors ........................................... 29
Sliding door ............................... 29
Rear doors ................................. 30
Load compartment ....................31
Vehicle security ............................ 34
Anti-theft locking system ...........34
Anti-theft alarm system ..............34
Immobiliser ................................ 36
Exterior mirrors ............................ 37
Convex shape ........................... 37
Electric adjustment ....................37
Folding mirrors .......................... 37
Heated mirrors ........................... 38
Interior mirrors ............................. 38
Manual anti-dazzle ....................38
Automatic anti-dazzle ................39Child surveillance mirror ............39
Rear view display ......................39
Windows ...................................... 40
Windscreen ............................... 40
Power windows ......................... 40
Rear windows ............................ 42
Heated rear window ..................42
Sun visors .................................. 43
Roller blinds ............................... 43
Roof ............................................. 43
Glass panel ............................... 43Keys, locks
KeysCaution
Do not attach heavy or bulky items to the ignition key.
Replacement keys
The key number is specified on a
detachable tag.
The key number must be quoted
when ordering replacement keys as it
is a component of the immobiliser
system.
Locks 3 246.
Central locking 3 24.
Starting the engine 3 145.
Radio remote control 3 21.
Electronic key 3 22.
The code number of the adapter for
the locking wheel nuts is specified on
a card. It must be quoted when
ordering a replacement adapter.
Wheel changing 3 237.
Page 41 of 281

Keys, doors and windows39Automatic anti-dazzle
Dazzle from following vehicles is
automatically reduced, when driving
in the dark.
Child surveillance mirror
A child surveillance mirror allows to
observe the rear seats. The mirror can be adjusted.
Rear view display
The rear view display can show three different views:
● close rear view
● passenger side view
● standard rear view
The standard rear view is displayed
by default.
Rear view camera 3 196
Passenger side camera 3 193
Page 42 of 281

40Keys, doors and windows
To switch between the views, press
p .
To switch the rear view display on or off, press ).
Windows
Windscreen Windscreen stickers
Do not attach stickers such as toll
road stickers or similar on the
windscreen in the area of the interior
mirror. Keep the sensor free from
dust, dirt and ice. Otherwise the
detection zone of the rain sensor /
light sensor and the view area of the
camera in the mirror housing could be
restricted.
Sensors 3 90, 3 122
Windscreen replacementCaution
If the vehicle has a front-looking
camera sensor for the driver
assistance systems, it is very
important that any windscreen
replacement is performed
accurately according to Vauxhall
specifications. Otherwise, these systems may not work properly
and there is a risk of unexpected
behaviour and / or messages from these systems.
Power windows
9 Warning
Take care when operating the
power windows. Risk of injury,
particularly to children.
If there are children on the rear seats, switch on the child safety
system for the power windows.
Page 115 of 281

Instruments and controls113when it is dark outside. Be sure tokeep the head-up display imagedim and placed low in your field of view.
Adjust brightness
The head-up display image will
automatically dim and brighten to
compensate for outside lighting.
Brightness can also be adjusted
manually as needed:
Press e to brighten the display. Press
æ to dim the display.
The image can temporarily light up
depending on angel and position of
sunlight.
Switching off Press æ and hold to turn the head-up
display off.
Language Preferred language can be set invehicle personalisation menu 3 115.
Units
Units can be changed in vehicle
personalisation menu 3 115.
Care of head-up display Clean the screen of the head-updisplay with a soft cloth sprayed withglass cleaner. Wipe the lens gently,
then dry it.
System limitations Head-up display may not operate
properly when:
● The lens in the instrument panel is covered by objects or not
clean.
● Display brightness is too dim or bright.
● Image is not adjusted to the proper height.
● The driver wears polarized sunglasses.
If the head-up image is not correct for
other reasons, contact a workshop.Rear view display
The rear view display is located at the position of the interior mirror.
It provides the following views: ● standard rear view 3 39
● close rear view 3 196
● passenger side view 3 193
Switching on
Press m and confirm the message
with p.
Page 195 of 281

Driving and operating193The state of the system is stored
when switching off the ignition.
The system is automatically
deactivated when towing an
electrically connected trailer.
Due to adverse weather conditions
such as heavy rain, false detections
may occur.
Fault
In the event of a fault, B flashes for a
few moments in the instrument panel,
accompanied by C and a display
message. Have the cause of the fault remedied by a workshop.
Passenger side cameraThe passenger side camera monitorsthe side of the vehicle.
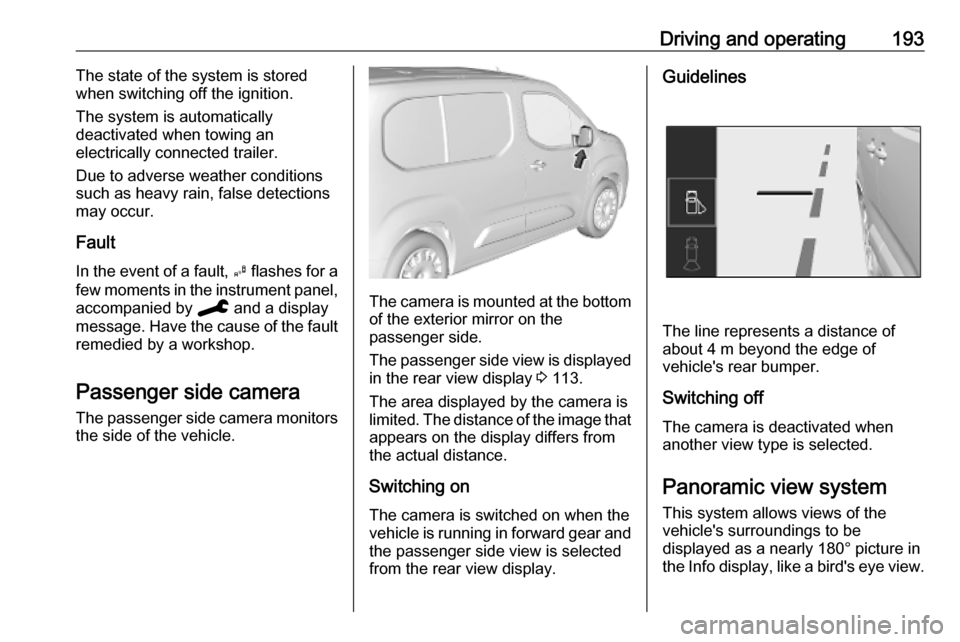
The camera is mounted at the bottom
of the exterior mirror on the
passenger side.
The passenger side view is displayed in the rear view display 3 113.
The area displayed by the camera is
limited. The distance of the image that
appears on the display differs from
the actual distance.
Switching on The camera is switched on when the
vehicle is running in forward gear and
the passenger side view is selected from the rear view display.
Guidelines
The line represents a distance of
about 4 m beyond the edge of
vehicle's rear bumper.
Switching off The camera is deactivated when
another view type is selected.
Panoramic view system
This system allows views of the
vehicle's surroundings to be
displayed as a nearly 180° picture in
the Info display, like a bird's eye view.
Page 196 of 281

194Driving and operatingThe system uses:● rear camera, installed in the tailgate
● ultrasonic parking sensors in the rear bumper
The screen in the Info display is
divided into two parts. On the right
there is a view from above the vehicle,
and on the left there is the view from
the rear displayed. The parking
sensors complete the information on
the view from above the vehicle.
Change the volume of the acoustic
signals by pressing C in the right
lower zone of the display.
Activation
Panoramic view system is activated
by:
● engaging reverse gear
● driving up to 6 mph
Functionality Different views can be selected in the
left part of the display. Change the
type of view at any time during a
manoeuvre by pressing the touch
field in the left lower zone of the
display:
● Standard view
● AUTO Mode
● Zoom view
● 180° view
The display is immediately updated
with the type of view selected.
AUTO Mode is activated by default. In
this mode, the system selects the
best view, standard or zoom, to
display according to the information
from the parking sensors.The state of the system is not kept in
memory when the ignition is switched
off.
Rear view / Standard view
The area behind the vehicle is
displayed in the screen. The vertical
lines represent the width of the
vehicle with mirrors unfolded. The
direction of the lines changes with the position of the steering wheel.
The first horizontal line represents a
distance of about 30 cm beyond the
edge of vehicle's rear bumper. The
upper horizontal lines represent
Page 230 of 281

228Vehicle careInstrument panel fuse boxThe fuse box is located behind a
cover in the instrument panel at the
left side.
Remove the cover by pulling at the
top left, then at the right side.
No.Circuit1Inductive charging, clutch
switch, selective ride control,
power steering, diesel exhaust
system, interior mirror4Horn6Windscreen washer7Power outlet rear10Door lock12Diagnostic connector, power
supply transformerNo.Circuit13Head-up display, climate
control, Infotainment system14Anti-theft alarm system, tele‐
matic unit15Automatic transmission, instru‐
ment cluster, climate control16Starter, power supply trans‐
former17Instrument cluster19Trailer socket, steering wheel
controls21Anti-theft system, power button22Rear view camera, rain and light sensor23Seat belt reminder, special
vehicle control module, start-
stop, trailer socket24Parking assist, Infotainment
system, rear view camera, side
blind spot camera25Airbag
Page 278 of 281

276Gear shifting............................... 103
General information ...................205
Glass panel .................................. 43
Glovebox ..................................... 69
Glovebox cooler ......................... 141
Graphic Info Display ...................115
H Halogen headlights ....................219
Hand brake ................................. 160
Hazard warning flashers ............124
Headlight flash ........................... 123
Headlight range adjustment ......124
Headlights................................... 121 Headlights when driving abroad 124
Head restraint adjustment .............8
Head restraints ............................ 44
Head-up display.......................... 112 Heated mirrors ............................. 38
Heated rear window ..................... 42
Heated steering wheel .................89
Heating ........................................ 49
Heating and ventilation system . 130
High beam ......................... 106, 122
High beam assist ................106, 122
Hill start assist ........................... 162
Horn ....................................... 13, 90
I
Identification plate .....................256
Ignition switch positions .............143Immobiliser .................................. 36
Indicators ...................................... 97
Inductive charging ........................94
Info Display ................................. 110
Installing seats .............................. 51
Instrument cluster ........................96
Instrument panel fuse box .........228
Instrument panel illumination control .................................... 127
Instrument panel overview ........... 10
Interior care ............................... 248
Interior lighting ............................ 127
Interior lights ...................... 127, 226
Interior mirrors .............................. 38
Introduction .................................... 3
J Jump starting ............................. 242
K Keys ............................................. 20
Keys, locks ................................... 20
L Ladder flap.................................... 74
Lane keep assist ................104, 198
Lashing eyes ............................... 78
LED headlights ...................106, 221
Lighting features .........................128
Light switch ................................ 121
Load compartment ................31, 74Load compartment cover .............75
Load compartment grille ...............81
Loading ............................. 47, 50, 51
Loading information .....................85
Low beam ................................... 106
Low fuel ..................................... 106
M
Malfunction indicator light ..........102
Manual anti-dazzle ......................38
Manual mode ............................. 156
Manual transmission .................. 158
Mirror adjustment ........................... 8
Misted light covers .....................126
Multimedia .................................. 115
Multimedia Navi Pro ...................115
N
New vehicle running-in ..............143
Number plate light .....................226
O Object detection systems ...........183
Odometer ..................................... 97
Oil, engine .......................... 254, 258
Outside temperature ....................92
Overhead console .......................71
Overload indicator ................86, 103
Overrun cut-off ........................... 147