Scr VAUXHALL COMBO E 2020 User Guide
[x] Cancel search | Manufacturer: VAUXHALL, Model Year: 2020, Model line: COMBO E, Model: VAUXHALL COMBO E 2020Pages: 279, PDF Size: 28.6 MB
Page 93 of 279
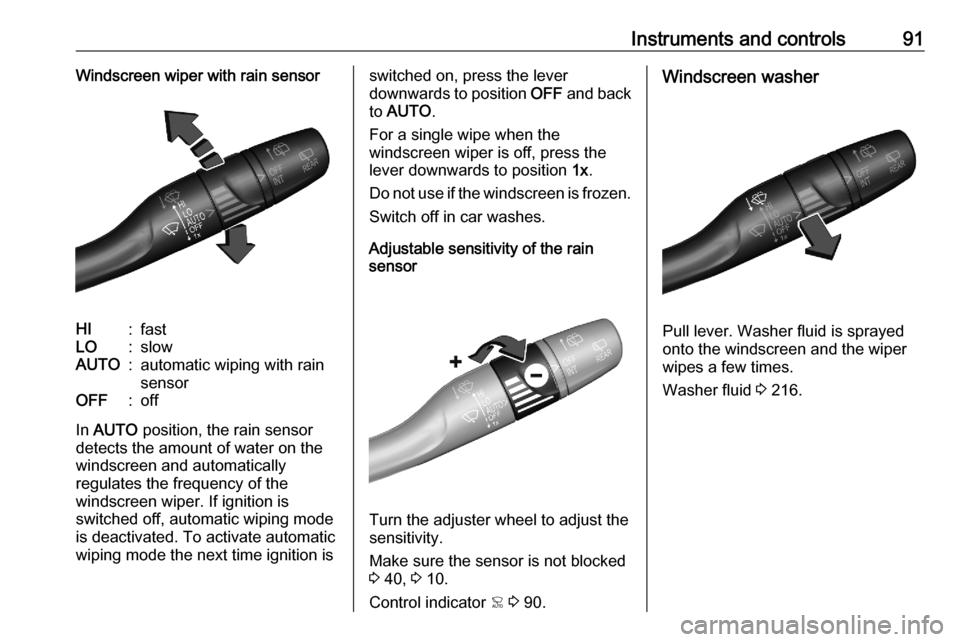
Instruments and controls91Windscreen wiper with rain sensorHI:fastLO:slowAUTO:automatic wiping with rain
sensorOFF:off
In AUTO position, the rain sensor
detects the amount of water on the
windscreen and automatically
regulates the frequency of the
windscreen wiper. If ignition is
switched off, automatic wiping mode
is deactivated. To activate automatic
wiping mode the next time ignition is
switched on, press the lever
downwards to position OFF and back
to AUTO .
For a single wipe when the
windscreen wiper is off, press the
lever downwards to position 1x.
Do not use if the windscreen is frozen. Switch off in car washes.
Adjustable sensitivity of the rain
sensor
Turn the adjuster wheel to adjust the
sensitivity.
Make sure the sensor is not blocked
3 40, 3 10.
Control indicator < 3 90.
Windscreen washer
Pull lever. Washer fluid is sprayed
onto the windscreen and the wiper
wipes a few times.
Washer fluid 3 216.
Page 94 of 279
92Instruments and controlsRear window wiper andwasher
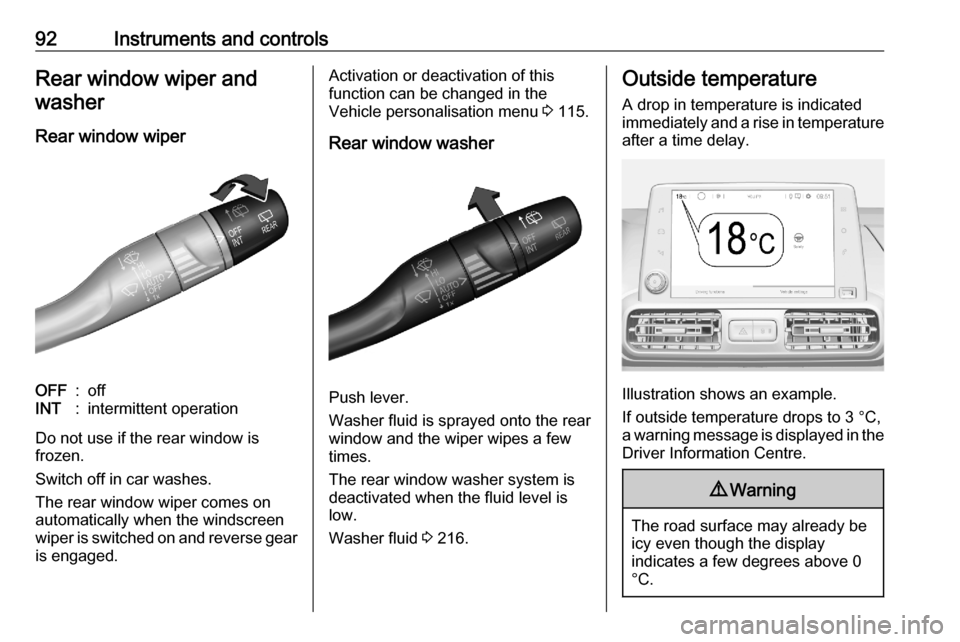
Rear window wiperOFF:offINT:intermittent operation
Do not use if the rear window is
frozen.
Switch off in car washes.
The rear window wiper comes on
automatically when the windscreen
wiper is switched on and reverse gear
is engaged.
Activation or deactivation of this
function can be changed in the
Vehicle personalisation menu 3 115.
Rear window washer
Push lever.
Washer fluid is sprayed onto the rear
window and the wiper wipes a few
times.
The rear window washer system is
deactivated when the fluid level is
low.
Washer fluid 3 216.
Outside temperature
A drop in temperature is indicated
immediately and a rise in temperature
after a time delay.
Illustration shows an example.
If outside temperature drops to 3 °C,
a warning message is displayed in the Driver Information Centre.
9 Warning
The road surface may already be
icy even though the display
indicates a few degrees above 0
°C.
Page 95 of 279
Instruments and controls93ClockDate and time are shown in the Info
Display.
The adjustment of date and time is
described in the Infotainment Manual.
Info Display 3 110.
Power outlets
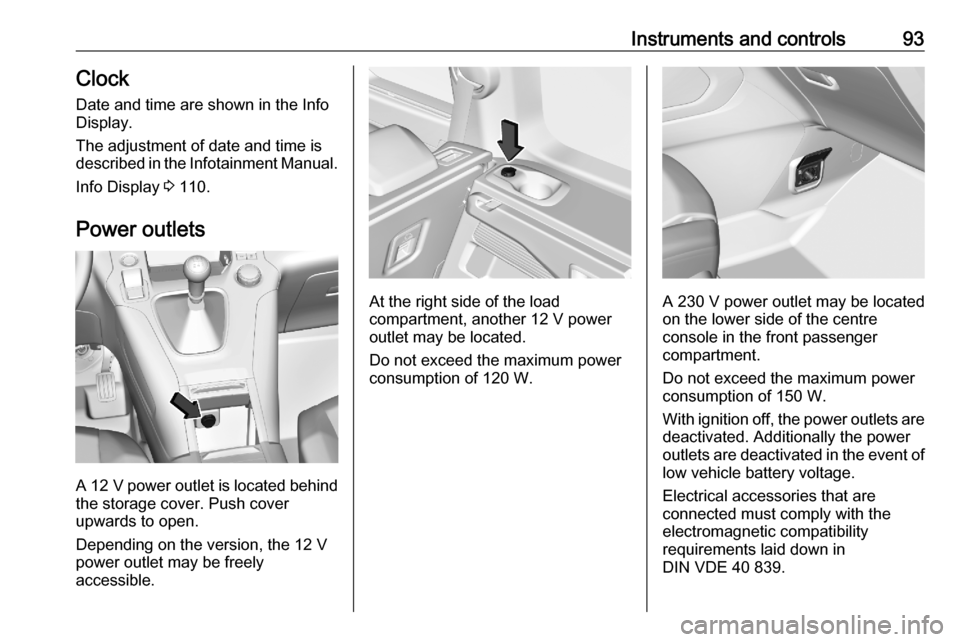
A 12 V power outlet is located behind
the storage cover. Push cover
upwards to open.
Depending on the version, the 12 V
power outlet may be freely
accessible.
At the right side of the load
compartment, another 12 V power
outlet may be located.
Do not exceed the maximum power
consumption of 120 W.A 230 V power outlet may be located
on the lower side of the centre
console in the front passenger
compartment.
Do not exceed the maximum power
consumption of 150 W.
With ignition off, the power outlets are
deactivated. Additionally the power
outlets are deactivated in the event of
low vehicle battery voltage.
Electrical accessories that are
connected must comply with the
electromagnetic compatibility
requirements laid down in
DIN VDE 40 839.
Page 102 of 279
100Instruments and controlsdistance. C flashes and then
illuminates permanently until service
is executed.
Reset of service interval After each service, the service
indicator must be reset to ensure
proper functionality. It is
recommended to seek the assistance of a workshop.
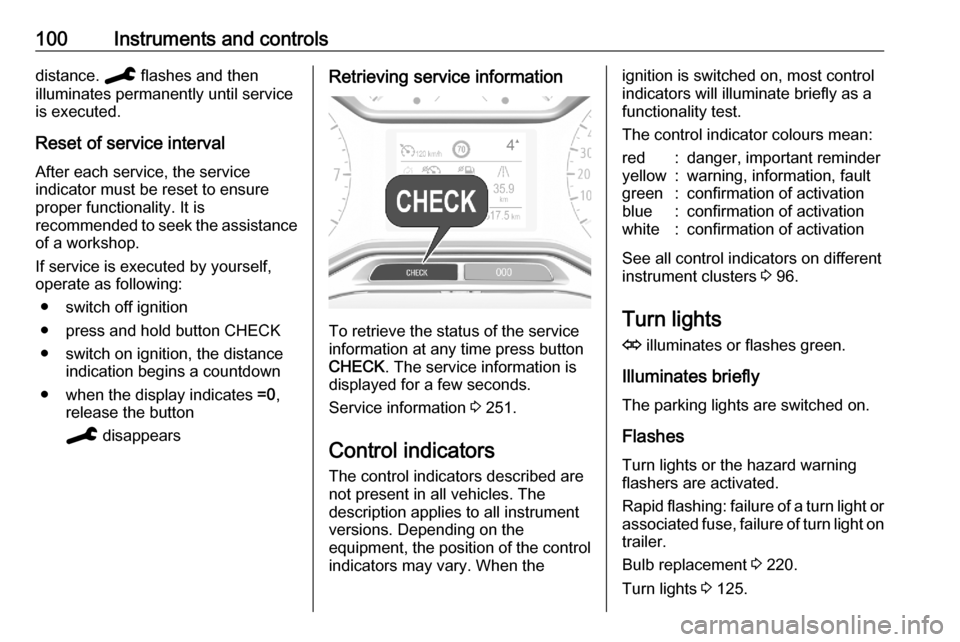
If service is executed by yourself,
operate as following:
● switch off ignition
● press and hold button CHECK
● switch on ignition, the distance indication begins a countdown
● when the display indicates =0,
release the button
C disappearsRetrieving service information
To retrieve the status of the service
information at any time press button
CHECK . The service information is
displayed for a few seconds.
Service information 3 251.
Control indicators The control indicators described are
not present in all vehicles. The
description applies to all instrument
versions. Depending on the
equipment, the position of the control indicators may vary. When the
ignition is switched on, most controlindicators will illuminate briefly as afunctionality test.
The control indicator colours mean:red:danger, important reminderyellow:warning, information, faultgreen:confirmation of activationblue:confirmation of activationwhite:confirmation of activation
See all control indicators on different
instrument clusters 3 96.
Turn lights
O illuminates or flashes green.
Illuminates briefly The parking lights are switched on.
Flashes
Turn lights or the hazard warning
flashers are activated.
Rapid flashing: failure of a turn light or associated fuse, failure of turn light on
trailer.
Bulb replacement 3 220.
Turn lights 3 125.
Page 110 of 279
108Instruments and controlsDisplaysDriver Information Centre
The Driver Information Centre is
located in the instrument cluster.
Driver Information Centre indicates: ● overall and trip odometer
● digital speed indication
● trip / fuel information menu
● gear shift indication
● service information
● vehicle and warning messages ● driver assistance messages
● pop-up messages
Selecting menus and functions
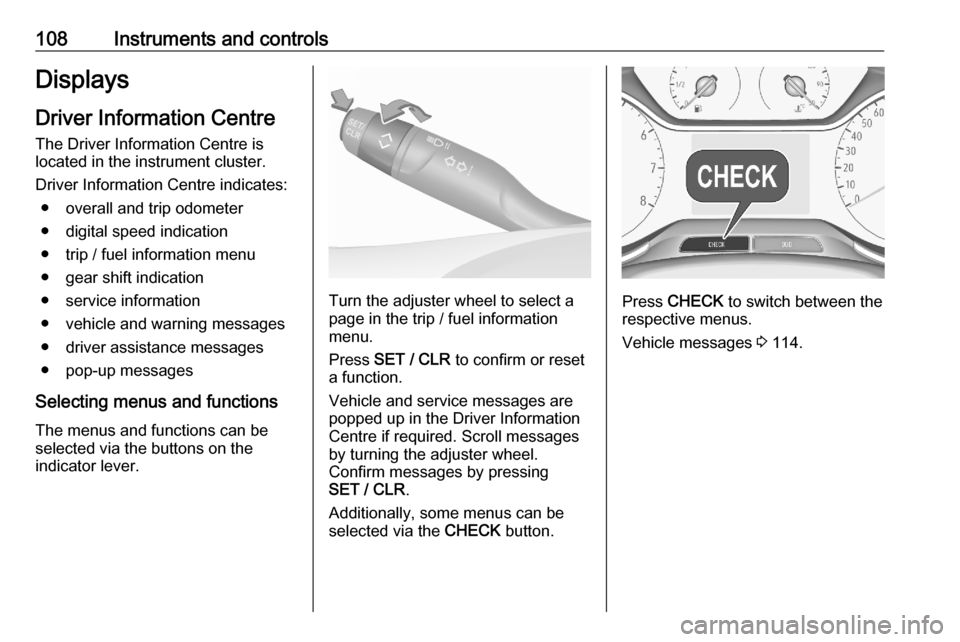
The menus and functions can be selected via the buttons on the
indicator lever.
Turn the adjuster wheel to select a
page in the trip / fuel information
menu.
Press SET / CLR to confirm or reset
a function.
Vehicle and service messages are popped up in the Driver Information
Centre if required. Scroll messages
by turning the adjuster wheel.
Confirm messages by pressing
SET / CLR .
Additionally, some menus can be selected via the CHECK button.Press CHECK to switch between the
respective menus.
Vehicle messages 3 114.
Page 112 of 279

110Instruments and controlsWhen the fuel level is low, a message
appears on the display and the
control indicator o in the fuel gauge
illuminates 3 106.
Instantaneous Fuel Consumption
Display of the instantaneous
consumption.
Trip 1 page:
Average speed
Display of average speed. The
measurement can be reset at any
time.
Average fuel consumption
Display of average consumption. The measurement can be reset at any
time and starts with a default value.
Distance travelled
Displays the current distance for trip
1 since the reset.
The values of trip 1 page can be reset
by pressing SET/CLR for a few
seconds.
Trip 2 page:
Average speedDisplay of average speed. The
measurement can be reset at any
time.
Average fuel consumption
Display of average consumption. The measurement can be reset at any
time and starts with a default value.
Distance travelled
Displays the current distance for trip
2 since a certain reset.
The values of trip 2 page can be reset by pressing SET/CLR for a few
seconds.
Digital speed page
Digital display of the instantaneous
speed.
Stop and Start time counter
A time counter calculates the time
spent in STOP mode during a
journey. It resets to zero every time
the ignition is switched on.
Compass page
Displays the geographic direction of
driving.Blank page
No trip/fuel information is displayed.
AdBlue Press CHECK repeatedly until the
AdBlue menu is shown.
AdBlue range
Indicates an estimate of the AdBlue
level. A message indicates whether
the level is sufficient or low.
3 152.
Info Display
The Info Display is located in the instrument panel near the instrument
cluster.
Depending on the vehicle
configuration the vehicle has a
● Graphic Info Display
or
● Colour Info Display with
touchscreen functionality
The Info Displays can indicate: ● time 3 93
● outside temperature 3 92
Page 113 of 279
Instruments and controls111● date 3 93
● Infotainment system, see description in the Infotainment
manual
● indication of rear view camera 3 196
● indication of panoramic view system 3 193
● indication of parking assist instructions 3 183
● navigation, see description in the
Infotainment manual
● vehicle and system messages 3 114
● settings for vehicle personalisation 3 115Graphic Info Display
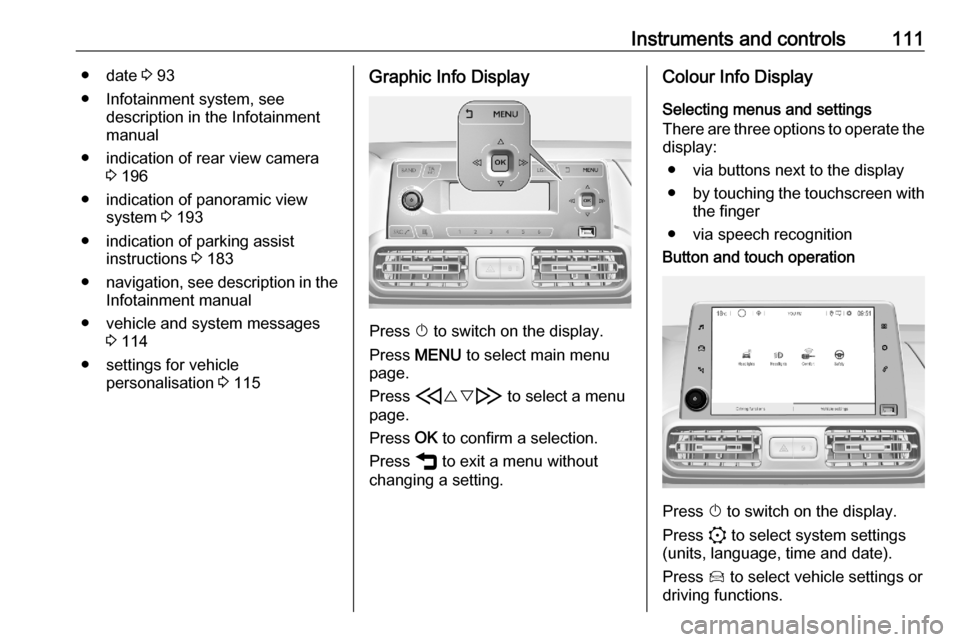
Press X to switch on the display.
Press MENU to select main menu
page.
Press H{} I to select a menu
page.
Press OK to confirm a selection.
Press ß to exit a menu without
changing a setting.
Colour Info Display
Selecting menus and settings
There are three options to operate the
display:
● via buttons next to the display● by touching the touchscreen with
the finger
● via speech recognitionButton and touch operation
Press X to switch on the display.
Press : to select system settings
(units, language, time and date).
Press Í to select vehicle settings or
driving functions.
Page 114 of 279
112Instruments and controlsTouch required menu display icon or
a function with the finger.
Confirm a required function or
selection by touching.
Touch r on the display to exit a
menu without changing a setting.
For further information, see
Infotainment manual.Speech recognition
Description see Infotainment manual.
Vehicle personalisation 3 115.
Head-up display
The head-up display displays driver
information concerning the
instrument cluster onto a foldable
projection plane on the driver's side.
The information appears as an image
projected from a lense in the
instrument panel onto the projection
plane directly ahead in driver's view.
The image appears focused out
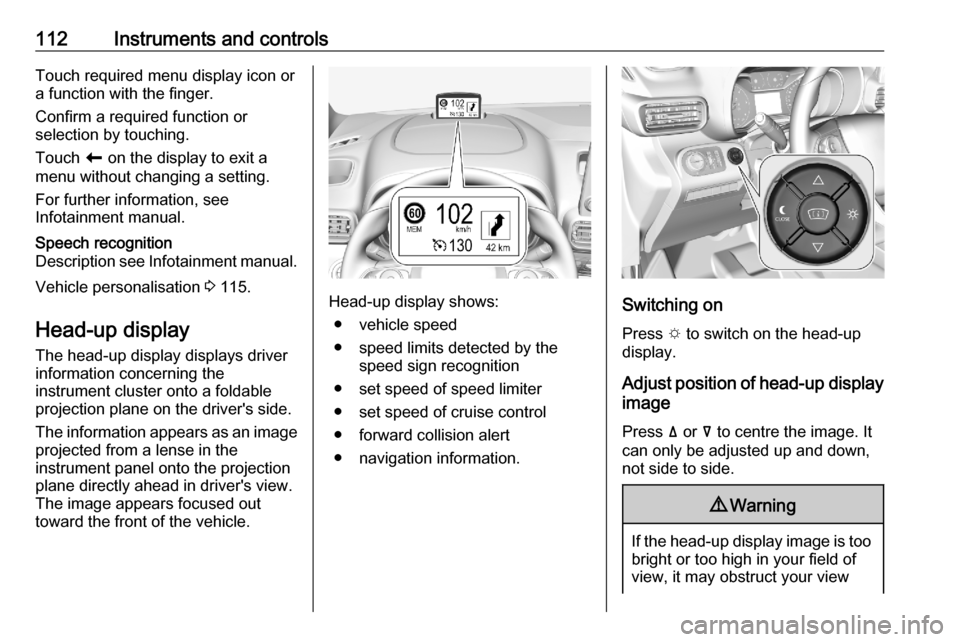
toward the front of the vehicle.Head-up display shows:
● vehicle speed
● speed limits detected by the speed sign recognition
● set speed of speed limiter
● set speed of cruise control
● forward collision alert
● navigation information.Switching on
Press e to switch on the head-up
display.
Adjust position of head-up display
image
Press ä or å to centre the image. It
can only be adjusted up and down,
not side to side.
9 Warning
If the head-up display image is too
bright or too high in your field of
view, it may obstruct your view
Page 115 of 279
Instruments and controls113when it is dark outside. Be sure tokeep the head-up display imagedim and placed low in your field of view.
Adjust brightness
The head-up display image will
automatically dim and brighten to
compensate for outside lighting.
Brightness can also be adjusted
manually as needed:
Press e to brighten the display. Press
æ to dim the display.
The image can temporarily illuminate
depending on angel and position of
sunlight.
Switching off Press æ and hold to turn the head-up
display off.
Language Preferred language can be set invehicle personalisation menu 3 115.
Units
Units can be changed in vehicle
personalisation menu 3 115.
Care of head-up display Clean the screen of the head-updisplay with a soft cloth sprayed withglass cleaner. Wipe the lens gently,
then dry it.
System limitations Head-up display may not operate
properly when:
● The lens in the instrument panel is covered by objects or not
clean.
● Display brightness is too dim or bright.
● Image is not adjusted to the proper height.
● The driver wears polarized sunglasses.
If the head-up image is not correct for
other reasons, contact a workshop.Rear view display
The rear view display is located at the position of the interior mirror.
It provides the following views: ● standard rear view 3 39
● close rear view 3 196
● passenger side view 3 192
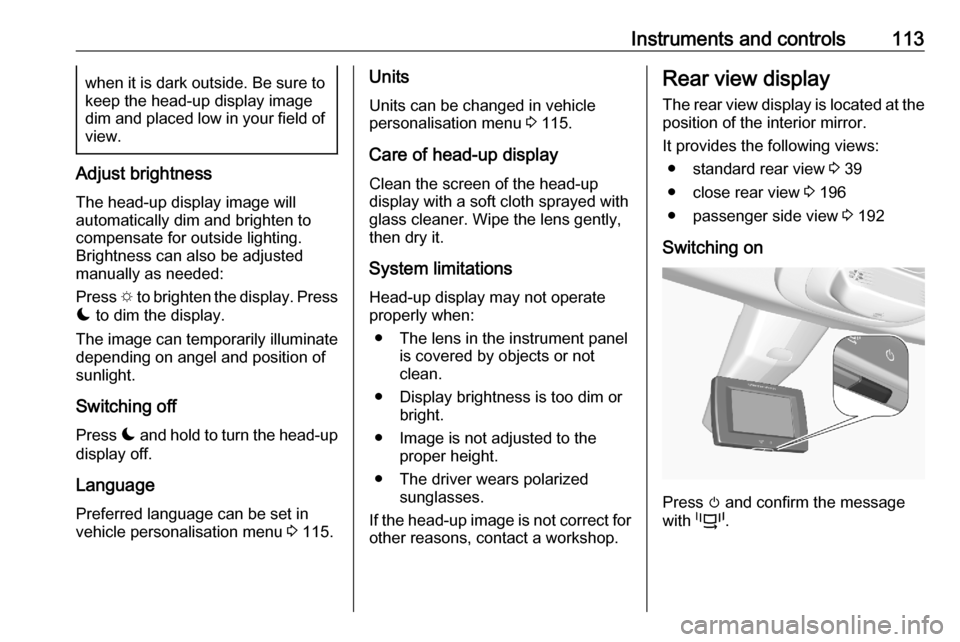
Switching on
Press m and confirm the message
with p.
Page 117 of 279
Instruments and controls115● If a warning message appears inthe Driver Information Centre.
● If the electronic key is not in the passenger compartment.
● If the parking assist detects an object.
● If an unintended lane change occurs.
● If the exhaust filter has reached the maximum filling level.
When the vehicle is parked and / or the driver's door is opened
● With exterior lights on.
During an Autostop ● If the driver's door is opened.
● If any condition for a restart of the
engine is not fulfilled.Vehicle personalisation
The vehicle's behaviour can be
personalised by changing the settings
in the Info Display.
Depending on vehicle equipment and
country-specific regulations some of
the functions described below may
not be available.
Some functions are only displayed or
active when the engine is running.
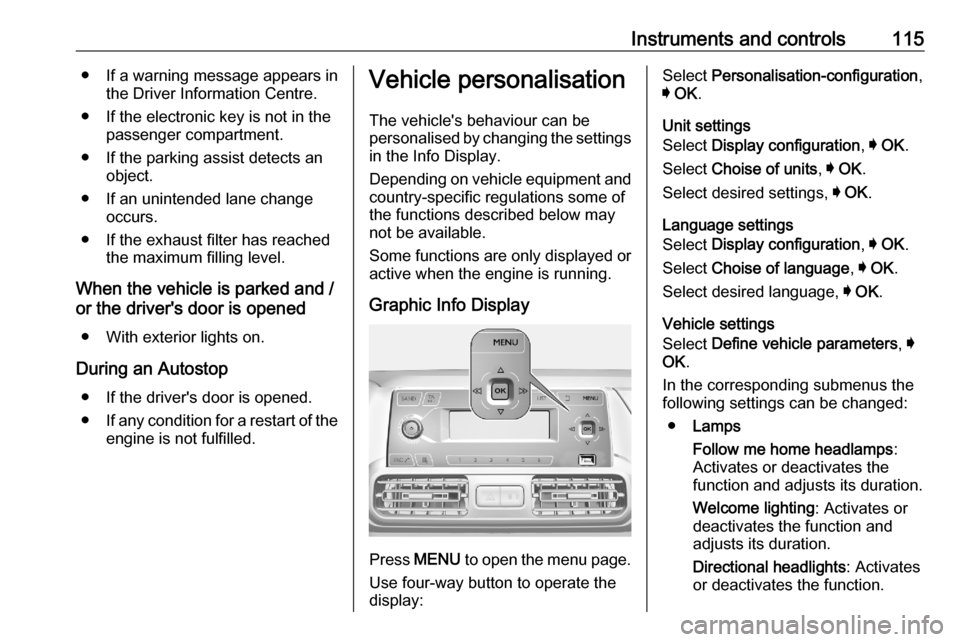
Graphic Info Display
Press MENU to open the menu page.
Use four-way button to operate the
display:
Select Personalisation-configuration ,
I OK .
Unit settings
Select Display configuration , I OK .
Select Choise of units , I OK .
Select desired settings, I OK .
Language settings
Select Display configuration , I OK .
Select Choise of language , I OK .
Select desired language, I OK .
Vehicle settings
Select Define vehicle parameters , I
OK .
In the corresponding submenus the
following settings can be changed:
● Lamps
Follow me home headlamps :
Activates or deactivates the
function and adjusts its duration.
Welcome lighting : Activates or
deactivates the function and
adjusts its duration.
Directional headlights : Activates
or deactivates the function.