key VAUXHALL COMBO E 2020 Owner's Guide
[x] Cancel search | Manufacturer: VAUXHALL, Model Year: 2020, Model line: COMBO E, Model: VAUXHALL COMBO E 2020Pages: 279, PDF Size: 28.6 MB
Page 117 of 279
Instruments and controls115● If a warning message appears inthe Driver Information Centre.
● If the electronic key is not in the passenger compartment.
● If the parking assist detects an object.
● If an unintended lane change occurs.
● If the exhaust filter has reached the maximum filling level.
When the vehicle is parked and / or the driver's door is opened
● With exterior lights on.
During an Autostop ● If the driver's door is opened.
● If any condition for a restart of the
engine is not fulfilled.Vehicle personalisation
The vehicle's behaviour can be
personalised by changing the settings
in the Info Display.
Depending on vehicle equipment and
country-specific regulations some of
the functions described below may
not be available.
Some functions are only displayed or
active when the engine is running.
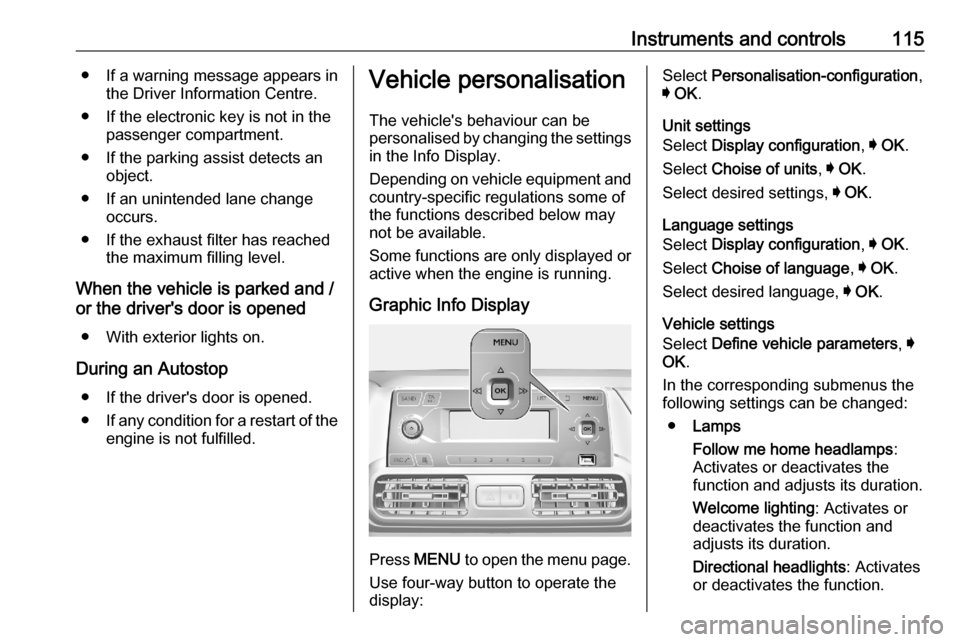
Graphic Info Display
Press MENU to open the menu page.
Use four-way button to operate the
display:
Select Personalisation-configuration ,
I OK .
Unit settings
Select Display configuration , I OK .
Select Choise of units , I OK .
Select desired settings, I OK .
Language settings
Select Display configuration , I OK .
Select Choise of language , I OK .
Select desired language, I OK .
Vehicle settings
Select Define vehicle parameters , I
OK .
In the corresponding submenus the
following settings can be changed:
● Lamps
Follow me home headlamps :
Activates or deactivates the
function and adjusts its duration.
Welcome lighting : Activates or
deactivates the function and
adjusts its duration.
Directional headlights : Activates
or deactivates the function.
Page 130 of 279
128LightingLighting featuresCentre console lighting A spotlight integrated in the overheadconsole illuminates the centre
console when headlights are
switched off.
The intensity can be adjusted in the
vehicle personalisation 3 115.
Entry lighting
Welcome lighting
Some or all of the following lights are
switched on for a short time by
unlocking the vehicle with the radio
remote control:
● headlights
● tail lights
● interior lights
The number of activated lights
depends on the surrounding light
conditions.
The lighting switches off immediately
when the ignition is switched on.
Starting off 3 17.This function can be activated or
deactivated in the vehicle
personalisation 3 115.
The following lights will additionally
switch on when the driver's door is
opened:
● illumination of some switches
● Driver Information Centre
Exit lighting The following lights are switched on if
the key is removed from the ignition
switch:
● interior lights
● instrument panel light
They will switch off automatically after
a delay. This function works only in
the dark.
Path lighting
Headlights, tail lights and number
plate lights illuminate the surrounding
area for an adjustable time after
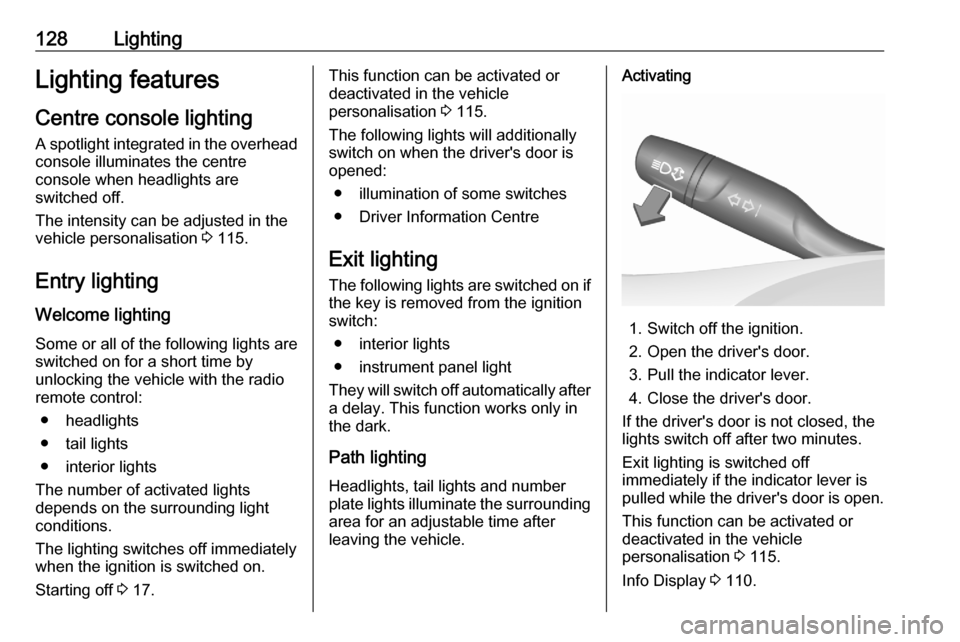
leaving the vehicle.Activating
1. Switch off the ignition.
2. Open the driver's door.
3. Pull the indicator lever.
4. Close the driver's door.
If the driver's door is not closed, the
lights switch off after two minutes.
Exit lighting is switched off
immediately if the indicator lever is
pulled while the driver's door is open.
This function can be activated or
deactivated in the vehicle
personalisation 3 115.
Info Display 3 110.
Page 145 of 279

Driving and operating143Driving hints
Control of the vehicle
Never coast with engine not
running
Many systems will not function in this
situation ( e.g. brake servo unit, power
steering). Driving in this manner is a danger to yourself and others.
All systems function during an
Autostop.
Stop-start system 3 147.
Pedals
To ensure the pedal travel is uninhibited, there must be no mats in the area of the pedals.
Use only floor mats, which fit properly
and are fixed by the retainers on the
driver side.Steering
If power steering assist is lost
because the engine stops or due to a system malfunction, the vehicle can
be steered but may require increased
effort.Starting and operating
New vehicle running-in Do not brake unnecessarily hard for
the first few journeys.
During the first drive, smoke may
occur because of wax and engine oil
evaporating off the exhaust system.
Park the vehicle in the open for a
while after the first drive and avoid
inhaling the fumes.
During the running-in period, fuel and engine oil consumption may be
higher.
Additionally, the cleaning process of
the exhaust filter may take place more
often.
Exhaust filter 3 151.
Ignition switch positions
Turn key:
Page 146 of 279
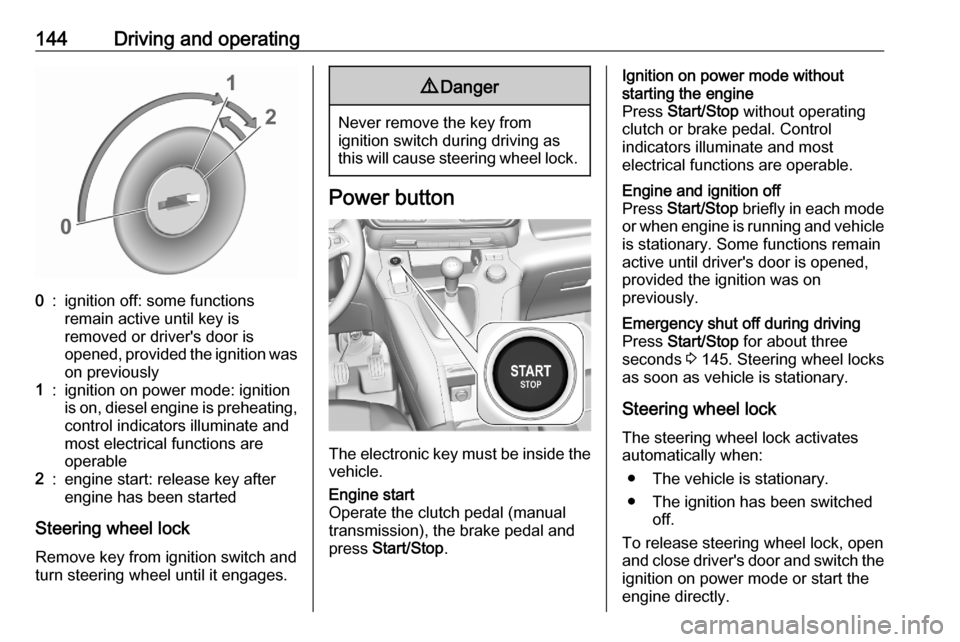
144Driving and operating0:ignition off: some functions
remain active until key is
removed or driver's door is
opened, provided the ignition was
on previously1:ignition on power mode: ignition
is on, diesel engine is preheating, control indicators illuminate and
most electrical functions are
operable2:engine start: release key after
engine has been started
Steering wheel lock
Remove key from ignition switch and
turn steering wheel until it engages.
9 Danger
Never remove the key from
ignition switch during driving as
this will cause steering wheel lock.
Power button
The electronic key must be inside the
vehicle.
Engine start
Operate the clutch pedal (manual
transmission), the brake pedal and
press Start/Stop .Ignition on power mode without
starting the engine
Press Start/Stop without operating
clutch or brake pedal. Control
indicators illuminate and most
electrical functions are operable.Engine and ignition off
Press Start/Stop briefly in each mode
or when engine is running and vehicle
is stationary. Some functions remain
active until driver's door is opened,
provided the ignition was on
previously.Emergency shut off during driving
Press Start/Stop for about three
seconds 3 145. Steering wheel locks
as soon as vehicle is stationary.
Steering wheel lock
The steering wheel lock activates
automatically when:
● The vehicle is stationary.
● The ignition has been switched off.
To release steering wheel lock, open
and close driver's door and switch the ignition on power mode or start the
engine directly.
Page 147 of 279
Driving and operating1459Warning
If the vehicle battery is discharged,
the vehicle must not be towed,
tow-started or jump-started as the
steering wheel lock cannot be
disengaged.
Operation on vehicles with
electronic key system in case of
failure
If either the electronic key fails or the
battery of the electronic key is weak,
a message may be displayed in the
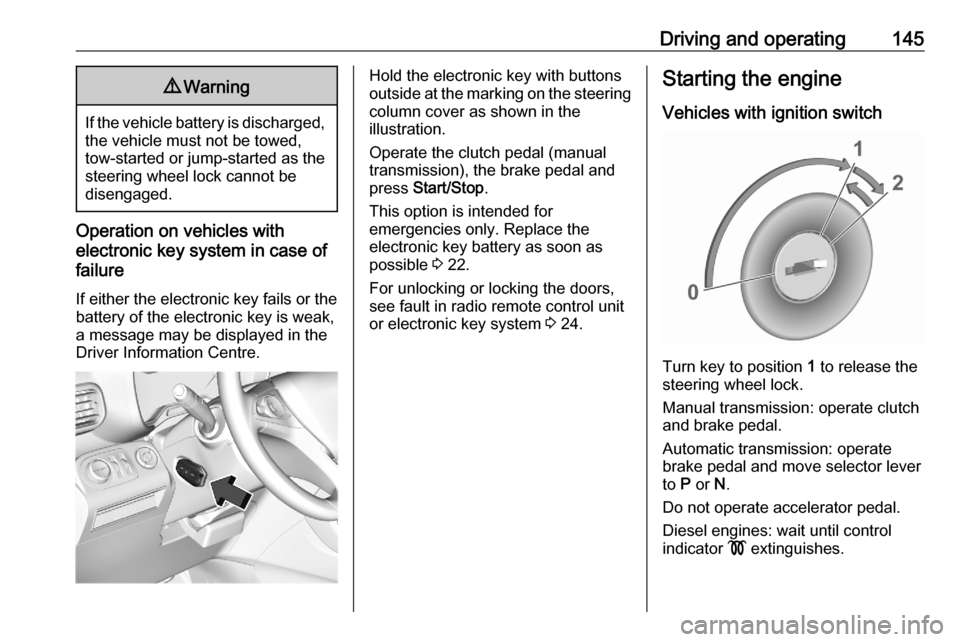
Driver Information Centre.
Hold the electronic key with buttons
outside at the marking on the steering column cover as shown in the
illustration.
Operate the clutch pedal (manual
transmission), the brake pedal and
press Start/Stop .
This option is intended for
emergencies only. Replace the
electronic key battery as soon as
possible 3 22.
For unlocking or locking the doors,
see fault in radio remote control unit
or electronic key system 3 24.Starting the engine
Vehicles with ignition switch
Turn key to position 1 to release the
steering wheel lock.
Manual transmission: operate clutch
and brake pedal.
Automatic transmission: operate
brake pedal and move selector lever
to P or N.
Do not operate accelerator pedal.
Diesel engines: wait until control
indicator ! extinguishes.
Page 148 of 279
146Driving and operatingTurn key briefly to position 2 and
release after engine has been
started.
Manual transmission: during an
Autostop, the engine can be started
by depressing the clutch pedal
3 147.
Automatic transmission: during an
Autostop, the engine can be started
by releasing the brake pedal 3 147.
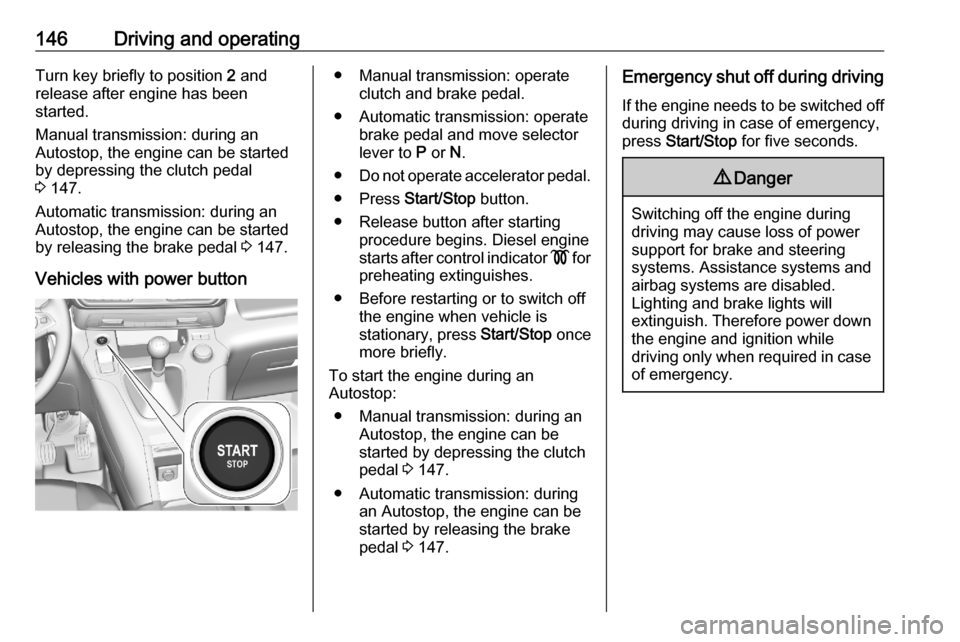
Vehicles with power button● Manual transmission: operate clutch and brake pedal.
● Automatic transmission: operate brake pedal and move selector
lever to P or N.
● Do not operate accelerator pedal.
● Press Start/Stop button.
● Release button after starting procedure begins. Diesel engine
starts after control indicator ! for
preheating extinguishes.
● Before restarting or to switch off the engine when vehicle is
stationary, press Start/Stop once
more briefly.
To start the engine during an
Autostop:
● Manual transmission: during an Autostop, the engine can be
started by depressing the clutch
pedal 3 147.
● Automatic transmission: during an Autostop, the engine can be
started by releasing the brake
pedal 3 147.Emergency shut off during driving
If the engine needs to be switched offduring driving in case of emergency,
press Start/Stop for five seconds.9Danger
Switching off the engine during
driving may cause loss of power
support for brake and steering
systems. Assistance systems and
airbag systems are disabled.
Lighting and brake lights will
extinguish. Therefore power down the engine and ignition while
driving only when required in case of emergency.
Page 152 of 279
150Driving and operatingParking9Warning
● Do not park the vehicle on an
easily ignitable surface. The
high temperature of the
exhaust system could ignite the
surface.
● Always apply the parking brake.
● If the vehicle is on a level surface or uphill slope, engage
first gear or set the selector
lever to position P. On an uphill
slope, turn the front wheels
away from the kerb.
If the vehicle is on a downhill
slope, engage reverse gear or
set the selector lever to position
P . Turn the front wheels
towards the kerb.
● Close the windows.
● Switch off the engine.
● Remove the ignition key from the ignition switch or switch off
ignition on vehicles with power
button. Turn the steering wheel until the steering wheel lock is
felt to engage.
● Lock the vehicle.
● Activate the anti-theft alarm system.
● The engine cooling fans may run
after the engine has been
switched off 3 213.
Caution
After running at high engine
speeds or with high engine loads,
operate the engine briefly at a low load or run in neutral for
approx. 30 seconds before
switching off, in order to protect
the turbocharger.
Notice
In the event of an accident with airbag deployment, the engine is
switched off automatically if the
vehicle comes to a standstill within a
certain time.
In countries with extreme low
temperatures it may be necessary to park the vehicle without applied
parking brake. Make sure to park the
vehicle on a level surface.
Page 156 of 279
154Driving and operatingNotice
Whenever a filling pump with a
nozzle for passenger cars is not
available at a filling station, use only
AdBlue bottles or canisters with a
sealed refill adapter for refilling, to
prevent splashback and overspill,
and in order to ensure that the fumes
from the tank are captured and do
not emerge. AdBlue in bottles or
canisters is available in many filling
stations and can be purchased e.g. at Vauxhall dealers and other retail
outlets.
Since AdBlue has a limited
durability, check the date of expiry
before refilling.
Notice
Refill the tank to a level of at least
5 l to ensure that the new AdBlue
level is being detected.
In case AdBlue refill is not
successfully detected:1. Continuously drive the vehicle for 10 min making sure that
vehicle speed is always higher
than 12 mph.
2. If AdBlue refill is detected successfully, AdBlue supply-
driven warnings or limitations will
disappear.
If AdBlue refill is still not detected, seek the assistance of a workshop.
If AdBlue must be refilled at
temperatures below -11 °C, the
refilling of AdBlue may not be
detected by the system. In this
event, park the vehicle in a space
with a higher ambient temperature
until AdBlue is liquified.
Notice
When unscrewing the protective cap
from the filler neck, ammonia fumes
may emerge. Do not inhale as the
fumes have a pungent smell. The
fumes are not harmful by inhalation.
The AdBlue tank should be filled
completely. This must be done if the
warning message regarding
prevention of an engine restart is
already displayed.The vehicle must be parked on a level surface.
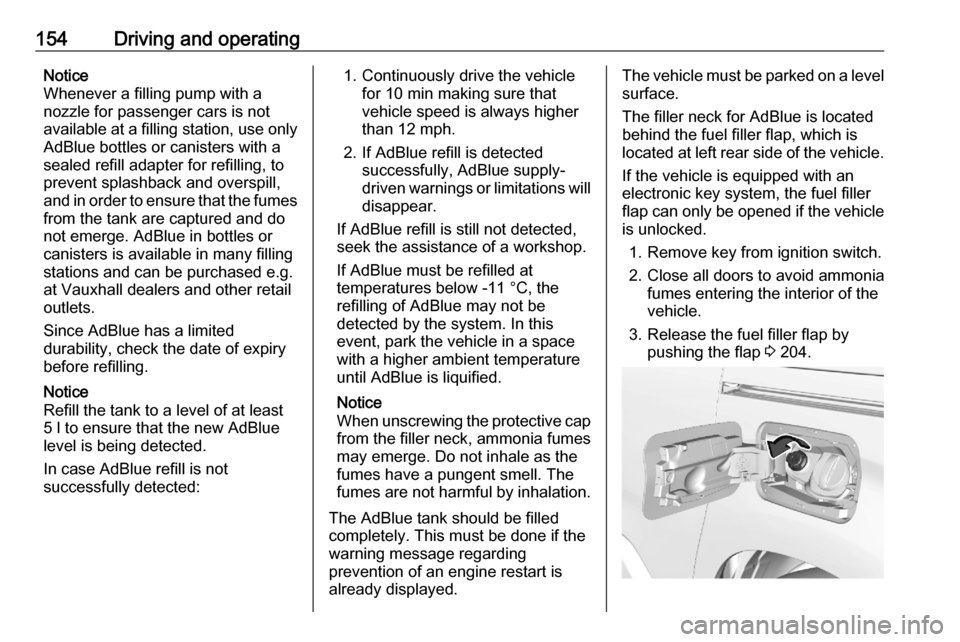
The filler neck for AdBlue is located
behind the fuel filler flap, which is located at left rear side of the vehicle.
If the vehicle is equipped with an
electronic key system, the fuel filler
flap can only be opened if the vehicle
is unlocked.
1. Remove key from ignition switch.
2. Close all doors to avoid ammonia fumes entering the interior of the
vehicle.
3. Release the fuel filler flap by pushing the flap 3 204.
Page 207 of 279
Driving and operating205
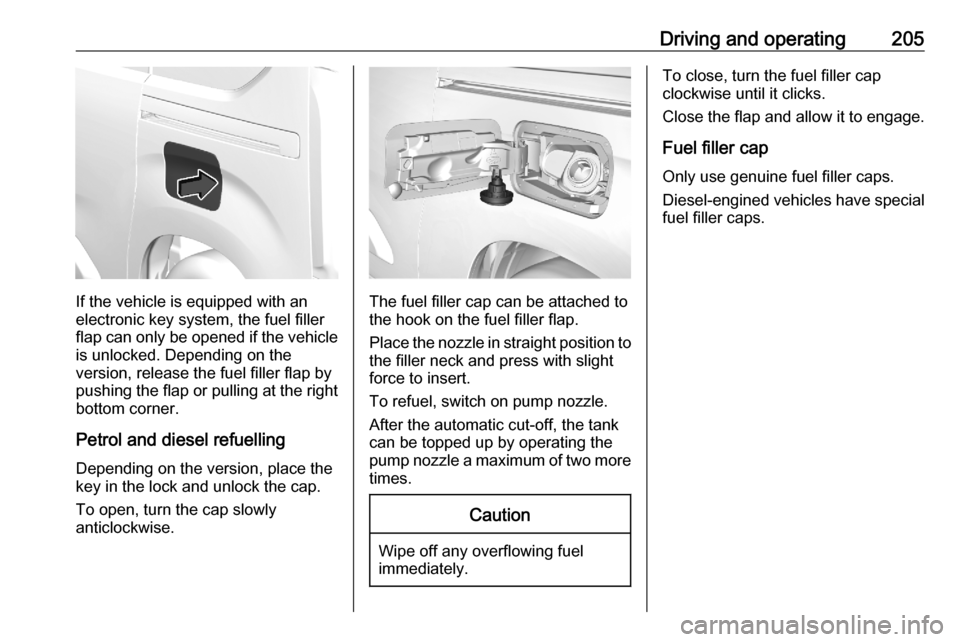
If the vehicle is equipped with an
electronic key system, the fuel filler
flap can only be opened if the vehicle
is unlocked. Depending on the
version, release the fuel filler flap by
pushing the flap or pulling at the right bottom corner.
Petrol and diesel refuellingDepending on the version, place the
key in the lock and unlock the cap.
To open, turn the cap slowly
anticlockwise.The fuel filler cap can be attached to
the hook on the fuel filler flap.
Place the nozzle in straight position to
the filler neck and press with slight
force to insert.
To refuel, switch on pump nozzle.
After the automatic cut-off, the tank
can be topped up by operating the
pump nozzle a maximum of two more times.
Caution
Wipe off any overflowing fuel
immediately.
To close, turn the fuel filler cap
clockwise until it clicks.
Close the flap and allow it to engage.
Fuel filler cap
Only use genuine fuel filler caps.
Diesel-engined vehicles have special fuel filler caps.
Page 209 of 279

Driving and operating207The permissible gross train weight
must not be exceeded. This weight is
specified on the identification plate
3 256.
Vertical coupling load
The vertical coupling load is the load
exerted by the trailer on the coupling
ball. It can be varied by changing the
weight distribution when loading the
trailer.
The maximum permissible vertical
coupling load is specified on the
towing equipment identification plate
and in the vehicle documents.
Always aim for the maximum vertical
coupling load, especially in the case
of heavy trailers. The vertical coupling load should never fall below 25 kg.
Rear axle load When the trailer is coupled and the
towing vehicle fully loaded, the
permissible rear axle load (see
identification plate or vehicle
documents) may be exceeded by
60 kg , the gross vehicle weight rating
must not be exceeded. If thepermissible rear axle load is
exceeded, a maximum speed of
60 mph applies.
Towing equipment
Depending on version the vehicle can be fitted with a detachable or a fixed
coupling ball bar.
Type ACaution
When operating without a trailer,
remove the coupling ball bar.
Fitting the coupling ball bar
1. Place the key in the lock and
unlock the coupling ball bar. Move
the lever to the rear position.
2. Clean the contact points with a soft clean cloth.