charge VAUXHALL COMBO E 2020 Owner's Manual
[x] Cancel search | Manufacturer: VAUXHALL, Model Year: 2020, Model line: COMBO E, Model: VAUXHALL COMBO E 2020Pages: 279, PDF Size: 28.6 MB
Page 21 of 279
In brief19Stop-start system
If the vehicle is at a low speed or at astandstill and certain conditions are
fulfilled, an Autostop is activated.
An Autostop is indicated by control
indicator D.
Manual transmission: to restart the
engine, depress the clutch pedal
again. Control indicator D
extinguishes.
Automatic transmission: to restart the
engine, release the brake pedal.
Control indicator D extinguishes.
Stop-start system 3 147.
Parking9 Warning
● Do not park the vehicle on an
easily ignitable surface. The
high temperature of the
exhaust system could ignite the
surface.
● Always apply the parking brake.
● If the vehicle is on a level surface or uphill slope, engage
first gear or set the selector
lever to position P. On an uphill
slope, turn the front wheels
away from the kerb.
If the vehicle is on a downhill
slope, engage reverse gear or
set the selector lever to position
P . Turn the front wheels
towards the kerb.
● Close the windows.
● Switch off the engine.
● Remove the ignition key from the ignition switch or switch off
ignition on vehicles with power
button. Turn the steering wheel until the steering wheel lock is
felt to engage.
● Lock the vehicle with e on the
radio remote control.
Activate the anti-theft alarm
system 3 34.
● The engine cooling fans may run
after the engine has been
switched off 3 213.
Caution
After running at high engine
speeds or with high engine loads,
operate the engine briefly at a low load or run in neutral for
approx. 30 seconds before
switching off, in order to protect
the turbocharger.
Keys, locks 3 20.
Laying-up the vehicle for a long
period of time 3 212.
Page 28 of 279
26Keys, doors and windowsPress with a finger or thumb on one
of the door handles (at the markings)
or press the tailgate button.
All doors, load compartment and fuel
filler flap will be locked.
If the vehicle is not closed properly,
the electronic key remains in the
vehicle or the ignition is not off,
locking will not be permitted.
Confirmation
Operation of central locking system is confirmed by the hazard warning
flashers.
Central locking button
Locks or unlocks all doors and the
load compartment from inside the
passenger compartment. If the
vehicle is equipped with electronic
key system, the fuel filler flap is locked or unlocked, too.
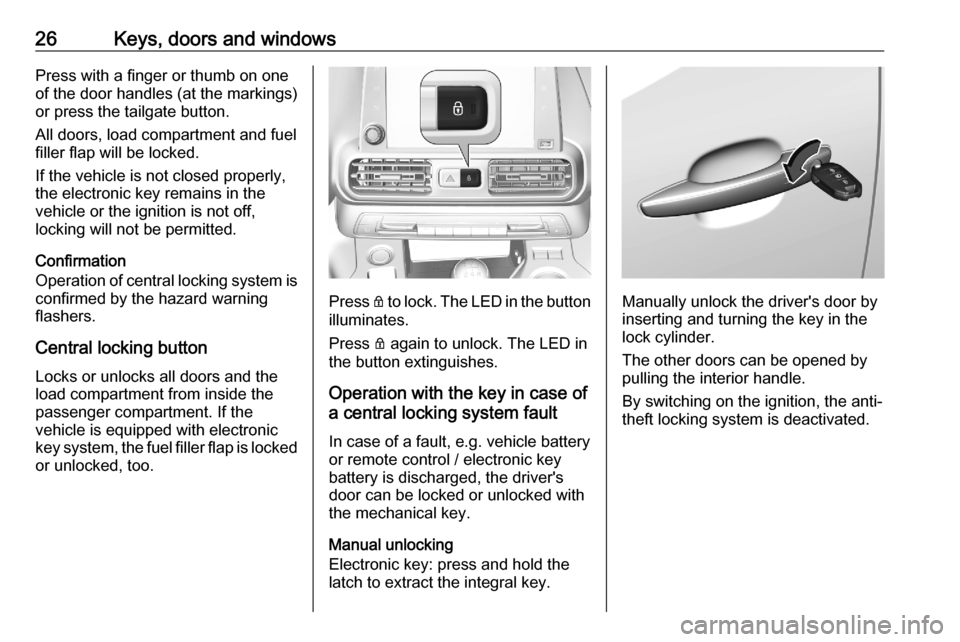
Press Q to lock. The LED in the button
illuminates.
Press Q again to unlock. The LED in
the button extinguishes.
Operation with the key in case of
a central locking system fault
In case of a fault, e.g. vehicle battery
or remote control / electronic key
battery is discharged, the driver's
door can be locked or unlocked with
the mechanical key.
Manual unlocking
Electronic key: press and hold the
latch to extract the integral key.Manually unlock the driver's door by
inserting and turning the key in the
lock cylinder.
The other doors can be opened by
pulling the interior handle.
By switching on the ignition, the anti- theft locking system is deactivated.
Page 88 of 279
86StorageTo calculate the payload, enter
the data for your vehicle in the
weights table at the front of this
manual.
The EC kerb weight includes
weights for the driver (68 kg),
luggage (7 kg) and all fluids (fuel
tank 90% full).
Optional equipment and
accessories increase the kerb
weight.
● Driving with a roof load increases
the sensitivity of the vehicle to
cross-winds and has a
detrimental effect on vehicle
handling due to the vehicle's
higher centre of gravity.
Distribute the load evenly and
secure it properly with retaining
straps. Adjust the tyre pressure
and vehicle speed according to
the load conditions. Check and
retighten the straps frequently.
Do not drive faster than 75 mph.
The permissible roof load is:● 80 kg for vehicles with roof railing
● 100 kg for vehicles without roof railing and with two roofracks
● 150 kg for vehicles without roof railing and with three
roof racks, except vehicles
with seven seats
● 100 kg for vehicles without roof railing and with three
roof racks and seven seats
The roof load is the combined weight
of the roof rack and the load.
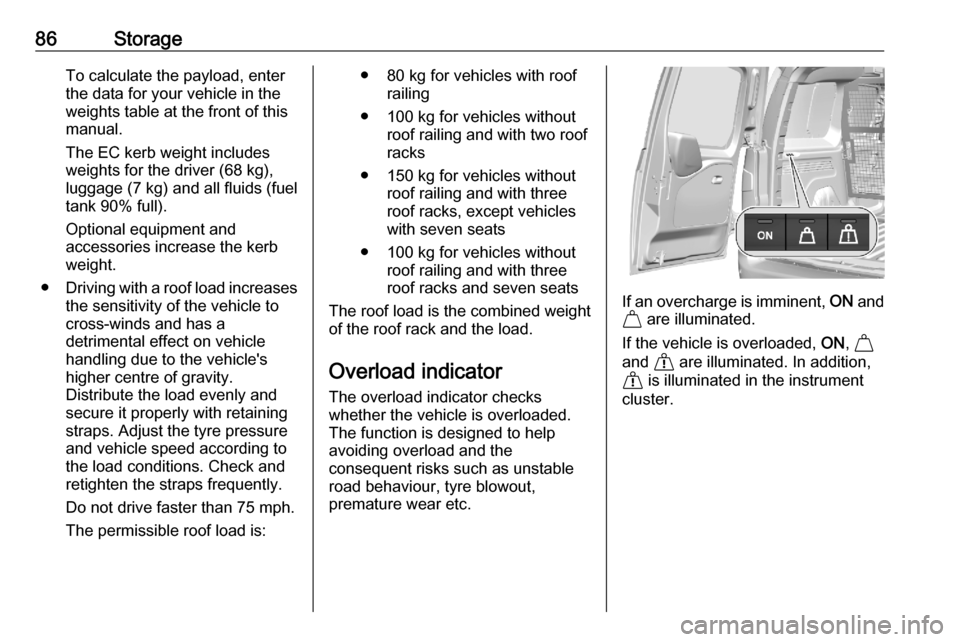
Overload indicator The overload indicator checks
whether the vehicle is overloaded.
The function is designed to help
avoiding overload and the
consequent risks such as unstable
road behaviour, tyre blowout,
premature wear etc.
If an overcharge is imminent, ON and
% are illuminated.
If the vehicle is overloaded, ON, %
and & are illuminated. In addition,
& is illuminated in the instrument
cluster.
Page 97 of 279
Instruments and controls959Warning
Remove any metal objects from
the charging device before
charging a mobile device, as these objects could become very hot.
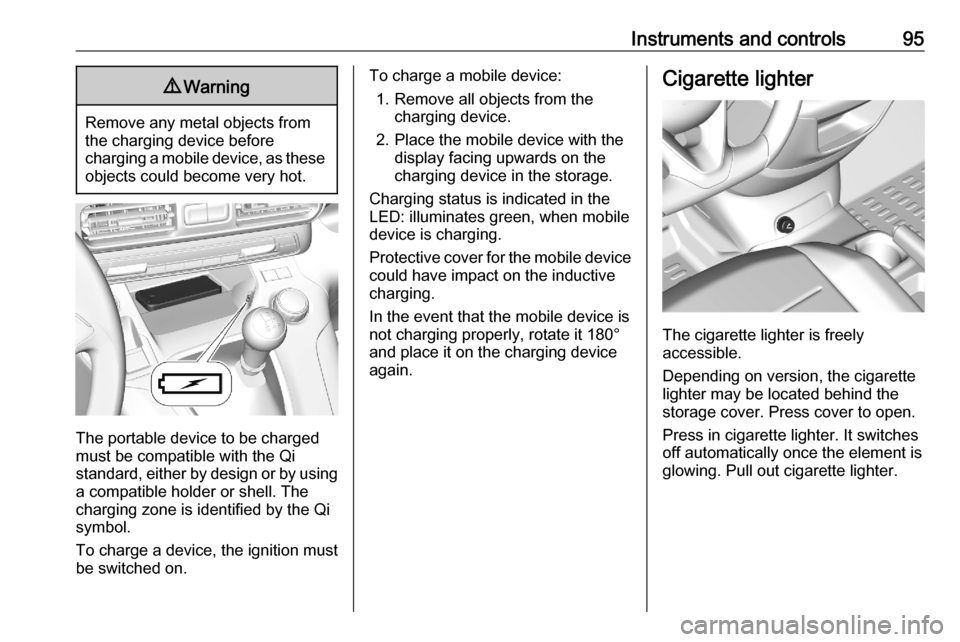
The portable device to be charged
must be compatible with the Qi
standard, either by design or by using a compatible holder or shell. The
charging zone is identified by the Qi
symbol.
To charge a device, the ignition must
be switched on.
To charge a mobile device:
1. Remove all objects from the charging device.
2. Place the mobile device with the display facing upwards on the
charging device in the storage.
Charging status is indicated in the
LED: illuminates green, when mobile
device is charging.
Protective cover for the mobile device
could have impact on the inductive
charging.
In the event that the mobile device is
not charging properly, rotate it 180°
and place it on the charging device
again.Cigarette lighter
The cigarette lighter is freely
accessible.
Depending on version, the cigarette
lighter may be located behind the storage cover. Press cover to open.
Press in cigarette lighter. It switches
off automatically once the element is
glowing. Pull out cigarette lighter.
Page 123 of 279

Lighting121LightingExterior lighting.......................... 121
Light switch .............................. 121
Automatic light control .............122
High beam ............................... 122
High beam assist .....................122
Headlight flash ......................... 123
Headlight range adjustment ....124
Headlights when driving abroad .................................... 124
Daytime running lights .............124
Hazard warning flashers ..........124
Turn lights ................................ 125
Front fog lights ......................... 125
Rear fog light ........................... 125
Parking lights ........................... 126
Reversing lights .......................126
Misted light covers ...................126
Interior lighting ........................... 126
Instrument panel illumination control ..................................... 126
Interior lights ............................ 127
Reading lights .......................... 127
Sunvisor lights ......................... 127
Lighting features ........................128
Centre console lighting ............128Entry lighting ............................ 128
Exit lighting .............................. 128
Vehicle locator lighting ............129
Peripheral lighting ....................129
Battery discharge protection ....129Exterior lighting
Light switch
Turn light switch:
AUTO:automatic light control
switches automatically
between daytime running
light and headlight8:sidelights9:headlights
When switching on the ignition,
automatic light control is active.
Control indicator 8 3 106.
Page 131 of 279

Lighting129Vehicle locator lighting
This function allows you to locate your vehicle, e.g., in weak lighting
conditions using the remote control.
The headlights come on and the turn
lights flash for 10 seconds.
Press N on the remote control.
The vehicle must be locked more than
5 seconds.
Peripheral lighting Peripheral lighting allows you to
switch on the position lights, low
beam and number plate lighting using
the remote control.
Press G on the remote control to
switch on peripheral lighting.
Press G a second time to switch off
peripheral lighting.
Battery discharge protection
To prevent discharge of the vehicle
battery when the ignition is switched
off, some interior lights are switched
off automatically after some time.
Page 141 of 279
Climate control139Two starting times for the operation of
the parking heater can be
programmed.
Press Time 1 or Time 2 to select the
desired timer and then press ü.
Define the time by pressing z Time
1 for the timer one or z Time 2 for the
timer two.
Press ü to save the settings.
Activate / deactivate the
programming
Press State.
Activate or deactivate Temperature
conditioning by pressing ON or
OFF and then press ü.
Only one starting time can be
activated.
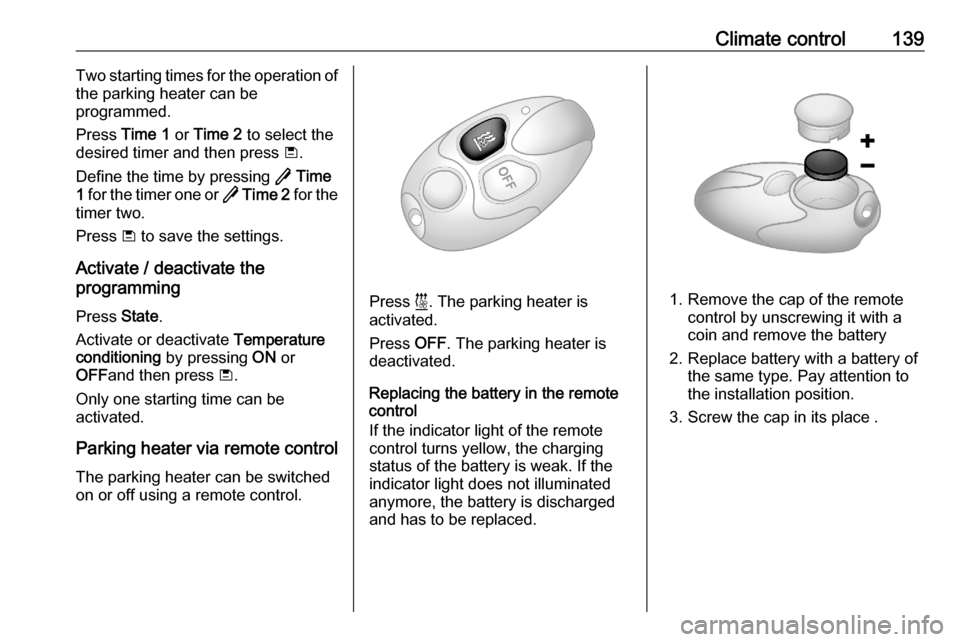
Parking heater via remote control
The parking heater can be switched
on or off using a remote control.
Press ì. The parking heater is
activated.
Press OFF. The parking heater is
deactivated.
Replacing the battery in the remote
control
If the indicator light of the remote
control turns yellow, the charging
status of the battery is weak. If the
indicator light does not illuminated
anymore, the battery is discharged
and has to be replaced.1. Remove the cap of the remote
control by unscrewing it with a
coin and remove the battery
2. Replace battery with a battery of the same type. Pay attention to
the installation position.
3. Screw the cap in its place .
Page 147 of 279
Driving and operating1459Warning
If the vehicle battery is discharged,
the vehicle must not be towed,
tow-started or jump-started as the
steering wheel lock cannot be
disengaged.
Operation on vehicles with
electronic key system in case of
failure
If either the electronic key fails or the
battery of the electronic key is weak,
a message may be displayed in the
Driver Information Centre.
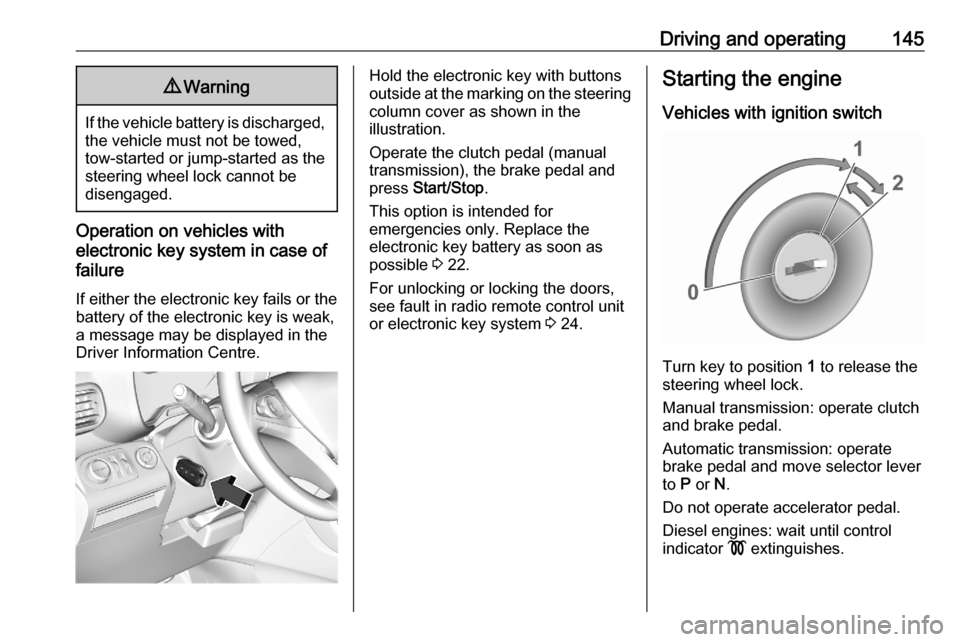
Hold the electronic key with buttons
outside at the marking on the steering column cover as shown in the
illustration.
Operate the clutch pedal (manual
transmission), the brake pedal and
press Start/Stop .
This option is intended for
emergencies only. Replace the
electronic key battery as soon as
possible 3 22.
For unlocking or locking the doors,
see fault in radio remote control unit
or electronic key system 3 24.Starting the engine
Vehicles with ignition switch
Turn key to position 1 to release the
steering wheel lock.
Manual transmission: operate clutch
and brake pedal.
Automatic transmission: operate
brake pedal and move selector lever
to P or N.
Do not operate accelerator pedal.
Diesel engines: wait until control
indicator ! extinguishes.
Page 149 of 279

Driving and operating147Starting the vehicle at lowtemperatures
Starting the engine without additional
heaters is possible down to -25 °С for diesel engines and -30 °C for petrol
engines. Required is an engine oil
with the correct viscosity, the correct fuel, performed services and a
sufficiently charged vehicle battery.
With temperatures below -30 °C the
automatic transmission requires a
warming phase of approx.
five minutes. The selector lever must
be in position P.
Heating functionalities Notice
Individual heating functionalities,
such as heated seats or heated
steering wheel, may be temporarily
unavailable in the event of electrical
loading constraints. Functions will
be resumed after some minutes.Turbo engine warm-up
Upon start-up, engine available
torque may be limited for a short time,
especially when the engine
temperature is cold. The limitation is
to allow the lubrication system to fully protect the engine.
Overrun cut-off
The fuel supply is automatically cut off
during overrun, i.e. when the vehicle
is driven with a gear engaged but
accelerator pedal is released.
Depending on driving conditions, the
overrun cut-off may be deactivated.
Stop-start system The stop-start system helps to save
fuel and to reduce the exhaust
emissions. When conditions allow, it
switches off the engine as soon as the
vehicle is at a low speed or at a
standstill, e.g. at a traffic light or in a
traffic jam.Activation
The stop-start system is available as
soon as the engine is started, the
vehicle starts-off and the conditions
as stated below in this section are
fulfilled.
The system is ready to operate when
the LED in the button Ò is not
illuminated. To activate the system
when the system is deactivated,
press Ó.
If the stop-start system is temporarily
not available and the button Ò is
pressed, the LED in the button
flashes.
Page 150 of 279
148Driving and operatingDeactivation
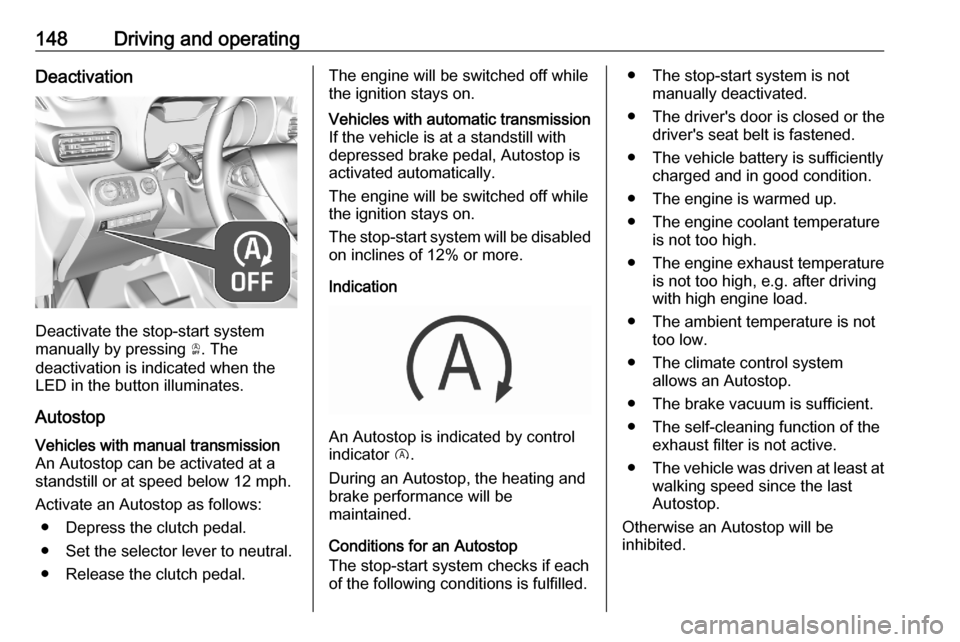
Deactivate the stop-start system
manually by pressing Ò. The
deactivation is indicated when the
LED in the button illuminates.
Autostop
Vehicles with manual transmission
An Autostop can be activated at a
standstill or at speed below 12 mph.
Activate an Autostop as follows: ● Depress the clutch pedal.
● Set the selector lever to neutral.
● Release the clutch pedal.The engine will be switched off while
the ignition stays on.Vehicles with automatic transmission If the vehicle is at a standstill with
depressed brake pedal, Autostop is
activated automatically.
The engine will be switched off while
the ignition stays on.
The stop-start system will be disabled
on inclines of 12% or more.
Indication
An Autostop is indicated by control
indicator D.
During an Autostop, the heating and
brake performance will be
maintained.
Conditions for an Autostop
The stop-start system checks if each
of the following conditions is fulfilled.
● The stop-start system is not manually deactivated.
● The driver's door is closed or the driver's seat belt is fastened.
● The vehicle battery is sufficiently charged and in good condition.
● The engine is warmed up.
● The engine coolant temperature is not too high.
● The engine exhaust temperature is not too high, e.g. after driving
with high engine load.
● The ambient temperature is not too low.
● The climate control system allows an Autostop.
● The brake vacuum is sufficient.
● The self-cleaning function of the exhaust filter is not active.
● The vehicle was driven at least at
walking speed since the last
Autostop.
Otherwise an Autostop will be
inhibited.