USB port VAUXHALL CORSA 2014.5 Infotainment system
[x] Cancel search | Manufacturer: VAUXHALL, Model Year: 2014.5, Model line: CORSA, Model: VAUXHALL CORSA 2014.5Pages: 177, PDF Size: 2.97 MB
Page 3 of 177

Touch & Connect...........................5
CD 40 USB .................................. 89
CD 30 / CD 30 MP3 ...................129
Mobile phone portal ...................157Contents
Page 5 of 177

Introduction.................................... 6
Radio ........................................... 20
CD Player .................................... 25
AUX input ..................................... 30
USB port ...................................... 31
Bluetooth music ........................... 34
Navigation .................................... 36
Phone .......................................... 75
Index ............................................ 86Touch & Connect
Page 6 of 177

6IntroductionIntroductionGeneral information.......................6
Theft-deterrent feature ...................7
Control elements overview ............9
Operation ..................................... 11General information
The Infotainment system provides
you with state-of-the-art in-car
infotainment.
The radio has six station memories
for the AM waveband and twelve
station memories for the FM
waveband.
The integrated audio player will
entertain you with audio CDs and
MP3/WMA CDs.
You can connect external data
storage devices, e.g. iPod, MP3
player or USB stick or a portable CD
player to the Infotainment system as
further audio sources; either via cable or via Bluetooth.
The navigation system with dynamic
route planning will reliably guide you
to your destination, and, if desired,
will automatically avoid traffic jams or other traffic problems.
In addition the Infotainment system is equipped with a phone portal that
allows for comfortable and safe use of
your mobile phone in the vehicle.Optionally, the Infotainment system
can be operated using controls on the steering wheel.
The well-thought-out design of the
control elements, the touch screen
and the clear displays enable you to
control the system easily and
intuitively.
Notice
This manual describes all options
and features available for the
various Infotainment systems.
Certain descriptions, including those for display and menu functions, may
not apply to your vehicle due to
model variant, country
specifications, special equipment or
accessories.
Important information on
operation and traffic safety9 Warning
The Infotainment system has to be
used so that the vehicle can bedriven safely at all times. If in doubt
Page 12 of 177

12Introduction
When the Infotainment system is
switched on, the last selected volume
is set.
If the volume is muted (set to zero),
the \ symbol is shown in the top line
of all main menus.
Speed compensated volume
When speed compensated volume is
activated, see "Volume settings"
below, the volume is adapted
automatically to make up for the road and wind noise as you drive.
Adjusting the volume of traffic
announcements (TA)
The volume of traffic announcements
can be adjusted during an
announcement using the X knob.
When the announcement is finished
or cancelled the volume is
automatically reset to the original
setting.
Further details on the TA function
3 20 and 3 22.Adjusting the volume of voice
commands (navigation)
The volume of voice commands can
be adjusted while a command is
announced using the X knob, or via
the navigation setup menu, see
"Volume settings" below.
The adjusted setting is stored by the
Infotainment system, and will be
automatically used for all future voice command announcements, until the
setting is changed again.
Adjusting the volume of AUX input
sources
The relative volume level of external
audio sources, e.g. a portable CD
player, can be adjusted via the audio
setup menu, see "Volume settings"
below.
Adjusting the volume of phone audio
The volume of phone audio can be
adjusted during a phone call using the
X knob.The adjusted setting is stored by the
Infotainment system and will be
automatically used for all future
phone calls until the setting is
changed again.
Notice
When the volume of phone audio is
changed the volume of the ring tone is changed simultaneously.
Modes of operation
Radio
Press the FM-AM button to open the
AM , FM1 or FM2 menus or to change
between these menus.
Detailed description of the radio
functions 3 20.
Audio players
Press the MEDIA button to open the
CD , CD MP3 , iPod , USB , AUX or
BLUETOOTH AUDIO menus (if
available) or to change between
these menus.
Detailed description of: ■ CD player functions 3 26
■ AUX input functions 3 30
Page 13 of 177
Introduction13
■ USB port functions 3 31
■ Bluetooth music functions 3 34
Navigation
Press the NAV button to open the
NAVIGATION menu.
Press the MAP button to display a
roadmap that shows the vehicle's
current position.
Detailed description of the navigation
functions 3 36.
Phone
Press the I button to open the
PHONE menu.
Detailed description of the phone
portal functions 3 75.
Controls for menu operation
Touch screen
The display of the Infotainment
system has a touch-sensitive surface
that allows for direct interaction with
the displayed menu controls.You can, for example, activate an on-
screen button by tapping on it with a
finger or change the position of an on- screen slider element by moving it
with a finger.Caution
Do not use pointed or hard items
like ball pens, pencils or similar for
touch screen operation.
Multifunction knob
In case the touch screen is not used
for menu operation the multifunction
knob is the central control element for
the menus.
Turn: ■ to select a screen button or menu item
■ to change a setting valuePress: ■ to activate a selected screen button
or menu item
■ to confirm a changed setting value
■ to switch to a different setting option/ (back) button
Press the / button to return from a
submenu to the next higher menu
level.
If a main menu is currently active,
e.g. the FM1 or CD menu, pressing
the / button displays the map with
the vehicle's current position.
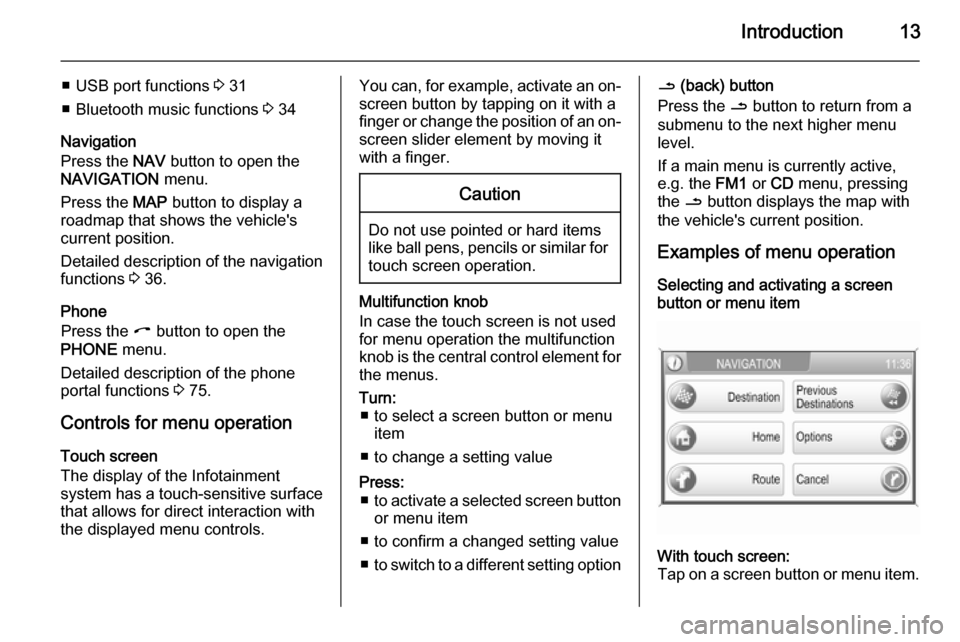
Examples of menu operation
Selecting and activating a screen
button or menu itemWith touch screen:
Tap on a screen button or menu item.
Page 31 of 177
USB port31USB portGeneral information.....................31
Playing saved audio files .............32General information
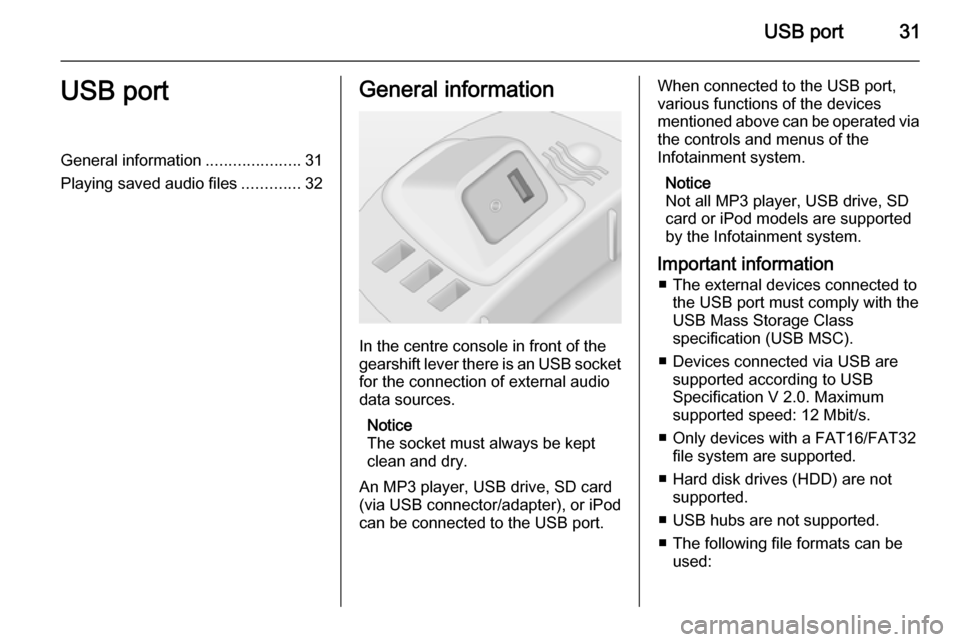
In the centre console in front of the
gearshift lever there is an USB socket
for the connection of external audio
data sources.
Notice
The socket must always be kept
clean and dry.
An MP3 player, USB drive, SD card
(via USB connector/adapter), or iPod
can be connected to the USB port.
When connected to the USB port,
various functions of the devices
mentioned above can be operated via the controls and menus of the
Infotainment system.
Notice
Not all MP3 player, USB drive, SD
card or iPod models are supported
by the Infotainment system.
Important information ■ The external devices connected to the USB port must comply with the
USB Mass Storage Class
specification (USB MSC).
■ Devices connected via USB are supported according to USB
Specification V 2.0. Maximum
supported speed: 12 Mbit/s.
■ Only devices with a FAT16/FAT32 file system are supported.
■ Hard disk drives (HDD) are not supported.
■ USB hubs are not supported.
■ The following file formats can be used:
Page 32 of 177
32USB port
ISO9660 Level 1, Level 2, (Romeo,
Joliet).
MP3 and WMA files written in any
format other than listed above may
not play correctly, and their file
names and folder names may not
be displayed correctly.
■ The following restrictions apply for the data stored on external devicesconnected to the USB port:
Maximum folder/playlist number:
5000.
Maximum file/song number: 15000.
Maximum file/song number per
folder/playlist: 6000.
Maximum folders in depth
hierarchy: at least 8.
WMA files with Digital Rights
Management (DRM) from online
music shops cannot be played.
WMA files can only be played back safely, if they were created with
Windows Media Player version 9 or later.
Applicable playlist
extensions: .m3u, .pls, .wpl.Playlist entries must be in the form
of relative paths.
The system attribute for folders/ files that contain audio data must
not be set.
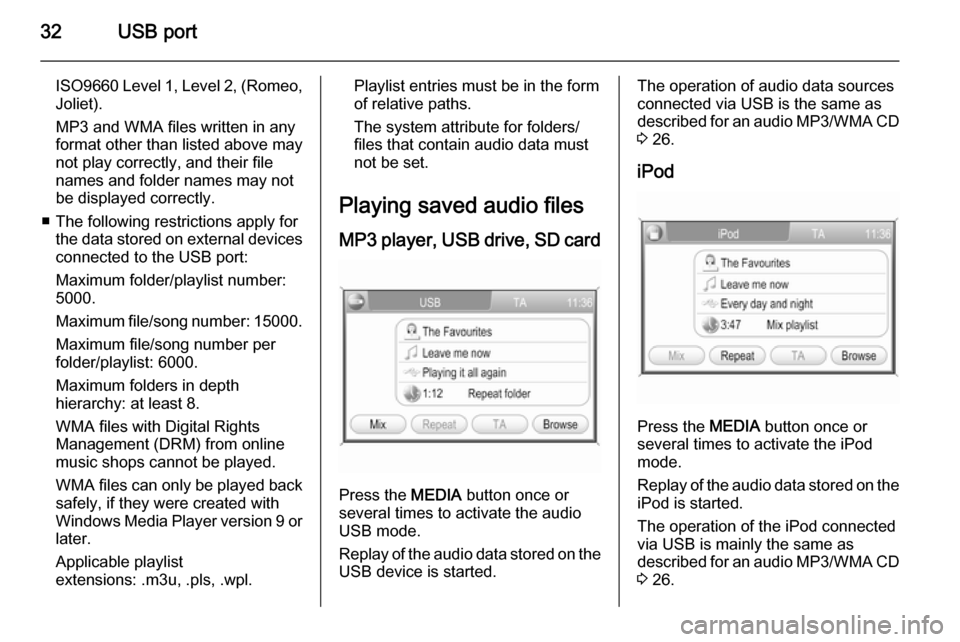
Playing saved audio files MP3 player, USB drive, SD card
Press the MEDIA button once or
several times to activate the audio
USB mode.
Replay of the audio data stored on the USB device is started.
The operation of audio data sources
connected via USB is the same as described for an audio MP3/WMA CD
3 26.
iPod
Press the MEDIA button once or
several times to activate the iPod
mode.
Replay of the audio data stored on the iPod is started.
The operation of the iPod connected
via USB is mainly the same as
described for an audio MP3/WMA CD
3 26.
Page 33 of 177
USB port33
Below only the aspects of operationthat are different/additional are
described.
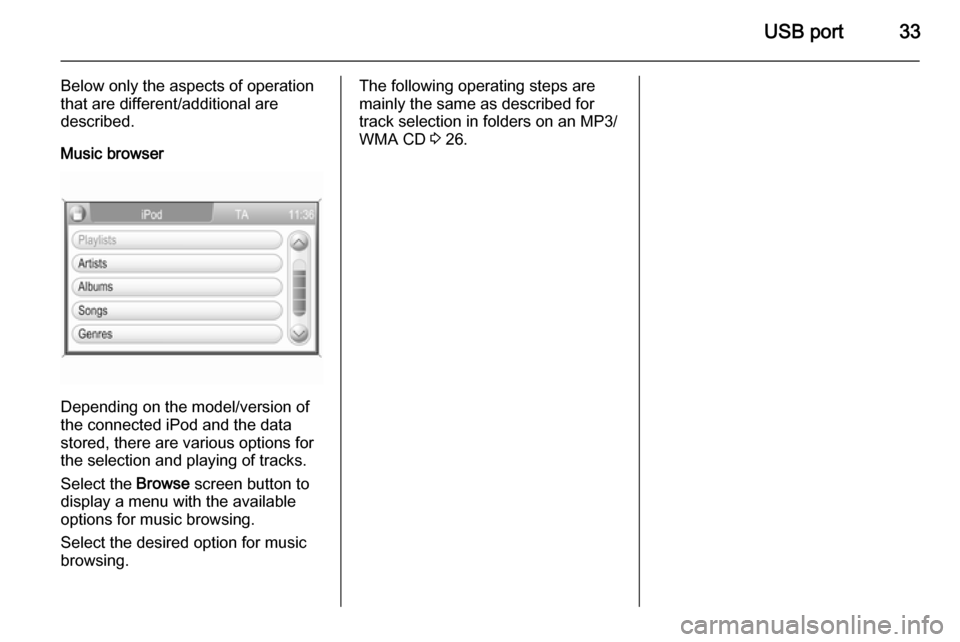
Music browser
Depending on the model/version of
the connected iPod and the data stored, there are various options for
the selection and playing of tracks.
Select the Browse screen button to
display a menu with the available
options for music browsing.
Select the desired option for music
browsing.
The following operating steps are
mainly the same as described for track selection in folders on an MP3/
WMA CD 3 26.
Page 44 of 177
44Navigation
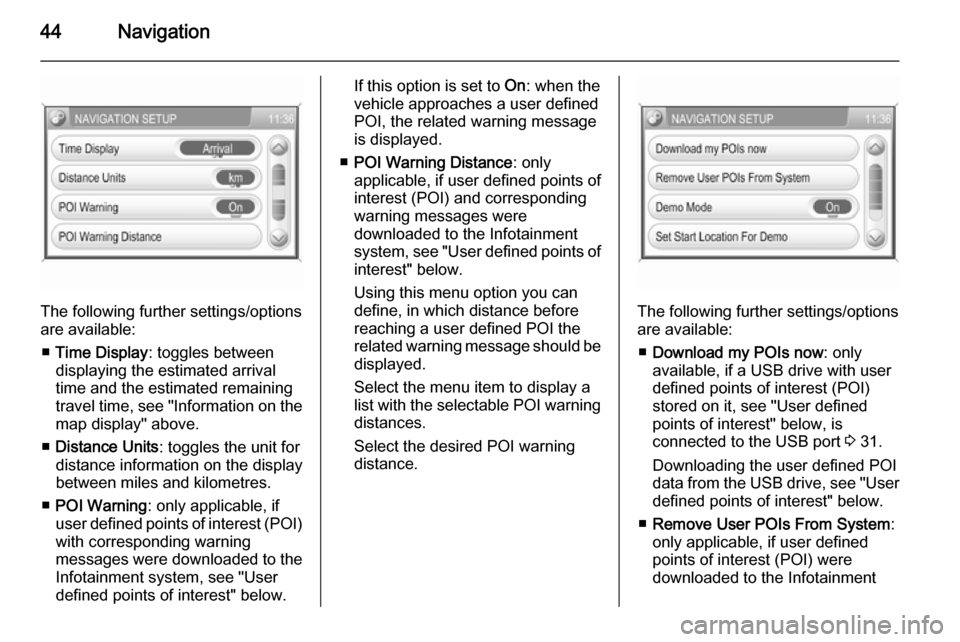
The following further settings/options
are available:
■ Time Display : toggles between
displaying the estimated arrival
time and the estimated remaining
travel time, see "Information on the
map display" above.
■ Distance Units : toggles the unit for
distance information on the display
between miles and kilometres.
■ POI Warning : only applicable, if
user defined points of interest (POI) with corresponding warning
messages were downloaded to the
Infotainment system, see "User
defined points of interest" below.
If this option is set to On: when the
vehicle approaches a user defined POI, the related warning message
is displayed.
■ POI Warning Distance : only
applicable, if user defined points of
interest (POI) and corresponding
warning messages were
downloaded to the Infotainment
system, see "User defined points of interest" below.
Using this menu option you can
define, in which distance before
reaching a user defined POI the
related warning message should be
displayed.
Select the menu item to display a list with the selectable POI warning distances.
Select the desired POI warning
distance.
The following further settings/options
are available:
■ Download my POIs now : only
available, if a USB drive with user defined points of interest (POI)
stored on it, see "User defined
points of interest" below, is
connected to the USB port 3 31.
Downloading the user defined POI data from the USB drive, see "User
defined points of interest" below.
■ Remove User POIs From System :
only applicable, if user defined
points of interest (POI) were
downloaded to the Infotainment
Page 47 of 177
![VAUXHALL CORSA 2014.5 Infotainment system Navigation47
Example: 9.9800000,
52.0150000, "Michaels House
[ Fleet Street ]"
Please note, that the text shown
above has to be entered in a
single line, see image above.
3. Get the required GPS coord VAUXHALL CORSA 2014.5 Infotainment system Navigation47
Example: 9.9800000,
52.0150000, "Michaels House
[ Fleet Street ]"
Please note, that the text shown
above has to be entered in a
single line, see image above.
3. Get the required GPS coord](/img/38/19421/w960_19421-46.png)
Navigation47
Example: 9.9800000,
52.0150000, "Michaels House
[ Fleet Street ]"
Please note, that the text shown
above has to be entered in a
single line, see image above.
3. Get the required GPS coordinates, e.g. from a
topographical map.
The GPS coordinates need to be
expressed in decimal degrees, as shown in the example above.
4. Enter the Longitude and Latitude coordinates into the text file,
separated by a comma and a
space.
5. Enter an arbitrary name for the POI, and, if desired, an optional
comment in square brackets.
The name and comment must be enclosed by quotation marks, and
separated from the GPS
coordinates by a comma and a
space.6. Enter further POI data, using a separate line for each POI, into
the text file, as described above.
7. Store the text file, e.g. on your local hard drive.POI warnings
Create a separate text file with an
arbitrary name and the file
extension .asc, e.g.
"TomsPOIWarnings.asc".
The further operating steps for
creating a text file with POI warnings are the same as described for
destination POIs, see above.
The only difference is: instead of
creating a name (e.g. "Michaels
house") you need to create a warning message (e.g. "Very sharp turn").
Storing the text files on a USB drive 1. In the root directory of a USB drive: create a folder named" myPOIs ", e.g. "F:\myPOIs",
where "F:\" is the root directory of
the USB drive.
2. In the "myPOIs" folder, store the text file with destination POIs,
e.g. "F:\myPOIs
\TomsDestinationPOIs.asc".
3. In the folder "myPOIs" create a subfolder named
" myPOIWarnings ".
4. In that subfolder store the text file with POI warnings, e.g.
"F:\myPOIs\myPOIWarnings
\TomsPOIWarnings.asc"
Downloading the user defined POIs
Connect the USB drive with your user
defined POI data to the USB port
3 31 of the Infotainment system.