light VAUXHALL CORSA 2014.5 Owner's Manual
[x] Cancel search | Manufacturer: VAUXHALL, Model Year: 2014.5, Model line: CORSA, Model: VAUXHALL CORSA 2014.5Pages: 231, PDF Size: 6.8 MB
Page 3 of 231

Introduction.................................... 2
In brief ............................................ 6
Keys, doors and windows ............19
Seats, restraints ........................... 34
Storage ........................................ 53
Instruments and controls .............70
Lighting ........................................ 98
Climate control ........................... 106
Driving and operating .................114
Vehicle care ............................... 145
Service and maintenance ..........194
Technical data ........................... 197
Customer information ................222
Index .......................................... 224Contents
Page 13 of 231

In brief11
1Side air vents ...................... 112
2 Light switch .......................... 98
Instrument illumination .......103
Rear fog light ....................... 102
Front fog lights ...................102
Headlight range
adjustment ........................... 99
3 Turn and lane-change
signals, headlight flash,
low beam and high beam ...101
Exit lighting .......................... 105
Parking lights ...................... 102
Cruise control ....................... 85
4 Steering wheel controls ........70
5 Horn ...................................... 71
Driver airbag ......................... 44
6 Instruments .......................... 76
7 Windscreen wiper,
windscreen washer system ...72
Trip computer ........................ 91
8 Centre air vents ................... 1129Info-Display ........................... 86
Trip computer ........................ 91
Electronic climate control
system ................................. 109
10 Left heated seat ....................38
Heated steering wheel ..........71
Tyre deflation detection
system ................................. 175
Parking assist ...................... 132
Hazard warning flashers .....101
Central locking system ..........21
Electronic stability program . 130
Airbag deactivation ...............46
Right heated seat ..................38
Eco button ........................... 116
Fuel selector ........................ 77
11 Front passenger airbag .........44
12 Glovebox .............................. 53
13 Climate control system ........ 10614Cigarette lighter ..................... 75
Power outlet .......................... 75
15 Ashtray .................................. 75
16 Ignition switch with
steering wheel lock .............115
17 Accelerator pedal ................115
18 Brake pedal ......................... 128
19 Clutch pedal ........................ 114
20 Steering wheel adjustment ...70
21 Bonnet release lever ...........147
Page 14 of 231

12In briefExterior lighting
Turn light switch
AUTO=Automatic light control:
Exterior lighting is
switched on and off
automaticallym=Activation or deactivation
of the automatic light
control8=sidelights9=low beam
Press switch
>=Front fog lightsr=Rear fog lightLighting 3 98.Headlight flash, high beam and
low beamheadlight flash=pull leverhigh beam=push leverlow beam=push or pull lever
High beam 3 99, Headlight flash
3 99, Automatic light control
3 98.
Page 15 of 231

In brief13
Turn and lane-change signalsright=lever upleft=lever down
Turn and lane-change signals
3 101, Parking lights 3 102.
Hazard warning flashers
Operated with the ¨ button.
Hazard warning flashers 3 101.
Horn
Press j.
Page 16 of 231

14In briefWasher and wiper systems
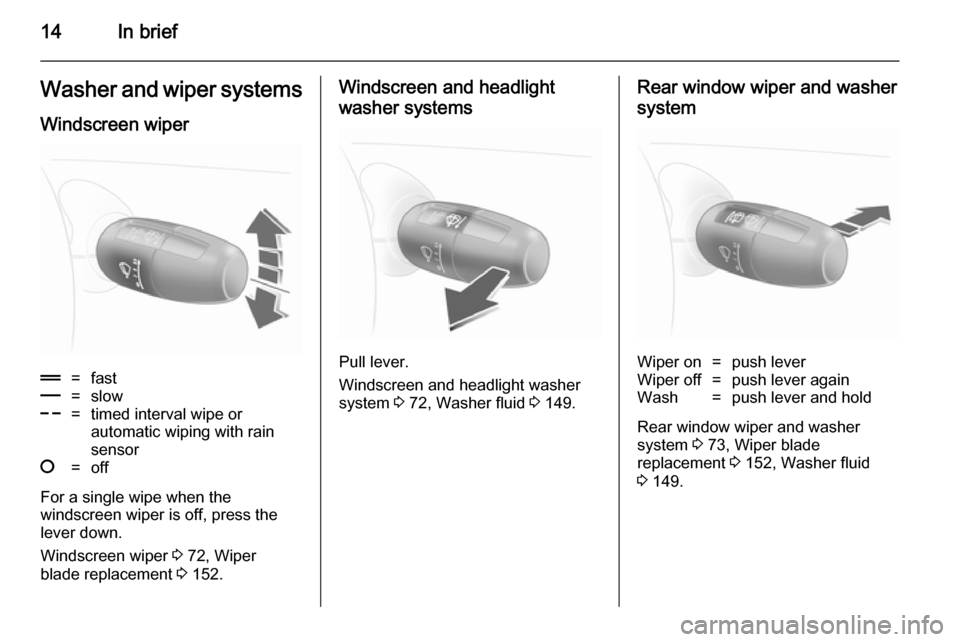
Windscreen wiper&=fast%=slow$=timed interval wipe or
automatic wiping with rain
sensor§=off
For a single wipe when the
windscreen wiper is off, press the
lever down.
Windscreen wiper 3 72, Wiper
blade replacement 3 152.
Windscreen and headlight
washer systems
Pull lever.
Windscreen and headlight washer
system 3 72, Washer fluid 3 149.
Rear window wiper and washer
systemWiper on=push leverWiper off=push lever againWash=push lever and hold
Rear window wiper and washer
system 3 73, Wiper blade
replacement 3 152, Washer fluid
3 149.
Page 18 of 231

16In brief
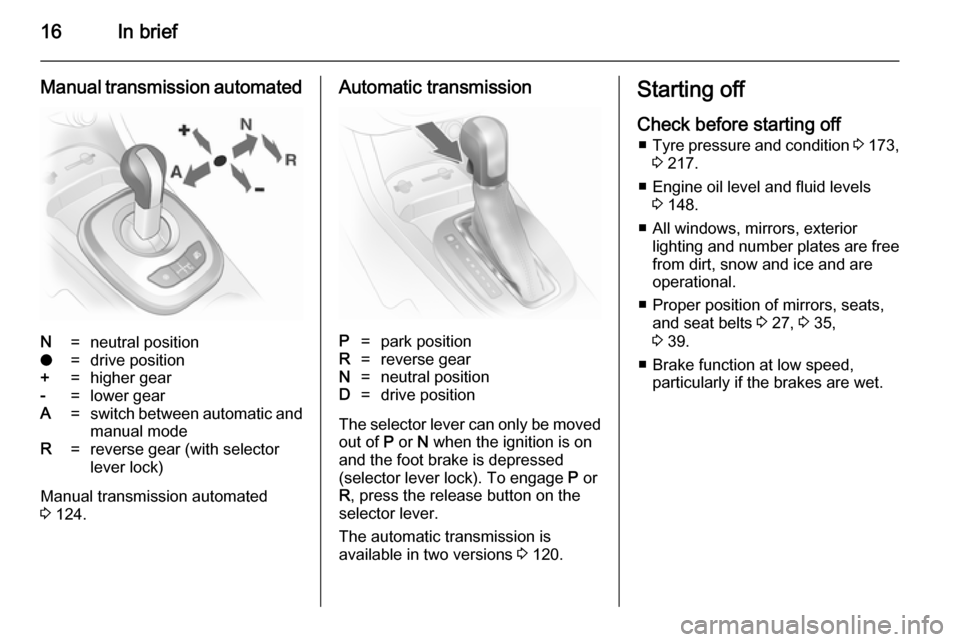
Manual transmission automatedN=neutral positiono=drive position+=higher gear-=lower gearA =switch between automatic and
manual modeR=reverse gear (with selector
lever lock)
Manual transmission automated
3 124.
Automatic transmissionP=park positionR=reverse gearN=neutral positionD=drive position
The selector lever can only be moved
out of P or N when the ignition is on
and the foot brake is depressed
(selector lever lock). To engage P or
R , press the release button on the
selector lever.
The automatic transmission is
available in two versions 3 120.
Starting off
Check before starting off ■ Tyre pressure and condition 3 173,
3 217.
■ Engine oil level and fluid levels 3 148.
■ All windows, mirrors, exterior lighting and number plates are free
from dirt, snow and ice and are
operational.
■ Proper position of mirrors, seats, and seat belts 3 27, 3 35,
3 39.
■ Brake function at low speed, particularly if the brakes are wet.
Page 19 of 231

In brief17
Starting the engine
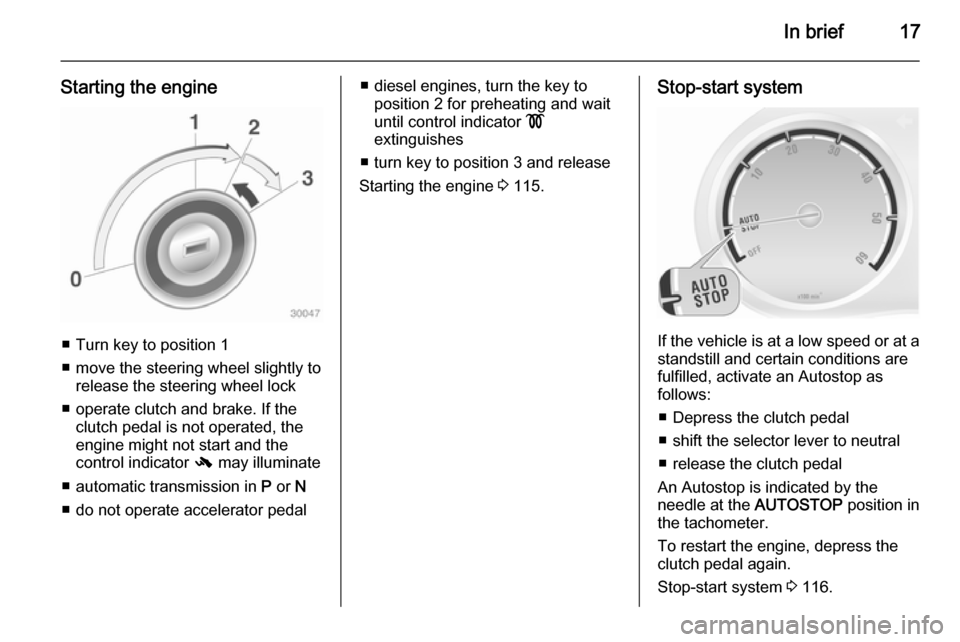
■ Turn key to position 1
■ move the steering wheel slightly to release the steering wheel lock
■ operate clutch and brake. If the clutch pedal is not operated, the
engine might not start and the
control indicator - may illuminate
■ automatic transmission in P or N
■ do not operate accelerator pedal
■ diesel engines, turn the key to position 2 for preheating and wait
until control indicator !
extinguishes
■ turn key to position 3 and release
Starting the engine 3 115.Stop-start system
If the vehicle is at a low speed or at a
standstill and certain conditions are
fulfilled, activate an Autostop as
follows:
■ Depress the clutch pedal
■ shift the selector lever to neutral
■ release the clutch pedal
An Autostop is indicated by the
needle at the AUTOSTOP position in
the tachometer.
To restart the engine, depress the
clutch pedal again.
Stop-start system 3 116.
Page 28 of 231

26Keys, doors and windows
Light-emitting diode (LED)
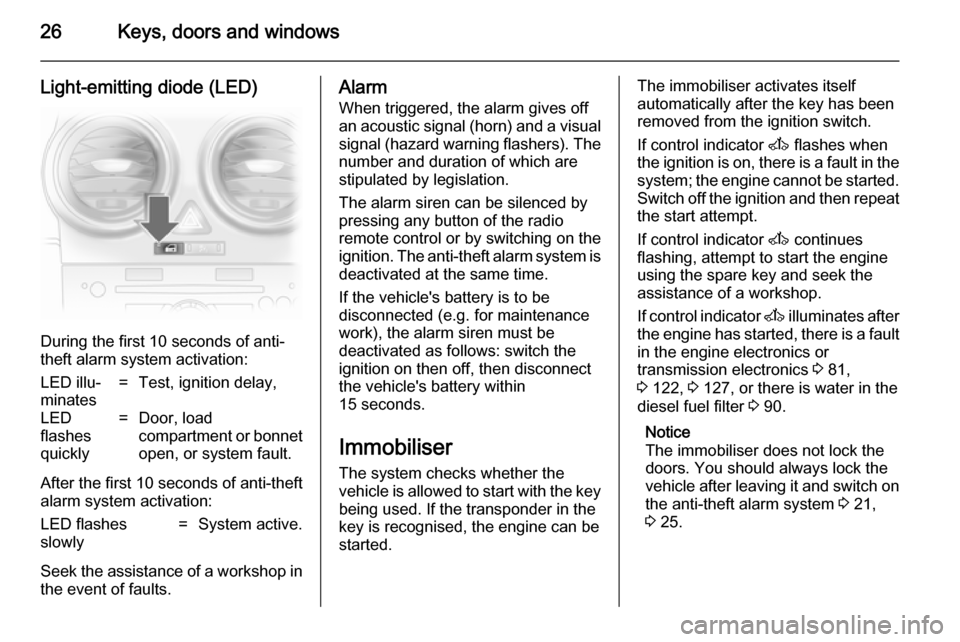
During the first 10 seconds of anti-
theft alarm system activation:
LED illu‐
minates=Test, ignition delay,LED
flashes
quickly=Door, load
compartment or bonnet open, or system fault.
After the first 10 seconds of anti-theft
alarm system activation:
LED flashes
slowly=System active.
Seek the assistance of a workshop in
the event of faults.
Alarm
When triggered, the alarm gives off
an acoustic signal (horn) and a visual signal (hazard warning flashers). The
number and duration of which are
stipulated by legislation.
The alarm siren can be silenced by
pressing any button of the radio
remote control or by switching on the
ignition. The anti-theft alarm system is deactivated at the same time.
If the vehicle's battery is to be
disconnected (e.g. for maintenance
work), the alarm siren must be
deactivated as follows: switch the
ignition on then off, then disconnect
the vehicle's battery within
15 seconds.
Immobiliser
The system checks whether the
vehicle is allowed to start with the key being used. If the transponder in the
key is recognised, the engine can be
started.The immobiliser activates itself
automatically after the key has been removed from the ignition switch.
If control indicator A flashes when
the ignition is on, there is a fault in the
system; the engine cannot be started. Switch off the ignition and then repeat
the start attempt.
If control indicator A continues
flashing, attempt to start the engine
using the spare key and seek the
assistance of a workshop.
If control indicator A illuminates after
the engine has started, there is a fault in the engine electronics or
transmission electronics 3 81,
3 122, 3 127, or there is water in the
diesel fuel filter 3 90.
Notice
The immobiliser does not lock the doors. You should always lock the
vehicle after leaving it and switch on the anti-theft alarm system 3 21,
3 25.
Page 29 of 231

Keys, doors and windows27Exterior mirrors
Convex shape
The convex exterior mirror contains
an aspherical area and reduces blind spots. The shape of the mirror makes
objects appear smaller, which will affect the ability to estimate
distances.
Electric adjustment
Setting with four-way switch in
vehicles with manual window operationFirst select the relevant exterior mirror then use the control to adjust.
Setting with four-way switch in
vehicles with electronic window
operation
First select the relevant exterior mirror then use the control to adjust.
Folding mirrors
For pedestrian safety, the exterior
mirrors will swing out of their normal
mounting position if they are struck
with sufficient force. Reposition the mirror by applying slight pressure tothe mirror housing.
Page 37 of 231

Seats, restraints35
Head restraints on rear seats
The height of the head restraints can
be set in two positions.
To set to the first position, pull the
head restraint upwards. To set to the
second position press the spring
marked in the illustration and push the
head restraint right up to the top.
To adjust downwards, press the
spring marked in the illustration and
push the head restraint downwards.
Active head restraints
In the event of a rear-end impact, the
active head restraints tilt slightly
forwards. The head is more
effectively supported so the risk of
whiplash injury is reduced.
Notice
Approved accessories may only be
attached to the front passenger seat head restraint if the seat is not in use.Front seats
Seat position9 Warning
Only drive with the seat correctly
adjusted.
■ Sit with buttocks as far back against
the backrest as possible. Adjust the distance between the seat and the
pedals so that legs are slightly
angled when pressing the pedals.
Slide the front passenger seat as
far back as possible.