infotainment VAUXHALL CORSA 2015.5 Owner's Manual
[x] Cancel search | Manufacturer: VAUXHALL, Model Year: 2015.5, Model line: CORSA, Model: VAUXHALL CORSA 2015.5Pages: 249, PDF Size: 7.3 MB
Page 13 of 249

In brief11
1Power windows .....................30
2 Exterior mirrors .....................28
3 Cruise control .....................147
Speed limiter ...................... 149
Forward collision alert ........150
4 Turn and lane-change
signals, headlight flash,
low beam and high beam ....112
Exit lighting ......................... 116
Parking lights ...................... 113
Buttons for Driver
Information Centre ................93
5 Instruments .......................... 82
6 Forward collision alert
indicator ............................. 150
7 Driver Information Centre ...... 93
8 Infotainment controls ...........74
9 Windscreen wiper,
windscreen washer
system, rear window
wiper, rear window washer
system ................................... 7610 Central locking system ..........22
City mode ............................ 146
Eco button for stop-start
system ................................. 131
Parking assist ..................... 153
Seat heating .......................... 38
Heated steering wheel ..........75
11 Anti-theft alarm system
status LED ........................... 26
12 Hazard warning flashers ....112
Control indicator for airbag
deactivation .......................... 88
Control indicator for front
passenger seat belt .............87
13 Colour-Info-Display ..............98
Graphic-Info-Display .............99
14 Centre air vents .................. 126
15 Side air vents, passenger
side ..................................... 126
16 Airbag deactivation switch
(behind glovebox cover) ......46
17 Glovebox .............................. 56
Fuse box ............................ 19618Climate control system ........ 118
19 Power outlet .......................... 81
20 AUX input, USB input ...........10
21 Selector lever,
transmission ....................... 139
22 Parking brake ......................144
23 Ignition switch with
steering wheel lock ............129
24 Horn ..................................... 75
Driver airbag ........................ 44
25 Bonnet release lever ..........178
26 Steering wheel adjustment ..74
27 Light switch ........................ 108
Headlight range
adjustment ......................... 110
Rear fog light ...................... 113
Fuse box ............................ 196
Brightness of instrument
panel illumination ................114
Page 24 of 249

22Keys, doors and windows
Radio remote controlsynchronisation
After replacing the battery, unlock the
door with the key in the driver's door
lock. The radio remote control will be
synchronised when the ignition is
switched on.
Memorised settings Whenever the key is removed from
the ignition switch, the following
settings are automatically memorised by the key:
■ lighting
■ electronic climate control
■ presets for Infotainment system
■ central locking system
■ comfort settings
The saved settings are automatically used the next time the memorised key
is inserted into the ignition switch and
turned to position 1 3 129.
A precondition is that Personalization
by driver is activated in the personal
settings of the Info-Display. This must
be set for each key used.Vehicle personalisation 3 103.
Central locking system Unlocks and locks doors, load
compartment and fuel filler flap.
A pull on an interior door handle
unlocks the respective door. Pulling
the handle once more opens the door.
Notice
In the event of an accident in which
airbags or belt pretensioners are
deployed, the vehicle is
automatically unlocked.
Notice
Three minutes after unlocking with
the remote control, the doors are
relocked automatically if no door has
been opened.Unlocking
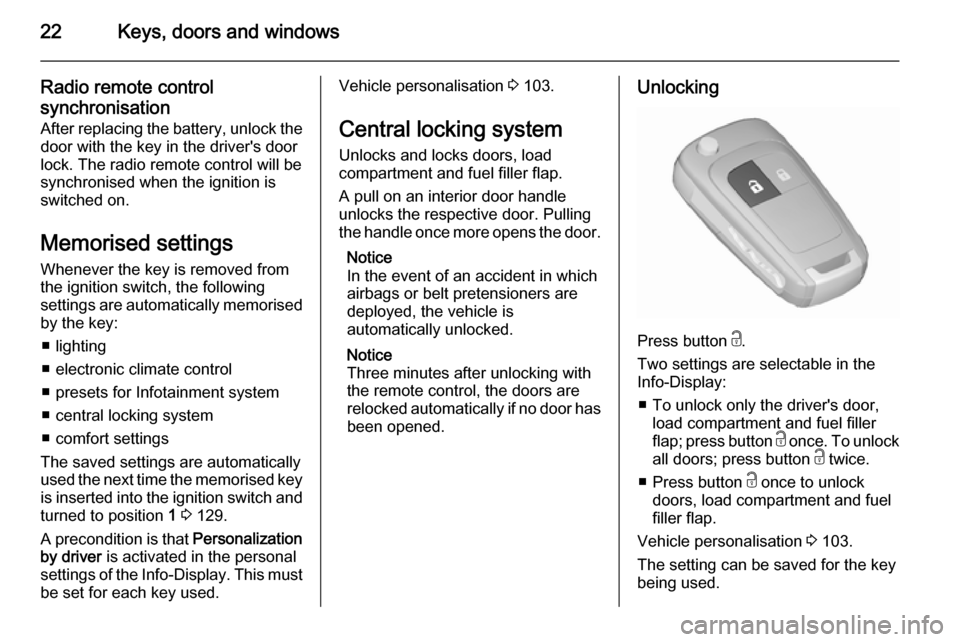
Press button c.
Two settings are selectable in the
Info-Display:
■ To unlock only the driver's door, load compartment and fuel filler
flap; press button c once. To unlock
all doors; press button c twice.
■ Press button c once to unlock
doors, load compartment and fuel
filler flap.
Vehicle personalisation 3 103.
The setting can be saved for the key
being used.
Page 76 of 249

74Instruments and controlsInstruments and
controlsControls ....................................... 74
Warning lights, gauges and indi‐
cators ........................................... 82
Information displays .....................93
Vehicle messages ...................... 100
Vehicle personalisation ..............103Controls
Steering wheel adjustment
Unlock lever, adjust steering wheel,
then engage lever and ensure it is fully locked.
Do not adjust steering wheel unless
vehicle is stationary and steering
wheel lock has been released.
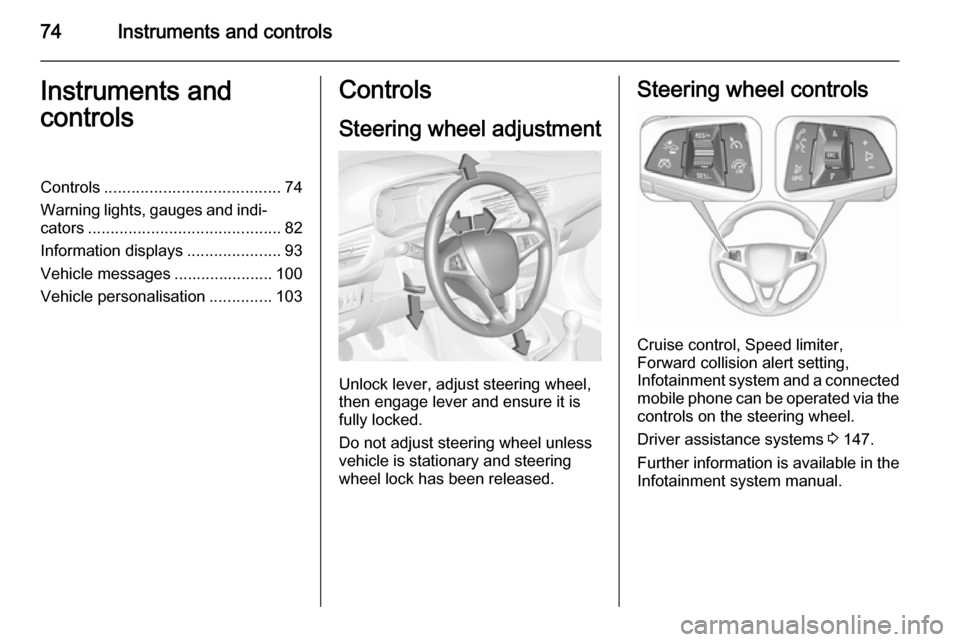
Steering wheel controls
Cruise control, Speed limiter,
Forward collision alert setting,
Infotainment system and a connected
mobile phone can be operated via the controls on the steering wheel.
Driver assistance systems 3 147.
Further information is available in the
Infotainment system manual.
Page 81 of 249

Instruments and controls79
If outside temperature drops to 3 °C,
a warning message is displayed in the Driver Information Centre.9 Warning
The road surface may already be
icy even though the display
indicates a few degrees above 0
°C.
Clock
Graphic-Info Display
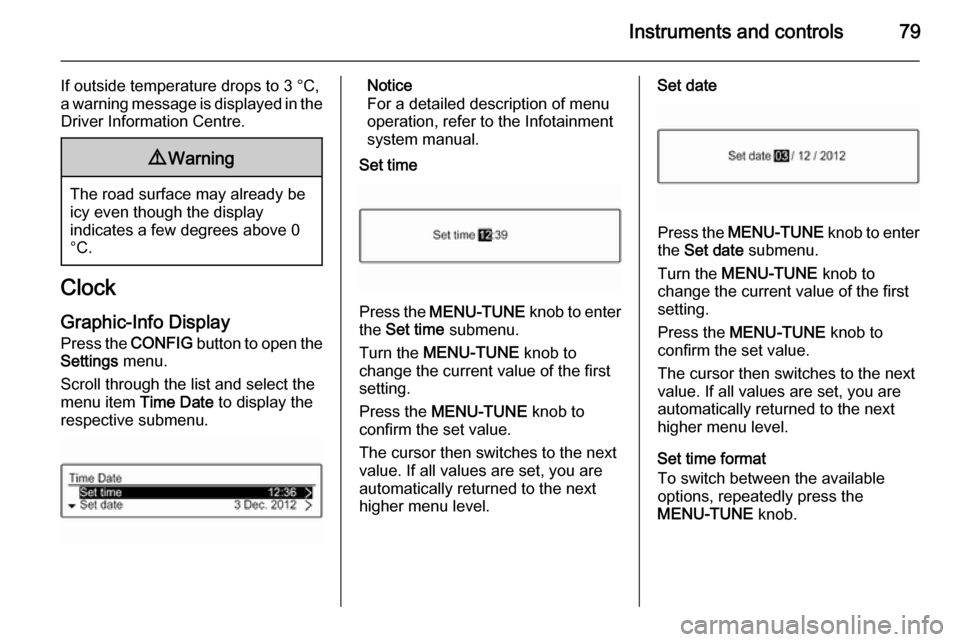
Press the CONFIG button to open the
Settings menu.
Scroll through the list and select the
menu item Time Date to display the
respective submenu.
Notice
For a detailed description of menu
operation, refer to the Infotainment
system manual.
Set time
Press the MENU-TUNE knob to enter
the Set time submenu.
Turn the MENU-TUNE knob to
change the current value of the first setting.
Press the MENU-TUNE knob to
confirm the set value.
The cursor then switches to the next
value. If all values are set, you are
automatically returned to the next
higher menu level.
Set date
Press the MENU-TUNE knob to enter
the Set date submenu.
Turn the MENU-TUNE knob to
change the current value of the first setting.
Press the MENU-TUNE knob to
confirm the set value.
The cursor then switches to the next
value. If all values are set, you are
automatically returned to the next
higher menu level.
Set time format
To switch between the available
options, repeatedly press the
MENU-TUNE knob.
Page 82 of 249

80Instruments and controls
Set date format
To switch between the available
options, repeatedly press the
MENU-TUNE knob.
RDS clock synchronization
The RDS signal of most VHF
transmitters automatically sets the
time. RDS time synchronisation can
take a few minutes. Some
transmitters do not send a correct
time signal. In such cases, it is
recommended to switch off the
automatic time synchronisation.
To switch between the options On
and Off, repeatedly press the
MENU-TUNE knob.
Colour-Info Display
Press the ; button and then select
the Settings screen button.
Select Time & date settings to display
the respective submenu.
Notice
For a detailed description of menu
operation, refer to the Infotainment
system manual.
Set time format
To select the desired time format, tap
on the screen buttons 12 h or 24 h .
Set date format
To select the desired date format, tap on the < and > screen buttons and
choose between the available
options.
Set time and date
To adjust the time and date settings,
tap on the H and I screen buttons.
RDS clock synchronization
The RDS signal of most VHF
transmitters automatically sets the
time. RDS time synchronisation can take a few minutes. Some
transmitters do not send a correct
time signal. In such cases, it is
recommended to switch off the
automatic time synchronisation.
To activate or deactivate RDS clock
synchronization , tap on the screen
buttons On or Off.
Page 96 of 249

94Instruments and controls
■language setting, if no Infotainment
system is available
■ clock, if no Infotainment system is available
■ outside temperature, if no Infotainment system is available
Some of the displayed functions differ when the vehicle is being driven or at
a standstill.
Midlevel display
The menu pages of the Midlevel
display are selected by pressing the
MENU button on the turn signal lever.
Selectable menu pages of Midlevel
display are:
■ Trip menu, see below
■ Vehicle menu, see below
Some of the displayed functions differ when the vehicle is being driven or at
a standstill. Some functions are only
available when the vehicle is being
driven.
Uplevel-DisplayThe menu pages of the Uplevel
display are selected by pressing the
MENU button on the turn signal lever.
Main menu symbols are indicated in
the top line of the display:
■ Trip menu, see below
■ Vehicle menu, see below
■ Eco menu, see below
Some of the displayed functions differ when the vehicle is being driven or at
a standstill. Some functions are only
available when the vehicle is being
driven.
Selecting menus and functions
The menus and functions can be
selected via the buttons on the turn
signal lever.
Page 98 of 249

96Instruments and controls
The information of trip page 1 and 2
can be reset separately while the
respective display is active.
Digital speed
Digital display of the instantaneous
speed.
Fuel range
Range is calculated from current fuel
tank content and current
consumption. The display shows
average values.
After refuelling, the range is updated
automatically after a brief delay.
When the fuel level in the tank is low,
a message appears on the display
and the control indicator Y in the fuel
gauge illuminates.
When the tank must be refuelled
immediately, a warning message
appears and remains on the display.
Additionally, the control indicator Y in
the fuel gauge flashes 3 92.
Instantaneous fuel economy Display of the instantaneous
consumption.Average vehicle speed
Display of average speed. The
measurement can be reset at any
time.
To reset, press SET/CLR button for a
few seconds while viewing this page.
Clock
Display of actual time.
Only indicated if no Infotainment
system is available.
Temperature
Display of actual outside
temperature.
Only indicated if no Infotainment
system is available.
Blank page
Shows a blank page without any
information.
Vehicle Menu Press the MENU button to select the
Vehicle Information Menu .
Turn the adjuster wheel to select a subpage.The following list contains all possible
Vehicle Menu pages. Some may not
be available for your particular
vehicle.
Follow the instructions given in the
submenus.
■ unit
■ speed warning
■ remaining oil life
■ tyre pressure
■ tyre loading
■ following distance
■ traffic sign assistant
■ language
Selection and indication is different
between Midlevel- and Uplevel-
Display.
Unit
Press SET/CLR while page is
displayed. Select imperial (unit 1) or metric (unit 3) by turning the adjuster
wheel. Press SET/CLR to set the unit.
Page 99 of 249

Instruments and controls97
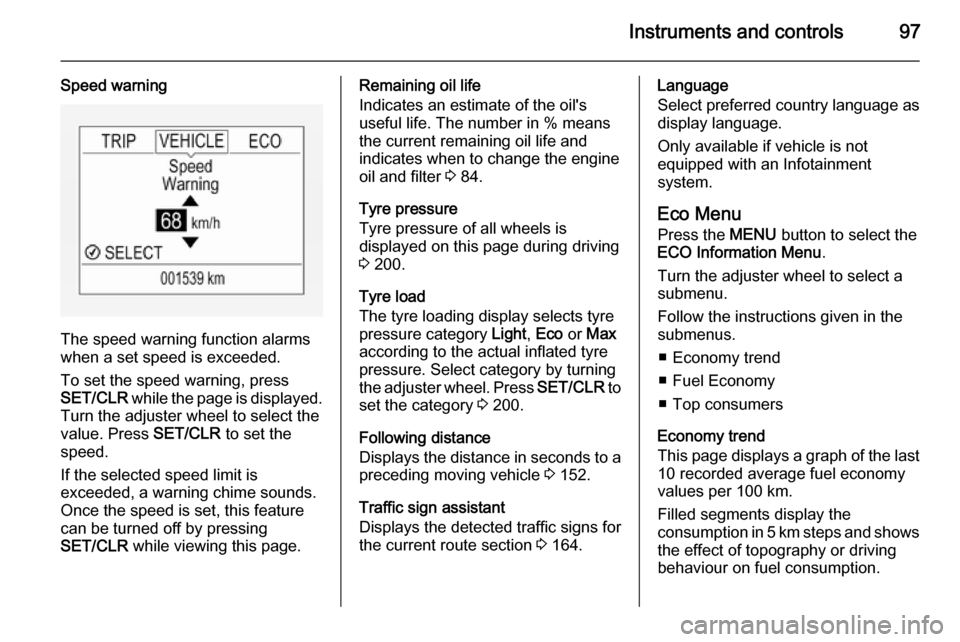
Speed warning
The speed warning function alarms
when a set speed is exceeded.
To set the speed warning, press
SET/CLR while the page is displayed.
Turn the adjuster wheel to select the
value. Press SET/CLR to set the
speed.
If the selected speed limit is
exceeded, a warning chime sounds.
Once the speed is set, this feature
can be turned off by pressing
SET/CLR while viewing this page.
Remaining oil life
Indicates an estimate of the oil's
useful life. The number in % means the current remaining oil life and
indicates when to change the engine
oil and filter 3 84.
Tyre pressure
Tyre pressure of all wheels is
displayed on this page during driving 3 200.
Tyre load
The tyre loading display selects tyre
pressure category Light, Eco or Max
according to the actual inflated tyre pressure. Select category by turning
the adjuster wheel. Press SET/CLR to
set the category 3 200.
Following distance
Displays the distance in seconds to a preceding moving vehicle 3 152.
Traffic sign assistant
Displays the detected traffic signs for
the current route section 3 164.Language
Select preferred country language as
display language.
Only available if vehicle is not
equipped with an Infotainment
system.
Eco Menu
Press the MENU button to select the
ECO Information Menu .
Turn the adjuster wheel to select a
submenu.
Follow the instructions given in the
submenus.
■ Economy trend
■ Fuel Economy
■ Top consumers
Economy trend
This page displays a graph of the last 10 recorded average fuel economy
values per 100 km.
Filled segments display the
consumption in 5 km steps and shows the effect of topography or driving
behaviour on fuel consumption.
Page 100 of 249

98Instruments and controls
Graph can be reset by pressing
SET/CLR button.
Fuel Economy
Indicates the average fuel
consumption since the last driver
reset compared to a best average fuel
consumption value. To reset average fuel consumption, press and hold
SET/CLR button while viewing this
page.
A short press on SET/CLR button
changes the distance over 10, 25 or
50 km.
Additionally the instantaneous
consumption value is displayed.
Top consumers
List of top comfort consumers
currently switched on is displayed in
descending order. Fuel saving
potential is indicated. A switched-off
consumer disappears from the list
and the consumption value will be
updated.
During sporadic driving conditions,
the engine will activate the heated
rear window automatically to increase
the engine load. In this event, theheated rear window is indicated as
one of the top consumers, without
activation by the driver.
Colour-Info-Display Depending on the vehicle
configuration, the vehicle has a
Colour-Info-Display with Touch-
Screen functionality.
The Colour-Info-Display with Touch- Screen functionality indicates in
colour:
■ time 3 79
■ outside temperature 3 78
■ date 3 79
■ rear view camera indication 3 162
■ parking assist and advanced parking assist instructions 3 153
■ electronic climate control settings 3 121
■ Infotainment system, see description in the Infotainment
system manual
■ system messages
■ vehicle messages 3 100
■ settings for vehicle personalisation 3 103
The type of information and how it is
displayed depends on the settings
made.
Selecting menus and settings
Menus and settings are selected via
the touch screen display.
Page 101 of 249

Instruments and controls99
Press button ;: Home page is
displayed.
Tap display icon Settings: Menu page
Settings is displayed. Select a setting
by tapping.
Tap selection once more to confirm a
setting or value.
Press display button q to exit a menu
or setting without changing or delete
the last character in a character
sequence.
To exit the Settings menu, press
display button q in steps or press
button ; after confirming the
changes.
Vehicle personalisation 3 103.
Memorised settings 3 22.
Graphic-Info-Display
Depending on the vehicle
configuration, the vehicle has a
Graphic-Info-Display.
The Graphic-Info-Display indicates:
■ time 3 79
■ outside temperature 3 78
■ date 3 79
■ electronic climate control settings 3 121
■ Infotainment system, see
description in the Infotainment
system manual
■ settings for vehicle personalisation 3 103
Selecting menus and settings
Menus and settings are accessed via the display.
Press button CONFIG: Menu page
Settings is displayed.
Turn knob MENU-TUNE to select a
setting or value.
Press knob MENU-TUNE to confirm
a setting or value.
Press button BACK to exit a menu or
setting without changing or delete the last character in a character
sequence. Press the button for a few
seconds to delete the entire entry.